

It is a 3D material of a double size bed. It has a side table and indirect lighting.
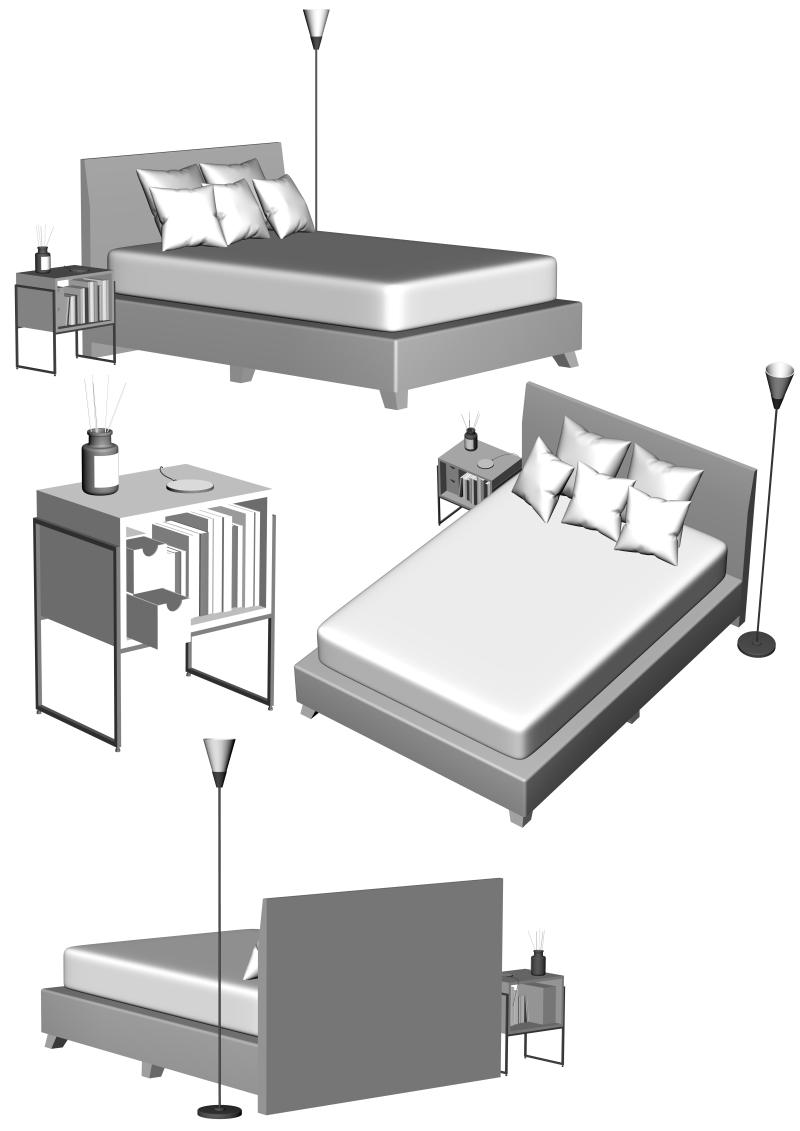
Each object movable.

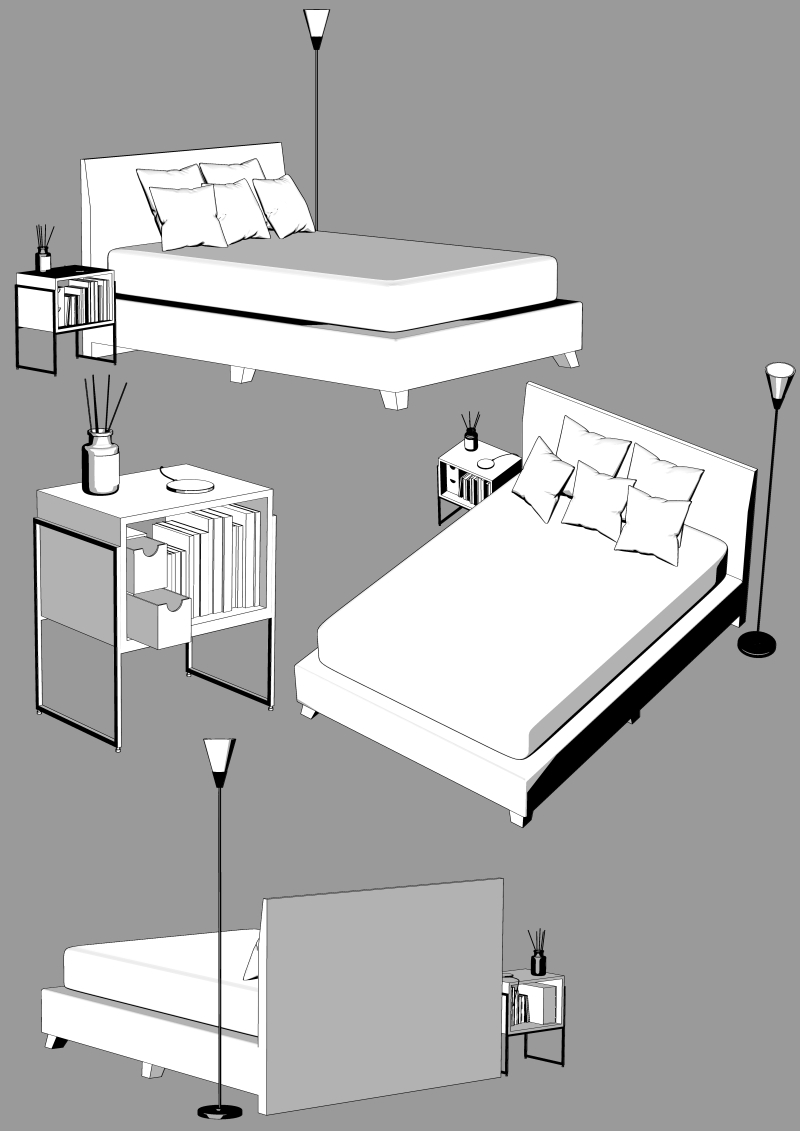
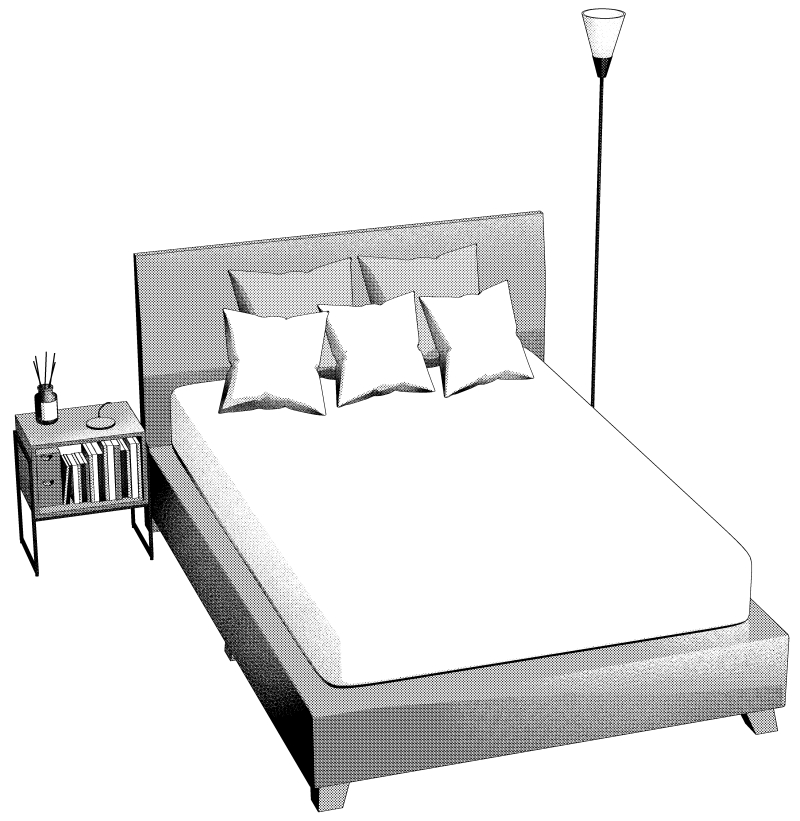
LT conversion example

↓ You can also hide the bed head.

↓ The following is my own drawing explanation.
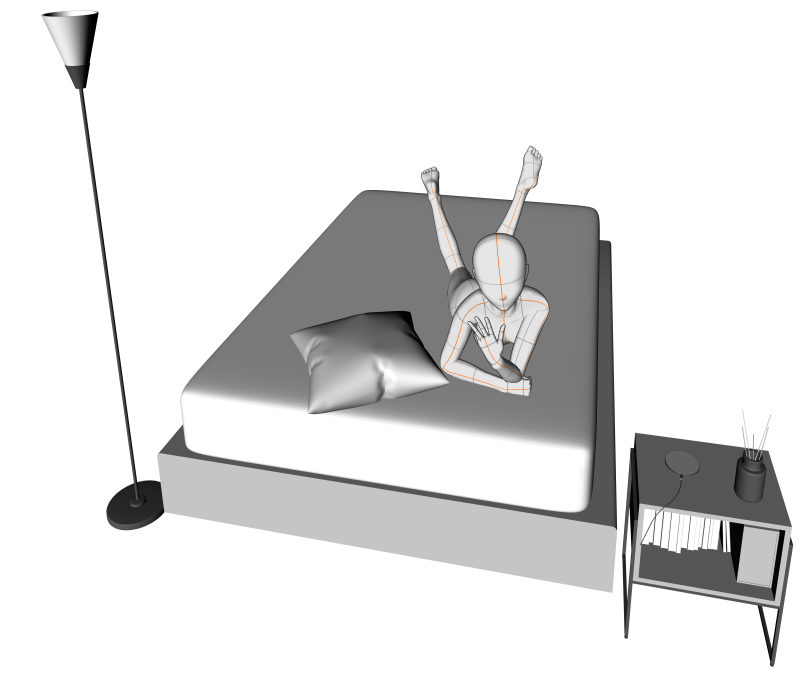
Place the 3D Object.
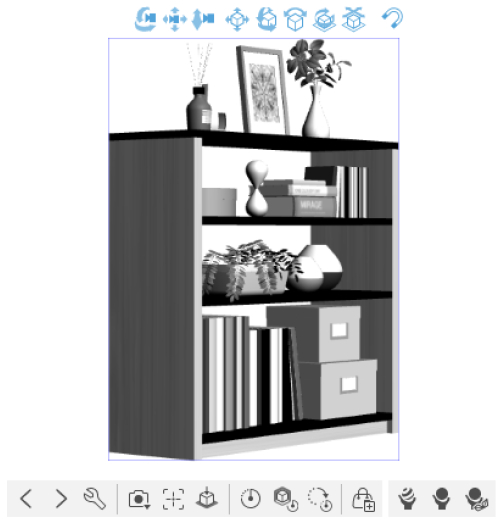
(*Used object sold separately: Content ID: 2128365 Title: Fashionable shelf_10)

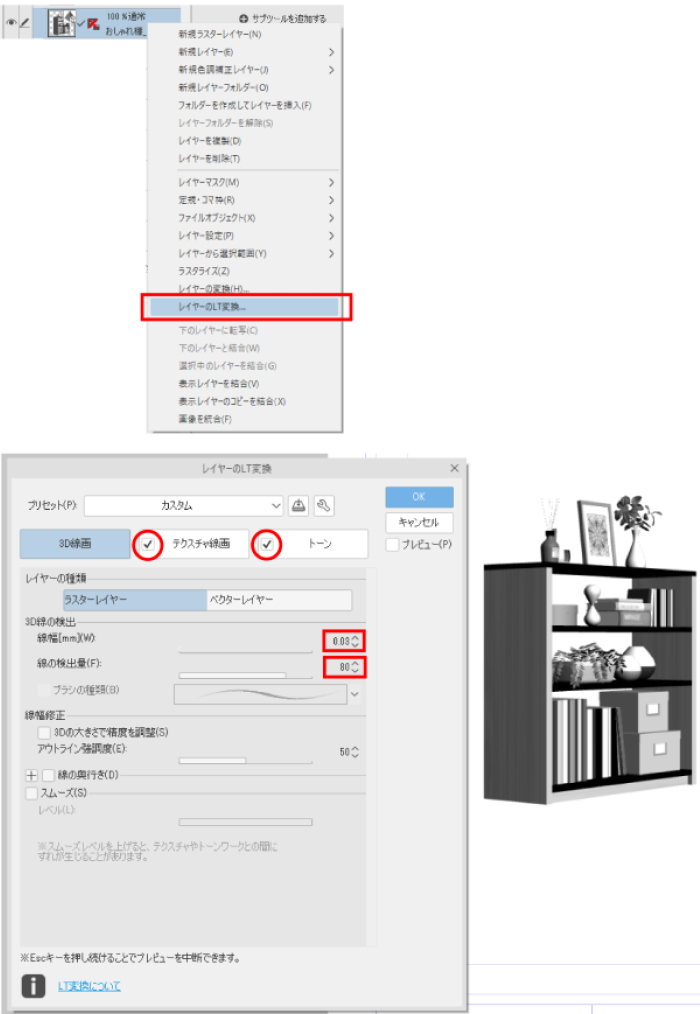
・LT conversion.
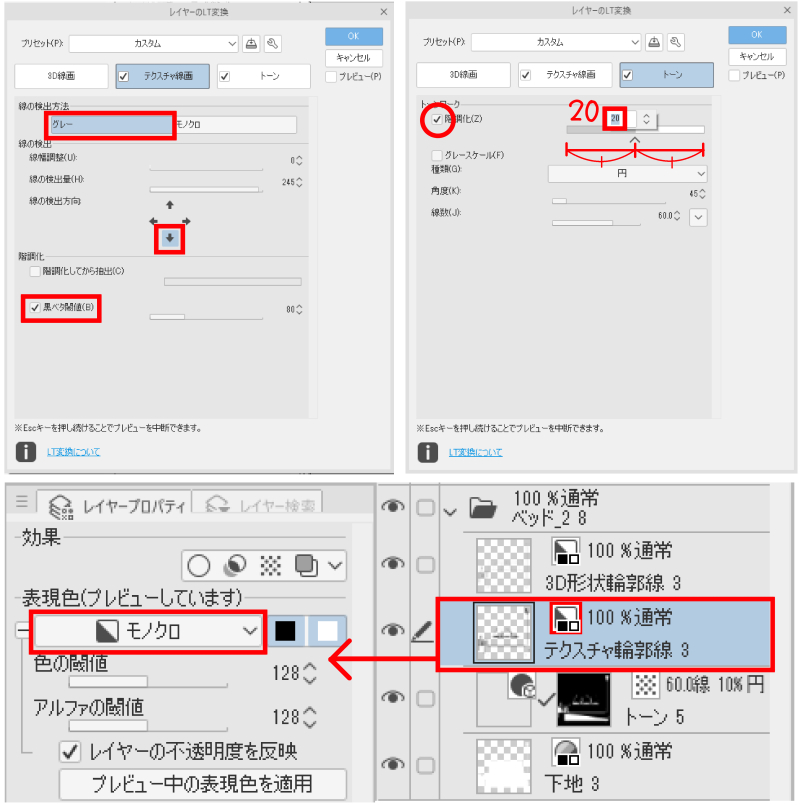
The line width is 0.03mm (1px), the line detection amount is 80, and the texture and tone settings are as shown in the image below.
After conversion, the expression color of the layer property of the "texture contour line" is changed to "monochrome".
.


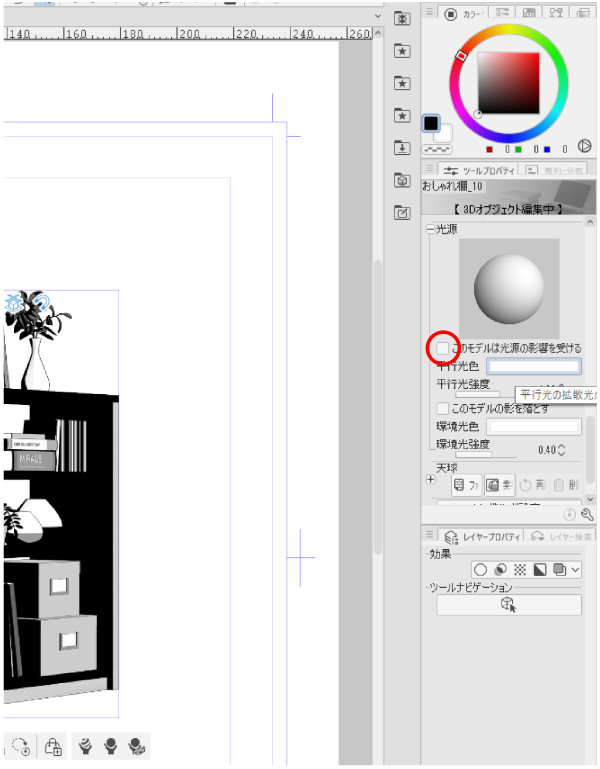
・ Use the color of the 3D Object texture as it is for the tone.
3D Object duplicate layer of the tool property light source
Uncheck "This model is apply light source".

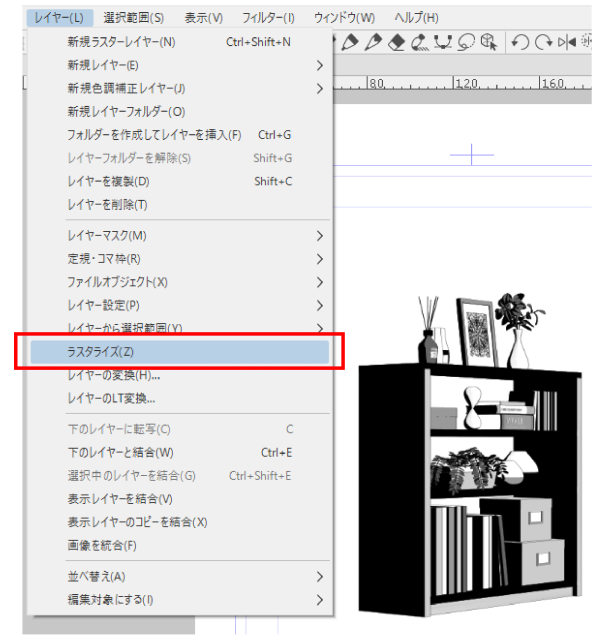
- rasterize the 3D Object layer.
(right-click on the layer or from the layer tab)

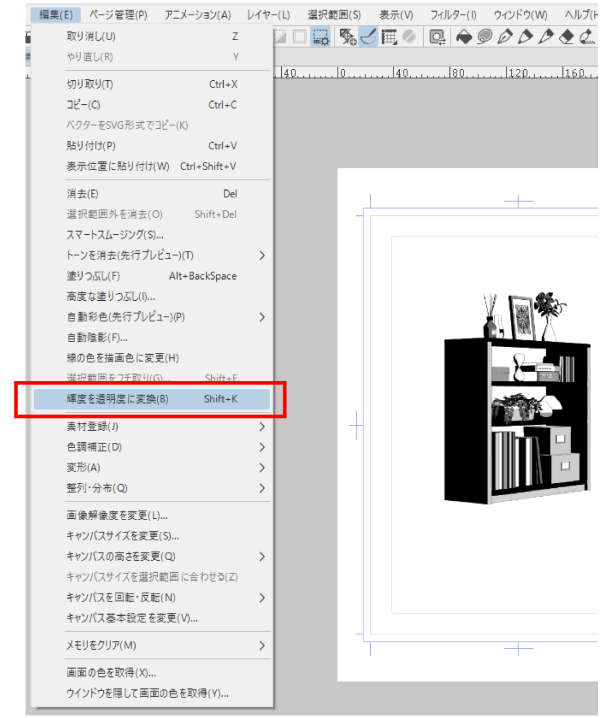
- Click "convert brightness to opacity" from the edit tab.
You should now be able to see the layer below.

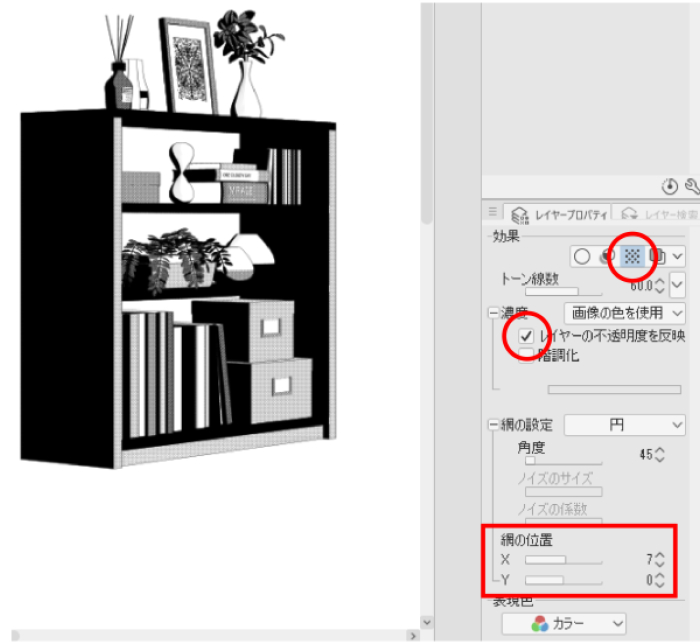
- Click "Tone" in the "Effects" section of the layer property.
You can also change it to your favorite color at the opacity of the layer.
I also change the dot position for when the tones overlap.

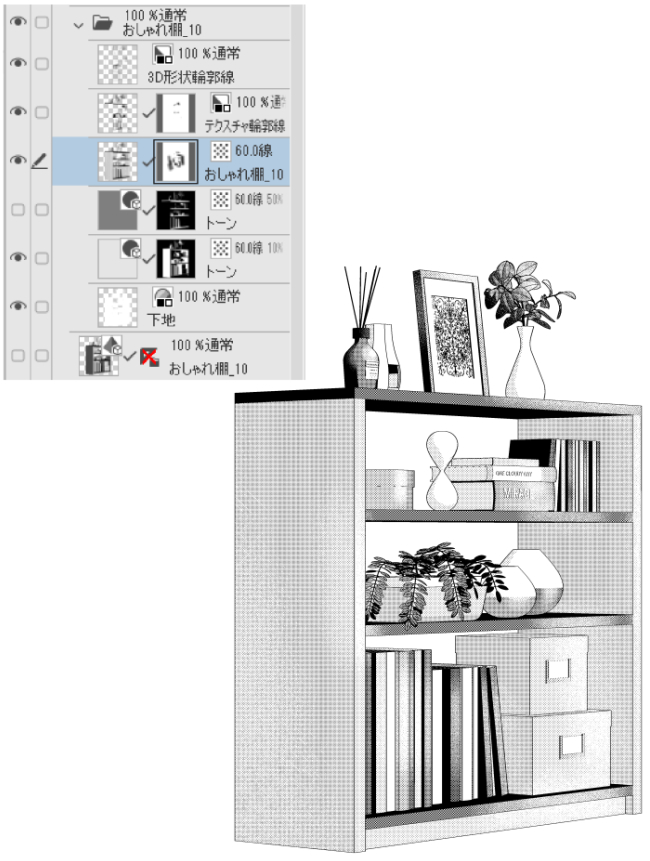
・ After that, mask each layer and shave it with your favorite brush!

↓ Example

My 3D Object almost tones the color of the texture as it is like this.
It is colored in gray for use.
This is because it is difficult to apply small pieces and tones.
Change the density of gray to look better balanced in black and white in monochrome manuscripts.
Positioning.
If you like, please check out my other materials.
ダブルサイズのベッドの3D素材です。サイドテーブルと間接照明付きです。
各オブジェクト可動です。
LT変換例
↓ベッドヘッドの非表示もできます。
↓以下私なりの作画解説です。
・3Dオブジェクトを配置します。
(※使用オブジェクトは別売り:コンテンツID:2128365 タイトル:おしゃれ棚_10)
・LT変換します。
線幅0.03mm(1px)、線の検出量80、テクスチャやトーンの設定は以下画像の通り。
変換後に、「テクスチャ輪郭線」のレイヤープロパティの表現色を「モノクロ」にしま
す。
・3Dオブジェクトのテクスチャの色味をそのままトーンに使用します。
3Dオブジェクトのレイヤーを複製して、ツールプロパティの光源の
「このモデルは光源の影響を受ける」のチェックを外します。
・3Dオブジェクトのレイヤーをラスタライズします。
(レイヤーの上で右クリック、またはレイヤータブから)
・編集タブから「輝度を透明度に変換」をクリックします。
これで下のレイヤーが見えるようになります。
・レイヤープロパティの「効果」の「トーン」をクリックします。
レイヤーの不透明度で好きな色味に変更するのもいいです。
トーンが重なった時の為に網の位置も変えます。
・後は各レイヤーにマスクして、好きなブラシでいい感じに削りましょう!
↓作例
私の3Dオブジェクトはほぼ、このようにテクスチャの色味をそのままトーンに
使用する為に、グレーで色付けしています。
こまごまとトーンを貼るのは大変だからです。
モノクロ原稿での白黒のバランスが良く見えるようにグレーの濃度を変え
配置しています。
良かったら私の他の素材もチェックしてみてくださいね。
material マテリアル
-
default material 初期マテリアル

disposition 配置
-
default layout 初期レイアウト


Other materials by miwa1121


Popular “3D object” materials


New materials


Badges
-
 MVP ◆This user has contributed greatly to the management of the community, by posting many great responses to the questions asked. Once every three months, MVPs are determined based on the points earned during that period and will be recognized accordingly.
 -
 New Valuable Player (NVP) ◆These are the next-best contributors to the community after MVPs. This is awarded to users who have not yet won an MVP award, based on the number of points they have earned.
 -
 Official Expert ◆Chosen out of all MVP awardees, who are already proof of excellence, this is a testimony of outstanding correspondence in the community. After careful screening, they are appointed by CELSYS and assume their position.Note: Formally called “Evangelists”
 -
 Official Moderator of CELSYS ◆Moderators are official CELSYS staff members who are fluent in Japanese as well as various other languages. Moderators are not experts on the software or illustration, so they are not able to directly answer your questions. However, moderators provide communication and language support to ensure that everyone can smoothly communicate with each other.
 -
 CELSYS official accountThe Official Administrator Account