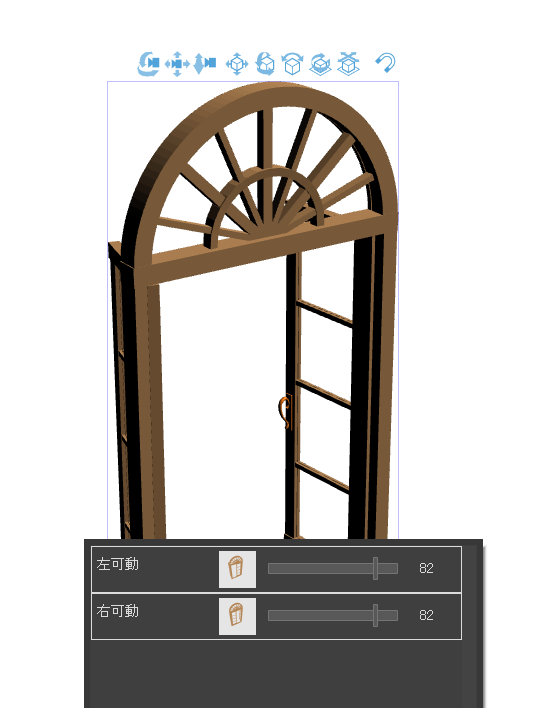
It is a 3D material that can be opened and closed by the modeler created from scratch in Blender.

It can be moved separately on the left and right.
After placing the 3D on the layer, press the wrench-shaped icon at the bottom and the sub tool detail will come out.
If you select the object list from the top tab there, you can hide it by clicking on the eye shape at the end of the blue arrow for each separated part.
Select a light source from the top list, tap
When you hover over a round area and drag, the light source moves, so you can change the way the shadow is cast.
If you want to use it with color, you can use it as it rasterize is, but if you want to use it with line art or tone, use lt conversion of layer.
If you check the depth, you can extract the line drawing in a nice way.
This is extracted with tones.
Initially, three different tones of different intensities can be created separately in the layer tab on the right.
You can adjust this to get closer to your liking.
When the middle tone layer is hidden and
This is the difference when the bottom two are hidden.
Please rasterize if you want to use the colored item as it is.
If you want to adjust the color tonal correction please touch the brightness and saturation.
However, if you try to change it as it is, the color of the handle part will also change, so if you want the handle to be a completely different color, roughly select the handle part,
If you click the third invert from the left of the lower bar, the color of the handle will be selected except for the handle, so if you adjust the color there first, and then invert the selection part, you can adjust the color of the handle part this time.
Also, I don't think you will notice it unless you close it up, but this window has a groove to fit the glass. If you don't need it, please fill it in.
I tried to draw it appropriately, but I tried to aim for something that would make the frame on the other side of the glass look blurry depending on the color and tone and make the composition more realistic.
If you use them side by side, I think it will be an addition to the decoration of the corridor or luxurious room of some mansion.
Blender で一から作成したものをモデラーで開閉できるようにした3D素材です。

左と右で別々に動かせます。
3Dをレイヤーに置いた後、下部にあるレンチの形のアイコンを押すとサブツール詳細が出てきます。
そこの一番上のタブからオブジェクトリストを選択すると、別れているパーツごとに青矢印の先にある目の形をクリックすれば、そこを隠すことができます。
上部リストから光源を選び、
丸い部分にカーソルを合わせドラッグすると光源が移動するので、影の付き方を変えられます。
色付のまま使う場合はそのままラスタライズすれば使えますが、線画やトーンで使いたい場合はレイヤーのLT変換を使います。
奥行にチェックを入れるといい感じに線画抽出できます。
これはトーンをつけて抽出したものです。
最初は右のレイヤータブに三種類の濃さの違うトーンが別々にできます。
これを調節してお好みに近づけることができます。
真ん中のトーンレイヤーを非表示にした場合と
下二つを非表示にした場合の違いです。
色付の物をそのまま使う場合はラスタライズしてください。
色を調節したければ色調補正から明度・彩度などを触ってみてください。
ただしこのまま変えようとすると取っ手部分も色が変わってしまうので、取っ手をまったく違う色にしたい場合は取っ手部分を大まかに選択して、
下のバーの左から三番目の反転をクリックすれば、取っ手以外が選択状態になるのでそちらをまず色を調整して、また選択部分の反転をすれば、今度は取っ手部分の色調整ができます。
あと、アップにでもしないと気づかないとは思いますが、この窓にはガラスをはめ込む溝が作られています。不必要な方は塗りつぶすなりしてください。
適当に描いてみましたが、溝があるとこういうガラスを枠の中央に配置してもおかしくない、色やトーンでガラスの向こう側のフレームがぼやけて見えてよりリアルな構図になる、みたいなものを狙ってみました。
並べて使えばどこかのお屋敷の廊下なり豪華な部屋の装飾の足しにもなるかと思います。


