

It is a self-made B5 doujinshi template. 自作のB5同人誌用テンプレートです。
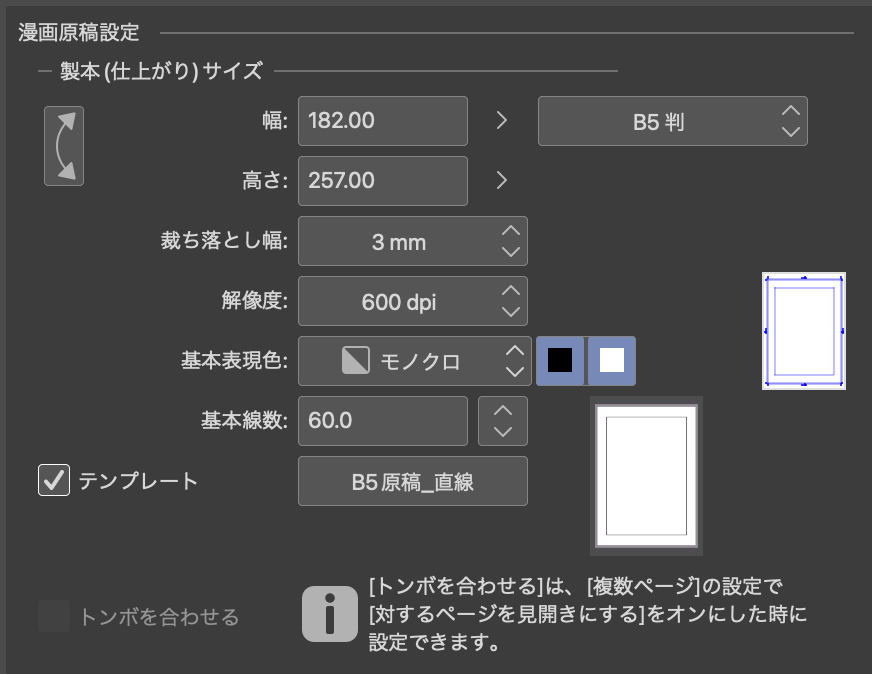
Please set it with "template" in the manga draft settings and use it.

■Layer contents

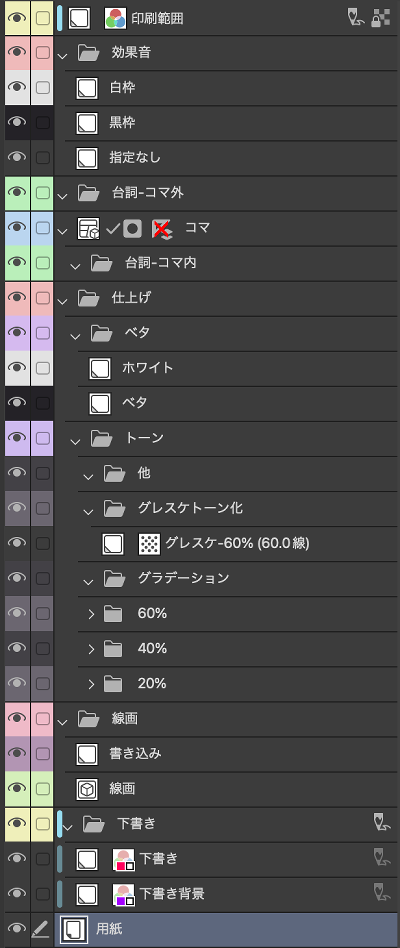
The "Print Area" layer at the top is for visualizing the bleed width.
Although it is made with "5mm", it does not affect the drawing area bleed width so there is no problem with output even if it is Mr./Ms. a "3mm" printing shop.
・"Line Art" folder
―"Line drawing"... vector layer
- "Write"... raster layer
Since it is a type that I want to use properly, there are two sheets like this. Duplicate and use more layers according to your situation.
・"Drafts" folder
- "Draft"... Drawn in pink color
- "Draft background"... Drawn in purple
・ "Dialogue - Outside the frame"
・ "Frame" - "Dialogue - Outside the frame"
・"Finish" - "Tone" - "Other"
・ "Finish" - "Tone" - "Gradient"
… The above four folders are empty folders that I have created because they are easy to classify personally. When the corresponding item is added, it is divided into folders.
■ About the "Dialogue-Extra-frame" and "Dialogue-In-frame" folders

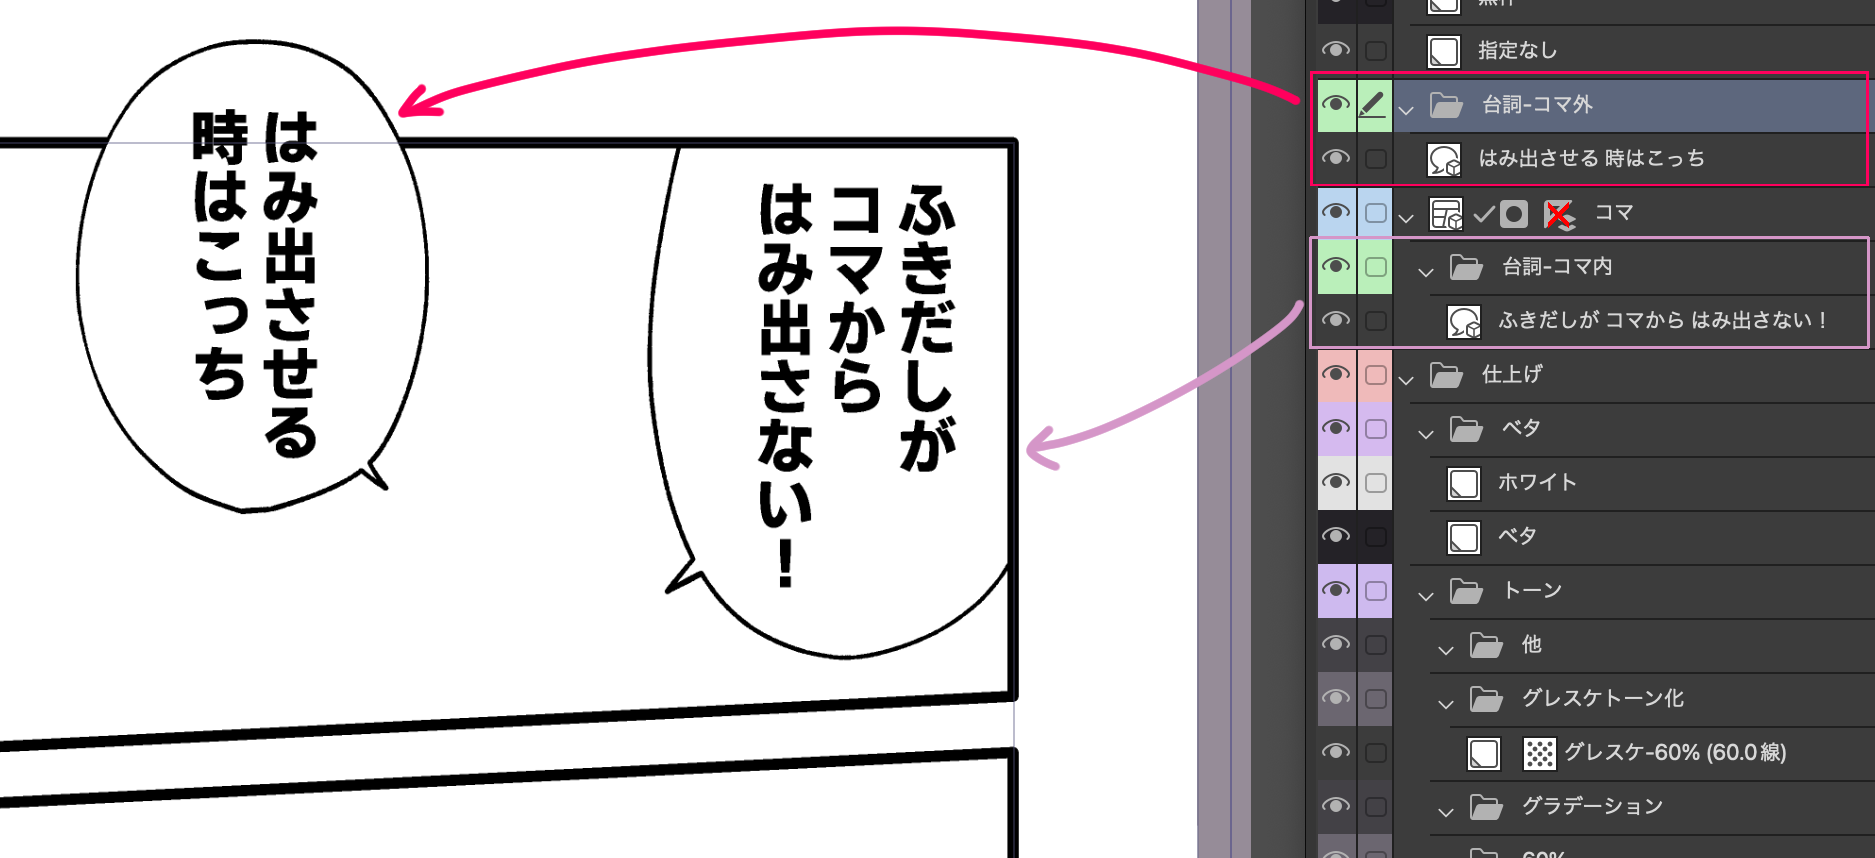
The speech bubbles placed in the "Dialogue - In the frame" folder do not protrude outside the frame.
Depending on the size of the speech bubble drawn balloon layer it may pop out in another frame, so in that case mask the outside of the frame so that it does not protrude.
The speech bubble placed in the "Dialogue - Out of Frame" folder will be in the form of a frame border.
About the "Tones" folder
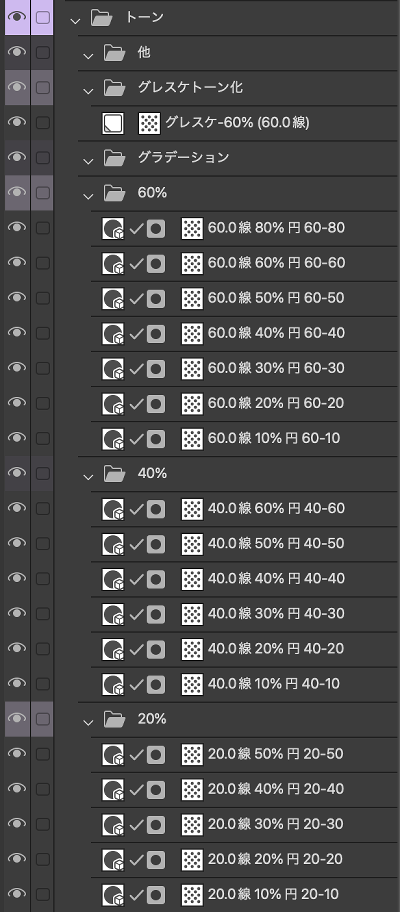
When expanded, it should look like this:

For halftone tones, "60%", "40%", and "20%" layers are available.
If you draw on the corresponding layer with a pen or fill with a bucket, you can draw a tone of the number of lines and %.
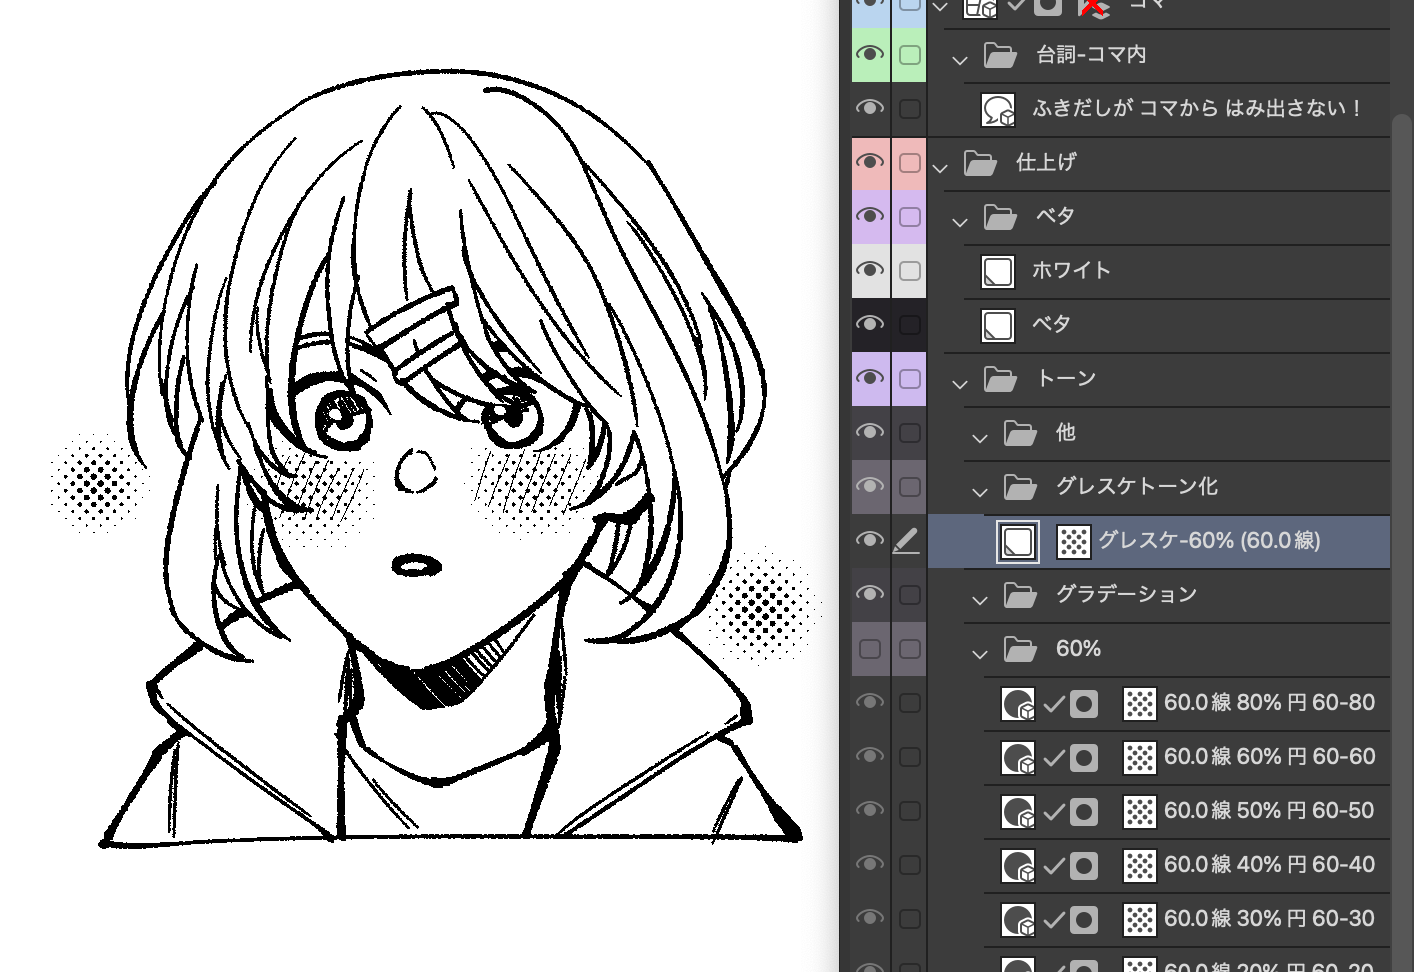
About the "Greske-60%" layer

If you draw with gray materials such as airbrushes and stamps, it will be toning at 60%.
I use it for drawing cheek dyeing with an airbrush as shown in the image above.

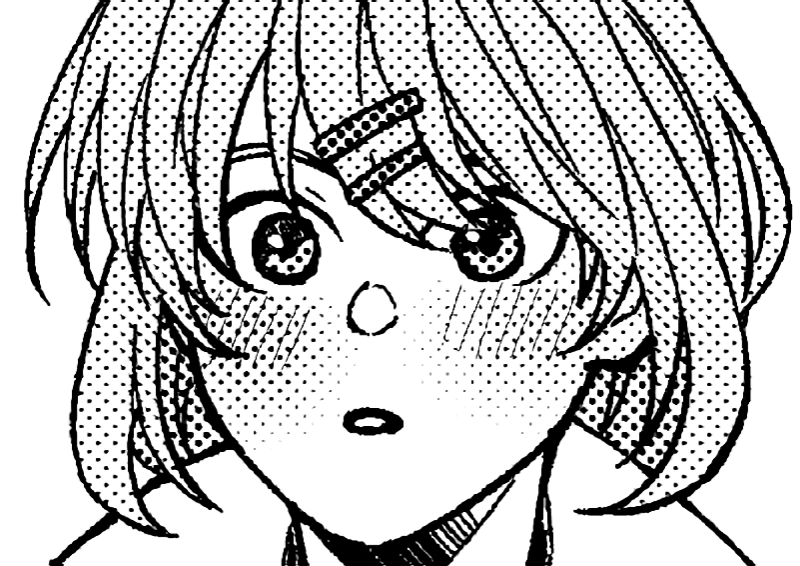
It's a little hard to understand, but if you overlap the 60% tone in the template and what you draw on the "Gresquet-60%" layer, the moiré will not appear.
■ About the "Sound Effects" folder

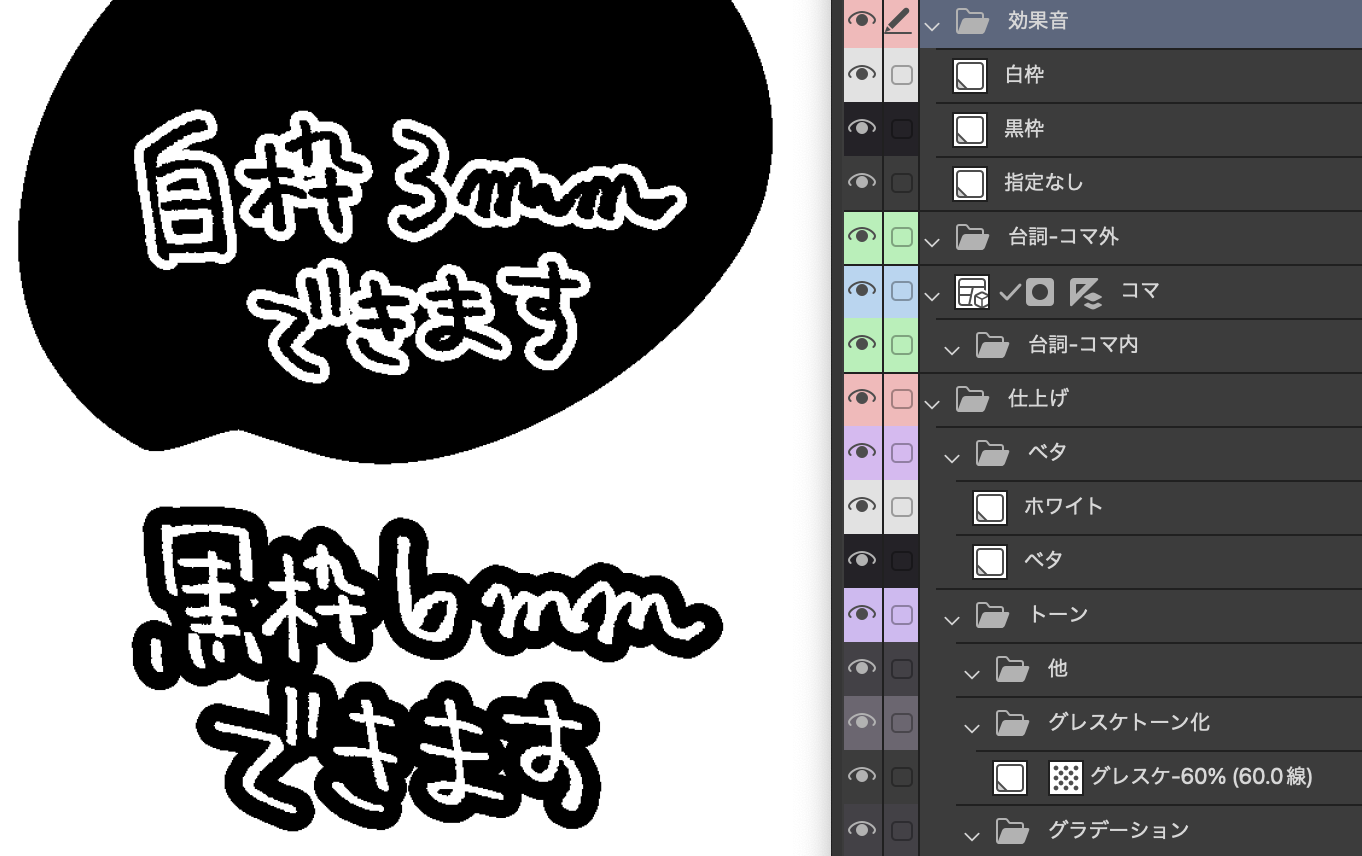
・ "White frame" layer: When drawing with "black", it is set to have a "3mm" white border.
・ "Black border" layer: When drawn in "white", it is set to have a "6mm" black border.
・ "Not specified" layer ... It is an ordinary raster layer with no special settings
■ About output

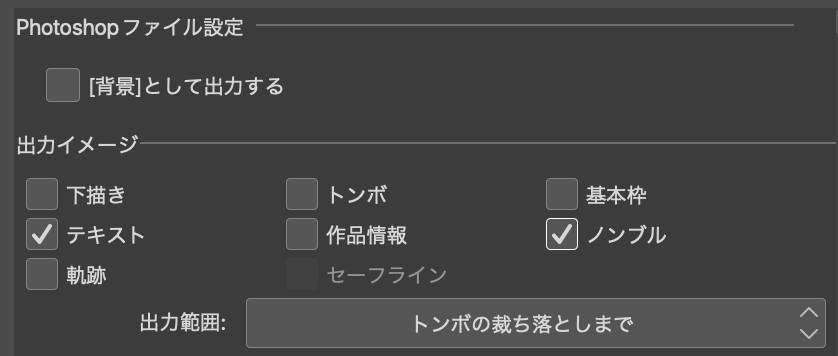
If you have checked "Draft" in the "output image" item, be sure to uncheck it.
You can hide the "Print Area" and "Drafts" folders displayed above in the template with finished data.
漫画原稿設定の「テンプレート」で設定して使用して下さい。


■レイヤー内容

・一番上の「印刷範囲」レイヤーは裁ち落とし幅を可視化させるためのものです。
「5mm」で作成していますが描画領域には影響ないので裁ち落とし幅が「3mm」の印刷所さんでも出力には問題ありません。
・「線画」フォルダ
―「線画」…ベクターレイヤー
―「書き込み」…ラスターレイヤー
使い分けしたいタイプなのでこのように2枚あります。状況に応じて複製してレイヤーを増やして使用してください。
・「下書き」フォルダ
―「下書き」…ピンク色で描画されます
―「下書き背景」…紫色で描画されます
・「台詞-コマ外」
・「コマ」―「台詞-コマ外」
・「仕上げ」―「トーン」―「他」
・「仕上げ」―「トーン」―「グラデーション」
…上記4フォルダは個人的に分類すると楽なので作っている空のフォルダです。該当物を追加した時にフォルダ分けしています。
■「台詞-コマ外」「台詞-コマ内」フォルダについて

「台詞-コマ内」フォルダに入れたふきだしはコマ外にはみ出しません。
描画したふきだしの大きさによっては別のコマに飛び出る場合があるのでその場合はふきだしレイヤー毎に該当コマ外をマスクしてはみ出ないように設定してください。
「台詞-コマ外」フォルダに入れたふきだしはコマ枠にかかる形になります。
■「トーン」フォルダについて
展開すると下のようになります。

網点トーンは「60%」「40%」「20%」のレイヤーを用意しています。
該当レイヤーにペンで描いたりバケツで塗りつぶしをするとその線数・%のトーンを描画することが出来ます。
■「グレスケ-60%」レイヤーについて

エアブラシやスタンプ等のグレースケール素材で描画すると60%でトーン化されます。
私は上記画像のようにエアブラシで頬染めの描画などに使用しています。

ちょっと分かりにくいですがテンプレ内にある60%トーンと「グレスケ-60%」レイヤーに描画したものを重ねるとモアレが出ないような設定にしています。
■「効果音」フォルダについて

・「白枠」レイヤー…「黒」で描画すると「3mm」の白フチが付く設定になっています
・「黒枠」レイヤー…「白」で描画すると「6mm」の黒フチが付く設定になっています
・「指定なし」レイヤー…特に設定のない普通のラスターレイヤーです
■出力時について

「出力イメージ」の項目の「下描き」のチェックをしている場合は必ず外してください。
テンプレート上表示されている「印刷範囲」、「下書き」フォルダを完成データで非表示にすることができます。


