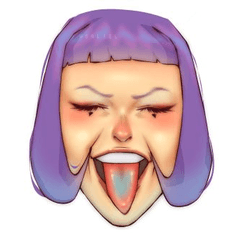
平放橡皮擦,使用參考圖層避免交叉邊緣(有關提示,請參閱頁面) Flatting Eraser that uses a reference layer to avoid crossing edges (see page for tips)
Clip Studio Paint 允許您 使用參考層次查看邊緣,並且僅在邊緣的一側進行繪製。這是一項 基本功能。 任何人都可以通過啟用[不要越過參考圖層的線]並設置一些基本設置來使任何畫筆執行此操作。

沿邊緣擦除 是一款具有邊緣檢測[防溢出]功能的橡皮擦,即使在形狀線沒有完全閉合的情況下,也可以清理顏色!
我覺得 使用參考圖層擦除 可能比用它塗顏色更可控、更有趣。

這款橡皮擦包含在我的木薯數位畫筆套裝中的壓平工具中,您可以在我的 gumroad/ko-fi 商店中找到。
別忘了設置參考圖層!

- 選擇 線條圖層。
- 按燈塔按鈕將其設置為參考圖層。
- 然後,您可以選擇顏色圖層並使用擦除工具。 它將使用參考圖層來判斷邊緣的位置。
畫筆大小 + 十字游標可讓您查看檢查邊緣的位置。


如果要查看圓心的位置,可以在Clip Studio Paint的 [Preferences...] 中的游標>游標形狀下 更改游標類型。
“畫筆大小和十字”將畫筆的半徑顯示為一個圓,中間有一個小十字。這有助於您查看檢查邊緣的位置,尤其是在您使用的無螢幕平板電腦時。
----
額外資訊
為什麼或何時應該以這種方式擦除?
帶有防溢出功能的畫筆就像一個迷你油漆桶工具,停留在其半徑內。

如果使用防溢 出進行繪畫,最終可能會得到充滿孔洞的顏色。內線越 複雜,這種方法就越可能導致問題。

如果只是繪製一個斑點,然後擦除外邊緣,則可以避免內孔。根據形狀的不同,像這樣擦除會更容易。

如果還有外相交線,您可能仍需要手動擦除它們。如果需要處理外線,這甚至可能不是最好的橡皮擦。但是對於整體公寓之類的事情,尤其是在第一階段,這可以節省大量時間。

這對於草圖和粗略動畫特別有用,在這些動畫中,線條並不總是閉合的,但您仍然希望快速而粗略地填充它們。

使用正確的熱鍵,您可以輕鬆地在此和其他橡皮擦和扁平工具之間切換,以快速適應不同的情況。 當我需要快速更改、編輯和清理 著色層的一小部分時,我經常會拿出這個橡皮擦。


在某些情況下,對於此類情況,有更好、更快 的填充/拼平工具,例如 [封閉和填充]。但有時,橡皮擦是您需要的。 知道您有不同的工具將為您提供更多選擇,以防其中一種工具不適合某些情況。

Clip Studio Paint 的邊緣檢測沒有抗鋸齒功能,因此擦除的邊緣最終可能會變得非常鋸齒狀。如果您以高解析度工作或線條完全不透明,這不是什麼大問題。但是,如果您只以 100% 的速度工作,則可能需要應用濾鏡>模糊>[平滑])或輕微的高斯模糊來消除一些粗糙度。
---
本部分僅說明 Clip Studio Paint 邊緣檢測的工作原理
它的邊緣檢測是如何工作的?
您可以在大多數畫筆中啟用此邊緣檢測功能。該複選框在 CSP 1.10 中標記為 [不要越過參考層的線]。如果未看到此選項,則可能需要在[子工具詳細資訊]視窗中啟用它。


邊緣檢測就像一個 迷你油漆桶工具,被限制在畫筆的半徑範圍內。它從中心開始檢查邊緣,並在看到邊緣或畫筆半徑時停止,然後在那裡限制其效果。

如果邊緣在圓的半徑內不完整, 則畫筆的效果會繞到 邊緣的另一側。

有時, 如果邊緣足夠透明或足夠輕,則將其計為間隙。在這種情況下,畫筆的效果仍然會繞著邊緣的另一側移動,就好像線條很輕的地方有一個間隙一樣。
要更改此閾值,您可以 調整[色邊距]。如果希望它作為邊緣的一部分停在最輕的線處,請將其設置為 零 (0)。

[區域縮放] 將效果推過您設置的像素數。這很有用,因此顏色可以在線條下以及它所具有的任何柔軟度、紋理 或抗鋸齒下。1 或 2 個就足夠了,但在某些情況下, 可能需要 5 或 10 個。
三種[縮放模式]決定了它如何擴展圖元,這在角落或紋理上最為明顯。
- [矩形] 在拐角處擴展為一個盒子。
- [圓形] 在拐角處擴展為一個圓。
- [至最暗圖元] 嘗試按最大區域縮放進行擴展,但在檢測到圖元變為最暗/最不透明時仍 停止。 如果線條或邊緣的柔軟度或厚度可變,這可能很有用, 但有時填充也可能看起來不完整。

如果邊緣看起來不對,請嘗試使用不同的設置。
感謝您的支援!
您可以訪問我的 商店購買數百種其他 刷子!- @PharanBrush

Clip Studio Paint lets you use a reference layer to see edges and only paint on one side of the edge. This is a basic feature. Anyone can make any brush do this by just enabling [Do not cross lines of reference layer] and setting some basic settings.

Erase Along Edge is an eraser with edge detection [anti-overflow], for cleaning up colors even when the shape lines are not fully closed everywhere!
I felt that it might be both more controllable and more enjoyable to erase using a reference layer than color with it.

This eraser in included among my flatting tools in my Tapioca Digital Painting Brush Set you can find in my gumroad/ko-fi shop.
DON'T FORGET TO SET THE REFERENCE LAYER!

- Select the lineart layer.
- Press the lighthouse button to set it as a reference layer.
- Then you can select your color layer and use the erase tool. It will use the reference layer to judge where the edge is.
The Brush size + Cross Cursor lets you see where the edge is checked.


If you want to see where the center of the circle is, you can change the cursor type in Clip Studio Paint's [Preferences...] under Cursor>Shape of Cursor.
"Brush size and cross" will show the radius of the brush as a circle, and a small cross in the center. This helps you see where the edge is checked especially if you are using a screenless tablet.
----
Extra information
Why or when should I erase this way?
A brush with Anti-overflow works like a mini paint bucket tool that stays inside its radius.

If you use anti-overflow for painting, you can end up with colors that are full of holes. The more complicated the inner lines are, more this method might cause problems.

If you just paint a blob and then erase the outer edges instead, you avoid the inner holes. Depending on the shape, it can be easier to erase like this.

If there are also outer intersecting lines, you may still have to erase them manually. This may not even be the best eraser to use if outer lines need to be handled. But for things like overall flats, especially in the first stages, this can save a lot of time.

This is especially useful for sketches and rough animation, where your lines aren't always closed, but you still want to quickly and roughly give them a fill.

With the right hotkeys, you can easily switch between this and other erasers and flatting tools to quickly adapt to different cases. This eraser is something I pull out quite often when I just quickly need to change, edit and clean up small section of a coloring layer.


In some cases, there are better and faster fill/flatting tools for cases like this like [Enclose and Fill]. But sometimes, an eraser is what you need. Knowing you have different tools will give you more options in case one of them doesn't work well for a situation.

Clip Studio Paint's edge detection isn't antialiased so your erased edges can end up very jagged. This isn't a big problem if you work at high resolutions or your lines are fully opaque. But if you only work at 100%, you may need to apply Filter>Blur>[Smoothing] or a slight gaussian blur to remove some of the roughness.
---
This part just explains how Clip Studio Paint edge detection it works
How does its edge detection work?
You can enable this edge detection feature in most brushes. The checkbox is labeled [Do not cross lines of reference layer] in CSP 1.10. If you don't see this option, you may need to enable it in the [Sub Tool Detail] window.


The edge detection works like a mini paint bucket tool, confined to the radius of the brush. It starts checking for the edge from the center and stops when it sees an edge or the radius of the brush, then limits its effect there.

If the edge is not complete within the radius of the circle, the effect of the brush goes around to the other side of the edge.

Sometimes, if the edge is transparent or light enough, it will be counted as a gap. In this case, the effect of the brush will still go around the other side of the edge as if there is a gap where the line was very light.
To change this threshold, you can adjust [Color margin]. Set it to zero (0) if you want it to stop at even the lightest lines as part of the edge.

[Area scaling] pushes the effect past the edge by the number of pixels you set. This is useful so the color can go under the lines and any softness, texture or antialiasing that it has. 1 or 2 can be enough but in some cases, 5 or 10 may be required.
The three [Scaling modes] determine how it extends the pixels, which is most noticeable either on corners or textures.
- [Rectangle] expands at the corners as a box.
- [Round] expands at corners as a circle.
- [To darkest pixel] tries to expand by the maximum area scaling but still stops when it detects that the pixel has become its darkest/most opaque. This can be useful if the lines or edge has variable softness or thickness, but sometimes the fill can also look incomplete.

If the edges look wrong, try experimenting with different settings.
Thanks for your support!
You can visit my store for hundreds of other brushes! - @PharanBrush


