
ffgghhjj의 후처리 세트 (ffgghhjj's Post-Processing Set) ffgghhjj's Post-Processing Set
콘텐츠 ID:1852450
-
1,252

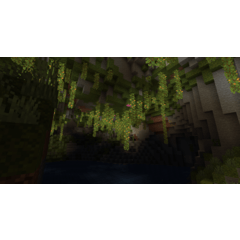
클립 스튜디오 페인트에서 사용할 수 없는 필터 및 효과를 재현하는 작업이 포함된 자동 작업 집합입니다. Auto-Action set containing actions that recreates filters and effects not available in Clip Studio Paint.


클립 스튜디오 페인트에서 현재 사용할 수 없는 필터를 재현하는 자동 액션 세트입니다. 사후 처리에 사용됩니다.
응용 프로그램의 최대 이점을 얻으려면 평평/ 병합된 레이어에 이러한 레이어를 사용하는 것이 좋습니다.
주요 특징은 이미지의 픽셀 채도에 의해 영향을 받는 하이 패스 필터 및 선택 레이어를 만드는 것입니다.
사용법:
그라데이션 맵 선택 및 채도 선택 자동 동작은 사용 편의성을 위해 선택 레이어를 출력합니다. 선택 레이어의 내용을 기반으로 선택 영역을 쉽게 만들려면 선택 레이어의 레이어 축소판 네일을 두 번 클릭합니다. 또한 선택 영역이 활성 상태인 동안 새 조정 레이어를 만들 수 있으며 클립 스튜디오 페인트는 자동으로 선택 영역을 사용하여 조정 레이어의 마스크로 사용할 수 있습니다.
그라데이션 맵 선택 및 채도 선택 자동 동작은 사용 편의성을 위해 선택 레이어를 출력합니다. 선택 레이어의 내용을 기반으로 선택 영역을 쉽게 만들려면 선택 레이어의 레이어 축소판 네일을 두 번 클릭합니다. 또한 선택 영역이 활성 상태인 동안 새 조정 레이어를 만들 수 있으며 클립 스튜디오 페인트는 자동으로 선택 영역을 사용하여 조정 레이어의 마스크로 사용할 수 있습니다.
채도 선택 자동 작업에 가장 쉬운 응용 프로그램은 선택을 하고 새로운 색조/채도 또는 색상 균형 조정 레이어를 만드는 것입니다. 그런 다음 채도 슬라이더를 변경하거나 그림의 프레젠테이션을 조정하기 위해 색상 균형 레이어의 설정을 사용할 수 있습니다.
또한 그라데이션 맵 선택과 채도 선택 과 교차하여 필요에 따라 보다 복잡한 선택을 할 수 있습니다.
또한 그라데이션 맵 선택과 채도 선택 과 교차하여 필요에 따라 보다 복잡한 선택을 할 수 있습니다.
노트:
- 하이 패스 필터를 사용하려면 출력 레이어를 가져 와서 혼합 모드를 "오버레이, 부드러운 빛, 하드 라이트, 선형 조명"으로 설정하여 이미지를 선명하게하십시오.
- P.Sharp 하이 패스 필터를 사용하면 폴더로 출력됩니다. 폴더의 루트로 이동하여 폴더의 혼합 모드를 "오버레이, 소프트 라이트, 하드 라이트, 선형 라이트"로 설정하기만 하면 됩니다. 원하는 경우 폴더의 내용을 병합할 수도 있지만 원하는 경우 마스킹 및 추가 변경을 적용할 수 있도록 폴더로 유지하기로 결정했습니다.
Auto-Action set that recreates filters not currently available in Clip Studio Paint. Used for post processing.
*****It is advised to use these on flattened/merged layers to get the maximum benefit of their applications.
Main features are the creation of High Pass filters and selection layers influenced by pixel saturation from an image.
Usage:
The Gradient Map Selection & Saturation Selection auto-actions output a selection layer for ease of use. Double-click the layer thumbnail of the selection layer in order to easily create a selection based on the contents of that selection layer. Furthermore, while you have a selection active, you can then create a new adjustment layer and Clip Studio Paint will automatically take your selection and use it as a mask for the adjustment layer.
The Gradient Map Selection & Saturation Selection auto-actions output a selection layer for ease of use. Double-click the layer thumbnail of the selection layer in order to easily create a selection based on the contents of that selection layer. Furthermore, while you have a selection active, you can then create a new adjustment layer and Clip Studio Paint will automatically take your selection and use it as a mask for the adjustment layer.
Easiest applications for the Saturation Selection auto-action is to take the selection and create a new Hue/Saturation or Color Balance adjustment layer. you can then alter the saturation slider or use the settings in the Color Balance layer in order to tweak the presentation of your illustration.
Additionally, you can intersect a gradient map selection with the saturation selection to make more complex selections based on your needs.
Additionally, you can intersect a gradient map selection with the saturation selection to make more complex selections based on your needs.
Notes:
- To use the high pass filters, simply take the output layer and set the blend mode to "overlay, soft light, hard light, linear light" to sharpen your image.
- When using the P.Sharp High Pass filter, it outputs as a folder. Just go to the root of the folder and set the folder's blend mode to "overlay, soft light, hard light, linear light". you can also merge the folder's contents if you wish, but I chose to keep it as a folder so that people can apply masking and additional changes if they wish.


'Ffgghhjj'님의 다른 소재


'오토 액션'의 인기 소재


신규 소재


배지
-
 MVP ◆질문에 적절한 답변을 많이 게시하고 커뮤니티 운영에 크게 공헌한 사용자입니다. MVP는 3개월에 한 번, 그 사이에 획득한 포인트를 바탕으로 결정하고 표창을 실시하고 있습니다.
 -
 NVP(New Valuable Player) ◆MVP 다음으로 커뮤니티 운영에 공헌한 사용자입니다. 이제까지 MVP 수상 경험이 없는 분 중에서 획득한 포인트를 바탕으로 결정하여 표창을 실시하고 있습니다.
 -
 공식 엑스퍼트 ◆뛰어난 응답자의 증표인 MVP수상자 중에서 선택된 커뮤니티에서 가장 뛰어난 응답자의 증표입니다. 심사를 거쳐서 저희 회사에서 의뢰할 경우 취임되십니다.※ 옛 명칭 '에반젤리스트'
 -
 셀시스 공인 모더레이터 ◆모더레이터는 일본어와 기타 언어로 말할 수 있는 셀시스 공인 스태프입니다. 소프트웨어나 창작 전문가가 아니므로 직접 의문을 해결할 수는 없지만 여러분이 순조롭게 소통할 수 있도록 언어나 커뮤니케이션 측면에서 지원합니다.
 -
 셀시스 공식운영에 관련된 공식 계정입니다.