

どんなお絵かきにもスタンプのような表情を出すためのツールセット! A set of tools to create a stamp-like look for any drawing!
このセットの使用方法:
1.レイヤーパネルでスタンプを作成するレイヤーを選択します。
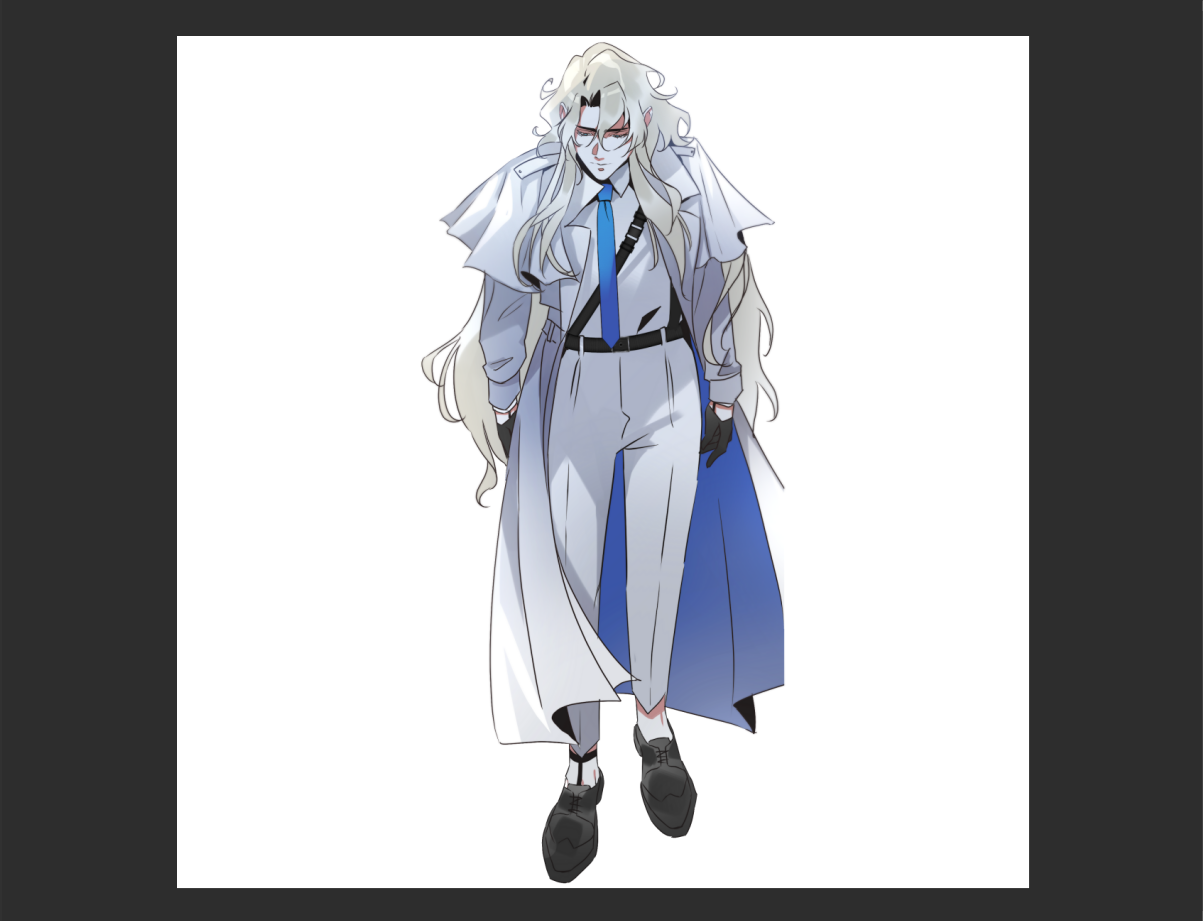
2. 「スタンプ」アクションを開始します。
1.レイヤーパネルでスタンプを作成するレイヤーを選択します。

2. 「スタンプ」アクションを開始します。
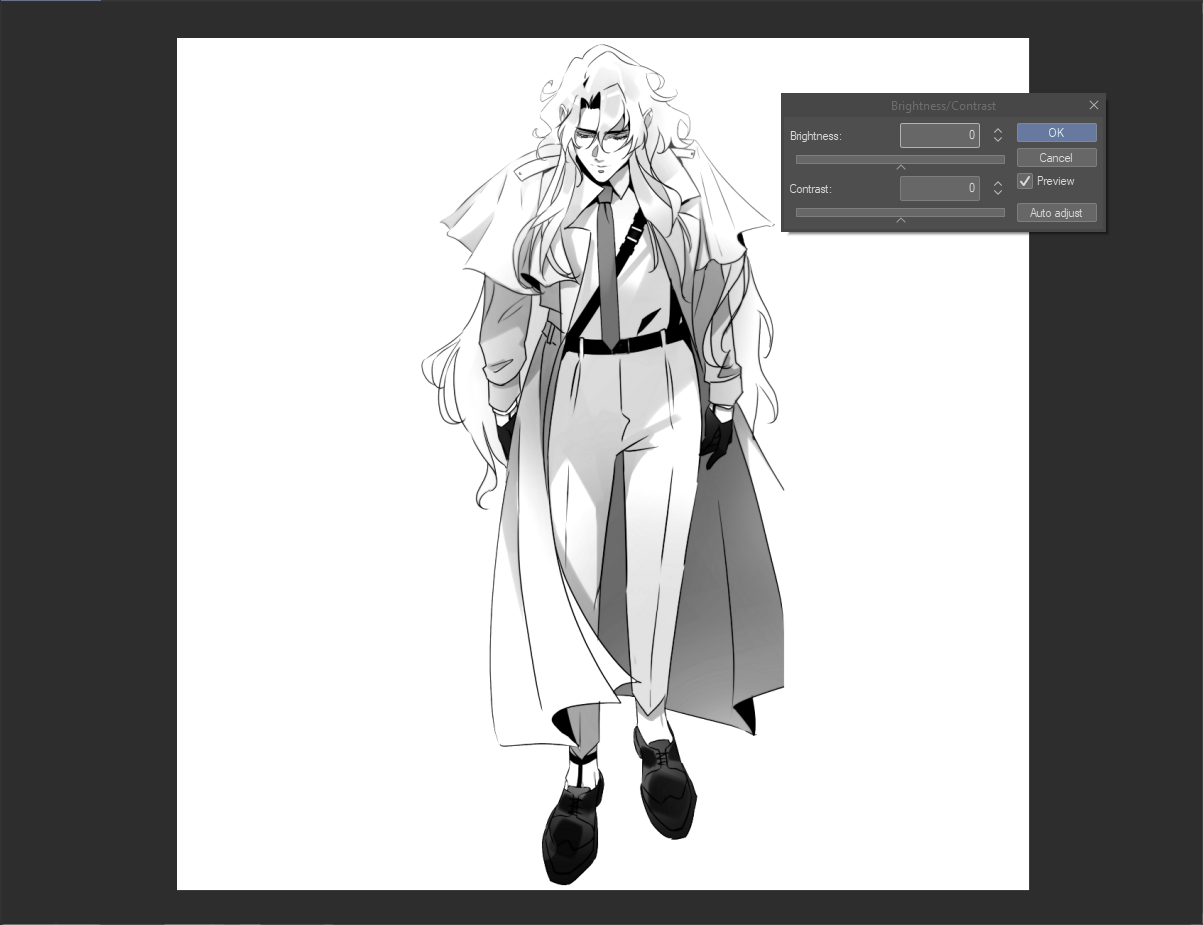
3.ポップアップメニューでパラメータを好みに合わせて変更します-暗いコントラストの領域が見えるほど、より良いスタンプが得られます!
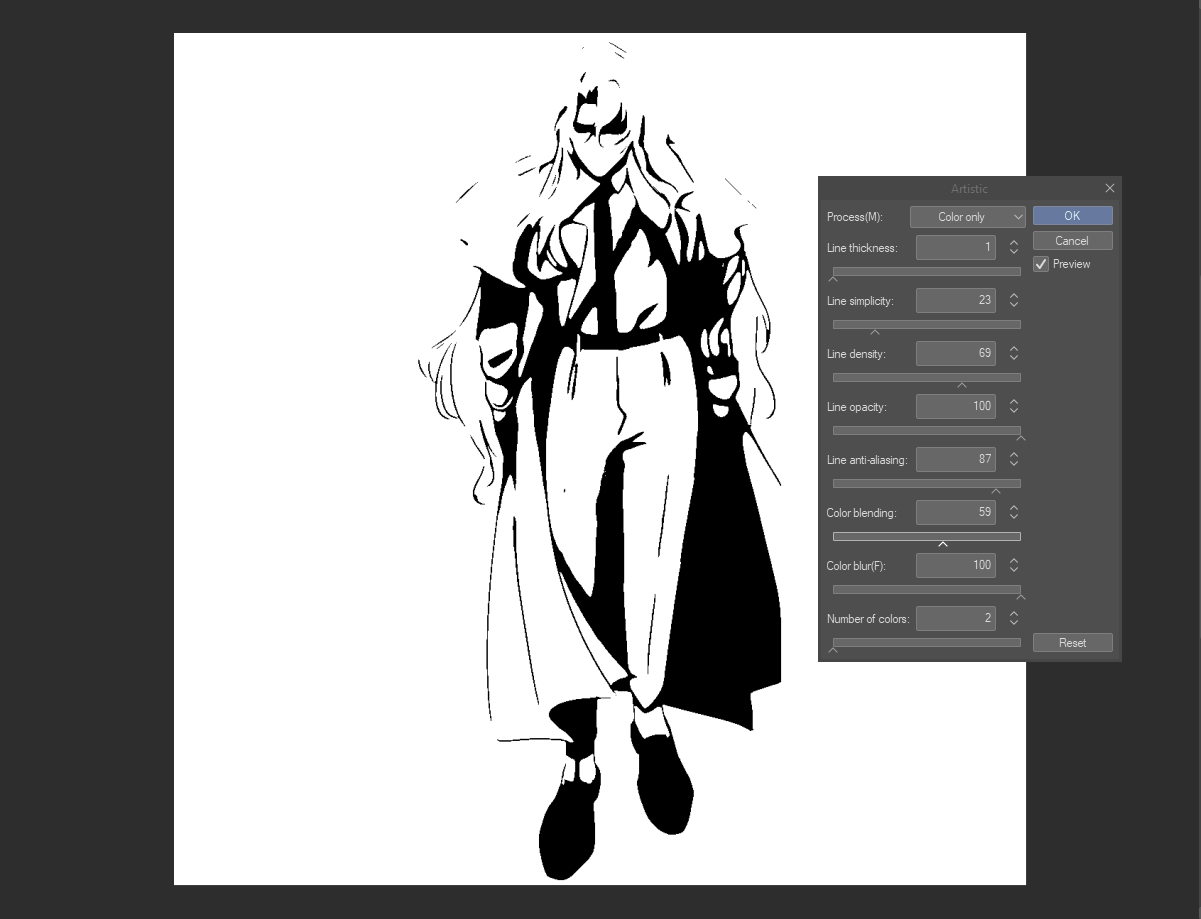
4.次に、新しいポップアウトが到着します、うわー!色のレベルについて尋ねられますが、そのうちの2つだけに固執することをお勧めします-最も自然な外観を提供します。
ただし、写真があまり見栄えがよくない場合は、色のぼかしとブレンドの設定をいじってみてください。
5.さて、アクションは終わりです。それは私たちのスタンプのメインベースレイヤーとその上の空のレイヤーを作りました。テクスチャブラシを使う時が来ました!
お気に入りのグランジブラシを使用するか、このセットのブラシを試すことができます-レンガの壁のクローズアップの写真を使用して作成しました:D
グランジのテクスチャーを好きなだけ追加してください。
色はまったく関係ありません!
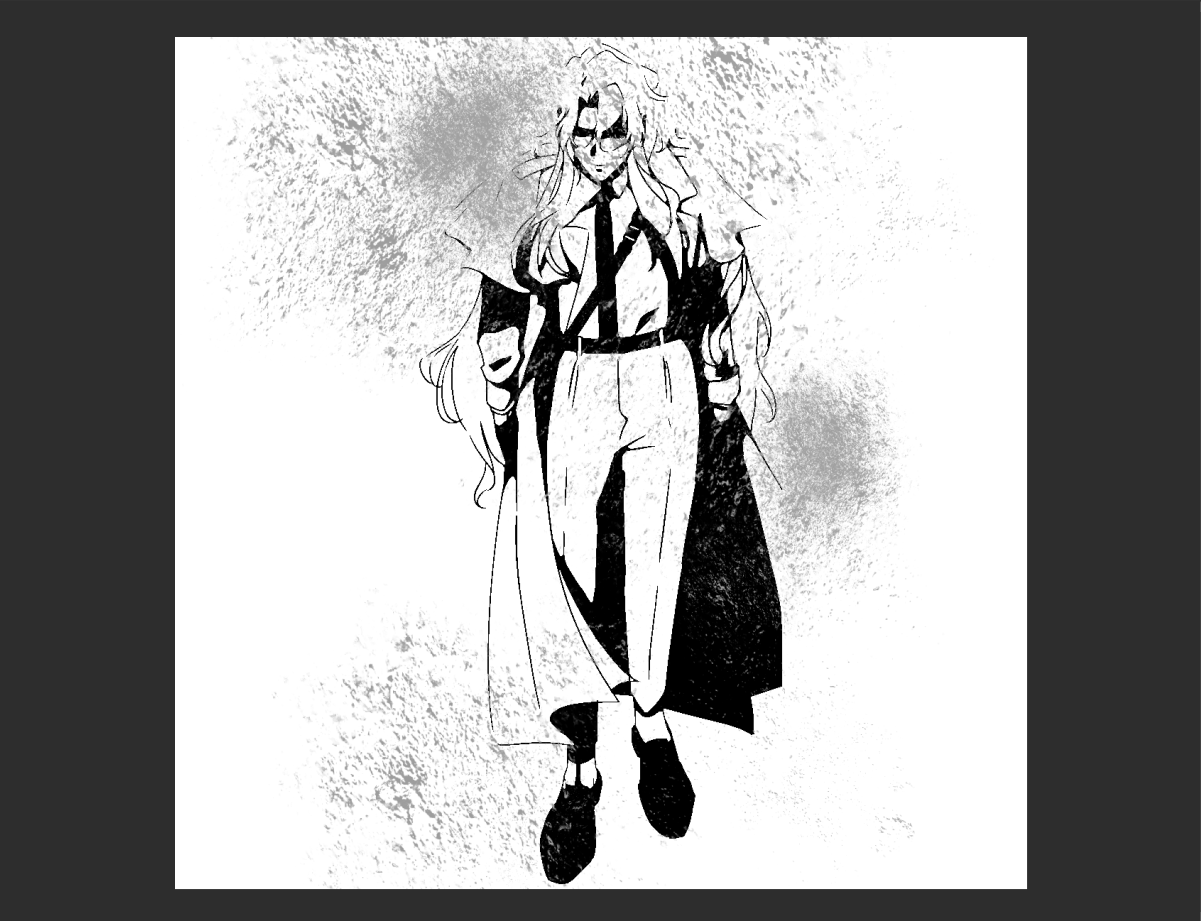
6.次に、テクスチャのあるレイヤーにとどまり、2番目のアクションであるスタンプテクスチャを開始します。この2つを組み合わせて、この素敵なスタンプを作成します。
これらすべての下に紙のテクスチャーを用意することを絶対にお勧めします-それが最良の結果をもたらします。
楽しむ!

4.次に、新しいポップアウトが到着します、うわー!色のレベルについて尋ねられますが、そのうちの2つだけに固執することをお勧めします-最も自然な外観を提供します。
ただし、写真があまり見栄えがよくない場合は、色のぼかしとブレンドの設定をいじってみてください。

5.さて、アクションは終わりです。それは私たちのスタンプのメインベースレイヤーとその上の空のレイヤーを作りました。テクスチャブラシを使う時が来ました!
お気に入りのグランジブラシを使用するか、このセットのブラシを試すことができます-レンガの壁のクローズアップの写真を使用して作成しました:D
グランジのテクスチャーを好きなだけ追加してください。
色はまったく関係ありません!

6.次に、テクスチャのあるレイヤーにとどまり、2番目のアクションであるスタンプテクスチャを開始します。この2つを組み合わせて、この素敵なスタンプを作成します。
これらすべての下に紙のテクスチャーを用意することを絶対にお勧めします-それが最良の結果をもたらします。

楽しむ!
How to use this set:
1. Select a layer you want to make a stamp of on the layer panel.
2. Start the 'Stamp' action.
1. Select a layer you want to make a stamp of on the layer panel.
2. Start the 'Stamp' action.
3. Change parameters In pop-out menu to your liking - the more dark contrasted areas visible, the better stamp you will get!
4. Next, a new popout arrive, woah! It asks you about levels of colors, and I recommend sticking to just 2 of them - it gives the most natural look.
However, if your picture doesn't look as good with it - try playing around with the color blur and blend settings!
5. Okay, action is over. It made a main base layer for our stamp AND an empty layer above it. Time to use the texture brush!
You can use any of your favorite grunge brushes or try out the one in this set - I created it using photos of my brick wall close up :D
Just add up as much of grungey texture as you like.
Colour doesn't matter at all!
6. Now, staying on the layer with the texture, start the second action - stamp texture. It will combine the two to create this nice stamp.
I totally recommend you to have a paper texture underneath all of these - it makes the best results.
ENJOY!
カテゴリー1 Category 1


"wpjp"さんの別の素材


"素材集"の人気素材


新着素材


バッジ
-
 MVP ◆質問に対して適切な回答を数多く投稿し、コミュニティの運営に大きく貢献したユーザーです。MVPは3ヶ月に一度、その間に獲得したポイントを元に決定し、表彰を行っています。
 -
 NVP (New Valuable Player) ◆MVPに次いでコミュニティの運営に貢献したユーザーです。これまでMVPの受賞経験のない方から、獲得したポイントを元に決定し、表彰を行なっています。
 -
 公式エキスパート ◆優れた回答者の証であるMVP受賞者の中からさらに選ばれた、コミュニティで最も優良な回答者の証です。審査を経て当社から依頼し就任いただいています。※旧名称「エバンジェリスト」
 -
 セルシス公認モデレーター ◆モデレーターは、日本語とその他の言語が話せるセルシス公認のスタッフです。ソフトウェアや創作のエキスパートではないので、直接疑問を解決することはできませんが、みなさんがスムーズにコミュニケーションできるように、言葉やコミュニケーションの側面からサポートします。
 -
 セルシス公式運営に関連した公式アカウントです。