

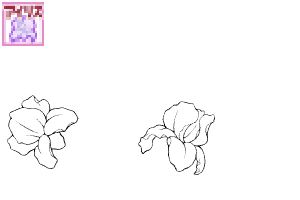
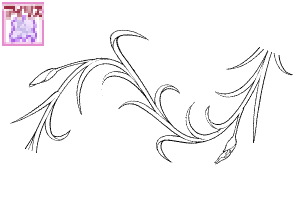
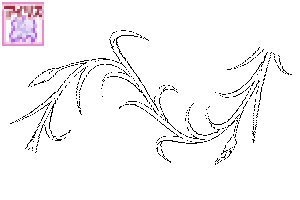
アイリス(アヤメ・菖蒲系)の各種ブラシです。
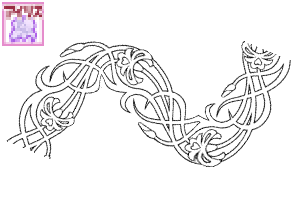
自動彩色を利用したり境界効果でフチ線を太くしたりすると
アールヌーヴォー風のいい感じにしあがります。
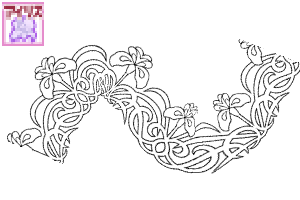
背景効果(模様や背負いなど)、花瓶、花束、ブーケ、
服やカーテン、クッションなどファブリックなどの布の模様や、
部屋の壁紙、包装紙、バッグの模様などにもいかがでしょうか。
服やカーテン、クッションなどファブリックなどの布の模様や、
部屋の壁紙、包装紙、バッグの模様などにもいかがでしょうか。
Various brushes for iris.
If you use automatic coloring or thicken the border line with the boundary effect
It will give you a nice Art Nouveau feel.
Background effect (backpack, etc.), vase, bouquet, bouquet,
Fabric patterns such as clothes, curtains and cushions,
How about it for room wallpaper, wrapping paper, bag patterns, etc.
合計9本のブラシ(6デザイン)が梱包されています。
メイン・サブカラー変更可能です。
重なった部分が白く抜けるものと(■マーク付)、
そうならない単体使いのもの(無印)と2種類のブラシがあります。
各種レイヤーの色モードによって使いわけてくださいね。
There are a total of 9 brushes (6 designs).
The main and sub colors can be changed.
There are two types of brushes, one that makes the overlapping part white and the other that does not.
Please use it properly according to the color mode of each layer.
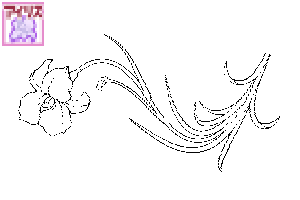
★☆★ 使用例・Usage example ★☆★
大半はクリスタについてる機能の「自動彩色」にて色を塗りました。
Most of them were painted with the "automatic coloring" function of Clip Studio.
使用例画像内のフレームは「アールヌーヴォー風お絵描きセット(ID:1770486)」の素材です。
Usage example The frame in the image is the material of the "Art Nouveau style drawing set"(ID:1770486).
Usage example The frame in the image is the material of the "Art Nouveau style drawing set"(ID:1770486).


I worked hard to make adjustments in dot units so that it looks beautiful. Please use it in various ways.
★ ☆ ★ …細部確認用の画像… ★ ☆ ★
For details confirmation: A part of the sample image of the usage example is enlarged.
For details confirmation: A part of the sample image of the usage example is enlarged.


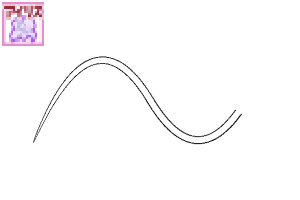
A-When you want to draw a beautiful curve.
Draw on a vector layer and erase or move the control points to form a beautiful shape.
Draw on a vector layer and erase or move the control points to form a beautiful shape.
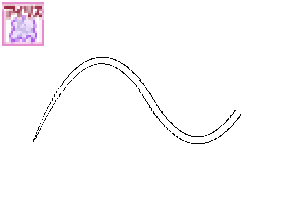
B-How to use a ruler.
Set the trajectory you want to create by operating the control points of the curve ruler.
Draw with a brush along the ruler.
Complete!
Set the trajectory you want to create by operating the control points of the curve ruler.
Draw with a brush along the ruler.
Complete!

It is a feature of the "white inside" brush with the ■ mark.
C-In the case of a monochrome layer, when drawing with one stroke, only the overlapping part becomes white.
In the case of drawing by itself or strokes drawn apart, the overlapping part will not be white.
In the case of drawing by itself or strokes drawn apart, the overlapping part will not be white.
D-For layers that have been reduced in color and changed to monochrome, and layers that are gray or color.
Whether you draw by connecting with one stroke or drawing separately, the overlapping part will be white.
Whether you draw by connecting with one stroke or drawing separately, the overlapping part will be white.
E-If you want to prevent whitening when writing with one brush or overlapping multiple strokes, use a brush without the ■ mark.
Common to monochrome / reduced monochrome / gray / color layers.
Common to monochrome / reduced monochrome / gray / color layers.
F-In one image of the B2 Iris-figure White-inside brush, the part where the flowers overlap is not white.
When the leaf stems overlap, it will come out white.
When the leaf stems overlap, it will come out white.
When the flowers and leaf stems overlap, they are white.

G-Tips on how to use brush strokes
A-Iris flower brush (stamp type)
Move the pen a little from left to right to see the image.
Move the pen a little from left to right to see the image.
The image of the B-shaped brush comes out from the flower. The image of the C leaf brush comes out from the tip. (Single / Ribbon type)
D Leaf and stem brushes connect multiple images at random.
The E and F pattern brushes produce images in succession.
DEF is a continuous ribbon type brush.

H-How to draw on a vector layer and adjust or process the arrangement later.
If you want to change the orientation, click with the object tool and operate the pointer around it to rotate.
If you can't rotate it, try the following:
Select what you drew with the object tool and specify "Sub tool details" → "Brush tip" → "Line direction".
If you want to change the orientation, click with the object tool and operate the pointer around it to rotate.
If you can't rotate it, try the following:
Select what you drew with the object tool and specify "Sub tool details" → "Brush tip" → "Line direction".
I- to change the height and width (thickness).
Select what you drew with the object tool and specify "Sub tool details" → "Brush tip" → "Thickness" → "Apply direction" → Select either "Horizontal / Vertical" → Change the number of "Thickness" .
Select what you drew with the object tool and specify "Sub tool details" → "Brush tip" → "Thickness" → "Apply direction" → Select either "Horizontal / Vertical" → Change the number of "Thickness" .
J-Tips for arranging the "white inside" brush with the ■ mark.
Draw a moderately and drag and drop with the object tool to move it to any position.
Rotate the direction or move with fine adjustment,
After making it look good, erase the parts you don't need at the end.
Draw a moderately and drag and drop with the object tool to move it to any position.
Rotate the direction or move with fine adjustment,
After making it look good, erase the parts you don't need at the end.

K-How to change the color of the brush.
Can be changed to gray or color.
Change the main color and sub color to any color.
You can invert white and black.
If the main color and sub color are the same, it will look like the figure.
If you select what you drew on the vector layer with the object tool
You can change the main color and sub color later.

Various ways to make the line "thck or thin" as a whole
L-Use "Vector line correction"
Draw on a raster layer and convert to vector to correct the line width.
Areas with a high density of lines look natural by correcting the line width to make them thinner.
Draw on a raster layer and convert to vector to correct the line width.
Areas with a high density of lines look natural by correcting the line width to make them thinner.
M-Use "selection range (color gamut specification)"
Adjust the line width by creating a selection area of the line and "expanding/contracting" to paint or erase.
Adjust the line width by creating a selection area of the line and "expanding/contracting" to paint or erase.
N-Use "boundary effect"
Draw on a raster layer, and from the menu bar above, "Convert brightness to transparency" to erase the white part.
After that, make a black line on the outside with "Boundary effect" of "Effect" of the layer property.
Add a white color to the background color.
Draw on a raster layer, and from the menu bar above, "Convert brightness to transparency" to erase the white part.
After that, make a black line on the outside with "Boundary effect" of "Effect" of the layer property.
Add a white color to the background color.
O-Use "color reduction display"
Draw using the main black and sub white on the gray layer, and apply the "Gaussian blur" of "Blur" of "Filter" from the menu bar above.
After that, change to a monochrome layer and adjust the value of "Color/alpha threshold" from the layer properties.
Draw using the main black and sub white on the gray layer, and apply the "Gaussian blur" of "Blur" of "Filter" from the menu bar above.
After that, change to a monochrome layer and adjust the value of "Color/alpha threshold" from the layer properties.
P-After thickening the line, if you are concerned about the density, or if you make it thin and the line is cut or faint, it is recommended to correct it by hand drawing. It will be a beautiful finish.
★☆★ 出品データ・Listing data ★☆★

★ ☆ ★ ☆ ★ ☆ ★ ☆ ★ ☆ ★ ☆ ★ ☆ ★ ☆ ★ ☆ ★ ☆
白下地入りのブラシです。
説明画像は図案が見やすいよう一部フチを太くしてるものがあります。
説明用の画像はサンプルなので線を入れています。実際の素材には入っていません。
説明画像は図案が見やすいよう一部フチを太くしてるものがあります。
説明用の画像はサンプルなので線を入れています。実際の素材には入っていません。
アイリスブラシ


"背景職人の館"さんの別の素材


"素材集"の人気素材


新着素材


バッジ
-
 MVP ◆質問に対して適切な回答を数多く投稿し、コミュニティの運営に大きく貢献したユーザーです。MVPは3ヶ月に一度、その間に獲得したポイントを元に決定し、表彰を行っています。
 -
 NVP (New Valuable Player) ◆MVPに次いでコミュニティの運営に貢献したユーザーです。これまでMVPの受賞経験のない方から、獲得したポイントを元に決定し、表彰を行なっています。
 -
 公式エキスパート ◆優れた回答者の証であるMVP受賞者の中からさらに選ばれた、コミュニティで最も優良な回答者の証です。審査を経て当社から依頼し就任いただいています。※旧名称「エバンジェリスト」
 -
 セルシス公認モデレーター ◆モデレーターは、日本語とその他の言語が話せるセルシス公認のスタッフです。ソフトウェアや創作のエキスパートではないので、直接疑問を解決することはできませんが、みなさんがスムーズにコミュニケーションできるように、言葉やコミュニケーションの側面からサポートします。
 -
 セルシス公式運営に関連した公式アカウントです。