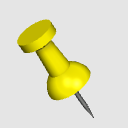

 It is an orthodox pin and a pushpin.
Please use it when I put it on a wall or a cork board, and print, a flyer, a photograph, etc. are fastened.
The size is φ 10 × H24 (MM3).
Five types of color variations are available as standard color variations.
Updated with topology and material changes.
 Any of the following rendering LT samples are basically "contour line" off/"apply light source" on/"method" Phone/"shadow" off/
"Backface" on/"lighting" was done with the on setting.
Especially for metallic and high gloss materials, shaders are recommended for the "phone" type.
If you need details, adjust the number of pixels to a certain degree to increase the "detection accuracy" and then LT.

When such a small object is loaded on the canvas and a new 3D layer is generated, at least on the CSP v1.10.13, the canvasIt seems that nothing is displayed except manipulator.
In such cases, please go to "environment" from "spanner icon" and open "rendering settings" and uncheck "automatic when camera reset" in the "clipping planes" section of "3D layer settings".
And the value of "near plane" is "1" * This value seems to be one of the minimum limits.
This will allow the 3D Object to visualize the rendered state in the canvas.

 オーソドックスなピン、画鋲です。
壁やコルクボードに刺して、プリントやチラシ、写真などを留めたりするときにお使い下さい。
サイズは、φ10×H24(mm3)です。
カラーバリエーションは標準的なカラーバリエーションとして5種類用意しています。
トポロジーとマテリアルの変更に伴い、アップデートしました。
 以下のいずれのレンダリング・LTサンプルも、基本的に 「輪郭線を付ける」オフ/「光源の影響を受ける」オン/「方式」フォン/「影」オフ/
「バックフェースカリング」オン/「照明」オン の設定で行いました。
特にメタリックやハイグロスな素材の場合、シェーダーは「フォン」タイプがおすすめです。
ディテールを必要とする場合は、画素数をある程度大きくして「検出精度」を高めに調整してLTしてください。

このような小さなオブジェクトをキャンバス上に読み込んで新規で3Dレイヤーが生成されるとき、少なくともCSP v1.10.13において、キャンバス上にはマニピュレータ以外に何も表示されない状態になってしまうようです。
そうした場合はお手数ですが、「スパナアイコン」から「環境」にアクセスし、「レンダリング設定」を開いていただき、 「3Dレイヤーの設定」のセクション内の「クリッピングプレーン」の「カメラリセット時に自動設定」のチェックを外してください。
そして「ニアプレーン」の値を「1」にします※この値はミニマムリミットが1のようです。
これで3Dオブジェクトがキャンバス内に目一杯レンダリングされた状態が可視化されるようになります。

Material マテリアル
-
default material 初期マテリアル
-
green 青
-
red 赤
-
Green 緑
-
white 白
-
yellow 黄
disposition 配置
-
default layout 初期レイアウト
-
Stab at the wall 壁に刺す
-
Put on a plane 平面に置く
-
Stab into a plane 平面に刺す
Update history
2016 first release (v001)
2016/9/16 material changes and explanatory text (v002)
2021/7/29 topology changes and texture images added (v003)
2016 初版公開(v001)
2016/9/16 マテリアルの変更と説明文をリニューアル(v002)
2021/7/29 トポロジーの変更とテクスチャー画像追加(v003)
Old version


