



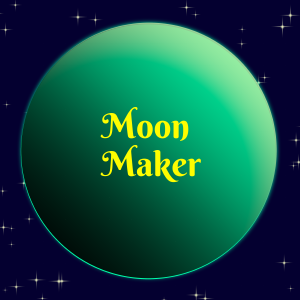
從任何圖像或圖案快速製作衛星和行星的快捷方式。
(V.2,自動操作已更新。
A shortcut to quickly make moons and planets from any image or pattern.
(V.2, auto action updated.)
包含一個自動操作和一個包含有用圖層的檔。
更新:自動操作不再需要特定的圖層名稱即可正常工作。它會將所選圖層本身重命名為月亮圖層。

如何使用月亮製造商:
1. 創建 3500x3500 插圖
2.從中拖動月亮製造商資料夾
插圖的材料。
使用圖層移動器將其居中。救!
插圖的材料。
使用圖層移動器將其居中。救!
3. (可選)在「自動操作」選項板中,按一下
添加自動操作集,然後選擇月亮製作器。
添加自動操作集,然後選擇月亮製作器。
4. 將第 1 層放在光層之間
和邊緣光層。 或者製作自己的層
具有任何色調,圖像或紋理的圖層,
然後柵格化它 。
和邊緣光層。 或者製作自己的層
具有任何色調,圖像或紋理的圖層,
然後柵格化它 。
5. 如果您使用的是自動操作,請選擇
上面有月亮紋理的層。

6. 應用自動操作
或
6. 按兩下綠色圓圈
在選擇圖層上。 選擇
您的圖像圖層。應用
濾鏡>扭曲>魚眼鏡片。
在所選內容之外刪除。
或
6. 按兩下綠色圓圈
在選擇圖層上。 選擇
您的圖像圖層。應用
濾鏡>扭曲>魚眼鏡片。
在所選內容之外刪除。
7. 打開陰影、燈光和/或邊緣燈,
如你所願。更改色調,如果您
希望適合您的作品。
如你所願。更改色調,如果您
希望適合您的作品。
8. 選擇陰影、光線、圖像圖層和
邊緣光。 合併選定的圖層。.
邊緣光。 合併選定的圖層。.
你的月亮完了!
Contains one auto action and a file containing useful layers.
UPDATE: The Auto Action no longer needs a specific layer name to work correctly. It will rename your selected layer itself to Moon Layer.
How to use Moon Maker:
1. Create a 3500x3500 illustration
2. Drag the Moon Maker folder from
Materials to the illustration.
Use the layer mover to center it. Save!
Materials to the illustration.
Use the layer mover to center it. Save!
3. (Optional) In the Auto Action palette, click
Add Auto Action Set, and choose Moon Maker.
Add Auto Action Set, and choose Moon Maker.
4. Put Layer 1 between the Light Layer
and the Rim Light layer. Or make your own
layer with any tone, image or texture,
then rasterize it .
and the Rim Light layer. Or make your own
layer with any tone, image or texture,
then rasterize it .
5. If you are using the Auto Action, select the
layer with your moon texture on it.
6. Apply the Auto Action
OR
6. Double-click on the green circle
on the Selection layer. Select
your image layer. Apply
filter> distort>fish-eye lens.
Delete outside the selection.
OR
6. Double-click on the green circle
on the Selection layer. Select
your image layer. Apply
filter> distort>fish-eye lens.
Delete outside the selection.
7. Turn on shadow, light and/or rim light,
as you prefer. Change the hues if you
would like, to fit your artwork.
as you prefer. Change the hues if you
would like, to fit your artwork.
8. Select shadow, light, image layer and
rim light. Merge selected layers,.
rim light. Merge selected layers,.
Your moon is finished!
類別 1 Category 1

過去版本





「Inkwolf」的其他素材


「素材集」的人氣素材


最新素材


徽章
-
 MVP ◆針對問題投稿了眾多適切的回答,對社群有顯著貢獻的用戶。每3個月一次,會依據期間內獲得的點數選出MVP用戶,並進行表揚。
 -
 NVP(New Valuable Player) ◆繼MVP後,對社群營運做出良好貢獻的用戶。將從不曾獲選為MVP的用戶中,依據獲得的點數進行評選、表揚。
 -
 官方推廣大使 ◆從被證明為優良回答用戶的MVP獲獎者中選出社群中最優異的回答者。並經審查後由本社委託就任。※舊名稱為「Evangelist」
 -
 CELSYS公認Moderator ◆Moderator為會使用日文及其他語言的CELSYS公認工作人員。由於並非軟體或創作的專業人士,Moderator無法直接為用戶解決疑問,但能在語言、交流方面提供支援,幫助用戶們順利地進行溝通。
 -
 CELSYS官方為與營運相關的官方帳號。