



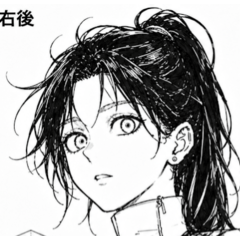
アートワークに取り入れるためのヘアスタイル。お楽しみください!
[LT変換例]
検出精度70音の作品が利用可能です
- 新しいキャンバスを作成するか、既存のプロジェクトを開いて3Dモデルを追加してください。
- マテリアルパネル(通常は右側)で、3Dオブジェクト>に移動します。
- ファイルエクスプローラーから3Dモデルファイルをドラッグするか 、手動でインポートしてください:
- インポートすると、モデルはキャンバスに表示されます。
- 画面上の移動、回転、スケールツールを使ってモデルの位置を調整してください:
- 青、緑、赤の矢印を使ってモデルを3D空間で動かします。
- 回転ハンドルを使って異なる軸の周りに回転させてください。
- 角をドラッグしたり、スケーリングツールを使って サイズ を調整してください。
- 3Dコントロール近くのツールバーにある カメラツール を使って、3Dオブジェクトの視角を調整してください。
- カメラをズームイン/アウトしたり回転させたりして、モデルの望む角度を捉えることができます。
- ツールプロパティパネル(上部または横)で光の方向や影の設定を調整できます。
- 環境光や物体の影の強度を調整して、よりリアルな効果を出すと良いでしょう。
- 位置調整が終わってさらに編集したい場合は、3Dレイヤーを 右クリック して「 ラスタライズ」を選択してください。
- これによりモデルは塗装やタッチアップ用の標準的な2Dレイヤーに変換されます
- 新しいキャンバスを作成するか、既存のプロジェクトを開いて3Dモデルを追加してください。
- マテリアルパネル(通常は右側)で、3Dオブジェクト>に移動します。
- ファイルエクスプローラーから3Dモデルファイルをドラッグするか 、手動でインポートしてください:


Hair Style to be used to incorporate into your artwork. Enjoy!
[LT conversion example]
Detection accuracy 70 tone work available
- Create a new canvas or open an existing project where you want to add the 3D model.
- In the Materials Panel (usually on the right side), go to 3D > Object.
- Drag the 3D model file from your file explorer or import it manually:
- Once imported, the model will appear on the canvas.
- Adjust the model's position using the on-screen move, rotate, or scale tools:
- Use the blue, green, and red arrows to move the model in 3D space.
- Use the rotation handles to rotate it around different axes.
- Adjust the size by dragging the corners or using the scaling tool.
- Use the Camera Tool (located in the toolbar near the 3D controls) to adjust your view of the 3D object.
- You can zoom in/out or rotate the camera to capture the desired angle of the model.
- In the Tool Property Panel (at the top or side), you can adjust light direction and shadow settings.
- Tweak the ambient light or object shadow intensity for a more realistic effect.
- If you’re done with positioning and want to make further edits, right-click on the 3D layer and choose Rasterize.
- This converts the model to a standard 2D layer for painting or touch-ups
- Create a new canvas or open an existing project where you want to add the 3D model.
- In the Materials Panel (usually on the right side), go to 3D > Object.
- Drag the 3D model file from your file explorer or import it manually:
素材 Material
-
デフォルト素材 Default material

配分 Allocate
-
デフォルトのレイアウト Default layout



"ChicoThaDon91"さんの別の素材


"3Dオブジェクト"の人気素材


新着素材








バッジ
-
 MVP ◆質問に対して適切な回答を数多く投稿し、コミュニティの運営に大きく貢献したユーザーです。MVPは3ヶ月に一度、その間に獲得したポイントを元に決定し、表彰を行っています。
 -
 NVP (New Valuable Player) ◆MVPに次いでコミュニティの運営に貢献したユーザーです。これまでMVPの受賞経験のない方から、獲得したポイントを元に決定し、表彰を行なっています。
 -
 公式エキスパート ◆優れた回答者の証であるMVP受賞者の中からさらに選ばれた、コミュニティで最も優良な回答者の証です。審査を経て当社から依頼し就任いただいています。※旧名称「エバンジェリスト」
 -
 セルシス公認モデレーター ◆モデレーターは、日本語とその他の言語が話せるセルシス公認のスタッフです。ソフトウェアや創作のエキスパートではないので、直接疑問を解決することはできませんが、みなさんがスムーズにコミュニケーションできるように、言葉やコミュニケーションの側面からサポートします。
 -
 セルシス公式運営に関連した公式アカウントです。