
ビデオテープスタイルのオートアクション (Video Tape-style Auto Action) Video Tape-style Auto Action
コンテンツID:2251343
-
41,401
by
 ◆
◆
◆
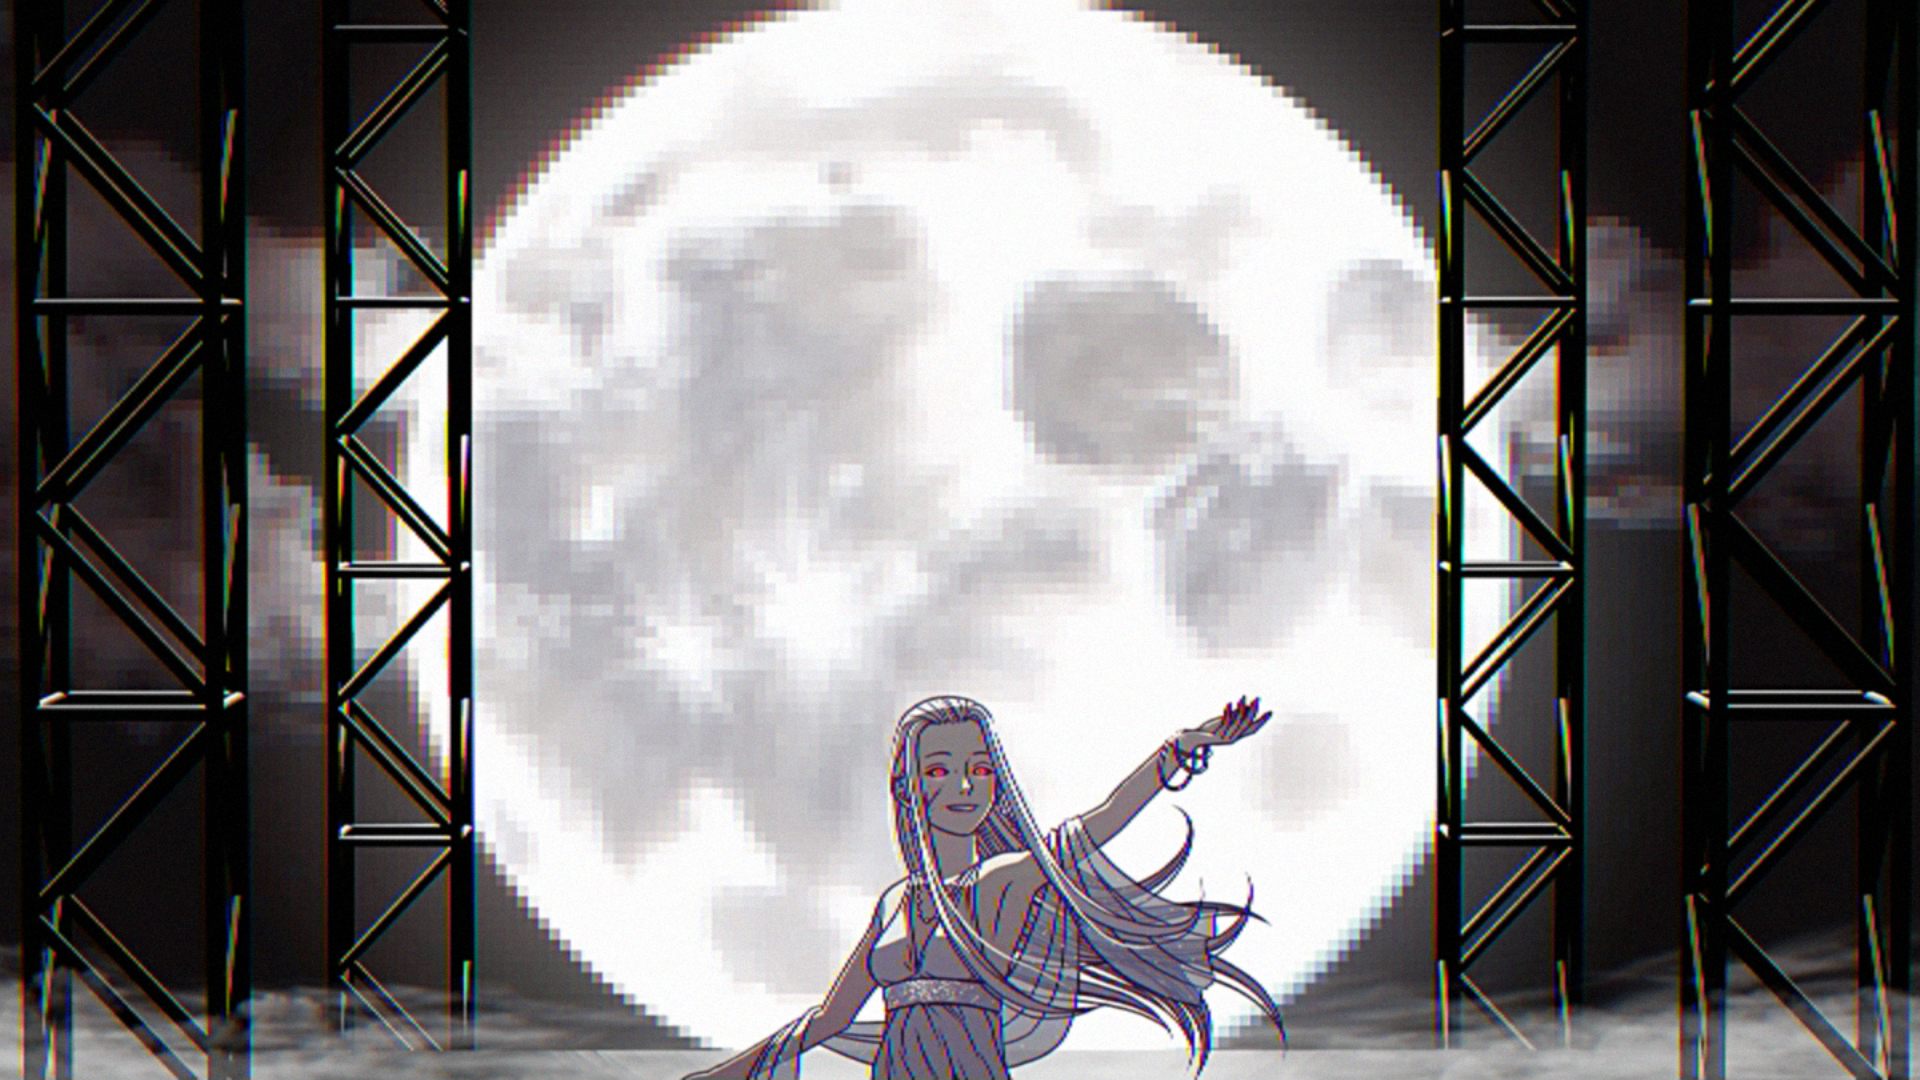
レトロなビデオテープ風の効果を生み出すオートアクション。 Auto action to create a retro videotape-style effect.
あなたの絵にレトロな雰囲気を作り出しましょう。例えば
VHSのようなアナログテープフォーマットによる信号劣化。新しいファイルや元のファイルに新しいレイヤーを作成するために使用できます。


いくつかの
VHSの技術的な詳細、減量など、できる限り詳しく教えてくれます
全体の解像度、クロマサブサンプリング、色差、色相
移動音と音。いずれもっと詳細を付け加えようとするかもしれません。
指示
開けて
図面を描いてオートアクションを動かします。現在では2つのバージョンがあります。「テープエフェクト(新しいファイル)を適用する」は、新しいファイルを作成して操作します(このフィルターの元のバージョンの動作モード)、「テープエフェクト(同じファイル)を適用する」は元のファイルに対して処理し、フィルタリング済みバージョンの新しいレイヤーを作成します。同じファイルを扱うのはやや難しいですが、あなたには便利かもしれません。
新しいファイルバージョン:
保存する名前と場所を選びます
新しいファイル。「画像サイズ変更」ウィンドウが表示されます。デフォルトは
高解像度ファイルには適していますが、約4K未満のファイルには適しています
スケールを1に近づけるのが良いかもしれません(デフォルトは0.22なので、そうなります)
4Kキャンバスを480pxの高さにするか、高解像度のために低くするのも良いでしょう。試してみて
何度か設定を変えてみて、自分に合うものを探してみてください。
A フィルタリング済みの画像で新しいファイルが作成されます。もし気に入らなければ 結果として、ファイルを削除しても変更は加えられません 君のオリジナルの絵だよ。
A フィルタリング済みの画像で新しいファイルが作成されます。もし気に入らなければ 結果として、ファイルを削除しても変更は加えられません 君のオリジナルの絵だよ。
同じファイルバージョン:
「スケールレイヤー」ツールが表示されます。旧バージョンのフィルターと同様に、スケールを好みのものに設定してください(デフォルトの22%で、旧バージョンと同じです)。自分に合う結果を見つけるためにいろいろ試してみてください。フィルターが他のステップを終えると、「スケールレイヤー」ツールが再び開きます。レイヤーを元の画像のサイズに合わせて拡大します。どのくらいスケールさせるかは、最初のスケールステップでどの設定を選んだかによります。正確なサイズを得るために必要な数値を計算するか、目で分量するのが一番簡単です。
結果が気に入らなければ、作成したレイヤーを削除してもう一度やり直してください。
サンプル

以前:解像度4K(3840x2160ピクセル)

その後:デフォルト設定(スケール=0.22、縦解像度=480px)で実行

以前:開始解像度=1080p(1920x1080ピクセル)

アフター:スケール=0.75(出力解像度=1440x810ピクセル)で実行します。

以前:解像度4K(3840x2160ピクセル)

アフター:スケール=0.5(1920x1080ピクセル)で実行
オートアクションについて
オートアクションを使ったことがなければ、以下に使い方のガイドを紹介します:
https://support.clip-studio.com/en-us/FAQ/articles/20210077
https://support.clip-studio.com/en-us/faq/articles/20220025
Create a retro feel for your drawings, similar to the
signal degradation produced by analog tape formats like VHS. Can be used to make a new file, or a new layer on the original file.
Emulates a number of the
technical details of VHS to the best of my ability, including decreasing
the overall resolution, chroma subsampling, chromatic aberration, hue
shifting, and noise. I may attempt to add more details at some point.
Instructions
Open
a drawing and run the auto action. There are now two versions: "Apply tape effect (new file)", which will create a new file to operate on (the mode of operation of the original version of this filter), or "Apply tape effect (same file)", which will work on the original file and create new layers for the filtered version. It's somewhat more difficult to work on the same file, but may be more convenient for you.
New File version:
Choose a name and location to save
the new file. The "Change image size" window will pop up. The default is
good for higher-resolution files, but for files smaller than roughly 4K
you may want to move the scale closer to 1 (defaults to .22, which will
make a 4K canvas 480px tall), or lower it for higher resolutions. Try
it out a few times with different settings to see what you like.
A new file will be created with the filtered image. If you don't like the results, you can delete the file and no changes will have been made to your original drawing.
A new file will be created with the filtered image. If you don't like the results, you can delete the file and no changes will have been made to your original drawing.
Same File version:
The "Scale layer" tool will appear. As with the old version of the filter, set the scale to whatever you prefer (default 22%, same as old version). Experiment to find the result you like best. After the filter has finished its other steps, the "Scale layer" tool will open again. Scale the layer back up to match the size of the original image. How much you have to scale will depend on what settings you chose for the first Scale step. You can do some math to find the exact required number to get the precise same size, or just eyeball it (the easiest way).
If you don't like the results, just delete the created layers and try again.
Samples
Before: Starting resolution 4K (3840x2160 px)
After: Run with default settings (scale = 0.22, vertical resolution = 480px)
Before: Starting resolution = 1080p (1920x1080 px)
After: Run with scale = 0.75 (output resolution = 1440x810 px)
Before: Starting resolution 4K (3840x2160 px)
After: Run with scale = 0.5 (1920x1080 px)
About Auto Actions
If you've never used an Auto Action before, here's some guides on how to use them:
https://support.clip-studio.com/en-us/faq/articles/20210077
https://support.clip-studio.com/en-us/faq/articles/20220025
旧バージョン


"DragonWithaFez"さんの別の素材


"オートアクション"の人気素材


新着素材


バッジ
-
 MVP ◆質問に対して適切な回答を数多く投稿し、コミュニティの運営に大きく貢献したユーザーです。MVPは3ヶ月に一度、その間に獲得したポイントを元に決定し、表彰を行っています。
 -
 NVP (New Valuable Player) ◆MVPに次いでコミュニティの運営に貢献したユーザーです。これまでMVPの受賞経験のない方から、獲得したポイントを元に決定し、表彰を行なっています。
 -
 公式エキスパート ◆優れた回答者の証であるMVP受賞者の中からさらに選ばれた、コミュニティで最も優良な回答者の証です。審査を経て当社から依頼し就任いただいています。※旧名称「エバンジェリスト」
 -
 セルシス公認モデレーター ◆モデレーターは、日本語とその他の言語が話せるセルシス公認のスタッフです。ソフトウェアや創作のエキスパートではないので、直接疑問を解決することはできませんが、みなさんがスムーズにコミュニケーションできるように、言葉やコミュニケーションの側面からサポートします。
 -
 セルシス公式運営に関連した公式アカウントです。