

ウィンドウのカスタマイズされたグリッドを作成する自動アクション。 Auto action to create a customized grid of windows.
街のスカイラインの窓をたくさん描くのは面倒なので、このツールを作りました。カスタマイズされたグリッドを作成します。線が少し斜めになることもあるので、遠くにある建物に最適です。

ビデオ:

詳細な手順:
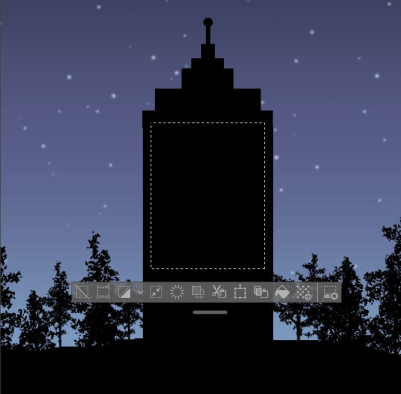
0.) オートアクションを開始する前に、ウィンドウで埋める領域を選択します。

- 新しいレイヤーが作成されるので、現在のレイヤーを台無しにする心配はありません。
- (!) 選択しないと、エフェクトがキャンバス全体に表示されます。あなたのコンピュータはそれを好まないかもしれません。
1.)オートアクションを開始します。
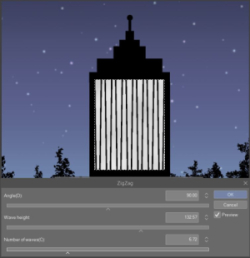
垂直方向の分割数を選択します。


- ジグザグプロンプト(左):
- 波の高さ = 初期線の太さ。
- 波の数=ライン数。
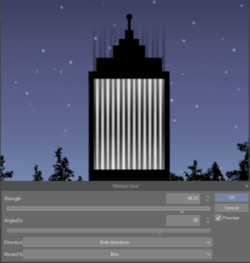
- モーションブラープロンプト(右):線を滑らかにしたりまっすぐにしたりします。通常は何も変更する必要はありませんが、万が一に備えてオプションが表示されます。
- 線が薄くなりすぎた場合や、コンピューターのパフォーマンスが心配な場合は、強度を下げてください。
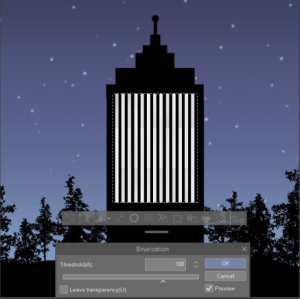
2.) 線を不透明にします。

- 二値化プロンプト: すべての線が黒くなるまで強度を変更します。
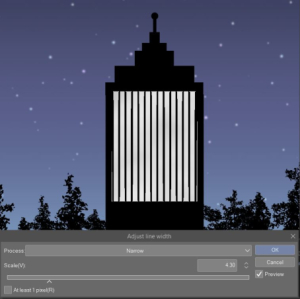
3.) 最終的な線幅を選択します。

- 線幅の調整プロンプト:デフォルト設定は細いですが、必要に応じて、代わりに線を太くすることができます。
4.) 水平方向の分割でプロンプトが再び表示されたら、再度応答します。

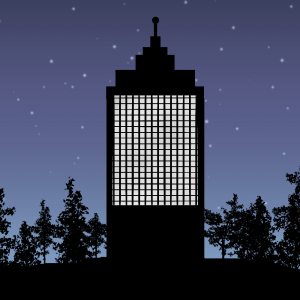
5.) 窓を楽しんでください!

ノート:
- アウトラインの場合は、レイヤープロパティ -> 境界効果 -> 効果範囲:マスク画像を有効にします。
- 最後にグリッドがレイヤーマスクになります。代わりにグリッドを 2 つの別々のレイヤーとして保持したい場合は、最後のモーション ブラーの後にすべてのステップをオフにします。
It's annoying to draw a lot of windows for city skylines, so I made this tool. It creates a customized grid. The lines can be a little slanted, so it's best suited for buildings that are farther away.
Video:
Detailed Instructions:
0.) Before starting the auto action, select an area to fill with windows.
- A new layer will be created, so you don't have to worry about messing up your current layer.
- (!) If you don't make a selection, the effects will appear over the entire canvas. Your computer might not like that.
1.) Start the auto action.
Choose the number of vertical divisions.
- Zigzag prompt (left):
- Wave height = initial line thickness.
- Number of waves = how many lines.
- Motion Blur prompt (right): smooths and straightens lines. You usually don't have to change anything, but the option appears just in case:
- Lower the intensity if the lines become too faint or if you are concerned about computer performance.
2.) Make lines opaque.
- Binarization prompt: change intensity until all lines are black.
3.) Choose the final line width.
- Adjust Line Width prompt: the default setting is thin, but if you want you can thicken the lines instead..
4.) Answer prompts again when they reappear for horizontal divisions.
5.) Enjoy your windows!
Notes:
- For outlines, enable Layer Property -> Border Effect -> Effect Range: Mask Image.
- At the end, the grid becomes a layer mask. If you want to keep the grid as two separate layers instead, turn off all steps after the final motion blur.


"wheatris"さんの別の素材


"オートアクション"の人気素材


新着素材


バッジ
-
 MVP ◆質問に対して適切な回答を数多く投稿し、コミュニティの運営に大きく貢献したユーザーです。MVPは3ヶ月に一度、その間に獲得したポイントを元に決定し、表彰を行っています。
 -
 NVP (New Valuable Player) ◆MVPに次いでコミュニティの運営に貢献したユーザーです。これまでMVPの受賞経験のない方から、獲得したポイントを元に決定し、表彰を行なっています。
 -
 公式エキスパート ◆優れた回答者の証であるMVP受賞者の中からさらに選ばれた、コミュニティで最も優良な回答者の証です。審査を経て当社から依頼し就任いただいています。※旧名称「エバンジェリスト」
 -
 セルシス公認モデレーター ◆モデレーターは、日本語とその他の言語が話せるセルシス公認のスタッフです。ソフトウェアや創作のエキスパートではないので、直接疑問を解決することはできませんが、みなさんがスムーズにコミュニケーションできるように、言葉やコミュニケーションの側面からサポートします。
 -
 セルシス公式運営に関連した公式アカウントです。