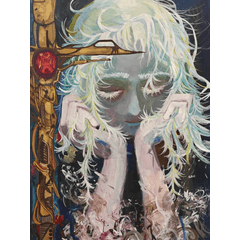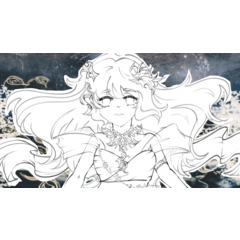

¡Un conjunto de degradados para que tu tinta parezca antigua! A gradient set to make your ink look antique!
Este es un conjunto de degradados que ayudan a que cualquier ilustración parezca una vieja ilustración de un libro que encontraste en un ático. :D
Colores a continuación:

La parte oscura es la tinta, la parte clara es el papel. Hay varias variaciones de cada color para que puedas ajustar el tipo de papel o envejecimiento que te gustaría en tu arte. Ajusta el equilibrio entre luces y sombras si descubres que algunas de tus obras de arte están perdiendo detalles, y siéntete libre de modificar los degradados a tu gusto.
Esto va a tomar un poco de explicación sobre cómo obtuve el efecto, así que simplemente desplácese hacia abajo para ver un ejemplo de todos los colores. Básicamente, utilicé una textura y los mapas de degradado.
"¿Cómo utilizo los mapas de degradado?"
1. Haga clic derecho en la capa.
2. Dirígete a "Nueva capa de corrección"
3. Haga clic en el de abajo, "Mapa de degradado..."
Más información aquí: https://help.clip-studio.com/en-us/manual_en/390_filters/Tonal_Correction_Effects.htm#1364051
¡Y un buen tutorial aquí! https://tips.clip-studio.com/en-us/articles/2453
Para tinta desgastada: Si no estás usando un pincel texturizado para tu arte lineal, te sugiero que uses una textura o un pincel (¡o ambos!) para envejecer aún más tu arte lineal. Los pinceles de ruido y cualquier pincel tipo mota pueden dar un aspecto desgastado.
Estaba pensando en mis Texturas de Relleno de Tinta Sólida (id: 2113481) cuando hice esto, pero puedes usar cualquiera de mis otras texturas que he hecho antes para esto también, así que probablemente no tendrás que descargar nada nuevo, ja. :D

Un tutorial rápido:
Texturizar el arte lineal
Método 1 - Texturas ligeras

1. Termina tu arte lineal y asegúrate de que esté todo en una sola capa.
2. Añade una capa de textura y recórtala sobre tus líneas. Asegúrate de que sea una capa de material de imagen. Si es una capa ráster normal, haz clic derecho en ella y haz clic en "convertir capa..." para cambiarlo.
3. Ve a "Propiedad de capa" y activa "Superposición" (en azul). Ajusta la fuerza a tu gusto.
Método 2 - Texturas oscuras

1. Dibuja tu arte lineal, rellena los espacios negros sólidos.
2. Duplica la capa y conviértela toda en blanco.
3. Añade tu textura ya sea como una capa "Recortada" o con una "máscara de capa".
4. Fusionar cuando esté satisfecho. Utilice la función "Convertir brillo en opacidad" para deshacerse del área blanca. También puede cambiar el modo de capa a "multiplicar".
Por último, después de aplicar el degradado, me gusta agregar una textura de papel en la parte superior , de esta manera, el papel no se ve afectado por el degradado.
VISTA PREVIA DEL COLOR
Original en blanco y negro en la parte superior izquierda.


I love antique illustrations! This is a set of gradients that help any illustration look like an old illustration out of a book you found in an attic. :D
Colors below:

The dark part is your ink, the light part is your paper. There are several variations of each color so you can fine tune what kind of paper or aging you'd like on your art. Adjust the balance between lights and darks if you find that some of your artwork is losing detail, and feel free to modify the gradients to your liking.
This is going to take a little explaining on how I got the effect, so just scroll down for an example of all the colors. Basically, I used a texture and the gradient maps.
"How do I use Gradient Maps?"
1. Right click on the layer.
2. Head to "New Correction Layer"
3. Click the bottom one, "Gradient Map...."
More info here: https://help.clip-studio.com/en-us/manual_en/390_filters/Tonal_Correction_Effects.htm#1364051
And a good tutorial here! https://tips.clip-studio.com/en-us/articles/2453
For worn ink: If you are not using a textured brush for you line art, I suggest using a texture or a brush (or both!) to age your line art further. Noise brushes & any speck type brushes can give a nice worn look.
I was thinking of my Solid Ink Fill Textures (id: 2113481) when I made this, but you can use any of my other textures I've made before for this too. So you likely won't have to download anything new, lol. :D

A quick tutorial:
Texturing Your Line Art
Method 1 - Light Textures

1. Finish your line art & make sure it is all on one layer.
2. Add a texture layer & clip it over your lines. Make sure it is an image material layer. If it is a normal raster layer, right click it & click "convert layer..." to change it.
3. Go to "Layer Property" & turn on "Overlay"(in blue). Adjust the strength to your liking.
Method 2 - Dark Textures

1. Draw your line art, fill in any solid black spaces.
2. Duplicate the layer & turn it all white.
3. Add in your texture either as a "Clipped" layer or with a "layer mask".
4. Merge when satisfied. Use the "Convert brightness to opacity" function to get rid of the white area. You can also change the layer mode to "multiply".
Lastly, after I apply the gradient, I like to add a paper texture on top. This way, the paper is not affected by the gradient.
COLOR PREVIEW
Original in black and white on top left.


