


更新:氣泡盒編織 編織零件 (Update Bubble Box Braids Braiding Parts) Update Bubble Box Braids Braiding Parts
素材ID:2306182
-
356


設計來讓畫黑色保護髮型變得更容易。
本資料將免費開放至 9 月 19 日
Made to make drawing black protective hairstyles easier to draw.
This material will remain free until september 19th

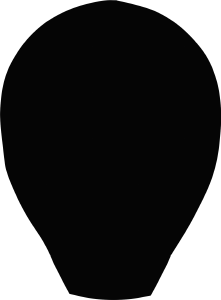
作為 編織部分的參考,我用了上圖中那個柔軟的網漫頭。 不過你可以把零件變形成適合你頭部的樣子
顏色 可以透過主色和次色來改變。主色控制 暗區和線條,次色則控制高光。

為了 讓編織部分看起來漂亮,我做了一個小教學教你怎麼做 它。

步進
1:
圖層
編織部分設定為灰階時,必須改成彩色。
不然你就沒辦法給零件上色。
步進
2:
使用
噴筆,勾勒出零件輪廓。氣筆不應該太軟。
步進
3:
使用
刷子稍微混合,選擇無顏色,並用小筆劃擦除
在那個地方。確保筆劃都朝向內側,朝向
張力點,編織線連接的地方。
步進
4:
使用
柔軟的線稿筆刷,如果願意可以加一些嬰兒髮。
只為臉部的部分加上。

我希望如此 目錄對除了我自己之外的任何人都有用:)
更新:筆刷已更新,不再與參考圖層衝突
As a reference for the braiding parts, I used the soft webtoon head, pictured above. Though you can transform the parts to fit with your head
The color can be changed with the primary and sub color. The primary color controls the dark areas and lineart, the sub color controls the highlight.
In order to make the braiding parts look good, I've made a small tutorial on how I do it.
Step
1:
The layer
of the braiding parts is set to grayscale, you must change it to color.
Otherwise you won't be able to color the parts.
Step
2:
Using an
airbrush, outline the parts. The air brush shouldn't be too soft.
Step
3:
Using a
brush that blends just slightly, select no color and erase in small strokes all
around the part. Make sure the strokes are all facing inwards towards the
tension point, where the braid is attached.
Step
4:
Using a
soft lineart brush, add some baby hairs if you'd like.
Only add them for the parts framing the face.
I hope this catalogue is of use to anyone besides myself :)
Update: The brushes have now been updated to no longer clash with the reference layer
第一類 Kategorie 1
-
盒形編織線的陰影更新 box braid shade UPDATED
-
盒狀編織線條與陰影 更新 box braid line n shade UPDATED
-
泡泡辮陰影 更新 Bubble Braids shaded UPDATED
-
泡泡辮基本款更新 Bubble Braids basic Updated
-
小零件B small parts b
-
中等部分 B medium parts b
-
大部分B部分 large parts b
-
巨型零件B jumbo parts b
-
背面沒有零件 back no parts
-
小零件 small parts s
-
中等零件 medium parts s
-
大片 large parts s
-
巨型零件 jumbo parts s
-
沒有零件 no parts s
-
小部分 f small parts f
-
中等部分 f medium parts f
-
大部分 f large parts f
-
巨型部分F jumbo parts f
-
無部分 f no parts f










過去版本


「ShokoLate」的其他素材

「素材集」的人氣素材


最新素材


-
 MVP ◆針對問題投稿了眾多適切的回答,對社群有顯著貢獻的用戶。每3個月一次,會依據期間內獲得的點數選出MVP用戶,並進行表揚。
 -
 NVP(New Valuable Player) ◆繼MVP後,對社群營運做出良好貢獻的用戶。將從不曾獲選為MVP的用戶中,依據獲得的點數進行評選、表揚。
 -
 官方推廣大使 ◆從被證明為優良回答用戶的MVP獲獎者中選出社群中最優異的回答者。並經審查後由本社委託就任。※舊名稱為「Evangelist」
 -
 CELSYS公認Moderator ◆Moderator為會使用日文及其他語言的CELSYS公認工作人員。由於並非軟體或創作的專業人士,Moderator無法直接為用戶解決疑問,但能在語言、交流方面提供支援,幫助用戶們順利地進行溝通。
 -
 CELSYS官方為與營運相關的官方帳號。