
Fetlock Better Bromines + Gradient Set (Fetlock Better Bromines + Gradient Set) Fetlock Better Bromines + Gradient Set
素材ID:2169088
-
421

一個自動作,用於對漸變映射執行 「bromine trick」,以及稍後使用的少量漸變選擇。 An auto action to do the 'bromine trick' with gradient maps, as well as a small selection of gradients to use afterwards.
想要一個溴化小技巧,讓你能在下面上色,不用做一堆麻煩事來準備你的作品嗎?
猶豫不決要用哪種溴?
這是一包給你的!
1. 一個在相當簡單前提下運作的圖層模板:基本上所有溴化技巧都得做五千步,才能完成一個漸層貼圖和幾個資料夾配合適當設定就能做到的事......兩秒鐘。
2. 一組專門調整成資料夾集功能的漸層,以防你沒有太多漸層貼圖集,且不喜歡 CSP 預設的效果。想用這些取代最初出現 的漸層,只要切換資料夾中使用的漸層。


常見問題:
問:我用的是溴層,但顏色效果不太對。
答:確認溴線層上用的是純黑色。此外,有紋理或透明的刷子是最適合這個技巧的!G筆或其他類似的100%不透明度純線只會有輕微的顏色變化。話雖如此,如果你複製線條並在下面用高斯模糊,這對製作有趣的傳統賽璐璐效果來說很有效。
問:我無法使用顏色,所有東西都呈現溴色......

問:我喜歡這個效果,但我希望每件作品都能用不同顏色來呈現溴的效果。有沒有辦法做到這點?
答:可以,但會變得雜亂;你需要多個資料夾,每個「零件」(衣服、皮膚)都要分開。所以你會有一個紫色溴特效線條資料夾,另一個資料夾裡有棕褐色,或其他類似的。
答:將工具設定為「參考圖層」而非「所有圖層」,並設定「在此畫線」作為參考,或者在使用該工具時暫時關閉「保持白色」圖層的可見性,完成後再重新開啟。「保持白色」圖層預設為草稿,以避免這些問題。

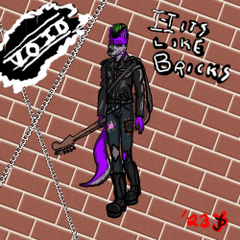
說到這裡......玩得開心!(這些例子 中的角色是我本人,我潦草的字跡也是我自己)
Want a bromine hack that will allow you to do coloring underneath without doing a bunch of nonsense to get your artwork prepped?
Indecisive about what color of bromine you want?
Here's a pack for you!
1. A layer template that works under a pretty simple premise : basically every single bromine trick out there is doing five thousand steps to do what a gradient map and a couple folders with the right settings could do in like... two seconds.
2. A set of gradients specifically tuned to what the folder set does, just in case you don't have a lot of gradient map sets already, and don't like the look of CSP's default ones. To use these instead of what initially pops in just swap which gradient is being used in the folder.
FAQ :
Q: I'm using the bromine layer, but the colors aren't working right.
A: Check to make sure that you're using pure black on the bromine lines layer. Additionally, brushes with grain or transparency are the ones that work best with this trick! A G-pen or any other similar solid 100% opacity line will only have mild color changes. That being said, that could work well for making interesting traditional cel effects, if you duplicate the lines and gaussian blur the duplicate underneath.
Q: I'm not able to use color, everything is turning out bromine color...
Q: I like this effect, but I would like to be able to do the bromine effect in different colors per piece of art. Is there a way to do this?
A: Yes, but it will get cluttered; you will need to have multiple folders, with each 'piece' (clothes, skin) separated out. So you'd have a purple bromine trick linework folder, and one that has a tan color in another one, or whatnot.
A: Set the tools to 'Reference Layer' instead of 'all layers', and set 'Draw Lines Here' as the reference, or temporarily toggle the visibility of the 'Keep White' layer off while using the tool in question, and turn it back on after you do so. The 'Keep White' layer is set as a Draft by default to avoid these issues in the first place.
With that... Have fun! (Character depicted in these examples is mine, and my sloppy handwriting is mine)
溴 The Bromines


更新歷史記錄
新增了更多關於如何解決讓溴效應正常運作的常見問題,因為部分說明在初次上傳時被遺忘了。 added further explanation of how to fix common problems with getting the bromine effect to work, as some portions of the explanation were forgotten on the initial upload.


「AMORPHAGE」的其他素材


「素材集」的人氣素材


最新素材


-
 MVP ◆針對問題投稿了眾多適切的回答,對社群有顯著貢獻的用戶。每3個月一次,會依據期間內獲得的點數選出MVP用戶,並進行表揚。
 -
 NVP(New Valuable Player) ◆繼MVP後,對社群營運做出良好貢獻的用戶。將從不曾獲選為MVP的用戶中,依據獲得的點數進行評選、表揚。
 -
 官方推廣大使 ◆從被證明為優良回答用戶的MVP獲獎者中選出社群中最優異的回答者。並經審查後由本社委託就任。※舊名稱為「Evangelist」
 -
 CELSYS公認Moderator ◆Moderator為會使用日文及其他語言的CELSYS公認工作人員。由於並非軟體或創作的專業人士,Moderator無法直接為用戶解決疑問,但能在語言、交流方面提供支援,幫助用戶們順利地進行溝通。
 -
 CELSYS官方為與營運相關的官方帳號。