

這是一個自動動作,您可以通過大約3個步驟輕鬆繪製這樣的爆炸。 建議將線條圖畫得更粗。 根據畫布的大小更改模糊。 我希望它能以某種方式提供説明。
我不知道英文翻譯好不好。
3手間くらいでそれっぽい爆発の塗りがお手軽にできるオートアクションです。線画は太めに描くのがオススメです。キャンバスの大きさによってぼかし具合を変更してください。何かの助けになれば幸いです。
英語訳は上手く訳せているか分かりません。
塗りと線画は新しくキャンバスを作成し、そこに描いてください。

1 首先,請準備一條線並像←一樣繪畫。線條圖和繪畫的顏色都很好。
請準備一張名為 「Layer 1」 的線條圖和一幅名為 「Layer 2」 的畫作。
如果您不命名它,它可能無法正常工作。
※請乾淨地填寫到線稿的底部。
2 當您運行 auto作時,“Radiation Blur” 視窗將出現多次。
如果你把 ✕ 標記放在爆炸的中心,它會很漂亮。
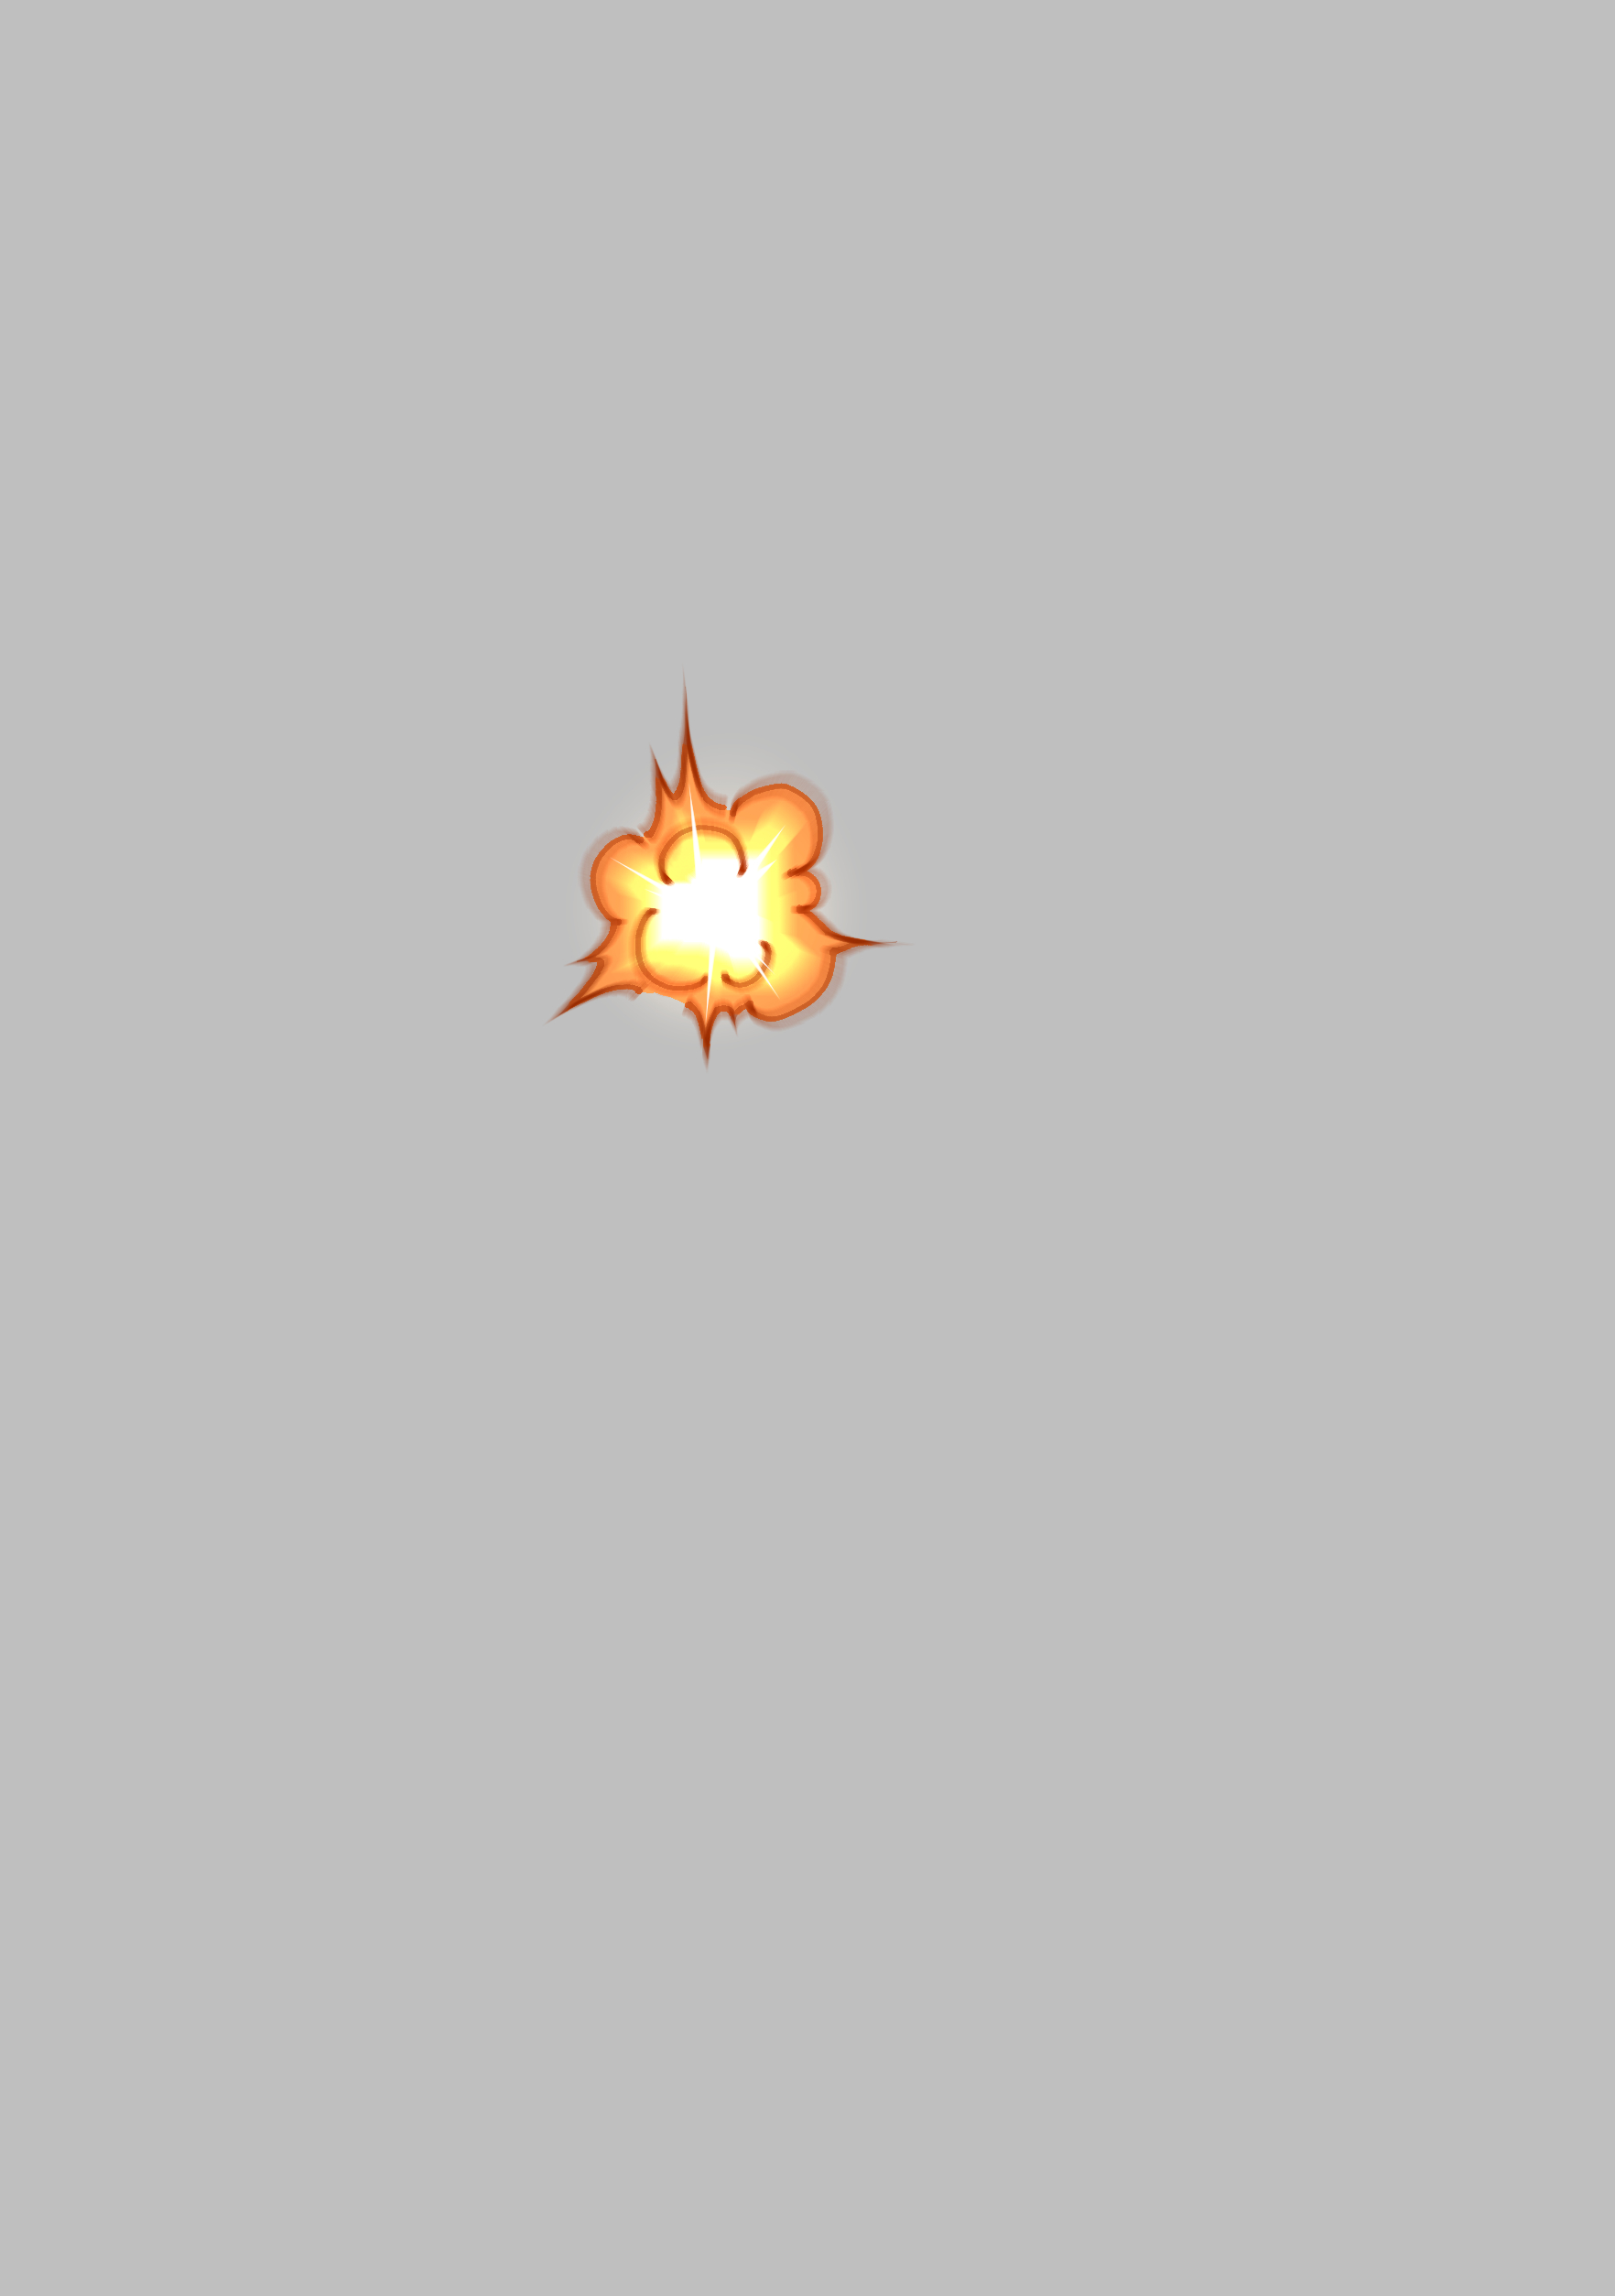
3 當 auto 動作完成後,它會是這樣的。之後,請根據需要添加和更正它。
由於圖層是分開的,因此也可以進行顏色編碼。
サンプル画像はB6サイズ、350pxにこのくらいの大きさで描きました。↓

こんなこともできます。↓

塗りと線画は新しくキャンバスを作成し、そこに描いてください。
1 First, please prepare a line and paint like ←. The color of the line drawing and the painting is fine.
Please prepare a line drawing named "Layer 1" and a painting named "Layer 2".
If you don't name it, it may not work properly.
※Please fill it cleanly to the bottom of the line drawing.
2 When you run the auto action, the "Radiation Blur" window will appear several times.
If you place the ✕mark in the center of the explosion, it will be beautifully finished.
3 When the auto action is finished, it will be like this. After that, please add and correct it as you like.
Since the layers are separated, it is also possible to color-code.
サンプル画像はB6サイズ、350pxにこのくらいの大きさで描きました。↓
こんなこともできます。↓


「奏蒼」的其他素材


「自動動作」的人氣素材


最新素材


徽章
-
 MVP ◆針對問題投稿了眾多適切的回答,對社群有顯著貢獻的用戶。每3個月一次,會依據期間內獲得的點數選出MVP用戶,並進行表揚。
 -
 NVP(New Valuable Player) ◆繼MVP後,對社群營運做出良好貢獻的用戶。將從不曾獲選為MVP的用戶中,依據獲得的點數進行評選、表揚。
 -
 官方推廣大使 ◆從被證明為優良回答用戶的MVP獲獎者中選出社群中最優異的回答者。並經審查後由本社委託就任。※舊名稱為「Evangelist」
 -
 CELSYS公認Moderator ◆Moderator為會使用日文及其他語言的CELSYS公認工作人員。由於並非軟體或創作的專業人士,Moderator無法直接為用戶解決疑問,但能在語言、交流方面提供支援,幫助用戶們順利地進行溝通。
 -
 CELSYS官方為與營運相關的官方帳號。