

用於創建看起來像貼紙的輪廓的畫筆。它可能不是最好看或最有效的,但它很容易使用。 A brush to create an outline that looks like a sticker. It may not be the best looking or the most efficient, but it is easy to use.
1. 創建兩個圖層:一個用於繪圖,另一個用於輪廓。將輪廓圖層放在繪圖下方。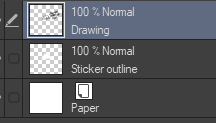

2. 我建議將顏色設置為白色,但如果您願意,也可以使用其他顏色。遺憾的是,無法更改實際輪廓的顏色。
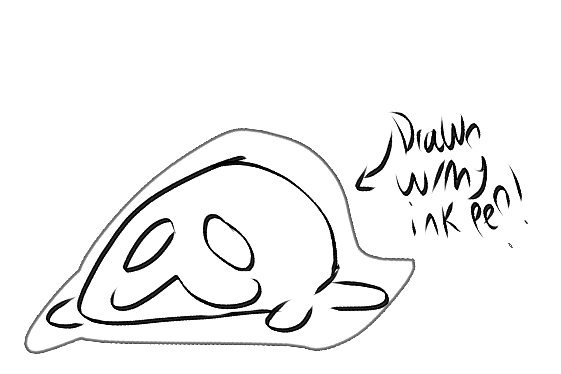
3. 在貼紙輪廓圖層上繪製圖畫的後面。為了讓它沒有任何隨機的黑線。(很抱歉 gif 品質低;我不得不把它壓縮了很多。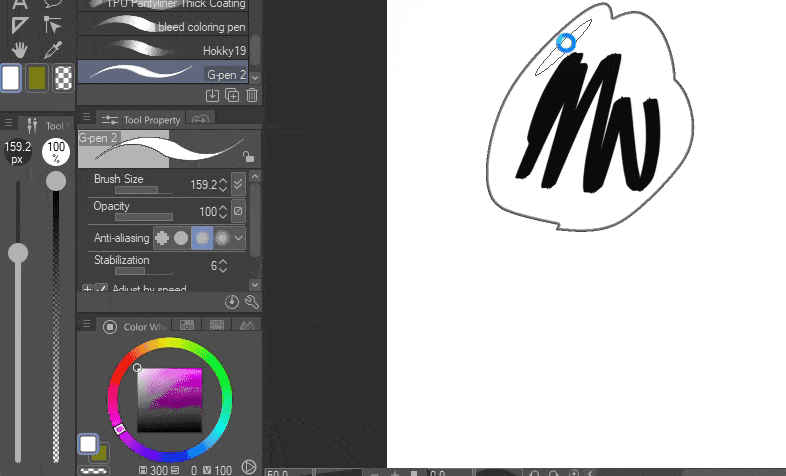

4. 如果您想增加輪廓的粗細/暗度,您可以通過轉到工具設置(扳手圖示)並找到“水彩邊緣”設置來實現。
貼紙示例!(不,它顯然不是賣的。
另外,如果您想出售貼紙,我不建議使用此工具。它主要是出於審美目的。

1. Create two layers: one for the drawing, another for the outline. Place the outline layer below the drawing.
2. I recommend setting the color as white, though you can use another color if you want. Unfortunately there isn't a way to change the color of the actual outline.
3. Draw behind the drawing on the sticker outline layer. In order to make it so that there aren't any random black lines. (Apologies for low quality gif; i had to compress it a lot.)
4. If you want to increase the thickness/darkness of the outline, you can do so by going to the tool settings (wrench icon) and locating the "watercolor edge" settings.
Example of a sticker! (No it is not for sale, obviously.)
Also, if you wish to sell a sticker, I DO NOT recommend using this tool. It is for aesthetic purposes, mainly.


「shadowandsonic」的其他素材

「筆刷」的人氣素材


最新素材


徽章
-
 MVP ◆針對問題投稿了眾多適切的回答,對社群有顯著貢獻的用戶。每3個月一次,會依據期間內獲得的點數選出MVP用戶,並進行表揚。
 -
 NVP(New Valuable Player) ◆繼MVP後,對社群營運做出良好貢獻的用戶。將從不曾獲選為MVP的用戶中,依據獲得的點數進行評選、表揚。
 -
 官方推廣大使 ◆從被證明為優良回答用戶的MVP獲獎者中選出社群中最優異的回答者。並經審查後由本社委託就任。※舊名稱為「Evangelist」
 -
 CELSYS公認Moderator ◆Moderator為會使用日文及其他語言的CELSYS公認工作人員。由於並非軟體或創作的專業人士,Moderator無法直接為用戶解決疑問,但能在語言、交流方面提供支援,幫助用戶們順利地進行溝通。
 -
 CELSYS官方為與營運相關的官方帳號。