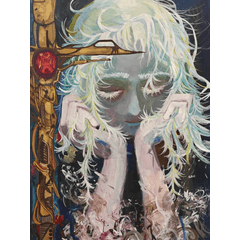
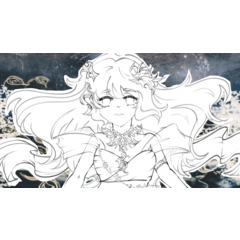
漸變組讓您的墨水看起來古色古香! A gradient set to make your ink look antique!
我喜歡古董插圖! 這是一組漸變,可説明任何插圖看起來像您在閣樓上找到的書中的舊插圖。 :D
顏色如下:

深色部分是你的墨水,淺色部分是你的紙張。 每種顏色都有幾種變化,所以你可以微調你想要的紙張類型或老化效果。 如果你發現你的一些作品丟失了細節,可以調整明暗之間的平衡,並隨意修改漸變以適應你的喜好。
這將需要稍微解釋一下我是如何獲得效果的,所以只需向下滾動查看所有顏色的示例。 基本上,我使用了紋理和漸變貼圖。
“如何使用漸變貼圖?”
1. 右鍵按兩下層次。
2. 前往“New Correction Layer”
3. 按兩下底部的“Gradient Map...”(漸變映射...)。
更多資訊請見:https://help.clip-studio.com/en-us/manual_en/390_filters/Tonal_Correction_Effects.htm#1364051
這是一個很好的教程!https://tips.clip-studio.com/en-us/articles/2453
對於磨損的墨水: 如果你沒有使用紋理刷來製作線條藝術,我建議使用紋理或刷子(或者兩者兼而有之)來進一步老化你的線條藝術。 噪音刷和任何斑點類型的刷子都可以給人一種漂亮的磨損外觀。
當我製作這個時,我在想我的Solid Ink Fill Textures(id: 2113481),但你也可以使用我之前製作的任何其他紋理。 所以你可能不需要下載任何新的東西,哈哈。:D

快速教學:
對線條圖進行紋理處理
方法 1 - 光照紋理

1. 完成你的線條藝術並確保它都在一層上。
2. 添加紋理層並將其剪輯在你的線上。 確保它是一個圖像材質層。 如果它是一個普通的柵格層,右鍵點擊它並點擊“轉換層...”以更改它。
3. 轉到「層次屬性」 並開啟「疊加」 (藍色) 。 根據你的喜好調整強度。
方法 2 - 深色紋理

1. 畫你的線條藝術,填滿任何純黑色空間。
2. 複製圖層並將其全部變為白色。
3. 將紋理添加為「剪切」圖層或「圖層蒙版」。。
4. 滿意時合併。 使用「將亮度轉換為不透明度」 功能來去除白色區域。 您也可以將層次模式更改為「乘法」。
最後,在我應用漸變后,我喜歡在上面添加紙張紋理。 這樣,紙張就不會受到漸變的影響。
顏色預覽
左上方為黑白原稿。


I love antique illustrations! This is a set of gradients that help any illustration look like an old illustration out of a book you found in an attic. :D
Colors below:

The dark part is your ink, the light part is your paper. There are several variations of each color so you can fine tune what kind of paper or aging you'd like on your art. Adjust the balance between lights and darks if you find that some of your artwork is losing detail, and feel free to modify the gradients to your liking.
This is going to take a little explaining on how I got the effect, so just scroll down for an example of all the colors. Basically, I used a texture and the gradient maps.
"How do I use Gradient Maps?"
1. Right click on the layer.
2. Head to "New Correction Layer"
3. Click the bottom one, "Gradient Map...."
More info here: https://help.clip-studio.com/en-us/manual_en/390_filters/Tonal_Correction_Effects.htm#1364051
And a good tutorial here! https://tips.clip-studio.com/en-us/articles/2453
For worn ink: If you are not using a textured brush for you line art, I suggest using a texture or a brush (or both!) to age your line art further. Noise brushes & any speck type brushes can give a nice worn look.
I was thinking of my Solid Ink Fill Textures (id: 2113481) when I made this, but you can use any of my other textures I've made before for this too. So you likely won't have to download anything new, lol. :D

A quick tutorial:
Texturing Your Line Art
Method 1 - Light Textures

1. Finish your line art & make sure it is all on one layer.
2. Add a texture layer & clip it over your lines. Make sure it is an image material layer. If it is a normal raster layer, right click it & click "convert layer..." to change it.
3. Go to "Layer Property" & turn on "Overlay"(in blue). Adjust the strength to your liking.
Method 2 - Dark Textures

1. Draw your line art, fill in any solid black spaces.
2. Duplicate the layer & turn it all white.
3. Add in your texture either as a "Clipped" layer or with a "layer mask".
4. Merge when satisfied. Use the "Convert brightness to opacity" function to get rid of the white area. You can also change the layer mode to "multiply".
Lastly, after I apply the gradient, I like to add a paper texture on top. This way, the paper is not affected by the gradient.
COLOR PREVIEW
Original in black and white on top left.


