KRITZEL PIXEL 的水彩套裝 (Watercolour Set by KRITZEL PIXEL) Watercolour Set by KRITZEL PIXEL

素材ID:2082893

  • 3,372
  • 免費
此素材集適用於CLIP STUDIO PAINT Ver.2以上的版本。 ( 取得CLIP STUDIO PAINT Ver.2 )

手工掃描畫筆和水彩紙,效果非常自然。 Hand scanned brushes and watercolour paper for a very natural effect.

歡迎來到我的水彩套裝。所有畫筆和紙張紋理都是手繪和手掃描的。通過一些畫筆的組合,您可以獲得非常逼真的水彩畫外觀。

  • 拖放水彩紋理
  • 墨水畫筆帶來逼真的感覺
  • 畫筆內的冷壓和熱壓紙紋理
這是用「hotpress」+「hotpress 3」以及「innen mixer」和「stroke blend」製成的。看起來像紙上的流血顏色,但你有完全的控制權。


要使紙張紋理正常工作,請在資源庫中獲取所有 3 個紋理,然後將所有 3 個紋理拖放到畫布上。在非 100% 白色上效果最好。我的紙總是有一絲黃色。


4 個畫筆用於截然不同的輪廓。


對於畫筆:使用混合模式。在相同的層上工作,以獲得非常好的自然混合。我首先用「冷壓」繪製我的底色,然後鎖定透明度。除此之外,我還使用噴槍和不同的顏色來打造逼真的洗滌外觀。然後我解鎖並添加一些邊緣。在那之後,我用另一個刷子乘法。同一層。您可以將混合模式與畫筆一起使用,有些畫筆已經啟動。所以顏色會混合自然。

非常簡單的例子。


對我來說,最重要的畫筆是“疊加筆”。根據自己的喜好更改設置。我經常玩不透明,並混合我的水彩線條。
數位水彩畫需要大量的混合、刪除、疊加和倍增,所以要讓它看起來很逼真。
除了輪廓之外,這都是一層:


我建議使用漸變和其他圖層效果來獲得更高的對比度和飽和度。這套給人一種非常原始的外觀,就像你掃描普通的水彩畫一樣。


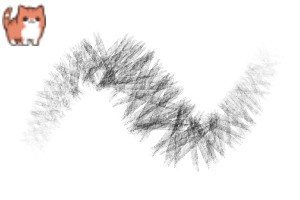
刷子俯瞰:


我非常匆忙地遵循了這個傳統的藝術 youtube 教程。
它不好,但它看起來像我第一次用水彩畫的東西。


更多畫筆示例


我自己創建了所有畫筆,使用了剪輯工作室繪畫原始教程中的一些技巧和技巧,還自己掃描了畫筆筆尖和紋理。對於圖片,我免費參考。
Welcome to my watercolour set. All brushes and paper textures are hand painted and hand scanned. With the combination of some of the brushes, you can achieve a very realistic watercolour look.

  • Drag and drop watercolour textures
  • Ink Brushes for a realistic feel
  • Coldpressed and Hotpressed paper textures inside the brushes
This was made with "hotpress" + "hotpress 3" and also "innen mixer" and "stroke blend". Looks like bleeding colour on paper, but you have full controll.


For the paper textures to work, grab all 3 of them in your asset library and drag and drop ALL THREE on your canvas. Works best on non 100% white. My paper always has a hint of yellow.


4 brushes for very different outlines.


For the brushes: play with blend modes. Work on same layers for a very good natural blending. I draw my base colours first with "coldpress" and then I lock transparency. Over that I go with an airbrush and different colours for a realistic look of my wash. Then I unlock and add some edges. After that I go over with another brush on multiply. Same layer. You can use mix modes with the brushes, some has it already active. So colours will mix natural.

Very simple example.


The most important brush for me is the "overlay pen". Change settings for your liking. I play with opacity a lot and blend my watercolour lines.
Digital watercolour needs a lot of blending, deleting, overlayers and multiply, so make it look realistic.
Besides outlines, this is all one layer:


I recommend working with gradiant and other layer effects for more contrast and saturation. This set gives a very raw look, like if you scanned normal watercolour.


Brush overlook:


I followed very rushed a traditional art youtube tutorial for this one.
It is not good, but it looks like the stuff I made first time drawing with watercolours.


More examples of the brushes


I created all brushes myself, used some tipps and tricks from clip studio paint original tutorials, and also scanned the brush tips and textures myself. For the pictures I worked with free reference.

Brushes

Paper

線筆 Line Brushes

更新歷史記錄

版本 1.0 Version 1.0

素材ID:2082893

公開日期 : 14 days ago

更新日期 : 14 days ago

KritzelPixel 的個人檔案 ...查看更多

🦇🐲🧙‍♀️ 📚 Author, Illustrator, Voice Actor, Streaming, Art Coach, Comics and more