

用於創建速度線敵人網路卡通的自動操作集 Auto action set for creating speed line foe webtoon
如何使用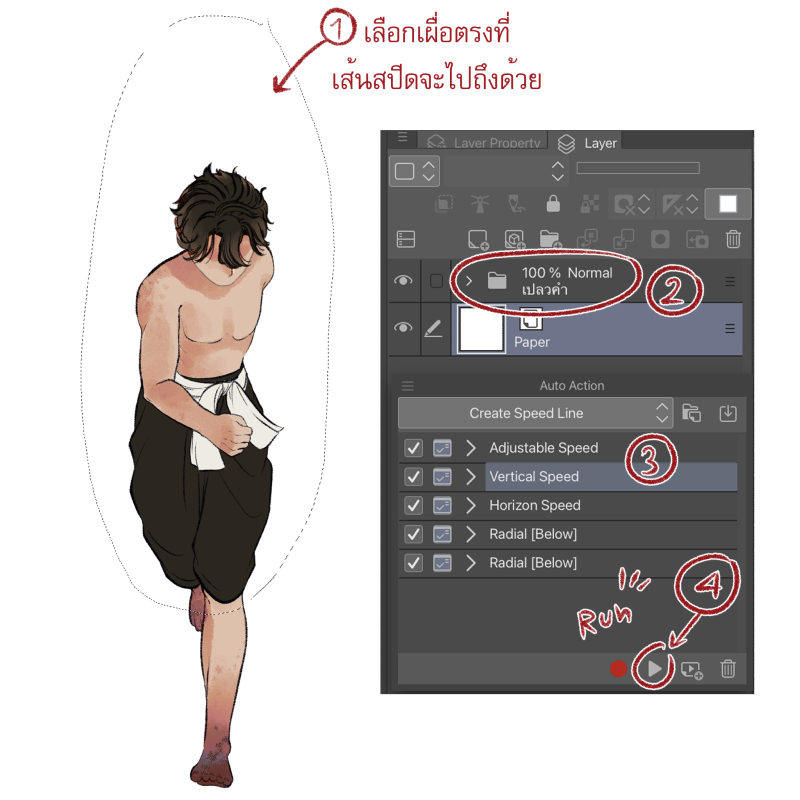


- 選擇要放置速度線的區域。(選擇速度線也將到達的區域。
- 選擇圖像資料夾(無需合併)
- 運行自動操作

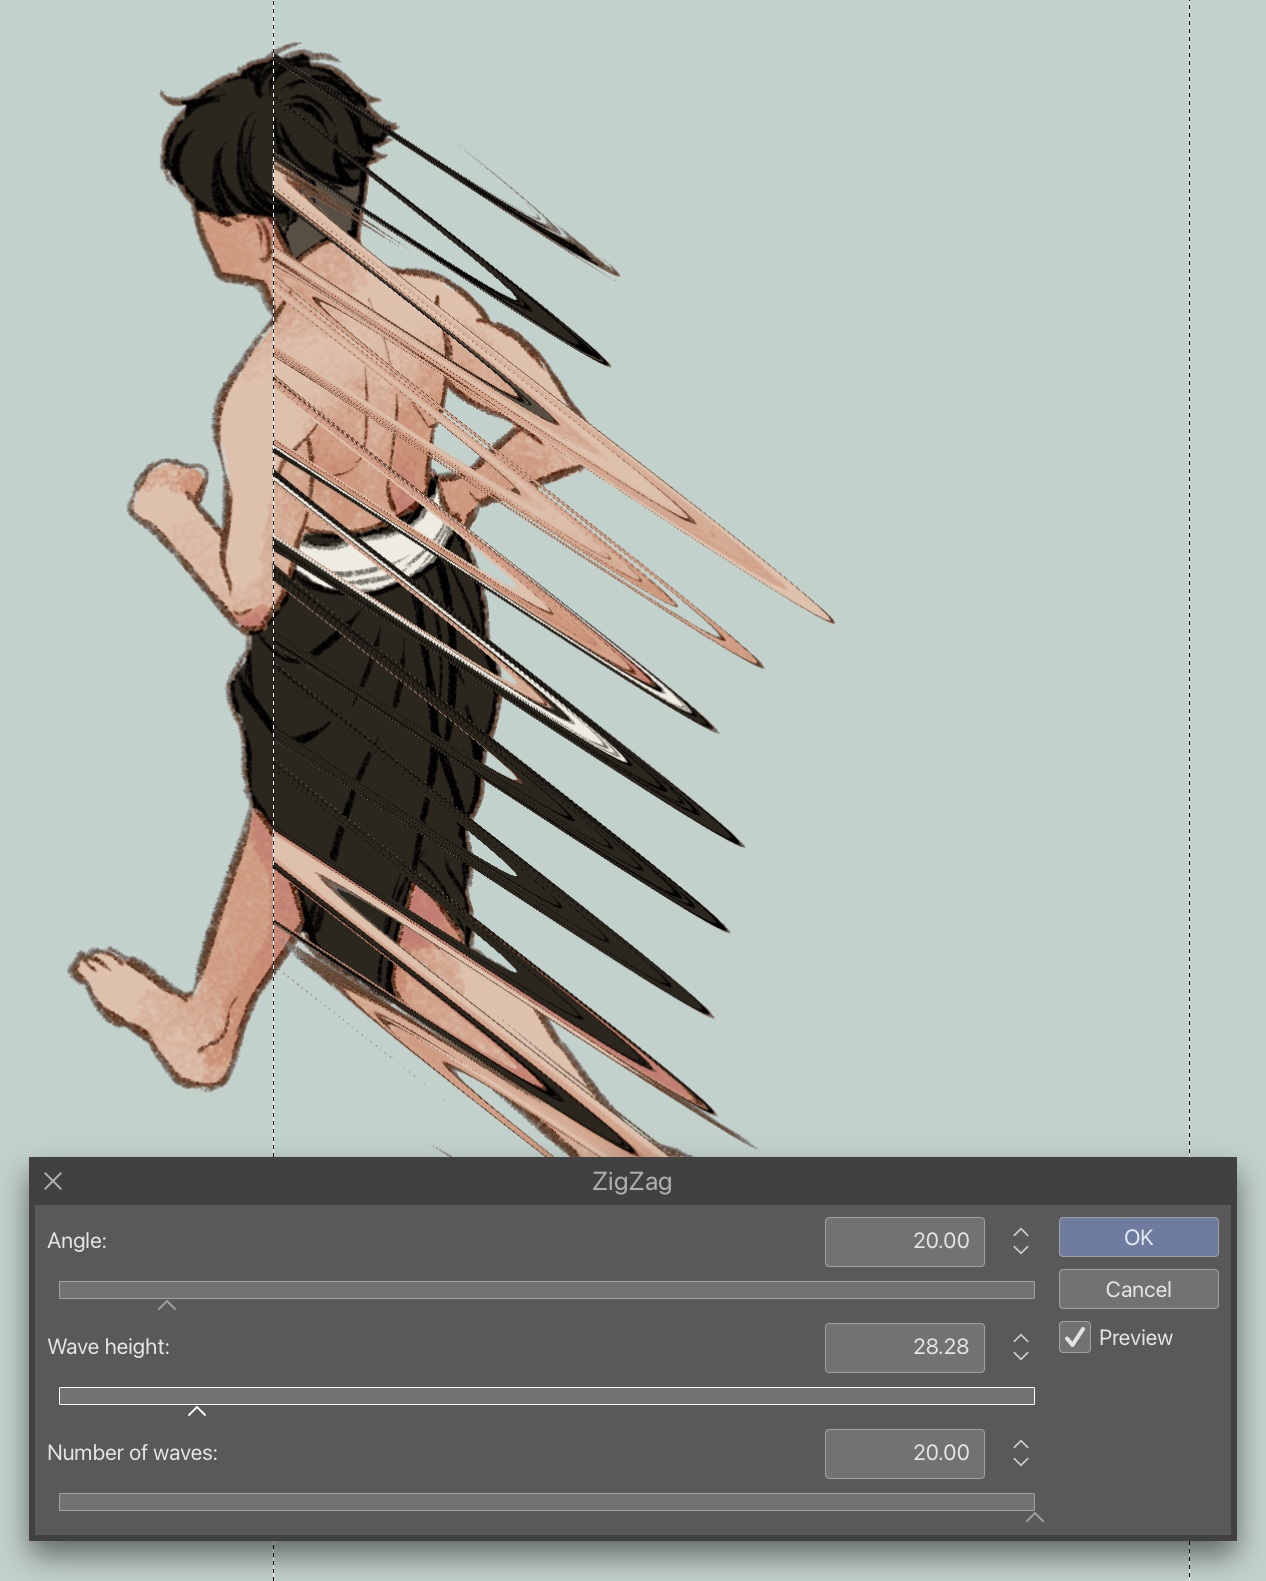
- 設置視窗將彈出,您可以在此處將速度線調整為小或大,短或長。

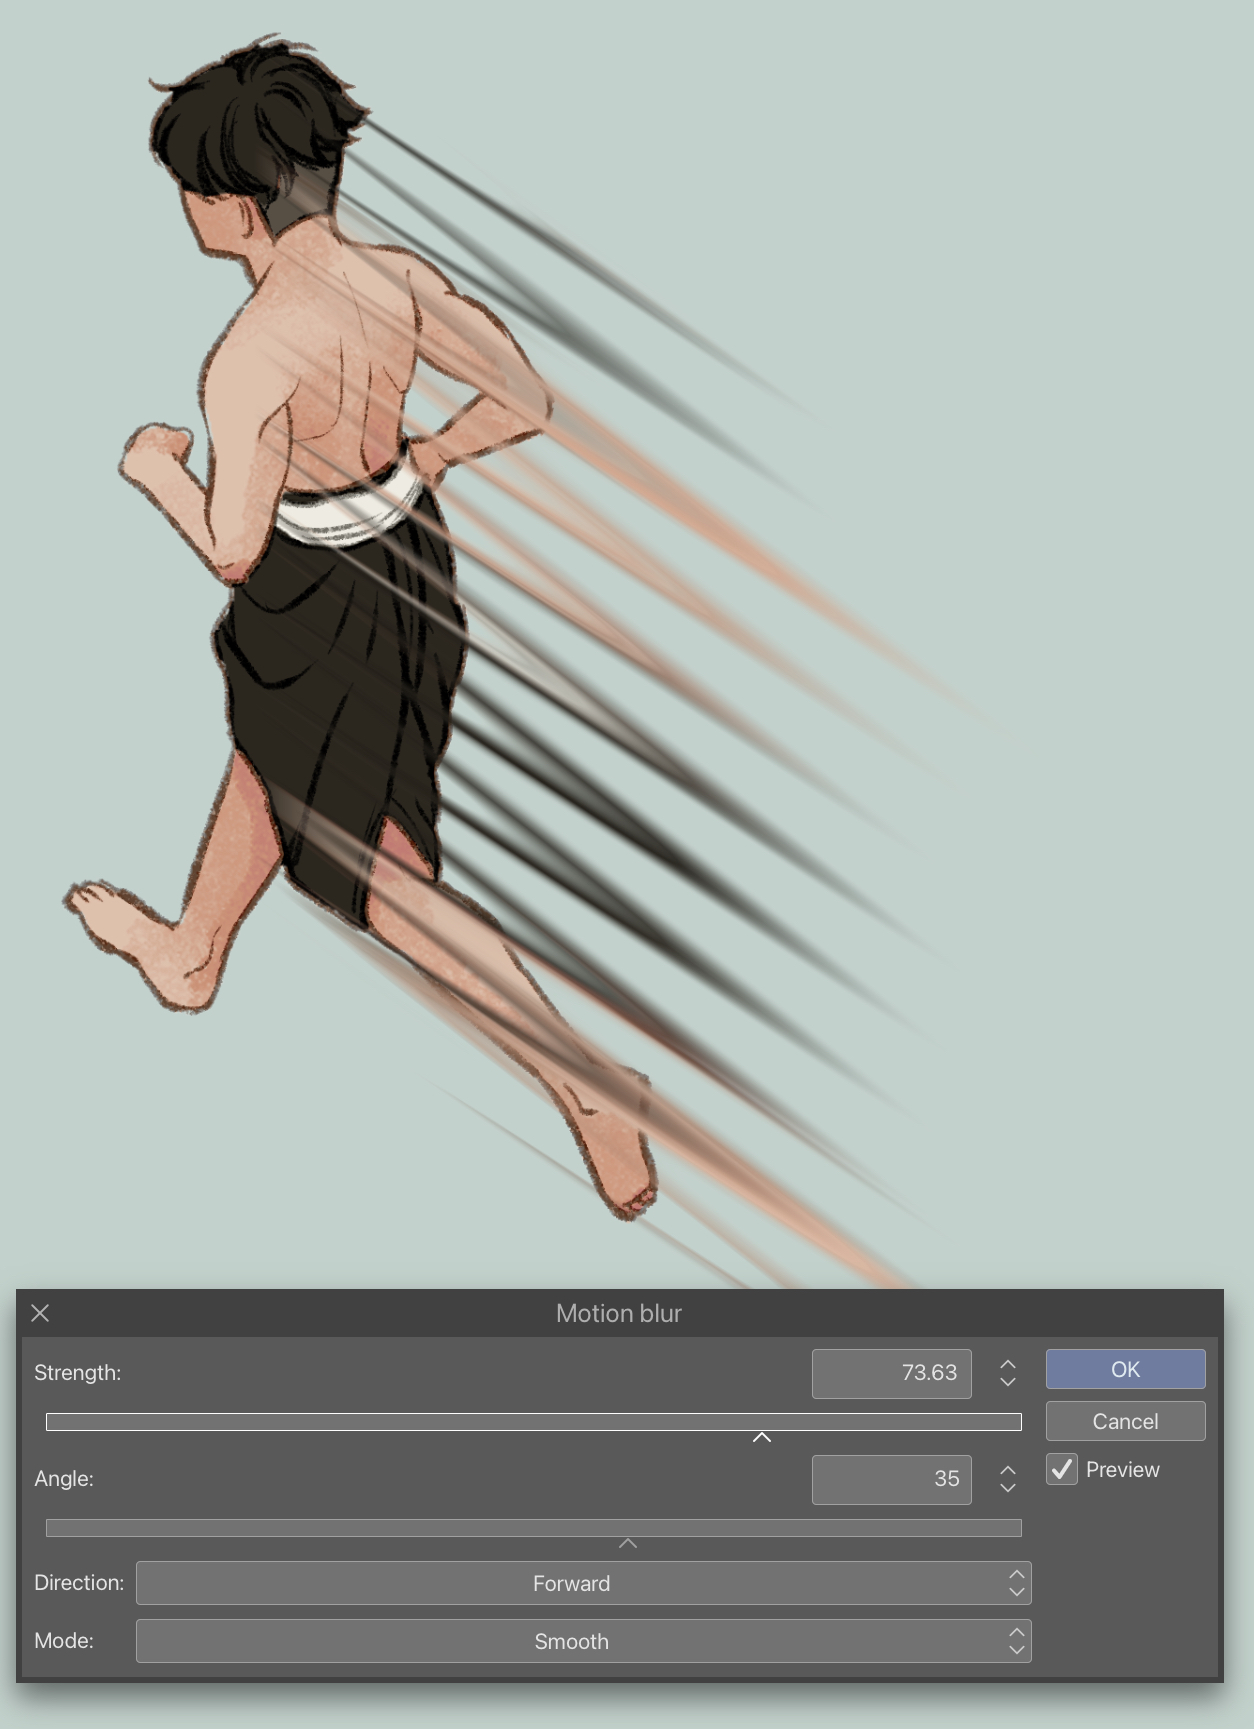
- 調整線條的模糊度和方向。

- 完成後,您可以調整圖層不透明度以達到滿意的結果。

- 垂直或水準速度線是相同的。

您不能選擇任何區域或使用沒有背景的圖像(不是資料夾),只需按一下即可跳過自動操作的某些步驟。
對於「可調速度」,您將必須調整角度,其餘的都是相同的 。


對於徑向速度,只需運行自動操作並拖動紅色 X 標記圖像中心


希望這有助於您更快地工作。有時間休息,睡覺和健康。
How to use
- Select the area where you want the speed line. (Select the area that the speed line will reach as well.)
- Select the folder of image (no need to merge)
- Run the auto action
- The setting window will pop-up, you can adjust the speed lines to be small or large, short or long here.
- Adjust the blur and direction of the lines.
- Finished, you can adjust the layer opacity to achieve satisfactory results.
- The vertical or horizontal speed lines are the same.
You may not select any area or use an image without background (not folder) too, just click to skip some step of the auto action.
For the 'Adjustable speed' you will have to adjust the angle, the rest is the same.
For the radial speed, just run the auto action and drag the red X mark the the center of image
Hope this helps you work faster. Have time to rest, sleep and be healthy.
過去版本


「Mululeee」的其他素材


「自動動作」的人氣素材


最新素材


徽章
-
 MVP ◆針對問題投稿了眾多適切的回答,對社群有顯著貢獻的用戶。每3個月一次,會依據期間內獲得的點數選出MVP用戶,並進行表揚。
 -
 NVP(New Valuable Player) ◆繼MVP後,對社群營運做出良好貢獻的用戶。將從不曾獲選為MVP的用戶中,依據獲得的點數進行評選、表揚。
 -
 官方推廣大使 ◆從被證明為優良回答用戶的MVP獲獎者中選出社群中最優異的回答者。並經審查後由本社委託就任。※舊名稱為「Evangelist」
 -
 CELSYS公認Moderator ◆Moderator為會使用日文及其他語言的CELSYS公認工作人員。由於並非軟體或創作的專業人士,Moderator無法直接為用戶解決疑問,但能在語言、交流方面提供支援,幫助用戶們順利地進行溝通。
 -
 CELSYS官方為與營運相關的官方帳號。