
3D 到 2D 紙杯蛋糕與自動操作 (3D to 2D Cupcakes with Auto Action) 3D to 2D Cupcakes with Auto Action
素材ID:1826121
-
1,108

3D蛋糕可以變成2D漫畫插圖與自動行動 3D Cupcakes can be turned into 2D manga illustrations with Auto Action
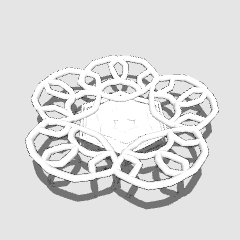
我在攪拌機中模仿紙杯蛋糕、蛋糕和多利, 然後把它們轉換成模型, 可用於剪輯工作室油漆 Ex 。我做了一個自動操作,使這個過程更容易。
在此處觀看教程:HTTPs://www.youtube.com/watch?v=o3cwi7v1gNI
要獲得最佳結果:
在自動操作之前,在3D模型中掉落後,按一下其子工具細節(看起來像扳手)。
轉到大綱並取消大綱寬度。
這將帶出3D模型的輪廓,使它看起來真的很好!

有關如何使用自訂自動操作的教程,請訪問此連結到 4 分鐘示例:
如果您想要一步一步,請閱讀下面。
使用自動操作:
注意:這會使過程更快,但之後您可能需要進行調整。
1) 拖放您的 3D 型號。將它們定位到所需的角度。
2) 轉到 3D 模型上的子工具,調整輪廓和照明。它們可以在"大綱"和"光源"選項中找到。
3) 複製該層。一層應該是音調,第二層是線性圖。音色層應在頂部。
4) 選擇音調層,然後轉到自動操作集"CAKE_SET_AUTOACTION"並按"cake_3dmodel_part02_tone"。按一下"播放"按鈕。它應該呈現。
5) 選擇線條圖層,然後轉到自動操作集並選擇"cake_3dmodel_partt01_binarization"。按一下播放,它會渲染。
6) 完成!(注意:層面板上有一個輪廓,如果您願意,可以將其刪除。
下圖以降低音調頻率的自動操作完成。

一步一步為那些誰只想要模型:
1) 調整模型並在子工具屬性中應用大綱後,對層進行柵格化並刪除尺規。
2) 轉到編輯 - - 色調更正 - + 色調 / 飽和度 / 發光度, 並一路向下打開飽和度, 直到沒有更多的顏色。
3) 複製層。為音調製作一層,為線性圖製作另一層。
對於音調層:
-轉到編輯 -+色調更正-+後代化,並將步驟降低到只有最基本的音調。我建議2-5。
-然後將音調屬性塗層,減少音調的頻率。將音調層從正常轉換為乘法。
對於線性層:
-轉到編輯-\托納爾更正-=比納利化
-選擇最適合您的線條的閾值。
結果:手工執行此項可實現更多控制。自動操作和一步一步地執行此操作都有其優勢。

I modeled cupcakes, a cake, and a doilie in Blender, then I converted them to models that can be used in Clip Studio Paint EX. I made an auto action to make this process easier.
Watch tutorial here: https://www.youtube.com/watch?v=o3cwi7v1gNI
For best results:
Before the auto action, after dropping in your 3D model, click on it's SUB TOOL DETAIL (that looks like a wrench).
Go to Outline and uncrease the outline width.
This will bring out the outlines for the 3D model and make it look really good!
For tutorial on how to use with the custom auto action, visit this link to a 4 minute example:
If you want a step by step, read below.
Using Auto Action:
Note: This makes the process go faster, though you might have to make adjustments afterwards.
1) Drag and drop your 3D Models. Position them to desired angle.
2) Go to the Sub tool on the 3D model, adjust outline and lighting. They can be found in the "Outline" and "Light Source" options.
3) Duplicate the layer. One layer should be for Tones, and the second is for Lineart. Tone layer should be on top.
4) Select the Tone Layer, then go to the Auto Action Set "CAKE_SET_AUTOACTION" and press "cake_3dmodel_part02_tone". Click the "play" button. It should render.
5) Select the Lineart Layer, then go to the Auto Action set and select "cake_3dmodel_partt01_binarization". Click play and it will render.
6) Done! (Note: There is an outline on the layer panel, you can remove it if you like. )
Image below was completed with Auto Actions with reduced tone frequency.
Step by Step for those who only want the models:
1) After adjusting the model and applying the outline in the sub tool properties, rasterize the layer and delete the ruler.
2) Go to EDIT->TONAL CORRECTION->HUE/SATURATION/LUMINOSITY and turn the saturation all the way down until there is no more color.
3) Duplicate the Layer. Make one layer for Tone and the other for Lineart.
For Tone Layer:
-Go to EDIT ->TONAL CORRECTION->POSTERIZATION and reduce the steps down to only the most basic tones. I reccomend 2-5.
-Then apply Tone properties to layer, reduce the frequency of the tone. Turn Tone layer from normal to multiply.
For Lineart Layer:
-Go to EDIT ->TONAL CORRECTION -> BINARIZATION
-Choose the threshold that is best for your lineart.
Result: Doing this by hand allows for more control. Both the auto action and doing this step by step have their advantages.
類別 1 Category 1


「Lillie7321」的其他素材


「素材集」的人氣素材


最新素材


徽章
-
 MVP ◆針對問題投稿了眾多適切的回答,對社群有顯著貢獻的用戶。每3個月一次,會依據期間內獲得的點數選出MVP用戶,並進行表揚。
 -
 NVP(New Valuable Player) ◆繼MVP後,對社群營運做出良好貢獻的用戶。將從不曾獲選為MVP的用戶中,依據獲得的點數進行評選、表揚。
 -
 官方推廣大使 ◆從被證明為優良回答用戶的MVP獲獎者中選出社群中最優異的回答者。並經審查後由本社委託就任。※舊名稱為「Evangelist」
 -
 CELSYS公認Moderator ◆Moderator為會使用日文及其他語言的CELSYS公認工作人員。由於並非軟體或創作的專業人士,Moderator無法直接為用戶解決疑問,但能在語言、交流方面提供支援,幫助用戶們順利地進行溝通。
 -
 CELSYS官方為與營運相關的官方帳號。