
メタリックインパスト オイル/アクリル【ブラシセット】 (METALLIC IMPASTO Oil/Acrylic [BRUSH SET]) METALLIC IMPASTO Oil/Acrylic [BRUSH SET]
コンテンツID:2278867
-
226

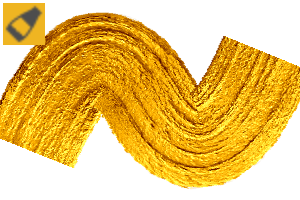
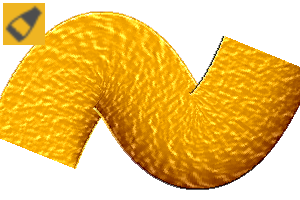
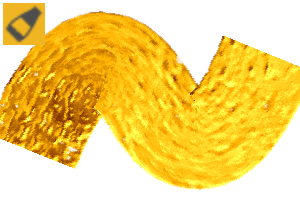
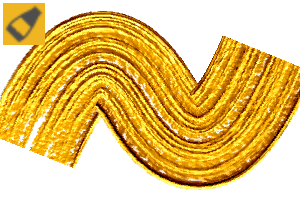
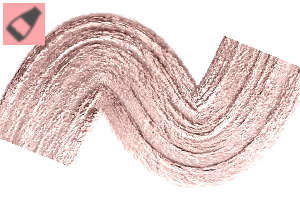
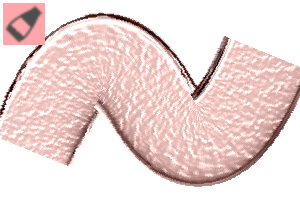
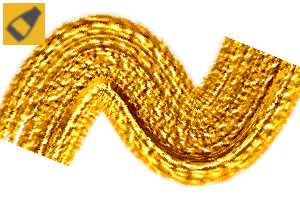
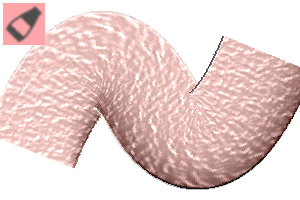
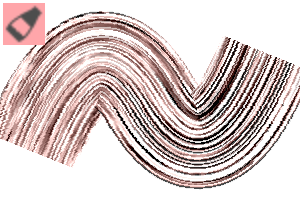
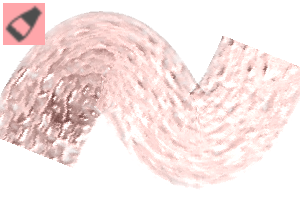
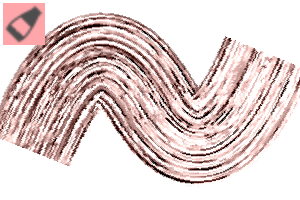
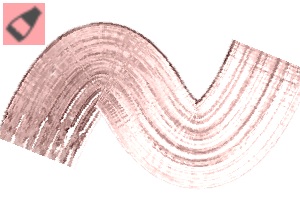
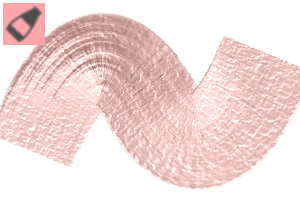
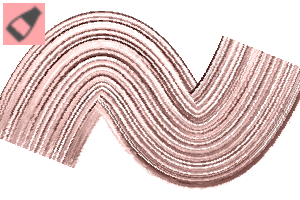
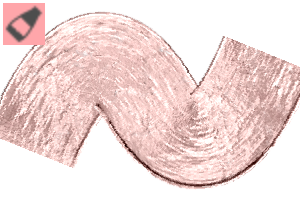
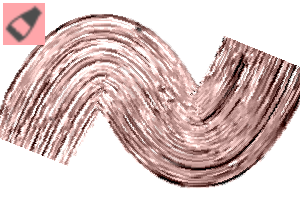
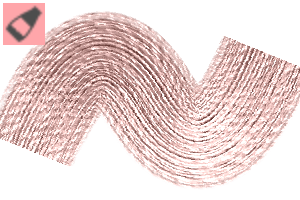
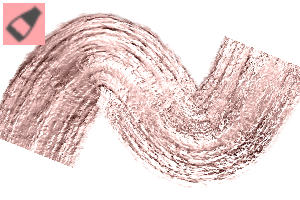
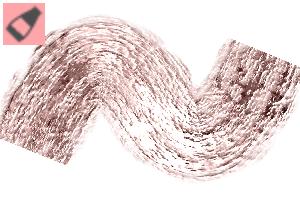
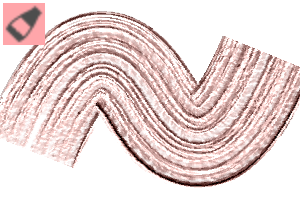
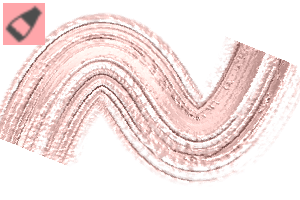
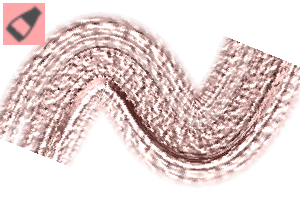
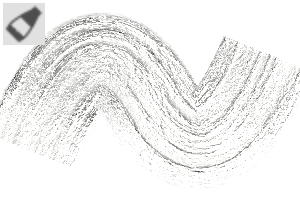
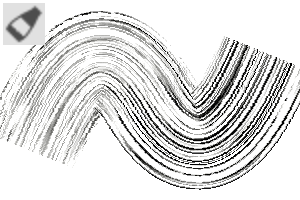
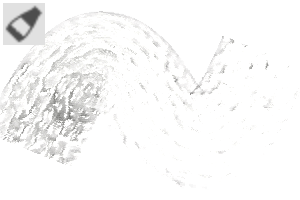
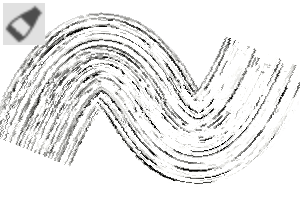
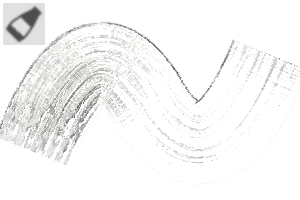
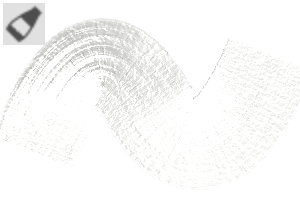
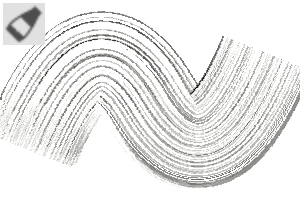
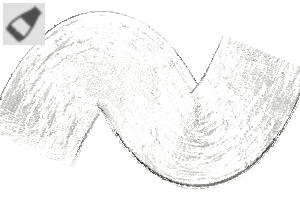
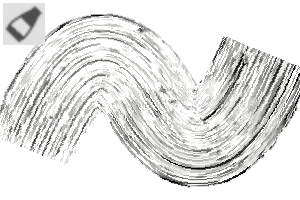
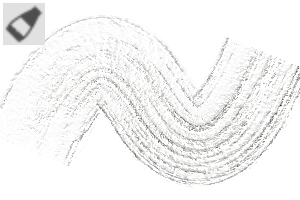
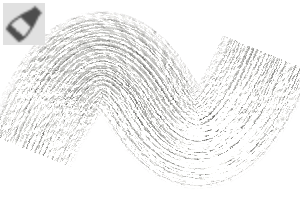
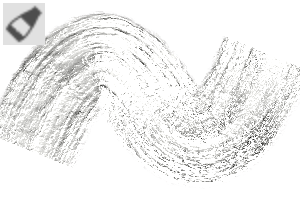
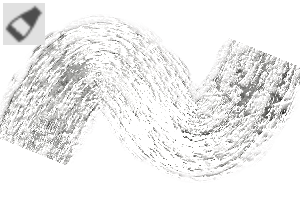
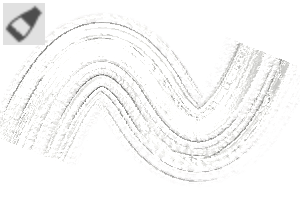
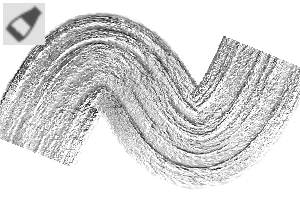
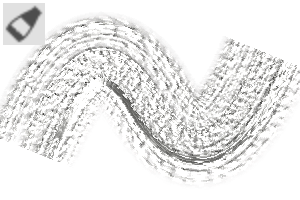
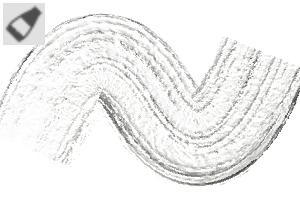
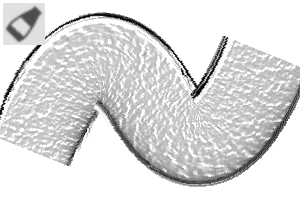
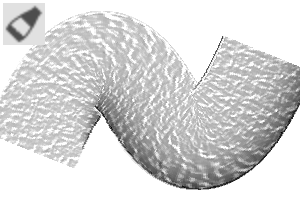
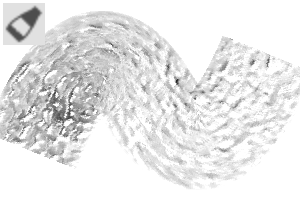
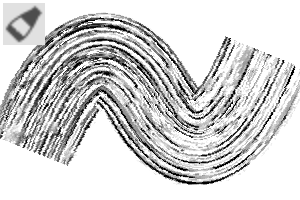
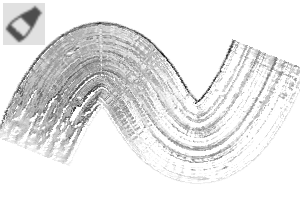
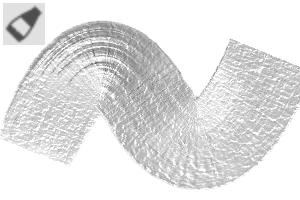
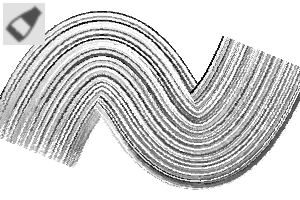
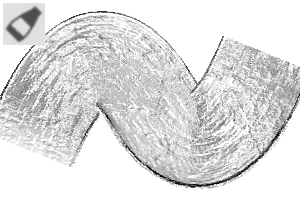
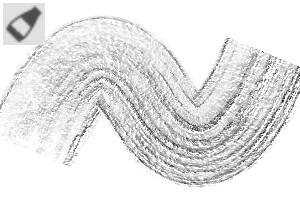
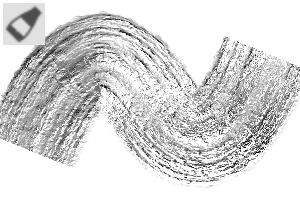
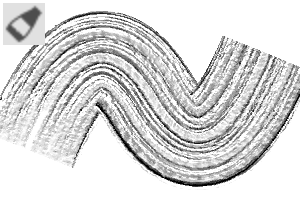
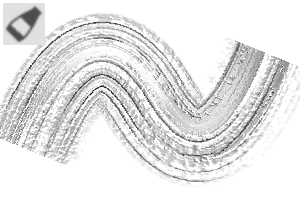
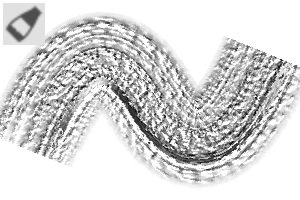
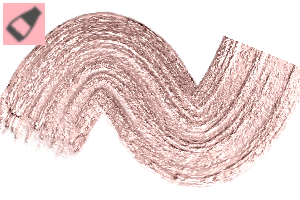
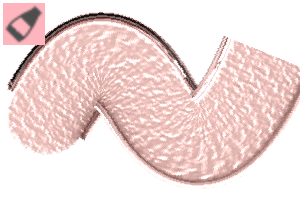
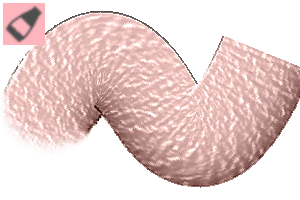
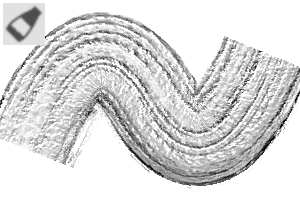
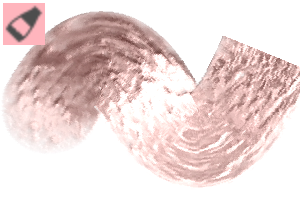
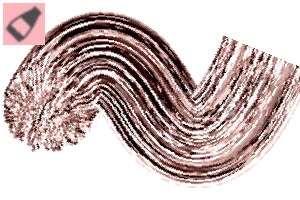
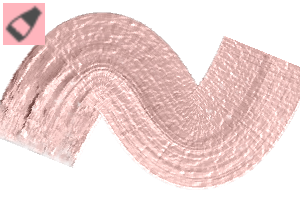
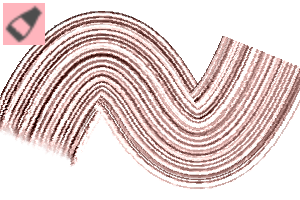
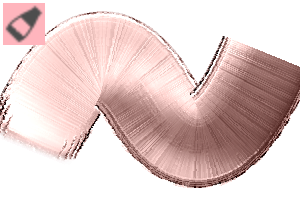
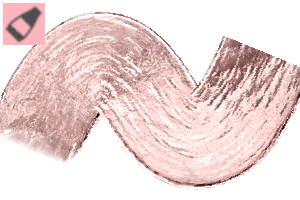
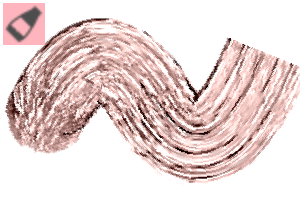
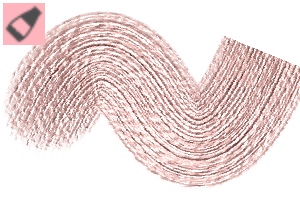
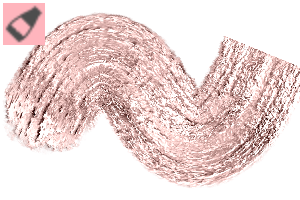
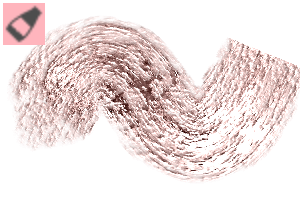
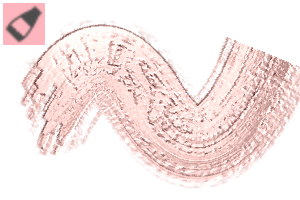
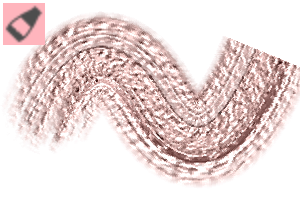
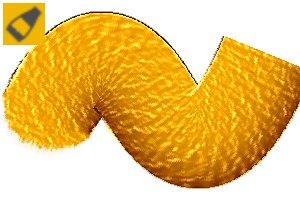
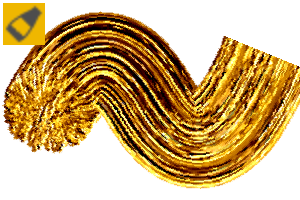
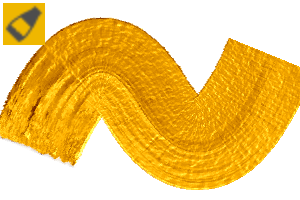
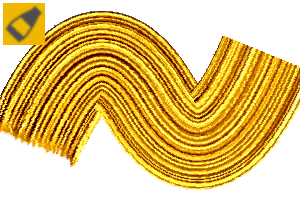
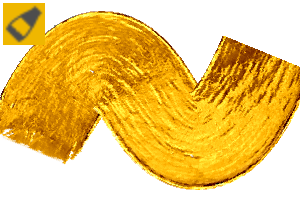
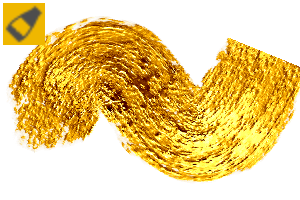
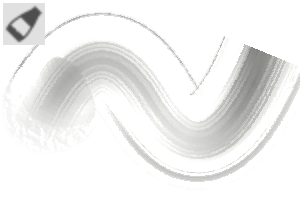
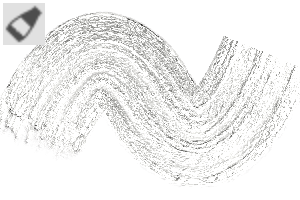
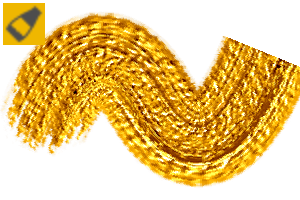
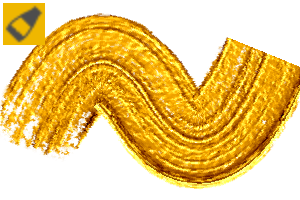
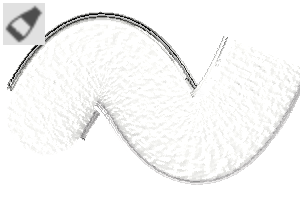
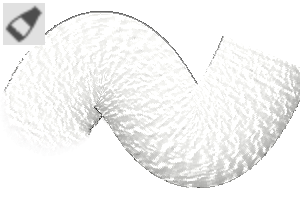
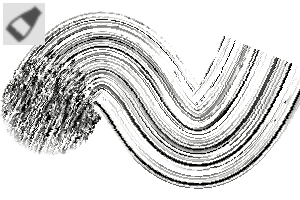
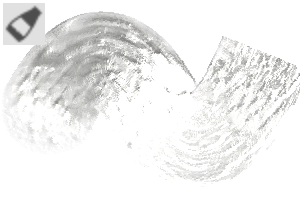
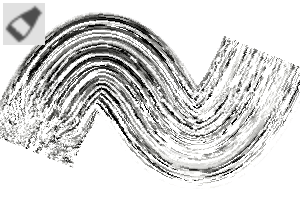
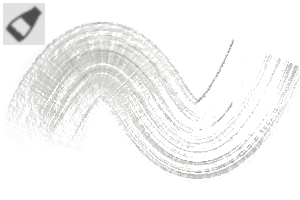
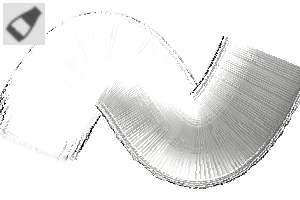
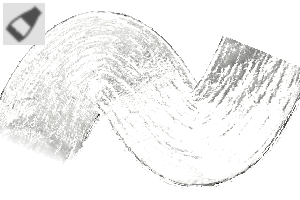
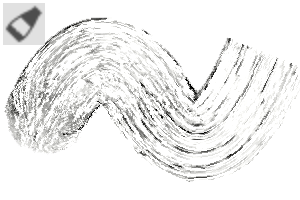
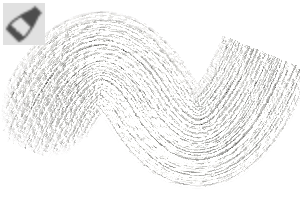
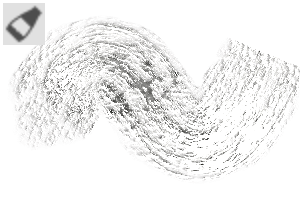
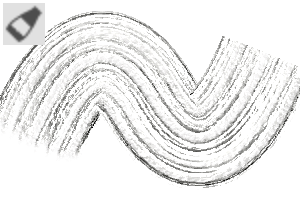
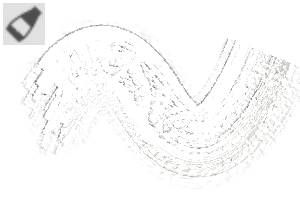
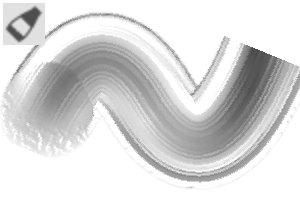
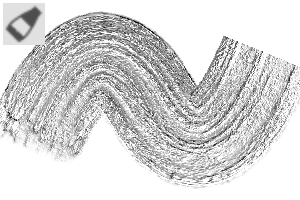
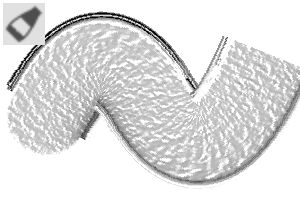
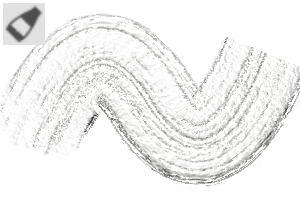
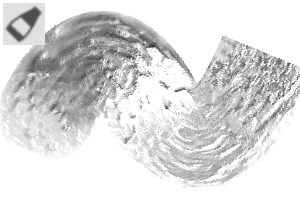
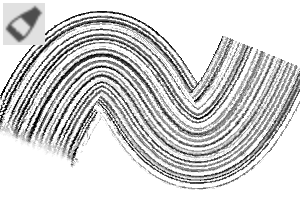
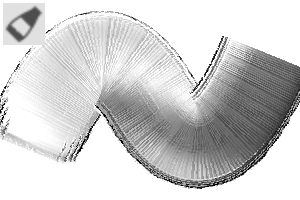
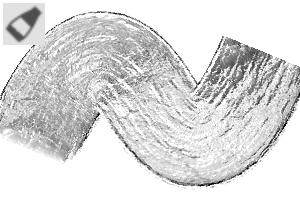
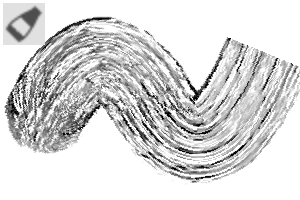
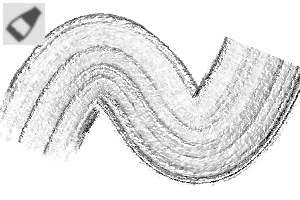
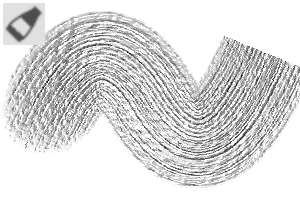
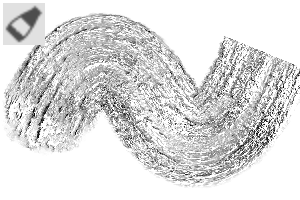
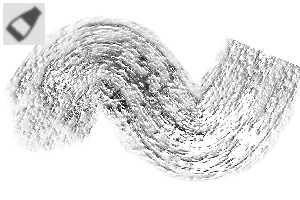
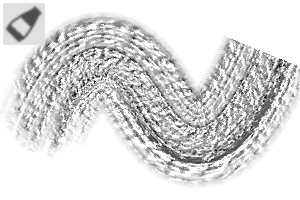
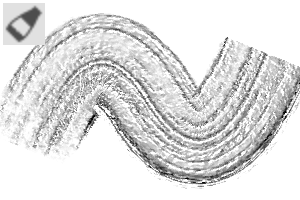
合計168本の筆。キャンバスに金属的なインパスト筆跡のように見せようとしました。
4色のメタリックカラーで提供:シルバー/ホワイトシルバー/ゴールド/ローズゴールド。
もしすでにGumroadで私のインパストブラシをフルセット購入していただければ、もう買う必要はありません。代わりに、Gumroadライブラリの最新アップデートをダウンロードして、「Analog Oil/Acrylic IMPASTO [Brush SET]-Clip Studio Paint」を探してみてください。
フルパックリンク:(https://assetsmarket.gumroad.com/l/AnalogImpastoBRUSHSET-Axssziel)
168 brushes total. I tried to make them look like metallic impasto brush strokes on a canvas.
Available in 4 metallic colors: Silver/White-Silver/Gold/Rose Gold.
If you already bought the full pack of my impasto brushes on Gumroad, no need to buy again; instead, download the newest update on your Gumroad library and look for "Analog Oil/Acrylic IMPASTO [Brush SET]-Clip Studio Paint".
Full pack link: (https://assetsmarket.gumroad.com/l/AnalogImpastoBRUSHSET-Axssziel)


- ブラシは「ツール設定」ウィンドウで「カラーミキシング」をオンにするとブレンドできます。デフォルトではブレンドはオフにされています。
- 「カラーストレッチ」ス ライダー を調整して、ブレンドの多寡を調整してください。
- 色の混色には ペンの圧力があります。強く押す とブレンドが減 り、 軽く押すとブレンドが増えます。

- Brushes can blend if you turn "color mixing" on in the "tool settings" window. By default, blending is turned off.
- Adjust the "color stretch" slider for more or less blending.
- Color mixing has pen pressure; press harder for less blending and lighter for more blending.
168本のブラシ 168 Brushes
-
[21] エンドレスゴールド メタリックオイル/アクリルインパスト(第5巻)-アックスジール [21] ENDLESS GOLD Metallic Oil/Acrylic Impasto (VOL.5)-Axssziel
-
[20] ENDLESS GOLD メタリックオイル/アクリルインパスト(第5巻)-Axssziel [20] ENDLESS GOLD Metallic Oil/Acrylic Impasto (VOL.5)-Axssziel
-
[19] ENDLESS GOLD メタリックオイル/アクリルインパスト(VOL.5)-Axssziel [19] ENDLESS GOLD Metallic Oil/Acrylic Impasto (VOL.5)-Axssziel
-
[18] ENDLESS GOLD メタリックオイル/アクリルインパスト(第5巻)-Axssziel [18] ENDLESS GOLD Metallic Oil/Acrylic Impasto (VOL.5)-Axssziel
-
[17] エンドレスゴールド メタリックオイル/アクリルインパスト(第5巻)-アクスジール [17] ENDLESS GOLD Metallic Oil/Acrylic Impasto (VOL.5)-Axssziel
-
[16] エンドレスゴールド メタリックオイル/アクリルインパスト(第5巻)-アックスジール [16] ENDLESS GOLD Metallic Oil/Acrylic Impasto (VOL.5)-Axssziel
-
[15] ENDLESS GOLD メタリックオイル/アクリルインパスト(VOL.5)-Axssziel [15] ENDLESS GOLD Metallic Oil/Acrylic Impasto (VOL.5)-Axssziel
-
[14] エンドレスゴールド メタリックオイル/アクリルインパスト(第5巻)-アックスジール [14] ENDLESS GOLD Metallic Oil/Acrylic Impasto (VOL.5)-Axssziel
-
[13] ENDLESS GOLD メタリックオイル/アクリルインパスト(VOL.5)-Axssziel [13] ENDLESS GOLD Metallic Oil/Acrylic Impasto (VOL.5)-Axssziel
-
[12] ENDLESS GOLD メタリックオイル/アクリルインパスト(VOL.5)-Axssziel [12] ENDLESS GOLD Metallic Oil/Acrylic Impasto (VOL.5)-Axssziel
-
[11] エンドレスゴールド メタリックオイル/アクリルインパスト(第5巻)-アックスジール [11] ENDLESS GOLD Metallic Oil/Acrylic Impasto (VOL.5)-Axssziel
-
[10] ENDLESS GOLD メタリックオイル/アクリルインパスト(VOL.5)-Axssziel [10] ENDLESS GOLD Metallic Oil/Acrylic Impasto (VOL.5)-Axssziel
-
[9] ENDLESS GOLD メタリックオイル/アクリルインパスト(第5巻)-Axssziel [9] ENDLESS GOLD Metallic Oil/Acrylic Impasto (VOL.5)-Axssziel
-
[8] ENDLESS GOLD メタリックオイル/アクリルインパスト(第5巻)-Axssziel [8] ENDLESS GOLD Metallic Oil/Acrylic Impasto (VOL.5)-Axssziel
-
[7] ENDLESS GOLD メタリックオイル/アクリルインパスト(VOL.5)-Axssziel [7] ENDLESS GOLD Metallic Oil/Acrylic Impasto (VOL.5)-Axssziel
-
[6] ENDLESS GOLD メタリックオイル/アクリルインパスト(VOL.5)-Axssziel [6] ENDLESS GOLD Metallic Oil/Acrylic Impasto (VOL.5)-Axssziel
-
[5] エンドレスゴールド メタリックオイル/アクリルインパスト(第5巻)-アクスジール [5] ENDLESS GOLD Metallic Oil/Acrylic Impasto (VOL.5)-Axssziel
-
[4] ENDLESS GOLD メタリックオイル/アクリルインパスト(VOL.5)-Axssziel [4] ENDLESS GOLD Metallic Oil/Acrylic Impasto (VOL.5)-Axssziel
-
[3] エンドレスゴールド メタリックオイル/アクリルインパスト(第5巻)-アックスジール [3] ENDLESS GOLD Metallic Oil/Acrylic Impasto (VOL.5)-Axssziel
-
[21] エンドレス・ローズゴールド メタリックインパスト(第5巻)-アックスツィール [21] ENDLESS ROSE GOLD Metallic Impasto (VOL.5)-Axssziel
-
[20] エンドレス・ローズゴールド メタリックインパスト(第5巻)-アックスジール [20] ENDLESS ROSE GOLD Metallic Impasto (VOL.5)-Axssziel
-
[19] エンドレス・ローズゴールド メタリックインパスト(第5巻)-アックスツィール [19] ENDLESS ROSE GOLD Metallic Impasto (VOL.5)-Axssziel
-
[2] ENDLESS GOLD メタリックオイル/アクリルインパスト(VOL.5)-Axssziel [2] ENDLESS GOLD Metallic Oil/Acrylic Impasto (VOL.5)-Axssziel
-
[1] ENDLESS GOLD メタリックオイル/アクリルインパスト(VOL.5)-Axssziel [1] ENDLESS GOLD Metallic Oil/Acrylic Impasto (VOL.5)-Axssziel
-
[18] エンドレス・ローズゴールド メタリックインパスト(第5巻)-アックスジール [18] ENDLESS ROSE GOLD Metallic Impasto (VOL.5)-Axssziel
-
[17] エンドレス・ローズゴールド メタリックインパスト(第5巻)-アックスツィール [17] ENDLESS ROSE GOLD Metallic Impasto (VOL.5)-Axssziel
-
[16] エンドレス・ローズゴールド メタリックインパスト(第5巻)-アックスジール [16] ENDLESS ROSE GOLD Metallic Impasto (VOL.5)-Axssziel
-
[15] エンドレス・ローズゴールド メタリック・インパスト(第5巻)-アックスツィール [15] ENDLESS ROSE GOLD Metallic Impasto (VOL.5)-Axssziel
-
[14] エンドレス・ローズゴールド メタリック・インパスト(第5巻)-アックスツィール [14] ENDLESS ROSE GOLD Metallic Impasto (VOL.5)-Axssziel
-
[13] エンドレス・ローズゴールド メタリックインパスト(第5巻)-アックスジール [13] ENDLESS ROSE GOLD Metallic Impasto (VOL.5)-Axssziel
-
[12] エンドレス・ローズゴールド メタリックインパスト(第5巻)-アックスツィール [12] ENDLESS ROSE GOLD Metallic Impasto (VOL.5)-Axssziel
-
[11] エンドレス・ローズゴールド メタリックインパスト(第5巻)-アックスツィール [11] ENDLESS ROSE GOLD Metallic Impasto (VOL.5)-Axssziel
-
[10] エンドレス・ローズゴールド メタリック・インパスト(第5巻)-アックスジール [10] ENDLESS ROSE GOLD Metallic Impasto (VOL.5)-Axssziel
-
[9] エンドレス・ローズゴールド メタリックインパスト(第5巻)-アクスツィール [9] ENDLESS ROSE GOLD Metallic Impasto (VOL.5)-Axssziel
-
[8] ENDLESS ROSE GOLD メタリックインパスト(Vol.5)-Axssziel [8] ENDLESS ROSE GOLD Metallic Impasto (VOL.5)-Axssziel
-
[7] エンドレス・ローズゴールド メタリックインパスト(第5巻)-アックスジール [7] ENDLESS ROSE GOLD Metallic Impasto (VOL.5)-Axssziel
-
[6] エンドレス・ローズゴールド メタリックインパスト(第5巻)-アックスジール [6] ENDLESS ROSE GOLD Metallic Impasto (VOL.5)-Axssziel
-
[5] エンドレス・ローズゴールド メタリックインパスト(第5巻)-アックスジール [5] ENDLESS ROSE GOLD Metallic Impasto (VOL.5)-Axssziel
-
[4] エンドレス・ローズゴールド メタリック・インパスト(第5巻)-アックスツィール [4] ENDLESS ROSE GOLD Metallic Impasto (VOL.5)-Axssziel
-
[3] エンドレス・ローズゴールド メタリックインパスト(第5巻)-アックスツィール [3] ENDLESS ROSE GOLD Metallic Impasto (VOL.5)-Axssziel
-
[2] エンドレス・ローズゴールド メタリックインパスト(第5巻)-アックスジール [2] ENDLESS ROSE GOLD Metallic Impasto (VOL.5)-Axssziel
-
[1] エンドレス・ローズゴールド メタリックインパスト(第5巻)-アクスツィール [1] ENDLESS ROSE GOLD Metallic Impasto (VOL.5)-Axssziel
-
[21] ENDLESS White Silver メタリック Impasto(VOL.5)-Axssziel [21] ENDLESS White Silver Metallic Impasto(VOL.5)-Axssziel
-
[20] ENDLESS White Silver メタリック Impasto(第5巻)-Axssziel [20] ENDLESS White Silver Metallic Impasto(VOL.5)-Axssziel
-
[19] ENDLESS ホワイトシルバーメタリックインパスト(VOL.5)-Axssziel [19] ENDLESS White Silver Metallic Impasto(VOL.5)-Axssziel
-
[18] ENDLESS White Silver メタリック Impasto(VOL.5)-Axssziel [18] ENDLESS White Silver Metallic Impasto(VOL.5)-Axssziel
-
[17] ENDLESS ホワイトシルバーメタリックインパスト(VOL.5)-Axssziel [17] ENDLESS White Silver Metallic Impasto(VOL.5)-Axssziel
-
[16] ENDLESS White Silver メタリック Impasto(VOL.5)-Axssziel [16] ENDLESS White Silver Metallic Impasto(VOL.5)-Axssziel
-
[15] ENDLESS White Silver メタリック Impasto(VOL.5)-Axssziel [15] ENDLESS White Silver Metallic Impasto(VOL.5)-Axssziel
-
[14] ENDLESS White Silver メタリック Impasto(第5巻)-Axssziel [14] ENDLESS White Silver Metallic Impasto(VOL.5)-Axssziel
-
[13] ENDLESS ホワイトシルバーメタリックインパスト(VOL.5)-Axssziel [13] ENDLESS White Silver Metallic Impasto(VOL.5)-Axssziel
-
[12] ENDLESS White Silver メタリック Impasto(VOL.5)-Axssziel [12] ENDLESS White Silver Metallic Impasto(VOL.5)-Axssziel
-
[11] ENDLESS White Silver メタリック Impasto(VOL.5)-Axssziel [11] ENDLESS White Silver Metallic Impasto(VOL.5)-Axssziel
-
[10] ENDLESS ホワイトシルバーメタリックインパスト(VOL.5)-Axssziel [10] ENDLESS White Silver Metallic Impasto(VOL.5)-Axssziel
-
[9] ENDLESS ホワイトシルバーメタリックインパスト(VOL.5)-Axssziel [9] ENDLESS White Silver Metallic Impasto(VOL.5)-Axssziel
-
[8] ENDLESS White Silver メタリック Impasto(VOL.5)-Axssziel [8] ENDLESS White Silver Metallic Impasto(VOL.5)-Axssziel
-
[7] ENDLESS White Silver メタリック Impasto(VOL.5)-Axssziel [7] ENDLESS White Silver Metallic Impasto(VOL.5)-Axssziel
-
[6] ENDLESS White Silver メタリック Impasto(VOL.5)-Axssziel [6] ENDLESS White Silver Metallic Impasto(VOL.5)-Axssziel
-
[5] ENDLESS ホワイトシルバーメタリックインパスト(VOL.5)-アクスツィール [5] ENDLESS White Silver Metallic Impasto(VOL.5)-Axssziel
-
[4] ENDLESS White Silver メタリック Impasto(VOL.5)-Axssziel [4] ENDLESS White Silver Metallic Impasto(VOL.5)-Axssziel
-
[3] ENDLESS White Silver メタリック Impasto(VOL.5)-Axssziel [3] ENDLESS White Silver Metallic Impasto(VOL.5)-Axssziel
-
[21] ENDLESS シルバーメタリックオイル/アクリルインパスト(VOL.5)-Axssziel [21] ENDLESS Silver Metallic Oil/Acrylic Impasto(VOL.5)-Axssziel
-
[20] ENDLESS シルバーメタリックオイル/アクリルインパスト(VOL.5)-Axssziel [20] ENDLESS Silver Metallic Oil/Acrylic Impasto(VOL.5)-Axssziel
-
[2] ENDLESS White Silver メタリック Impasto(VOL.5)-Axssziel [2] ENDLESS White Silver Metallic Impasto(VOL.5)-Axssziel
-
[1] ENDLESS ホワイトシルバーメタリックインパスト(VOL.5)-Axssziel [1] ENDLESS White Silver Metallic Impasto(VOL.5)-Axssziel
-
[19] ENDLESS シルバーメタリックオイル/アクリルインパスト(VOL.5)-Axssziel [19] ENDLESS Silver Metallic Oil/Acrylic Impasto(VOL.5)-Axssziel
-
[18] ENDLESS シルバーメタリックオイル/アクリルインパスト(VOL.5)-Axssziel [18] ENDLESS Silver Metallic Oil/Acrylic Impasto(VOL.5)-Axssziel
-
[17] ENDLESS シルバーメタリックオイル/アクリルインパスト(VOL.5)-Axssziel [17] ENDLESS Silver Metallic Oil/Acrylic Impasto(VOL.5)-Axssziel
-
[16] ENDLESS シルバーメタリックオイル/アクリルインパスト(VOL.5)-Axssziel [16] ENDLESS Silver Metallic Oil/Acrylic Impasto(VOL.5)-Axssziel
-
[15] ENDLESS シルバーメタリックオイル/アクリルインパスト(VOL.5)-Axssziel [15] ENDLESS Silver Metallic Oil/Acrylic Impasto(VOL.5)-Axssziel
-
[14] ENDLESS シルバーメタリックオイル/アクリルインパスト(VOL.5)-Axssziel [14] ENDLESS Silver Metallic Oil/Acrylic Impasto(VOL.5)-Axssziel
-
[13] ENDLESS シルバーメタリックオイル/アクリルインパスト(VOL.5)-Axssziel [13] ENDLESS Silver Metallic Oil/Acrylic Impasto(VOL.5)-Axssziel
-
[12] ENDLESS シルバーメタリックオイル/アクリルインパスト(VOL.5)-Axssziel [12] ENDLESS Silver Metallic Oil/Acrylic Impasto(VOL.5)-Axssziel
-
[11] ENDLESS シルバーメタリックオイル/アクリルインパスト(VOL.5)-Axssziel [11] ENDLESS Silver Metallic Oil/Acrylic Impasto(VOL.5)-Axssziel
-
[10] ENDLESS シルバーメタリックオイル/アクリルインパスト(VOL.5)-Axssziel [10] ENDLESS Silver Metallic Oil/Acrylic Impasto(VOL.5)-Axssziel
-
[9] ENDLESS シルバーメタリックオイル/アクリルインパスト(VOL.5)-Axssziel [9] ENDLESS Silver Metallic Oil/Acrylic Impasto (VOL.5)-Axssziel
-
[8] ENDLESS シルバーメタリックオイル/アクリルインパスト(第5巻)-Axssziel [8] ENDLESS Silver Metallic Oil/Acrylic Impasto (VOL.5)-Axssziel
-
[7] ENDLESS シルバーメタリックオイル/アクリルインパスト(VOL.5)-Axssziel [7] ENDLESS Silver Metallic Oil/Acrylic Impasto (VOL.5)-Axssziel
-
[6] ENDLESS シルバーメタリックオイル/アクリルインパスト(VOL.5)-Axssziel [6] ENDLESS Silver Metallic Oil/Acrylic Impasto (VOL.5)-Axssziel
-
[5] ENDLESS シルバーメタリックオイル/アクリルインパスト(第5巻)-Axssziel [5] ENDLESS Silver Metallic Oil/Acrylic Impasto (VOL.5)-Axssziel
-
[4] ENDLESS シルバーメタリックオイル/アクリルインパスト(第5巻)-Axssziel [4] ENDLESS Silver Metallic Oil/Acrylic Impasto (VOL.5)-Axssziel
-
[3] ENDLESS Silver Metallic Oil/Acrylic Impasto (VOL.5) - Axssziel [3] ENDLESS Silver Metallic Oil/Acrylic Impasto (VOL.5)-Axssziel
-
[2] ENDLESS シルバーメタリックオイル/アクリルインパスト(VOL.5)-Axssziel [2] ENDLESS Silver Metallic Oil/Acrylic Impasto (VOL.5)-Axssziel
-
[21] ROSE GOLD メタリックオイル/アクリルインパスト(VOL.5)-Axssziel [21] ROSE GOLD Metallic Oil/Acrylic Impasto (VOL.5)-Axssziel
-
[20] ROSE GOLD メタリックオイル/アクリルインパスト(第5巻)-Axssziel [20] ROSE GOLD Metallic Oil/Acrylic Impasto (VOL.5)-Axssziel
-
[19] ROSE GOLD メタリックオイル/アクリルインパスト(第5巻)-Axssziel [19] ROSE GOLD Metallic Oil/Acrylic Impasto (VOL.5)-Axssziel
-
[18] ROSE GOLD メタリックオイル/アクリルインパスト(第5巻)-Axssziel [18] ROSE GOLD Metallic Oil/Acrylic Impasto (VOL.5)-Axssziel
-
[1] ENDLESS シルバーメタリックオイル/アクリルインパスト(VOL.5)-Axssziel [1] ENDLESS Silver Metallic Oil/Acrylic Impasto (VOL.5)-Axssziel
-
[17] ROSE GOLD メタリックオイル/アクリルインパスト(第5巻)-Axssziel [17] ROSE GOLD Metallic Oil/Acrylic Impasto (VOL.5)-Axssziel
-
[16] ROSE GOLD メタリックオイル/アクリルインパスト(第5巻)-Axssziel [16] ROSE GOLD Metallic Oil/Acrylic Impasto (VOL.5)-Axssziel
-
[15] ROSE GOLD メタリックオイル/アクリルインパスト(VOL.5)-Axssziel [15] ROSE GOLD Metallic Oil/Acrylic Impasto (VOL.5)-Axssziel
-
[14] ROSE GOLD メタリックオイル/アクリルインパスト(第5巻)-Axssziel [14] ROSE GOLD Metallic Oil/Acrylic Impasto (VOL.5)-Axssziel
-
[13] ROSE GOLD メタリックオイル/アクリルインパスト(第5巻)-Axssziel [13] ROSE GOLD Metallic Oil/Acrylic Impasto (VOL.5)-Axssziel
-
[12] ROSE GOLD メタリックオイル/アクリルインパスト(VOL.5)-Axssziel [12] ROSE GOLD Metallic Oil/Acrylic Impasto (VOL.5)-Axssziel
-
[11] ROSE GOLD メタリックオイル/アクリルインパスト(第5巻)-Axssziel [11] ROSE GOLD Metallic Oil/Acrylic Impasto (VOL.5)-Axssziel
-
[10] ROSE GOLD メタリックオイル/アクリルインパスト(第5巻)-Axssziel [10] ROSE GOLD Metallic Oil/Acrylic Impasto (VOL.5)-Axssziel
-
[9] ROSE GOLD メタリックオイル/アクリルインパスト(第5巻)-Axssziel [9] ROSE GOLD Metallic Oil/Acrylic Impasto (VOL.5)-Axssziel
-
[8] ROSE GOLD メタリックオイル/アクリルインパスト(VOL.5)-Axssziel [8] ROSE GOLD Metallic Oil/Acrylic Impasto (VOL.5)-Axssziel
-
[7] ROSE GOLD メタリックオイル/アクリルインパスト(VOL.5)-Axssziel [7] ROSE GOLD Metallic Oil/Acrylic Impasto (VOL.5)-Axssziel
-
[6] ROSE GOLD メタリックオイル/アクリルインパスト(第5巻)-Axssziel [6] ROSE GOLD Metallic Oil/Acrylic Impasto (VOL.5)-Axssziel
-
[5] ローズゴールド メタリックオイル/アクリルインパスト(第5巻)-アックスジール [5] ROSE GOLD Metallic Oil/Acrylic Impasto (VOL.5)-Axssziel
-
[4] ROSE GOLD メタリックオイル/アクリルインパスト(VOL.5)-Axssziel [4] ROSE GOLD Metallic Oil/Acrylic Impasto (VOL.5)-Axssziel
-
[3] ROSE GOLD メタリックオイル/アクリルインパスト(VOL.5)-Axssziel [3] ROSE GOLD Metallic Oil/Acrylic Impasto (VOL.5)-Axssziel
-
[2] ROSE GOLD メタリックオイル/アクリルインパスト(第5巻)-Axssziel [2] ROSE GOLD Metallic Oil/Acrylic Impasto (VOL.5)-Axssziel
-
[1] ROSE GOLD メタリックオイル/アクリルインパスト(第5巻)-Axssziel [1] ROSE GOLD Metallic Oil/Acrylic Impasto (VOL.5)-Axssziel
-
[21] GOLD メタリックオイル/アクリルインパスト(VOL.5)-Axssziel [21] GOLD Metallic Oil/Acrylic Impasto (VOL.5)-Axssziel
-
[20] GOLD メタリックオイル/アクリルインパスト(第5巻)-Axssziel [20] GOLD Metallic Oil/Acrylic Impasto (VOL.5)-Axssziel
-
[19] GOLD メタリックオイル/アクリルインパスト(第5巻)-Axssziel [19] GOLD Metallic Oil/Acrylic Impasto (VOL.5)-Axssziel
-
[18] GOLD メタリックオイル/アクリルインパスト(VOL.5)-Axssziel [18] GOLD Metallic Oil/Acrylic Impasto (VOL.5)-Axssziel
-
[17] GOLD メタリックオイル/アクリルインパスト(第5巻)-Axssziel [17] GOLD Metallic Oil/Acrylic Impasto (VOL.5)-Axssziel
-
[16] GOLD メタリックオイル/アクリルインパスト(第5巻)-Axssziel [16] GOLD Metallic Oil/Acrylic Impasto (VOL.5)-Axssziel
-
[15] GOLD メタリックオイル/アクリルインパスト(第5巻)-Axssziel [15] GOLD Metallic Oil/Acrylic Impasto (VOL.5)-Axssziel
-
[14] GOLD メタリックオイル/アクリルインパスト(VOL.5)-Axssziel [14] GOLD Metallic Oil/Acrylic Impasto (VOL.5)-Axssziel
-
[13] GOLD メタリックオイル/アクリルインパスト(第5巻)-Axssziel [13] GOLD Metallic Oil/Acrylic Impasto (VOL.5)-Axssziel
-
[12] GOLD メタリックオイル/アクリルインパスト(第5巻)-Axssziel [12] GOLD Metallic Oil/Acrylic Impasto (VOL.5)-Axssziel
-
[11] GOLD メタリックオイル/アクリルインパスト(VOL.5)-Axssziel [11] GOLD Metallic Oil/Acrylic Impasto (VOL.5)-Axssziel
-
[10] GOLD メタリックオイル/アクリルインパスト(VOL.5)-Axssziel [10] GOLD Metallic Oil/Acrylic Impasto (VOL.5)-Axssziel
-
[9] GOLD メタリックオイル/アクリルインパスト(VOL.5)-Axssziel [9] GOLD Metallic Oil/Acrylic Impasto (VOL.5)-Axssziel
-
[8] GOLD メタリックオイル/アクリルインパスト(VOL.5)-Axssziel [8] GOLD Metallic Oil/Acrylic Impasto (VOL.5)-Axssziel
-
[7] GOLD メタリックオイル/アクリルインパスト(VOL.5)-Axssziel [7] GOLD Metallic Oil/Acrylic Impasto (VOL.5)-Axssziel
-
[6] GOLD メタリックオイル/アクリルインパスト(VOL.5)-Axssziel [6] GOLD Metallic Oil/Acrylic Impasto (VOL.5)-Axssziel
-
[5] GOLD メタリックオイル/アクリルインパスト(VOL.5)-Axssziel [5] GOLD Metallic Oil/Acrylic Impasto (VOL.5)-Axssziel
-
[4] GOLD メタリックオイル/アクリルインパスト(第5巻)-Axssziel [4] GOLD Metallic Oil/Acrylic Impasto (VOL.5)-Axssziel
-
[21] ホワイトシルバーメタリックオイル/アクリルインパスト(第5巻)-アクスツィール [21] White Silver Metallic Oil/Acrylic Impasto (VOL.5)-Axssziel
-
[20] ホワイトシルバーメタリックオイル/アクリルインパスト(第5巻)-Axssziel [20] White Silver Metallic Oil/Acrylic Impasto (VOL.5)-Axssziel
-
[3] GOLD メタリックオイル/アクリルインパスト(第5巻)-Axssziel [3] GOLD Metallic Oil/Acrylic Impasto (VOL.5)-Axssziel
-
[2] GOLD メタリックオイル/アクリルインパスト(第5巻)-Axssziel [2] GOLD Metallic Oil/Acrylic Impasto (VOL.5)-Axssziel
-
[1] GOLD メタリックオイル/アクリルインパスト(VOL.5)-Axssziel [1] GOLD Metallic Oil/Acrylic Impasto (VOL.5)-Axssziel
-
[19] ホワイトシルバーメタリックオイル/アクリルインパスト(第5巻)-アクスツィール [19] White Silver Metallic Oil/Acrylic Impasto (VOL.5)-Axssziel
-
[18] ホワイトシルバーメタリックオイル/アクリルインパスト(第5巻)-Axssziel [18] White Silver Metallic Oil/Acrylic Impasto (VOL.5)-Axssziel
-
[17] ホワイトシルバーメタリックオイル/アクリルインパスト(第5巻)-アクスツィール [17] White Silver Metallic Oil/Acrylic Impasto (VOL.5)-Axssziel
-
[16] ホワイトシルバーメタリックオイル/アクリルインパスト(第5巻)-アクスツィール [16] White Silver Metallic Oil/Acrylic Impasto (VOL.5)-Axssziel
-
[15] ホワイトシルバーメタリックオイル/アクリルインパスト(第5巻)-アックスジール [15] White Silver Metallic Oil/Acrylic Impasto (VOL.5)-Axssziel
-
[14] ホワイトシルバーメタリックオイル/アクリルインパスト(第5巻)-アックスツィール [14] White Silver Metallic Oil/Acrylic Impasto (VOL.5)-Axssziel
-
[13] ホワイトシルバーメタリックオイル/アクリルインパスト(第5巻)-アクスツィール [13] White Silver Metallic Oil/Acrylic Impasto (VOL.5)-Axssziel
-
[12] ホワイトシルバーメタリックオイル/アクリルインパスト(第5巻)-アックスツィール [12] White Silver Metallic Oil/Acrylic Impasto (VOL.5)-Axssziel
-
[11] ホワイトシルバーメタリックオイル/アクリルインパスト(第5巻)-アックスツィール [11] White Silver Metallic Oil/Acrylic Impasto (VOL.5)-Axssziel
-
[10] ホワイトシルバーメタリックオイル/アクリルインパスト(第5巻)-アクセシエル [10] White Silver Metallic Oil/Acrylic Impasto (VOL.5)-Axssziel
-
[9] ホワイトシルバーメタリックオイル/アクリルインパスト(第5巻)-アクスツィール [9] White Silver Metallic Oil/Acrylic Impasto (VOL.5)-Axssziel
-
[8] ホワイトシルバーメタリックオイル/アクリルインパスト(第5巻)-アクスツィール [8] White Silver Metallic Oil/Acrylic Impasto (VOL.5)-Axssziel
-
[7] ホワイトシルバーメタリックオイル/アクリルインパスト(第5巻)-アクスツィール [7] White Silver Metallic Oil/Acrylic Impasto (VOL.5)-Axssziel
-
[6] ホワイトシルバーメタリックオイル/アクリルインパスト(第5巻)-アクスツィール [6] White Silver Metallic Oil/Acrylic Impasto (VOL.5)-Axssziel
-
[5] ホワイトシルバーメタリックオイル/アクリルインパスト(VOL.5)-アクスツィール [5] White Silver Metallic Oil/Acrylic Impasto (VOL.5)-Axssziel
-
[4] ホワイトシルバーメタリックオイル/アクリルインパスト(第5巻)-アックスツィール [4] White Silver Metallic Oil/Acrylic Impasto (VOL.5)-Axssziel
-
[3] ホワイトシルバーメタリックオイル/アクリルインパスト(VOL.5)-Axssziel [3] White Silver Metallic Oil/Acrylic Impasto (VOL.5)-Axssziel
-
[2] ホワイトシルバーメタリックオイル/アクリルインパスト(第5巻)-アクスツィール [2] White Silver Metallic Oil/Acrylic Impasto (VOL.5)-Axssziel
-
[21] シルバーメタリックオイル/アクリルインパスト(第5巻)-Axssziel [21] Silver Metallic Oil/Acrylic Impasto (VOL.5)-Axssziel
-
[20] シルバーメタリックオイル/アクリルインパスト(第5巻)-アクスツィール [20] Silver Metallic Oil/Acrylic Impasto (VOL.5)-Axssziel
-
[19] シルバーメタリックオイル/アクリルインパスト(第5巻)-アクスツィール [19] Silver Metallic Oil/Acrylic Impasto (VOL.5)-Axssziel
-
[18] シルバーメタリックオイル/アクリルインパスト(第5巻)-アクスジール [18] Silver Metallic Oil/Acrylic Impasto (VOL.5)-Axssziel
-
[1] ホワイトシルバーメタリックオイル/アクリルインパスト(第5巻)-アクスジール [1] White Silver Metallic Oil/Acrylic Impasto (VOL.5)-Axssziel
-
[17] シルバーメタリックオイル/アクリルインパスト(第5巻)-アックスツィール [17] Silver Metallic Oil/Acrylic Impasto (VOL.5)-Axssziel
-
[16] シルバーメタリックオイル/アクリルインパスト(第5巻)-アクスツィール [16] Silver Metallic Oil/Acrylic Impasto (VOL.5)-Axssziel
-
[15] シルバーメタリックオイル/アクリルインパスト(第5巻)-アクスツィール [15] Silver Metallic Oil/Acrylic Impasto (VOL.5)-Axssziel
-
[14] シルバーメタリックオイル/アクリルインパスト(第5巻)-アクスツィール [14] Silver Metallic Oil/Acrylic Impasto (VOL.5)-Axssziel
-
[13] シルバーメタリックオイル/アクリルインパスト(第5巻)-アクスツィール [13] Silver Metallic Oil/Acrylic Impasto (VOL.5)-Axssziel
-
[12] シルバーメタリックオイル/アクリルインパスト(第5巻)-アックスツィール [12] Silver Metallic Oil/Acrylic Impasto (VOL.5)-Axssziel
-
[11] シルバーメタリックオイル/アクリルインパスト(第5巻)-アクスツィール [11] Silver Metallic Oil/Acrylic Impasto (VOL.5)-Axssziel
-
[10] シルバーメタリックオイル/アクリルインパスト(第5巻)-アクスツィール [10] Silver Metallic Oil/Acrylic Impasto (VOL.5)-Axssziel
-
[9] シルバーメタリックオイル/アクリルインパスト(第5巻)-アクスツィール [9] Silver Metallic Oil/Acrylic Impasto (VOL.5)-Axssziel
-
[8] シルバーメタリックオイル/アクリルインパスト(VOL.5)-アックスツィール [8] Silver Metallic Oil/Acrylic Impasto (VOL.5)-Axssziel
-
[7] シルバーメタリックオイル/アクリルインパスト(VOL.5)-アクスツィール [7] Silver Metallic Oil/Acrylic Impasto (VOL.5)-Axssziel
-
[6] シルバーメタリックオイル/アクリルインパスト(第5巻)-アクスツィール [6] Silver Metallic Oil/Acrylic Impasto (VOL.5)-Axssziel
-
[5] シルバーメタリックオイル/アクリルインパスト(第5巻)-アクスツィール [5] Silver Metallic Oil/Acrylic Impasto (VOL.5)-Axssziel
-
[4] シルバーメタリックオイル/アクリルインパスト(第5巻)-アックスツィール [4] Silver Metallic Oil/Acrylic Impasto (VOL.5)-Axssziel
-
[3] シルバーメタリックオイル/アクリルインパスト(VOL.5)-アクスツィール [3] Silver Metallic Oil/Acrylic Impasto (VOL.5)-Axssziel
-
[2] シルバーメタリックオイル/アクリルインパスト(第5巻)-アクスツィール [2] Silver Metallic Oil/Acrylic Impasto (VOL.5)-Axssziel
-
[1] シルバーメタリックオイル/アクリルインパスト(VOL.5)-アクスツィール [1] Silver Metallic Oil/Acrylic Impasto (VOL.5)-Axssziel


"Axssziel"さんの別の素材


"素材集"の人気素材


新着素材


-
 MVP ◆質問に対して適切な回答を数多く投稿し、コミュニティの運営に大きく貢献したユーザーです。MVPは3ヶ月に一度、その間に獲得したポイントを元に決定し、表彰を行っています。
 -
 NVP (New Valuable Player) ◆MVPに次いでコミュニティの運営に貢献したユーザーです。これまでMVPの受賞経験のない方から、獲得したポイントを元に決定し、表彰を行なっています。
 -
 公式エキスパート ◆優れた回答者の証であるMVP受賞者の中からさらに選ばれた、コミュニティで最も優良な回答者の証です。審査を経て当社から依頼し就任いただいています。※旧名称「エバンジェリスト」
 -
 セルシス公認モデレーター ◆モデレーターは、日本語とその他の言語が話せるセルシス公認のスタッフです。ソフトウェアや創作のエキスパートではないので、直接疑問を解決することはできませんが、みなさんがスムーズにコミュニケーションできるように、言葉やコミュニケーションの側面からサポートします。
 -
 セルシス公式運営に関連した公式アカウントです。