

!使用前に指示書を必ず読んでください!
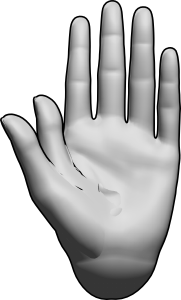
これらのモデルは、Clip Studio Paintの内蔵手模型を使って、親指がもう一つあったキャラクターを描くためのものです
!READ INSTUCTIONS BEFORE USE!
These models are for drawing characters with an extra thumb using the build in hand models made by Clip Studio Paint
!!使用前にインストラクションを必ず読んでください!!
最初のステップは手を合わせることです。

「Basic - Left 2」を「Basic Left」にドラッグします。

次は、ポーズの取り方です。
手動でポージングすることを強くおすすめします。
内蔵の手ポージングツールは100%推奨ではありませんが、それでも役立ちます。
手のポーズを貼り付けるのは推奨されません。
手のスキャナーは絶対に使わないでください。ポーズが崩れてしまいます。
メインの手を選ぶと、すべての指をアンロックできます。


アンロックされるべき指は、セカンダリーハンドを選択すると親 指 だけです。


カスタマイズ
手動ミキサーを使うのは問題ありません
指の長さを調整するのは100%推奨ではありませんが、それでも役立ちます。
手のひらのサイズを調整するのは100%推奨ではありませんが、それでも有用です。
手首を使わせるのは推奨されません。
メインの手を選ぶと、すべての指を調整できます。
調整すべき指は、セカンダリーハンドを選択するときに親指 だけです 。
例


*これらの指示は元々英語で書かれており、機械によって翻訳されているため、もし指示が奇妙に感じるならそれが理由です。
!! READ INSTUCTIONS BEFORE USE!!
The first step is to put the hands together.
Drag "Basic - Left 2" into "Basic Left".
Next up - How to pose it.
Manual posing is highly recommended.
Built-in Hand posing tools not 100% recommended but still useful.
Pasting hand poses are not recommended.
DO NOT use the hand scanner it will break the pose.
All fingers can be unlocked when the main hand is selected.
The only finger that should be unlocked is the THUMB when the secondary hand is selected.
Customization
Using the hand mixer is okay
Adjusting finger length is not 100% recommended but still useful.
Adjusting palm size is not 100% recommended but still useful.
Enabling wrist is not recommended.
All fingers can be adjusted when the main hand is selected.
The only finger that should be adjusted is the THUMB when the secondary hand is selected.
Examples
*These instructions were originally written in English and they are being translated by a machine so if the instructions seem odd that is why.
カテゴリー1 Category 1


"curtisCru"さんの別の素材

"素材集"の人気素材


新着素材


バッジ
-
 MVP ◆質問に対して適切な回答を数多く投稿し、コミュニティの運営に大きく貢献したユーザーです。MVPは3ヶ月に一度、その間に獲得したポイントを元に決定し、表彰を行っています。
 -
 NVP (New Valuable Player) ◆MVPに次いでコミュニティの運営に貢献したユーザーです。これまでMVPの受賞経験のない方から、獲得したポイントを元に決定し、表彰を行なっています。
 -
 公式エキスパート ◆優れた回答者の証であるMVP受賞者の中からさらに選ばれた、コミュニティで最も優良な回答者の証です。審査を経て当社から依頼し就任いただいています。※旧名称「エバンジェリスト」
 -
 セルシス公認モデレーター ◆モデレーターは、日本語とその他の言語が話せるセルシス公認のスタッフです。ソフトウェアや創作のエキスパートではないので、直接疑問を解決することはできませんが、みなさんがスムーズにコミュニケーションできるように、言葉やコミュニケーションの側面からサポートします。
 -
 セルシス公式運営に関連した公式アカウントです。