
Live2D用のVtuberモデルセットアップ (Vtuber Model SetUp for Live2D) Vtuber Model SetUp for Live2D
コンテンツID:2252285
-
170

Live2D用のレイヤー設定テンプレート Template for the layers's configuration for Live2D
これは 自分で作った色 分けレイヤー のテンプレート で、 色付きのレイヤー の方が欲しいものを見つけ やすい ので、色分けしたものを用意した方が良いです!


この素材は何をするのでしょうか?
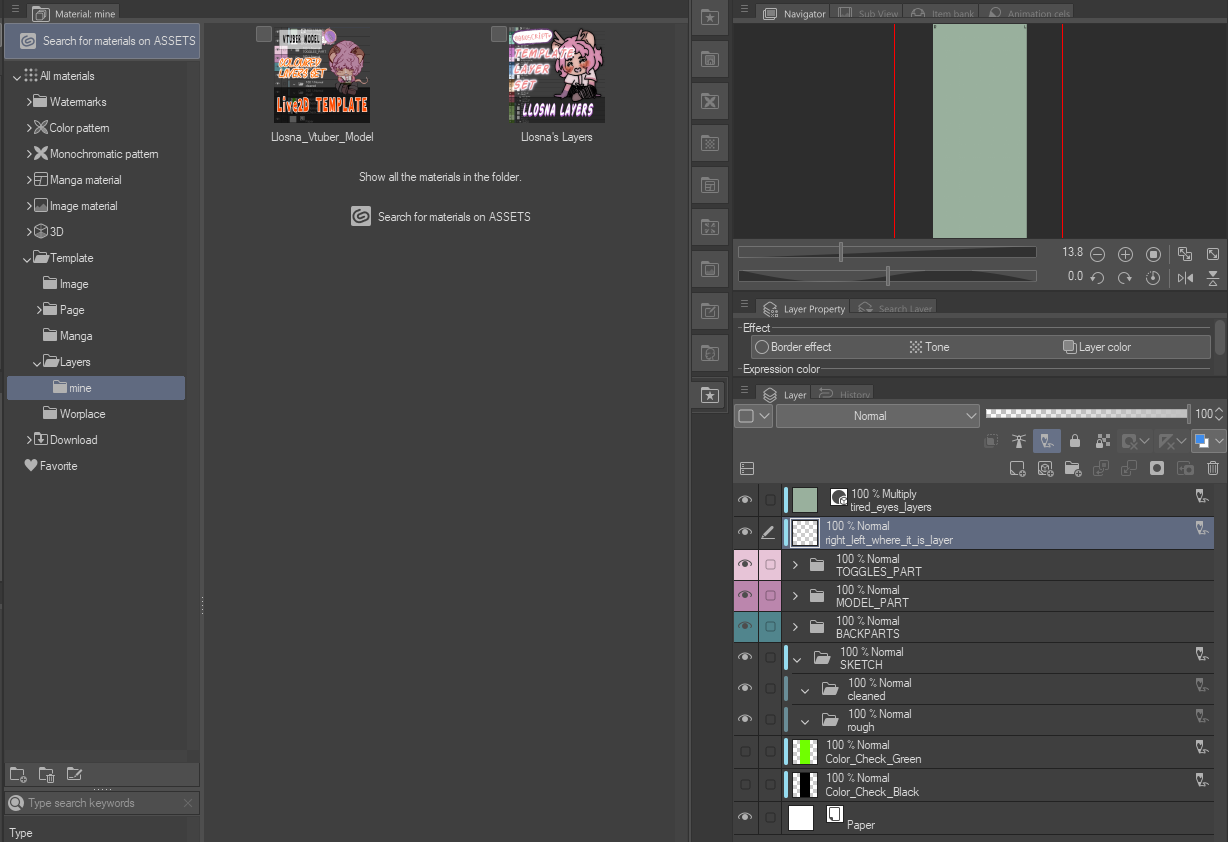
このテンプレート はイラストに加え 、 複数のネム付き フォルダ、 サブフォルダ 、 レイヤーを追加し、 VTuber モデル をレイヤー 化 して リギングの 準備 を整 えます。
主に三 つのカテゴリー に分け られます 。
- トグル |ライトピンク
- ボディ|パープル
- バックパート |ダックグリーン
各 フォルダとレイヤーはLive2Dリギング用に指定 されています
すべて 空 のレイヤーで、 最も 基本的な レイヤーを挿入しました 。レイヤーやフォルダは好きなように追加・ 削除 できます 。
レイヤー名に空白 を入れ ないように 注意 してください。Live2Dは 名前を削除 して 「ArtMesh」に置き換え ます 。
アンダースコアはあなたの最高の友達です :3
「R」と「L」のスイッチの配置はアーティストやリガーの好みによって変わりますが、私は個人的に名前の最後に置くのが好きで、すべて名前の最後に置くのが好きです。
メインフォルダ は大文字で、サブフォルダやレイヤー名は小文字です 。
Live2Dでは消去またはオフに切り替えるためのレイヤーが4つ作成されています。
- 目の精疲労層:画面による目の疲れを和らげる層です
- R and L:ページの両面に「R」と「L」と書かれたレイヤーで、Vtuber モデルの右と左を覚えやすくします
- グリーンフィル:消すための色のスポットを見つけるためのレイヤーです
- ブラックフィル:消すためのカラースポットを見つけるためのレイヤー
どうやって設定すればいいですか?
まず「template」ボタンのgをクリックし、「downloaded material」から検索するか、検索オプションで「LLOSNA」と入力して追加できます

あるいは、素材からレイヤーにドラッグして移動させる方法もあります。

追加するとこう見えます:

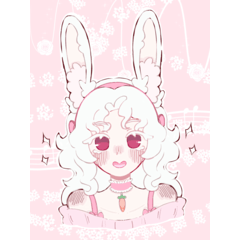
モデルが完成 したときの様子はこんな感じです
(私の古いVTuberモデルから引用)

これでモデルをリギングに送る良い基礎になるはずです!
そして、必ず高解像度のページを作成することを忘れないでください!
上に行くより下がる方がいつも楽です。
楽しんでください!
This is a colour coded layers template I made for myself, because I prefer to have my layers with colours, as it is easier for me to find what I want !
WHAT DOES THIS MATERIAL DO ?
This template add to your illustration, multiple nammed folders, subfolders and layers to help you layer your VTuber Model to make it ready for Rigging.
It is separated in three main categories :
- Toggle | Light Pink
- Body | Purple
- BackPart | Duck green
Each folders and layers are nammed for Live2D Rigging in mind
They are all empty layers, I inserted the most basic layers, you can add and remove layers and folders as your heart content,
Just remember to not leave space in your layer's name, because Live2D will remove the name and replace it with "ArtMesh".
Underscore are your best friend :3
The placement of "R" and "L" switch depending of artist's and rigger's preference, I, personally, prefer mine at the end, so they all are at the end of the name.
The main folder are in uppercase, the subfolders as well as layers's name are in lowercase.
There are four layers created to either erase, or toggle off for Live2D.
- Eye-strain layers : A layer to help with the eye strain from the screen
- R and L : A Layer with "R" and "L" written on each side of the page, to help you remember which side is the right and left for your Vtuber Model
- Green fill : A layer to help you find colour spot to erase
- Black fill : A layer to help you find colour spot to erase
HOW TO SET UP ?
You can add it first by clicking on the "template" button and searching it from "downloaded material"or writing "LLOSNA" in the search option
Or by dragging it to your layers, from your materials.
This is how it looks when you add it :
And this is how it looks once you are done with your model
(Taken from my old Vtuber Model) :
This should give you a good base for sending your model to rigging !
And don't forget to ALWAYS create a page in high resolution !
It's always easier to go down than up.
Have fun !


"Llsona"さんの別の素材

"レイヤーテンプレート"の人気素材


新着素材


バッジ
-
 MVP ◆質問に対して適切な回答を数多く投稿し、コミュニティの運営に大きく貢献したユーザーです。MVPは3ヶ月に一度、その間に獲得したポイントを元に決定し、表彰を行っています。
 -
 NVP (New Valuable Player) ◆MVPに次いでコミュニティの運営に貢献したユーザーです。これまでMVPの受賞経験のない方から、獲得したポイントを元に決定し、表彰を行なっています。
 -
 公式エキスパート ◆優れた回答者の証であるMVP受賞者の中からさらに選ばれた、コミュニティで最も優良な回答者の証です。審査を経て当社から依頼し就任いただいています。※旧名称「エバンジェリスト」
 -
 セルシス公認モデレーター ◆モデレーターは、日本語とその他の言語が話せるセルシス公認のスタッフです。ソフトウェアや創作のエキスパートではないので、直接疑問を解決することはできませんが、みなさんがスムーズにコミュニケーションできるように、言葉やコミュニケーションの側面からサポートします。
 -
 セルシス公式運営に関連した公式アカウントです。