
Fetlock Better Bromines + グラジエントセット (Fetlock Better Bromines + Gradient Set) Fetlock Better Bromines + Gradient Set
コンテンツID:2169088
-
412

グラデーションマップを使用して「臭素トリック」を実行する自動アクションと、後で使用するグラデーションの小さな選択。 An auto action to do the 'bromine trick' with gradient maps, as well as a small selection of gradients to use afterwards.
下から色を塗れる臭素のハックが欲しいですか?作品の準備に面倒な手間をかけずに済むように。
どの色の臭素にするか迷っていますか?
これがあなたのためのパックです!
1. かなりシンプルな前提で機能するレイヤーテンプレート:基本的にすべての臭素の技術は、グラデーションマップといくつかの適切な設定のフォルダでできるようなことを5,000ステップも行っています。2秒。
2. フォルダセットの特性に合わせて特別に調整されたグラデーションのセット。すでにグラデーションマップセットがあまり多くなく、CSPのデフォルトマップの見た目が気に入らない場合は。これらを使うには、最初に表示される グラデーションの代わりに使うと、フォルダ内でどのグラデーションが使われているかを切り替えればいいのです。


FAQ:
Q: 臭素層を使っていますが、色がうまくいっていません。
A: 臭素線の層に純粋な黒を使っているか確認してください。さらに、木目や透明ブラシがこの方法に最も合っています!Gペンやそれに似た100%不透明度の単線は、色の変化はわずかな程度です。とはいえ、線を複製して下にガウスをぼかすと、面白い伝統的なセルエフェクトを作るのに良い方法かもしれません。
Q: 色は使えません。すべてが臭素色になってしまいます...

Q: この効果は好きですが、作品ごとに異なる色で臭素効果を出したいです。これを実現する方法はありますか?
A: はい、でも散らかってしまいます。複数のフォルダーを用意し、それぞれの「パーツ」(服や皮膚)を分けて保管する必要があります。例えば、紫色のブロミントリックの線作業フォルダーと、別のフォルダーにタンカラーのフォルダーなどがある、などです。
A: ツールを「すべてのレイヤー」ではなく「参照レイヤー」に設定し、「ここに線を描く」を参照にするか、ツール使用中に一時的に「白を保持」レイヤーの表示をオフにしてから再度オンにしてください。「ホワイトを保持」レイヤーは、これらの問題を避けるためにデフォルトでドラフトに設定されています。

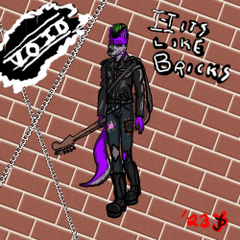
それで...楽しんでください!(これらの例 に描かれているキャラクターは私のものであり、私の雑な筆跡は私のものです)
Want a bromine hack that will allow you to do coloring underneath without doing a bunch of nonsense to get your artwork prepped?
Indecisive about what color of bromine you want?
Here's a pack for you!
1. A layer template that works under a pretty simple premise : basically every single bromine trick out there is doing five thousand steps to do what a gradient map and a couple folders with the right settings could do in like... two seconds.
2. A set of gradients specifically tuned to what the folder set does, just in case you don't have a lot of gradient map sets already, and don't like the look of CSP's default ones. To use these instead of what initially pops in just swap which gradient is being used in the folder.
FAQ :
Q: I'm using the bromine layer, but the colors aren't working right.
A: Check to make sure that you're using pure black on the bromine lines layer. Additionally, brushes with grain or transparency are the ones that work best with this trick! A G-pen or any other similar solid 100% opacity line will only have mild color changes. That being said, that could work well for making interesting traditional cel effects, if you duplicate the lines and gaussian blur the duplicate underneath.
Q: I'm not able to use color, everything is turning out bromine color...
Q: I like this effect, but I would like to be able to do the bromine effect in different colors per piece of art. Is there a way to do this?
A: Yes, but it will get cluttered; you will need to have multiple folders, with each 'piece' (clothes, skin) separated out. So you'd have a purple bromine trick linework folder, and one that has a tan color in another one, or whatnot.
A: Set the tools to 'Reference Layer' instead of 'all layers', and set 'Draw Lines Here' as the reference, or temporarily toggle the visibility of the 'Keep White' layer off while using the tool in question, and turn it back on after you do so. The 'Keep White' layer is set as a Draft by default to avoid these issues in the first place.
With that... Have fun! (Character depicted in these examples is mine, and my sloppy handwriting is mine)
臭素 The Bromines


更新履歴
初期アップロード時に一部の説明が忘れられていたため、臭素効果を動作させる際の一般的な問題を修正する方法についてさらに説明を追加しました。 added further explanation of how to fix common problems with getting the bromine effect to work, as some portions of the explanation were forgotten on the initial upload.


"AMORPHAGE"さんの別の素材


"素材集"の人気素材


新着素材


-
 MVP ◆質問に対して適切な回答を数多く投稿し、コミュニティの運営に大きく貢献したユーザーです。MVPは3ヶ月に一度、その間に獲得したポイントを元に決定し、表彰を行っています。
 -
 NVP (New Valuable Player) ◆MVPに次いでコミュニティの運営に貢献したユーザーです。これまでMVPの受賞経験のない方から、獲得したポイントを元に決定し、表彰を行なっています。
 -
 公式エキスパート ◆優れた回答者の証であるMVP受賞者の中からさらに選ばれた、コミュニティで最も優良な回答者の証です。審査を経て当社から依頼し就任いただいています。※旧名称「エバンジェリスト」
 -
 セルシス公認モデレーター ◆モデレーターは、日本語とその他の言語が話せるセルシス公認のスタッフです。ソフトウェアや創作のエキスパートではないので、直接疑問を解決することはできませんが、みなさんがスムーズにコミュニケーションできるように、言葉やコミュニケーションの側面からサポートします。
 -
 セルシス公式運営に関連した公式アカウントです。