
瞳孔グロー効果グロー(追加) 2.0 (Pupil Glow Effect Glow(Add) 2.0) Pupil Glow Effect Glow(Add) 2.0
コンテンツID:1958695
-
2,089

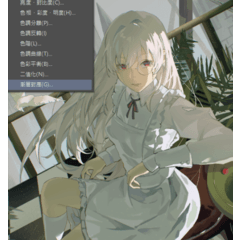
瞳孔グロー効果ブラシ!それは輝きと目のための効果を追加します。
The Pupil Glow Effect Brush! It adds Shine and an effect for eyes.
このブラシは、内側の目がグロー効果を追加するためのものです!
(テクスチャなし)
ブラシ先端は次のようになります。

A)
それを使用する1つの方法は、ブレンドモードを「標準」に設定することです。
これにより、マテリアルは選択した色(+わずかな色相の多様性)になります。
-> このようにして、別のレイヤーのレイヤー効果とともに使用できます。

B)
もう1つの方法は、ダウンロードした ブラシ を使用することです。
描画モードは「追加(グロー)」です。
- >あなたは着色層やアウトライン上で右にそれを使用することができます!

しかし、注意してください:
方法B)を使用すると、それに応じて効果を形作ることが不可能になります
あなたが描いた目に!私は最初のオプションをお勧めします。オプションA)。
vvvvvvv
最初のオプションの例と、プロセスがどのように見えるかを次に示します。
1.新しいレイヤーを追加します。レイヤーを「追加(グロー)」に設定します。
2.ブラシのブレンドモードを「通常」に設定する
3.必要な色を選択します。
4.必要な/好きな頻度をタップします。
5.瞳孔にないものをエアレスする。
6. マージ。

This Brush is for the inner Eye to add a glow effect!
(Without Textures)
The Brush Tip looks as following:
A)
One way to use it is, to set the Blending Mode to "Normal".
This will make the material have the color you choose (+ slight hue varity).
-> This way, you can use it with Layer Effects on a seperate Layer.
B)
Another way is, to use the brush as you downloaded it.
The Blending mode is "Add(glow)".
-> You can use it right on the coloring layer or on outlines!
But be Careful:
Using methode B) makes it impossible to shape the Effect according
to the eye you drew! I recommend the first option. Option A).
vvvvvv
Here an example of the first option and how the process could look:
1. Add new layer. Set Layer to "add(glow)"
2. Set Blending mode of brush to "normal"
3. Choose the color you want.
4. Tap how often you need/like it.
5. Erease what isn't on the pupil.
6. Merge.


"PetriBaron"さんの別の素材


"ブラシ"の人気素材


新着素材


バッジ
-
 MVP ◆質問に対して適切な回答を数多く投稿し、コミュニティの運営に大きく貢献したユーザーです。MVPは3ヶ月に一度、その間に獲得したポイントを元に決定し、表彰を行っています。
 -
 NVP (New Valuable Player) ◆MVPに次いでコミュニティの運営に貢献したユーザーです。これまでMVPの受賞経験のない方から、獲得したポイントを元に決定し、表彰を行なっています。
 -
 公式エキスパート ◆優れた回答者の証であるMVP受賞者の中からさらに選ばれた、コミュニティで最も優良な回答者の証です。審査を経て当社から依頼し就任いただいています。※旧名称「エバンジェリスト」
 -
 セルシス公認モデレーター ◆モデレーターは、日本語とその他の言語が話せるセルシス公認のスタッフです。ソフトウェアや創作のエキスパートではないので、直接疑問を解決することはできませんが、みなさんがスムーズにコミュニケーションできるように、言葉やコミュニケーションの側面からサポートします。
 -
 セルシス公式運営に関連した公式アカウントです。