

アニメ/マンガのような髪をより速く簡単に描くのに役立つブラシのセット A set of brushes that will help you to draw anime/manga-like hair faster and easier
これは、髪を描くためのブラシのセットです。主にマンガ/コミックに適していますが、イラストにも 適しています
■使用例をいくつかご紹介します。
カーブツールブラシ

■ 楕円ブラシ
■ヘアリング塗りつぶしブラシは、タップすると自動的に塗りつぶされますが、いくつかの隙間が残ります。ご注意下さい。
■使用上のヒント。 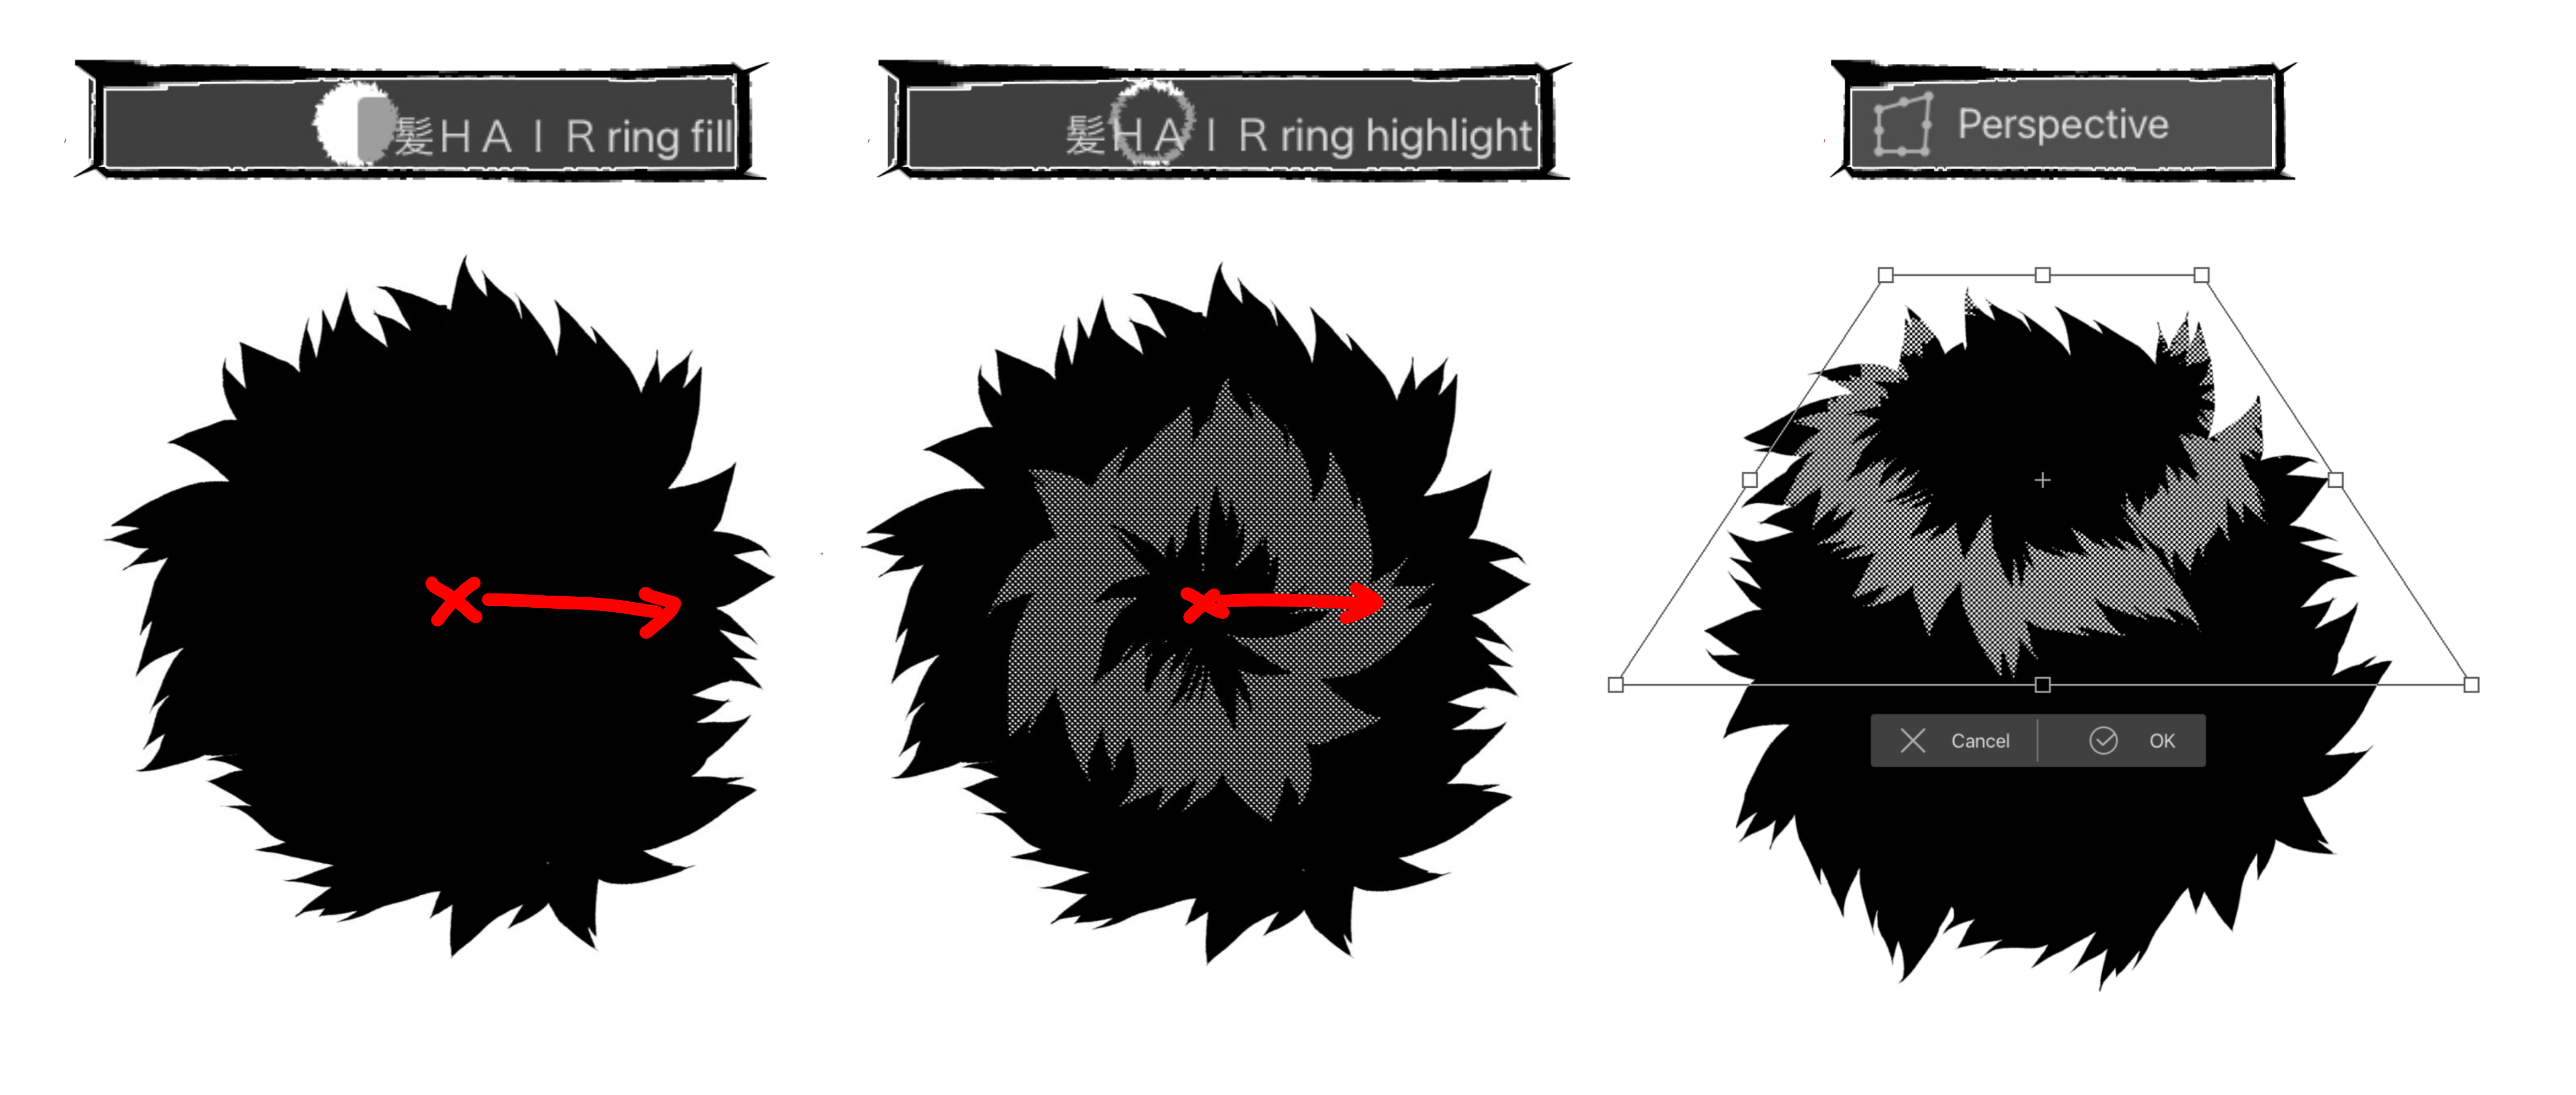
1本目のブラシ HAIR[1ストローク] は、耳から耳へと一本の線を描きます。正面/背面図から顔を描くためにこれを使用してください。
他のブラシはどんな角度にも合います。
尖ったブラシは、主に単純化された/様式化されたイラスト用です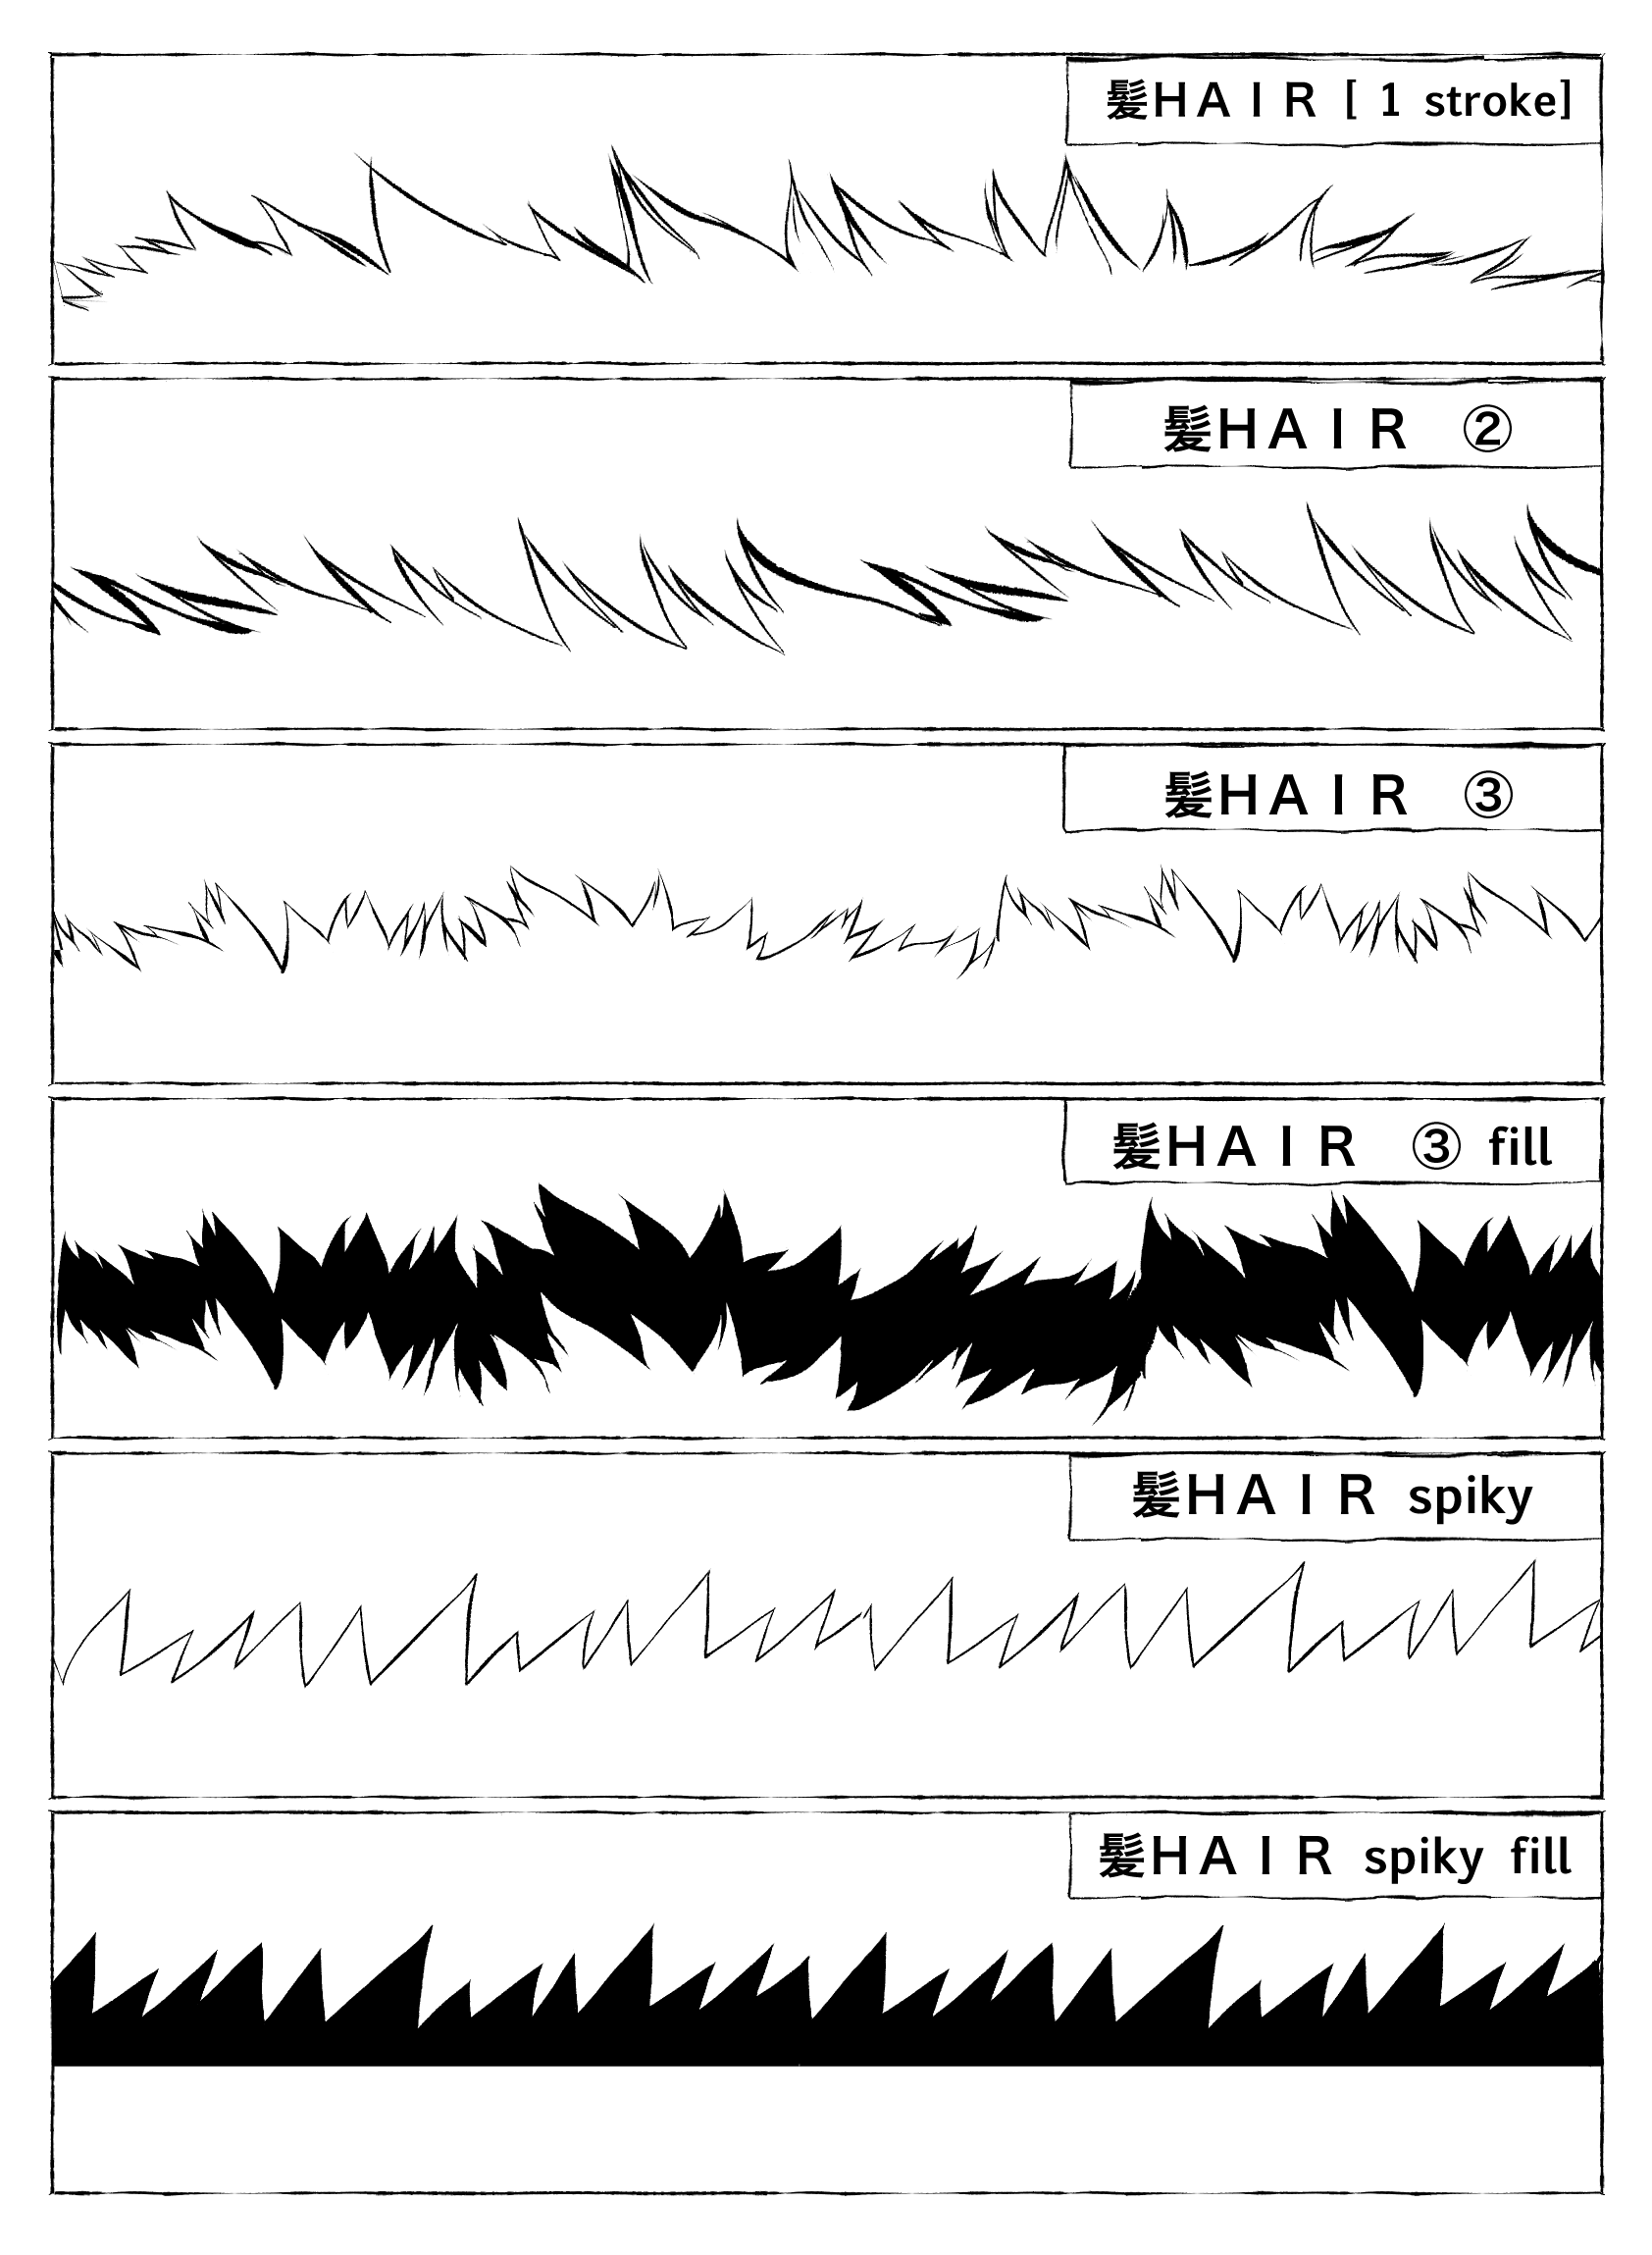


(1)頭の上に線を引きます。
(2) BANGブラシ (カーブツール)で額に線を引きます。
(3)バケツツールで塗りつぶし、欠けている部分に色を付けます。
(4)いくつかの調整を行い、欠けている部分を埋め、サイドとバックの髪を追加します。
私は基本的な 本当のGペン/リアルGpen でこれらのブラシを作成しました。調整にお使いください。

(1)強打を描きます。
(2)必要な曲線を調整します。
[このブラシを使用して、背面図から下の毛線を描画することもできます]

(1)中央からスタートし、片側を描きます。
(2)次に、垂直反転セクションをチェックし、「反転 」を選択します
(3)反対側を描きます。
(4)同じブラシで生え際を描きましたが、 ブラシサイズを変更しました。
[ THICKNESS セクションでブラシの変更を確認することもできます。異なる結果を得るには、50、100、または150に設定してみてください]
(5)いくつかの調整を行い、上と耳の近くにいくつかの髪を追加します。

■ 髪の毛の尖った ブラシ。
(1)頭の上に線を引きます。
(2)後ろと下の髪を追加します。私はそれらを手で描きました(ブラシはあまり良くありませんが、試してみるかもしれません)
(3)バケツツールで充填する
(4) LIQUIFY TOOL を使って音量を修正しました。


これらのブラシは、髪の毛の円全体を作成します。俯瞰図と背面図に使用します。ブラシのサイズを変更して、さまざまな結果が得られます。 サイズが小さいほど、髪の毛のスパイクは短くなります。
背面図の場合は、 アスペクトタイプ を W 0,8-0,9 および H 1.0に設定してください。より自然に見える形になります。
首の下部を消して、 カーブブラシ で描き直すこともできます。 パースペクティブ/マッシュトランスフォーメーション でも遊んでみてください。
[必要に応じて、見栄えを良くするためにいくつかの髪を描く]

(1)頭の中心から円を描きます。
(2)新しいレイヤーを作成し、同じ中心から小さな白い円を描きます。レイヤーをスクリーントーンに変換し、不透明度を30-50に下げます。
(3)ハイライトレイヤーに パースペクティブ変換 を使用して、角度を作成します。

This is a set of brushes for drawing hair. Mostly suits for manga/comics but works for illustration as well
■ Here are some examples of use.
■ Curve tool brush
■ Ellipse brushes
■ The HAIR ring fill brush fills automatically when you tap BUT it leaves some gaps. Pay attention, please.
■ Some tips on usage.
The 1st brush HAIR [1 stroke] draws a single line from ear to ear. Use this one for drawing faces from the front/back view, please.
Other brushes suit for any angle.
The spiky brushes are mostly for simplified/stylised illustrations
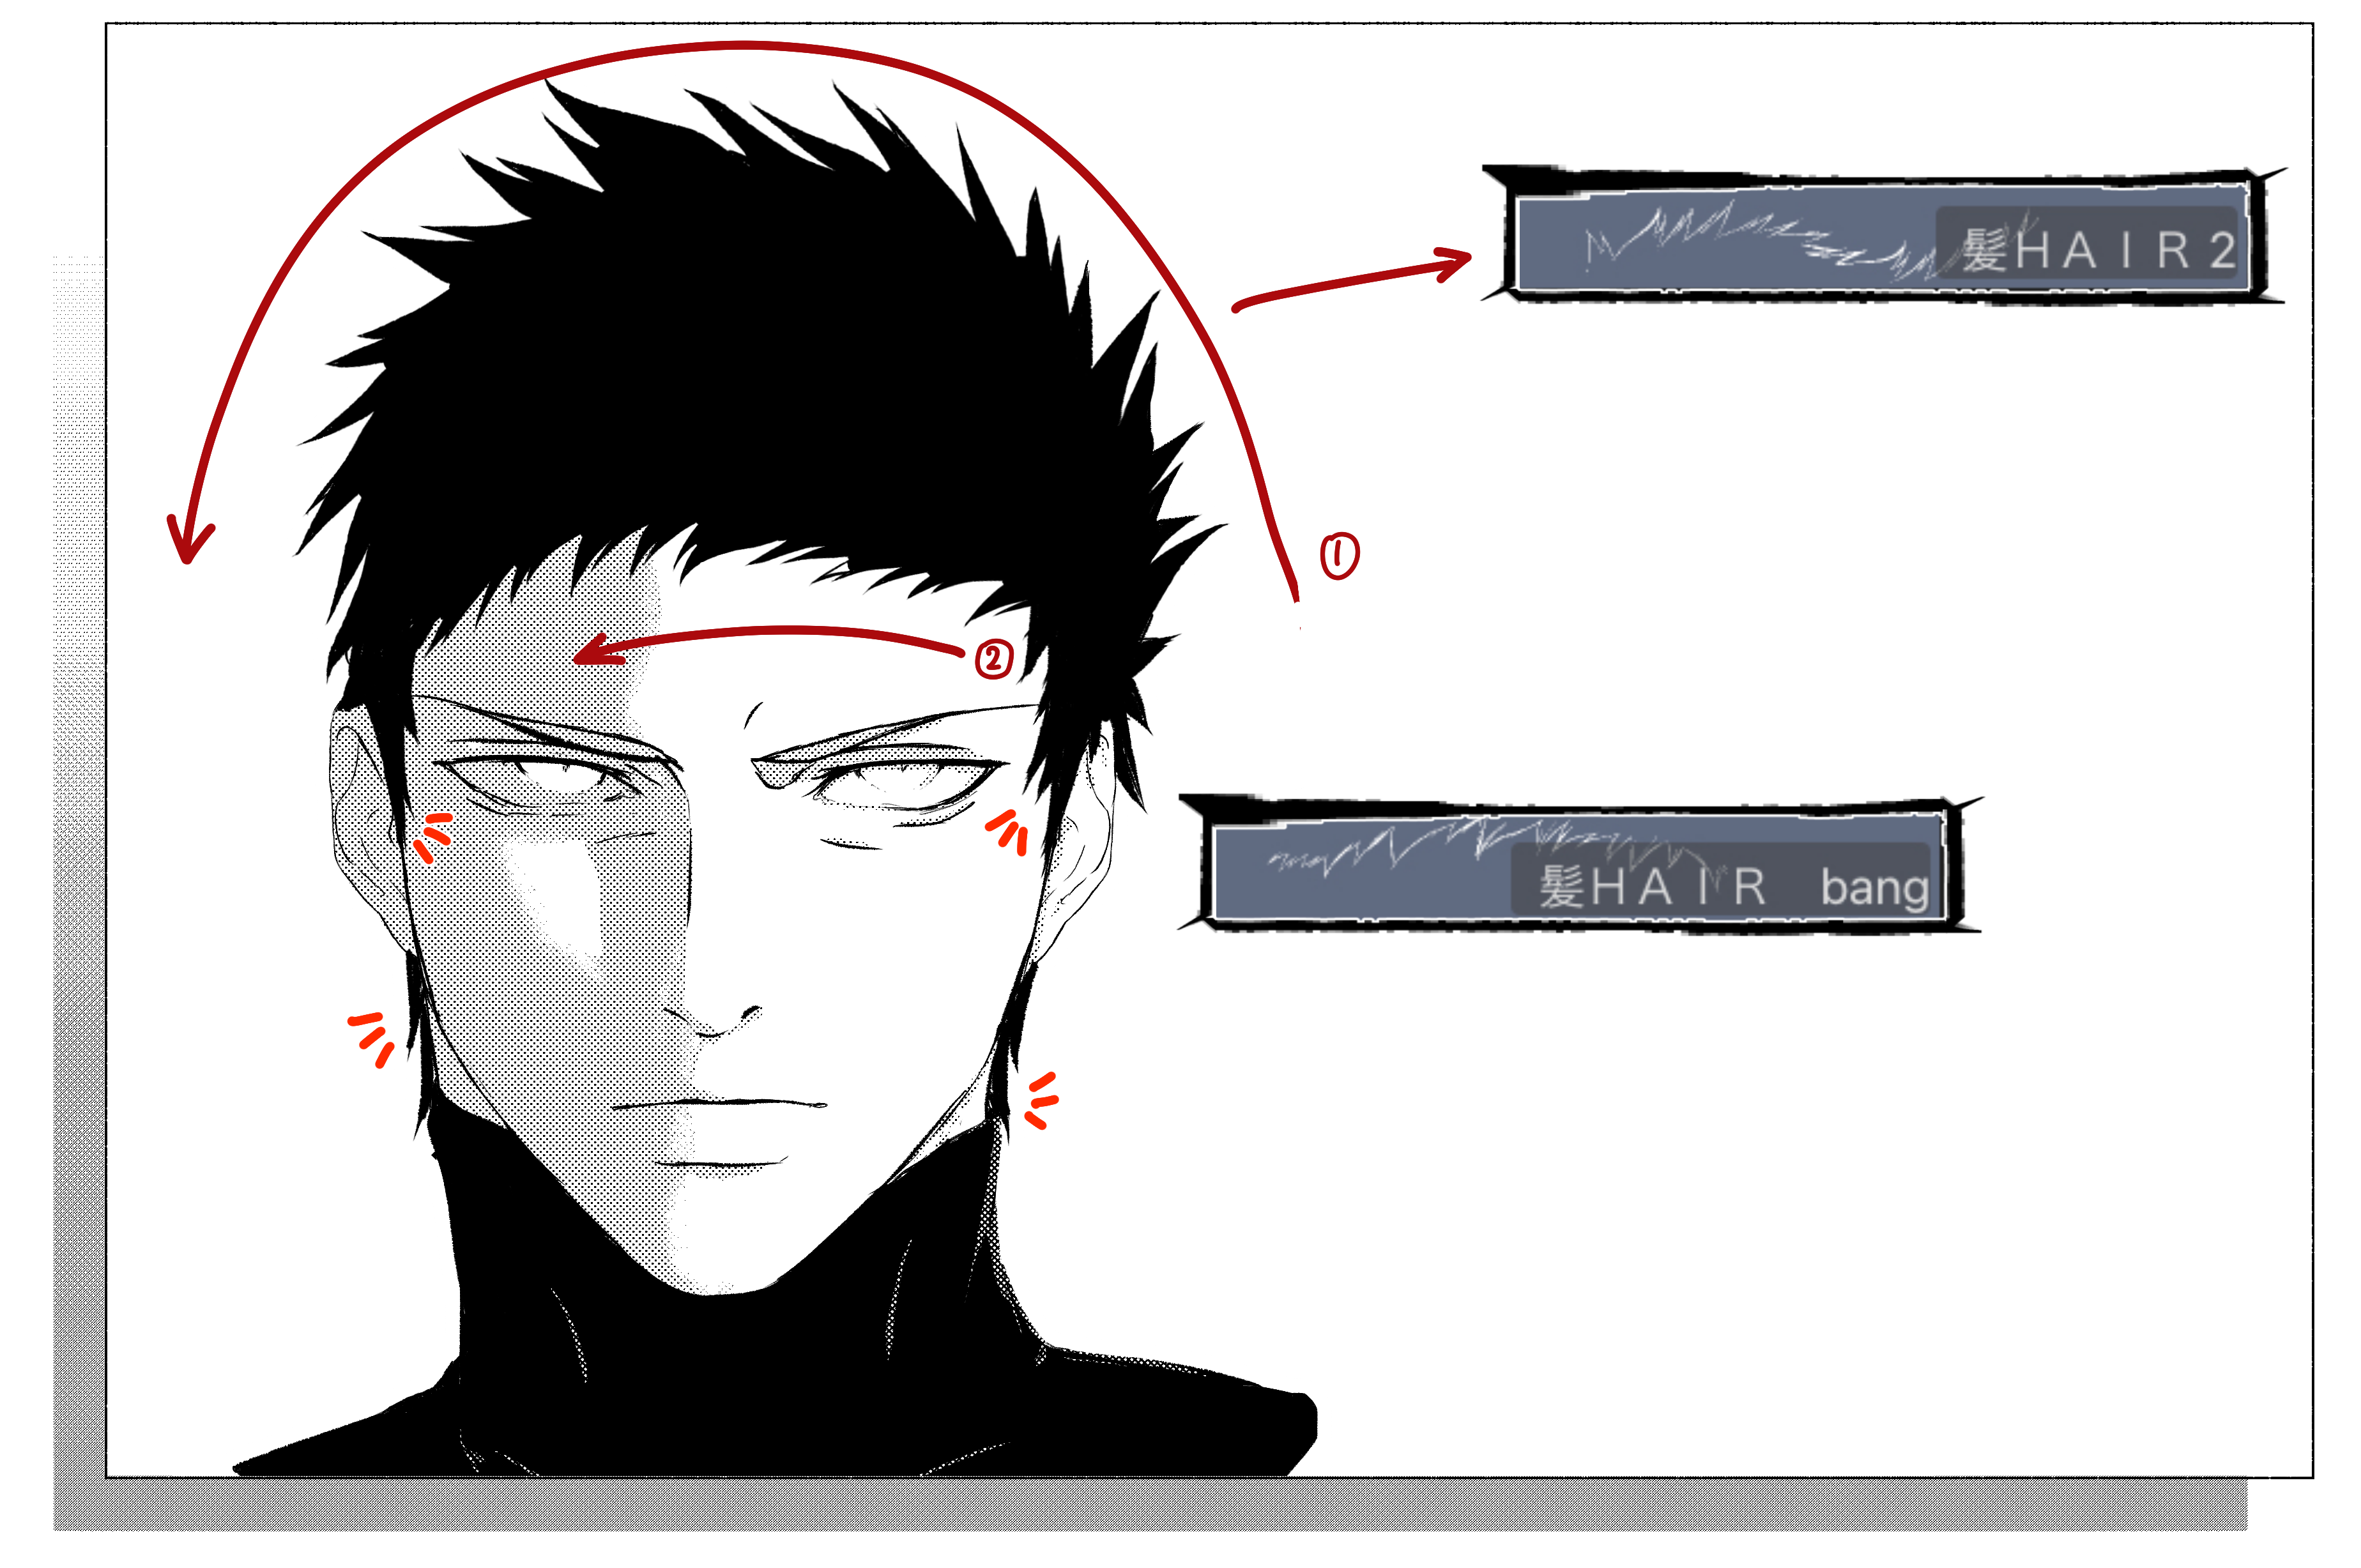
① Draw a line above the head.
② Draw a line on the forehead with BANG brush (curve tool).
③ Fill with bucket tool and colour some missing parts.
④ Make some adjustments and fill the missing parts, add side and back hair.
I created these brushes with basic real G pen / リアルGペン. Use it for adjustments, please.
① Draw the bang.
② Adjust the needed curve.
[You may also use this brush to draw the bottom hair line from the back view]
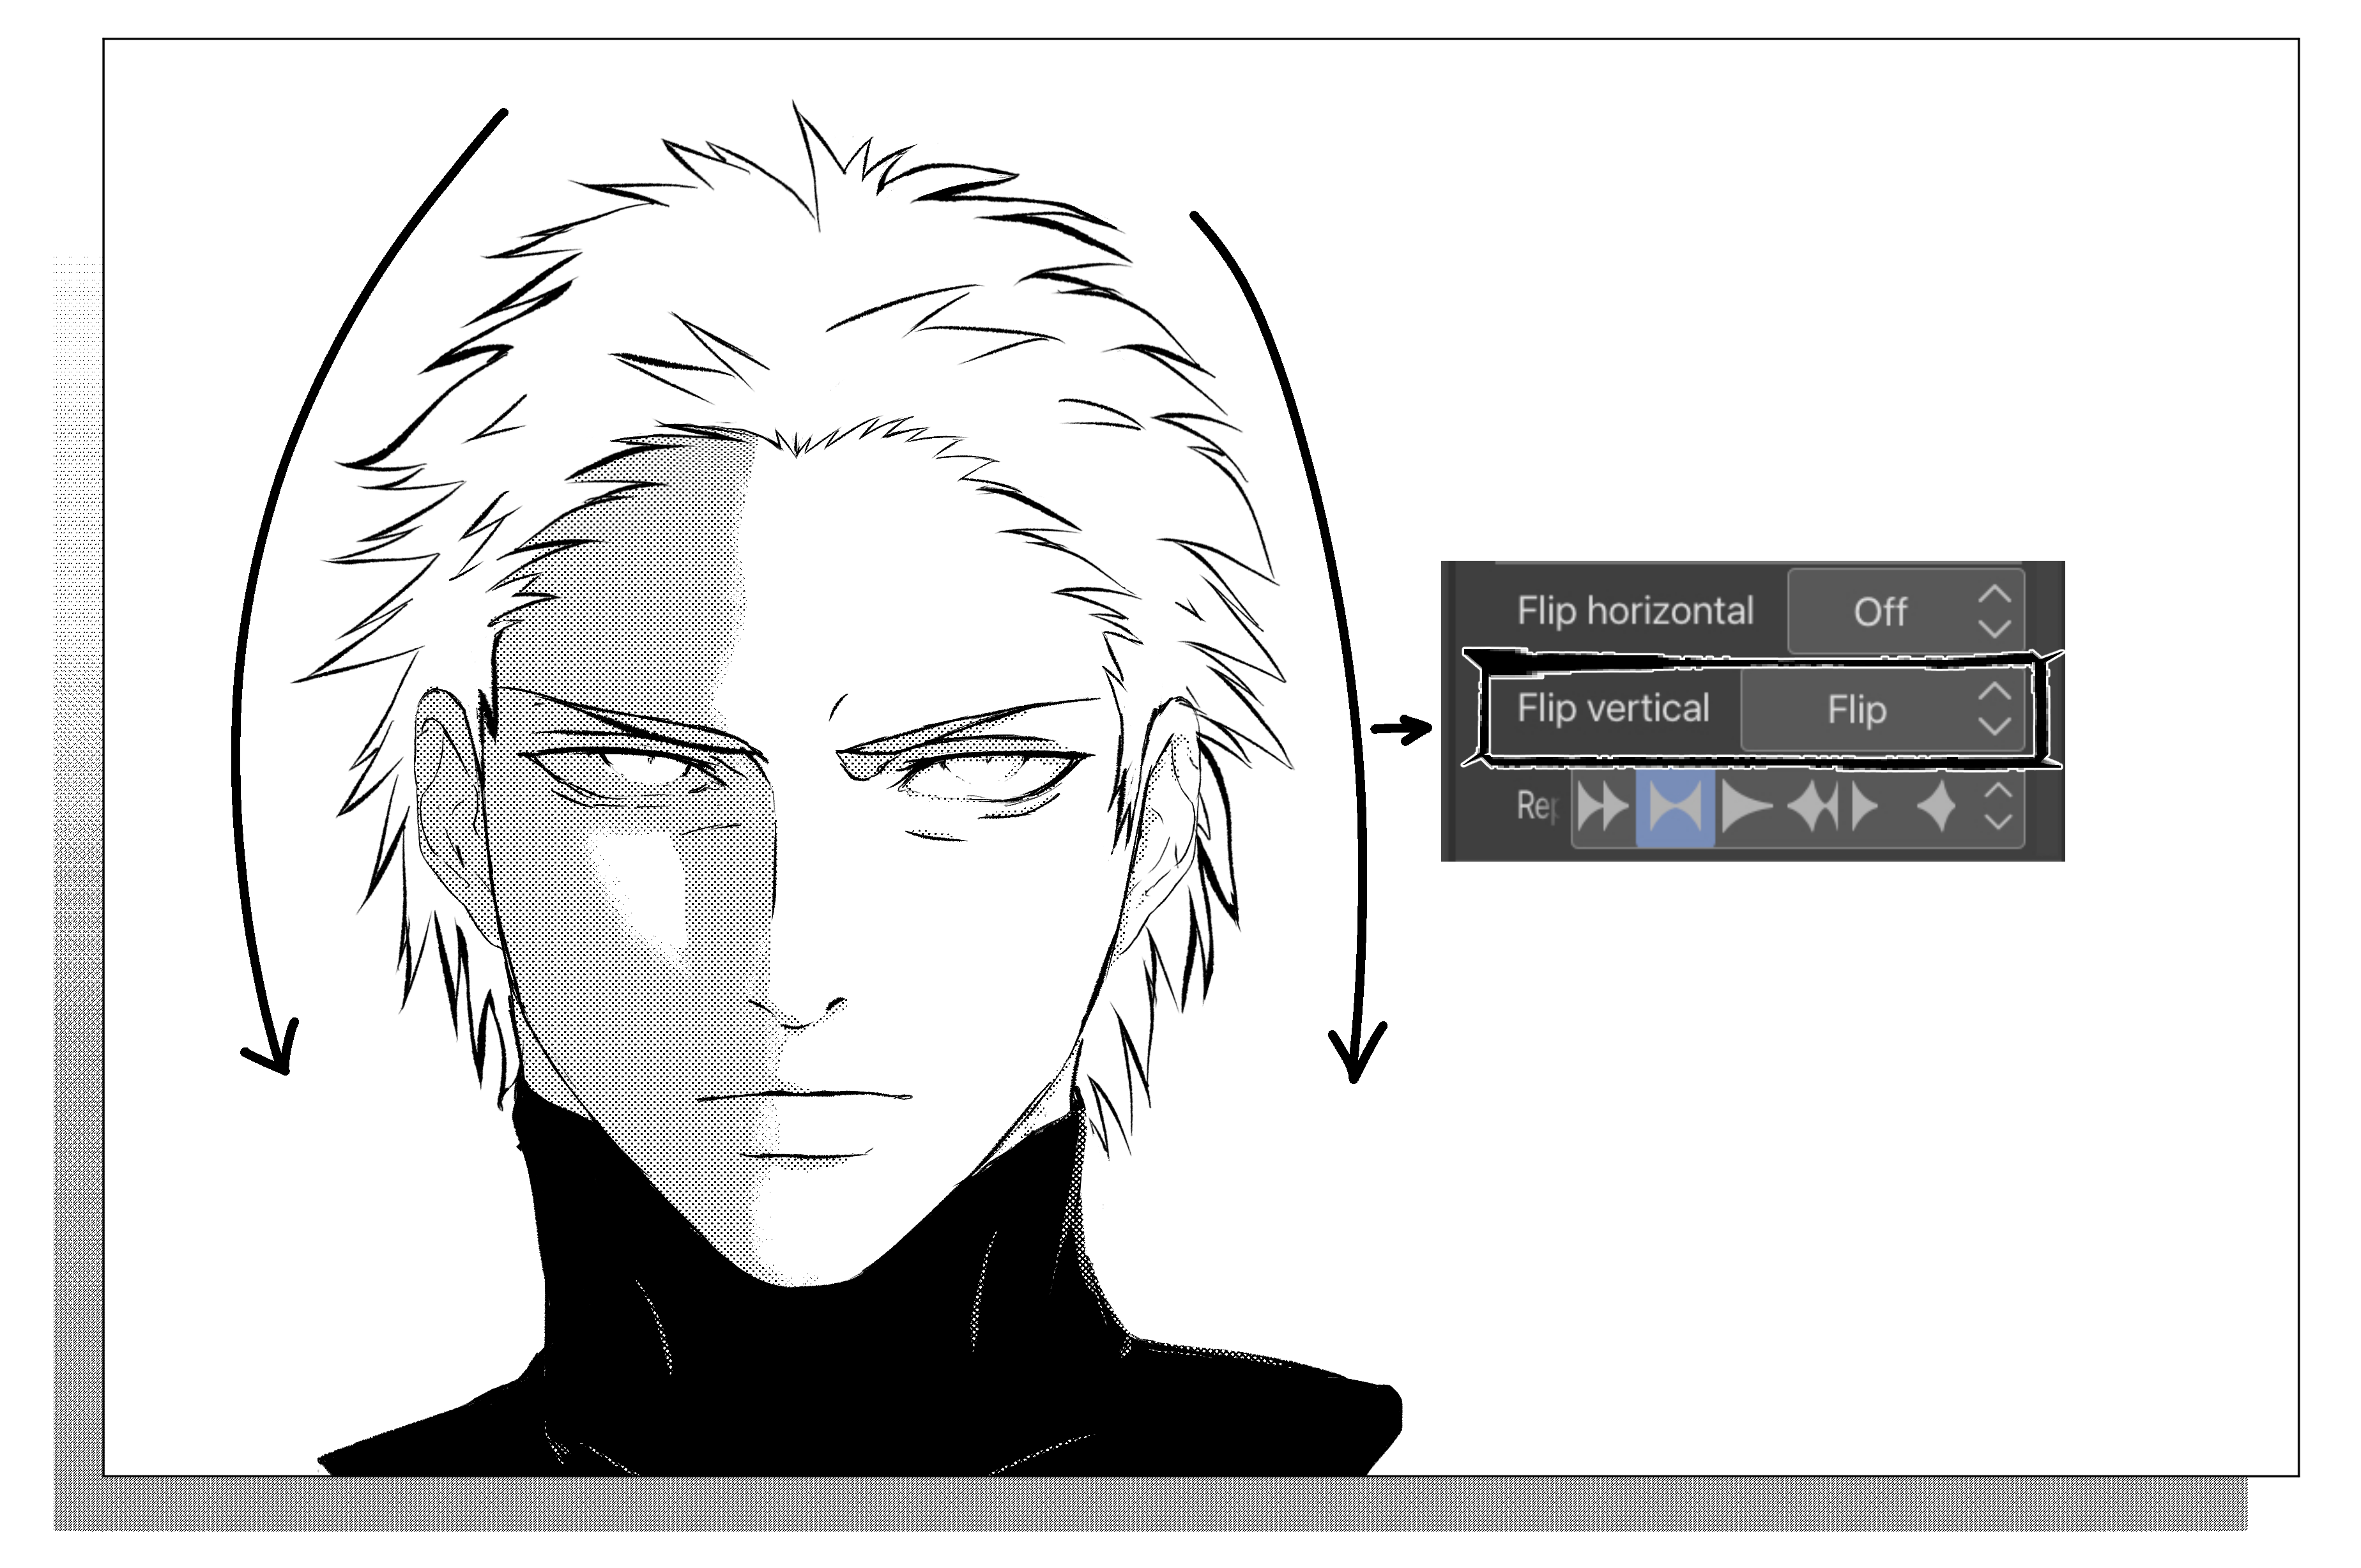
① Start from the center and draw one side.
② Then check the FLIP VERTICAL section and choose ‘flip’
③ Draw the other side.
④ I drew the hairline with the same brush but changed the brush size.
[You may also check the THICKNESS section for some brush changes. Try to set it to 50, or 100, or 150 for different results]
⑤ Make some adjustments, add some hairs on top and near ears.
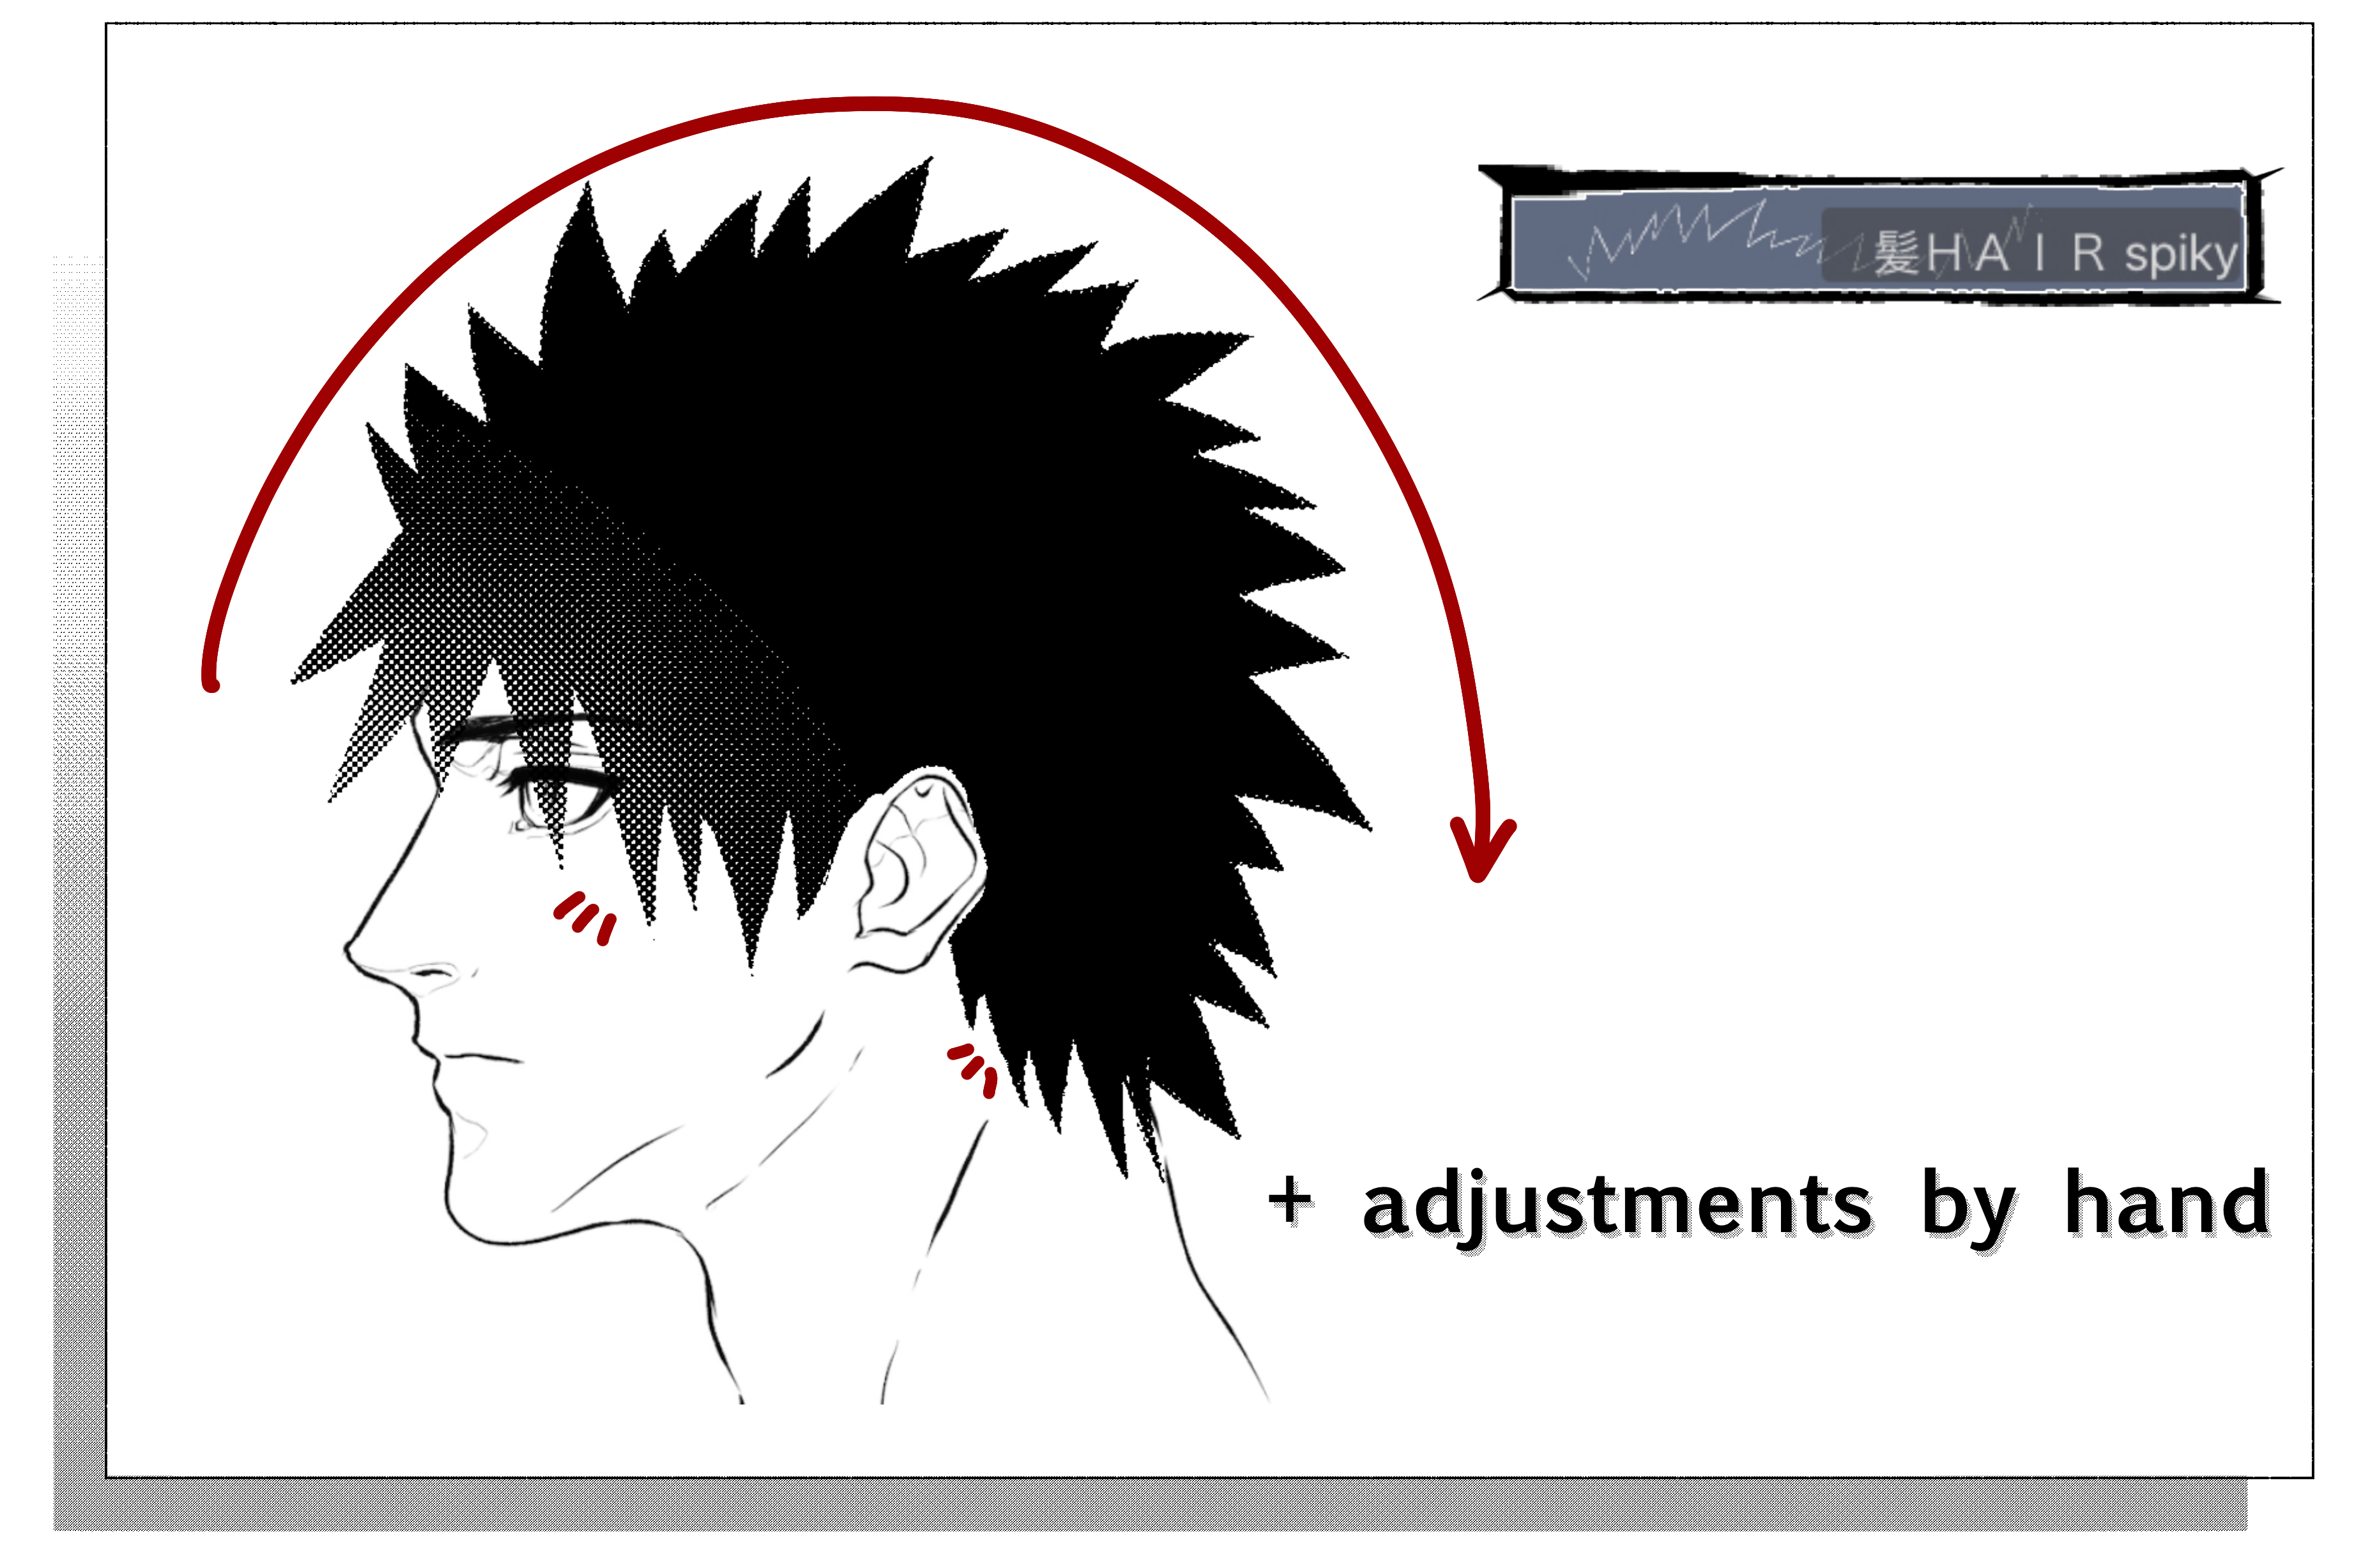
■ HAIR spiky brush.
① Draw the line above the head.
② Add back and bottom hair. I drew them by hand (the brush is not very good for it but you may try)
③ Fill with bucket tool
④ I also used LIQUIFY TOOL to correct the volume.
These brushes create the whole circle of hair. Use it for overhead and back views. Change the brush size for different results. The smaller the size the shorter and smaller the spikes of hair.
For a back view, please, set the ASPECT TYPE to W 0,8-0,9 and H 1.0. It will create a more natural-looking shape.
You may also erase the bottom part on the neck and redraw it with CURVE BRUSH. Try to play with PERSPECTIVE/MASH TRANSFORMATION as well.
[Draw some hairs, where needed, for a better look]
① Draw a circle from the center of the head.
② Create a new layer, draw a smaller white circle from the same center. Convert the layer to screentone and lower the opacity to 30-50.
③ Use a PERSPECTIVE TRANSFORMATION for the highlight layer to create some angle.
ブラシ Brush


カーブツール Curve tool


楕円ツール Ellipse tool


"EnumaElishhhhh"さんの別の素材


"素材集"の人気素材


新着素材


バッジ
-
 MVP ◆質問に対して適切な回答を数多く投稿し、コミュニティの運営に大きく貢献したユーザーです。MVPは3ヶ月に一度、その間に獲得したポイントを元に決定し、表彰を行っています。
 -
 NVP (New Valuable Player) ◆MVPに次いでコミュニティの運営に貢献したユーザーです。これまでMVPの受賞経験のない方から、獲得したポイントを元に決定し、表彰を行なっています。
 -
 公式エキスパート ◆優れた回答者の証であるMVP受賞者の中からさらに選ばれた、コミュニティで最も優良な回答者の証です。審査を経て当社から依頼し就任いただいています。※旧名称「エバンジェリスト」
 -
 セルシス公認モデレーター ◆モデレーターは、日本語とその他の言語が話せるセルシス公認のスタッフです。ソフトウェアや創作のエキスパートではないので、直接疑問を解決することはできませんが、みなさんがスムーズにコミュニケーションできるように、言葉やコミュニケーションの側面からサポートします。
 -
 セルシス公式運営に関連した公式アカウントです。