
きらめき!自動アクション (更新) (Shimmer! Auto Action (Update)) Shimmer! Auto Action (Update)
コンテンツID:1775374
-
15,340

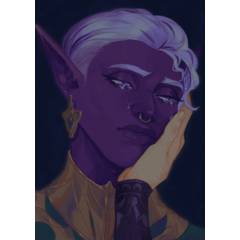
この自動アクションは、皮膚にきらめく効果を生み出します。を行ってください。 上から下へ順番にアクションを実行します。


このアクションは、"シマー" という名前の新しいレイヤーを作成し、 ブレンドモードを「グローを追加」に設定します。これできらめきを作成できます。 このレイヤー上の任意の色で効果を持ちます。色を使用することをお勧めします それは皮膚の赤面またはアンダートーンです。


- このアクションは単にシマーレイヤーを複製します をクリックし、"アウトライン" の名前を変更します。このレイヤーを配置する必要があります。 次のステップに備えるために、シマー層の下に移動します。もしあなたなら ない、あなたが望ましい効果を得ることはありません。


- このアクションは、きらめく領域を暗くします カラーバーンの描画モードで。次のオプションが与えられます。 輪郭を変形して、浮き出し効果を作成します。あなたは また、色相/彩度/値を調整するオプションを与えられました 概要。浮き出しの場合は、アウトラインをもう一度変換することができます 効果はあなたの好みに合わない。


このアクション は、サイズを大きくします。 きらめく領域、領域の周りの皮膚を明るくし、使用 ガウスブラー。私は通常、サイズを5ピクセル増やしますが、それは キャンバスのサイズによって異なります。調整するオプション 色相/彩度/値が与えられます。の量を調整するオプション ぼかしが与えられる。


- あなたが満足していない場合 結果、修正のシマーと軟化アウトライン アクションはオプションのアクションです。
- シマーレイヤーをクリックし、修正シムマーアクションを使用して きらめき。
- アウトラインレイヤーをクリックし、アウトラインを柔らかくするアクションを使用して、アウトラインを柔らかく 概要。
![]()

![]()

This auto action creates a shimmery effect for skin. Please do the actions in order from top to bottom:
This action creates a new layer named "Shimmer" and sets the blending mode to Add Glow. You can now create your shimmery effect with any color on this layer. I recommend using a color that is the blush or undertone of the skin.
- This action simply duplicates the Shimmer layer and renames it "Outline." You should place this layer below the Shimmer Layer to prepare for the next step. If you don't, you will not get the desired effect.
- This action darkens the shimmery area with the Color Burn blending mode. You are given the option to transform the outline so that it creates an embossed effect. You are also given the option to adjust the Hue/Saturation/Value of the outline. You can transform the outline once again if the embossed effect is not to your liking.
This action increases the size of the shimmery area, lightens the skin around the area, and uses Gaussian Blur. I usually increase the size by 5 pixels, but it depends on the size of the canvas. The option to adjust the Hue/Saturation/Value is given. The option to adjust the amount of blurring is given.
- If you are not happy with the results, the Fix Shimmer and Soften Outline Actions are optional actions.
- Click on the Shimmer Layer and use the Fix Shimmer Action to change the color of the shimmer.
- Click on the Outline Layer and use the Soften Outline Action to soften the outline.
![]()
![]()
きらめき!オートアクション+ 2ブラシ Shimmer! Auto Action + 2 Brushes


旧バージョン


"tojibon"さんの別の素材


"素材集"の人気素材


新着素材


-
 MVP ◆質問に対して適切な回答を数多く投稿し、コミュニティの運営に大きく貢献したユーザーです。MVPは3ヶ月に一度、その間に獲得したポイントを元に決定し、表彰を行っています。
 -
 NVP (New Valuable Player) ◆MVPに次いでコミュニティの運営に貢献したユーザーです。これまでMVPの受賞経験のない方から、獲得したポイントを元に決定し、表彰を行なっています。
 -
 公式エキスパート ◆優れた回答者の証であるMVP受賞者の中からさらに選ばれた、コミュニティで最も優良な回答者の証です。審査を経て当社から依頼し就任いただいています。※旧名称「エバンジェリスト」
 -
 セルシス公認モデレーター ◆モデレーターは、日本語とその他の言語が話せるセルシス公認のスタッフです。ソフトウェアや創作のエキスパートではないので、直接疑問を解決することはできませんが、みなさんがスムーズにコミュニケーションできるように、言葉やコミュニケーションの側面からサポートします。
 -
 セルシス公式運営に関連した公式アカウントです。