Veuillez noter que la résolution par défaut est de 300 dpi :)
> Comment :
1.
Sélectionnez votre calque d’image (si vous souhaitez que le patch suive la forme, assurez-vous que l’image est sur un fond transparent)
2.

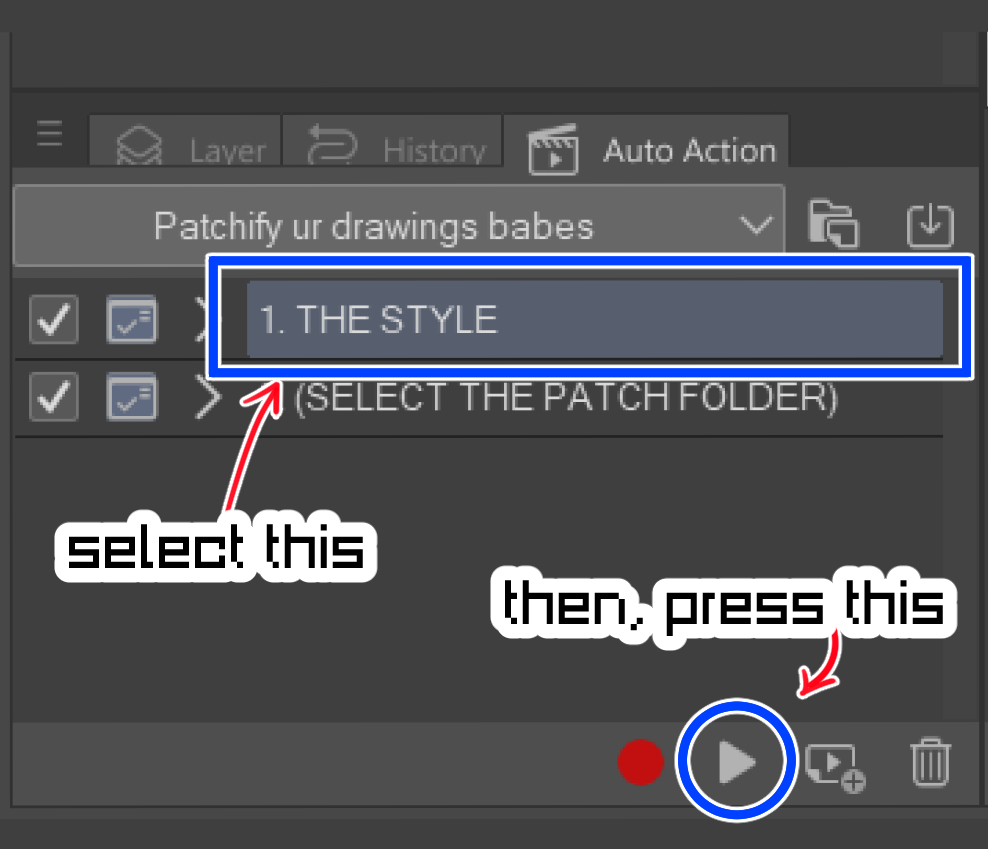
Appliquez la commande [1. LE STYLE] auto-action
3.
Ajustez le réglage de la ligne et de la couleur comme vous le souhaitez ! (cela déterminera à quel point votre patch était désordonné/propre)
4.
Vous pouvez ajuster la bordure du côté extérieur du patch sur l’effet de propriété de calque, en changeant la couleur ou l’épaisseur, etc.
5.

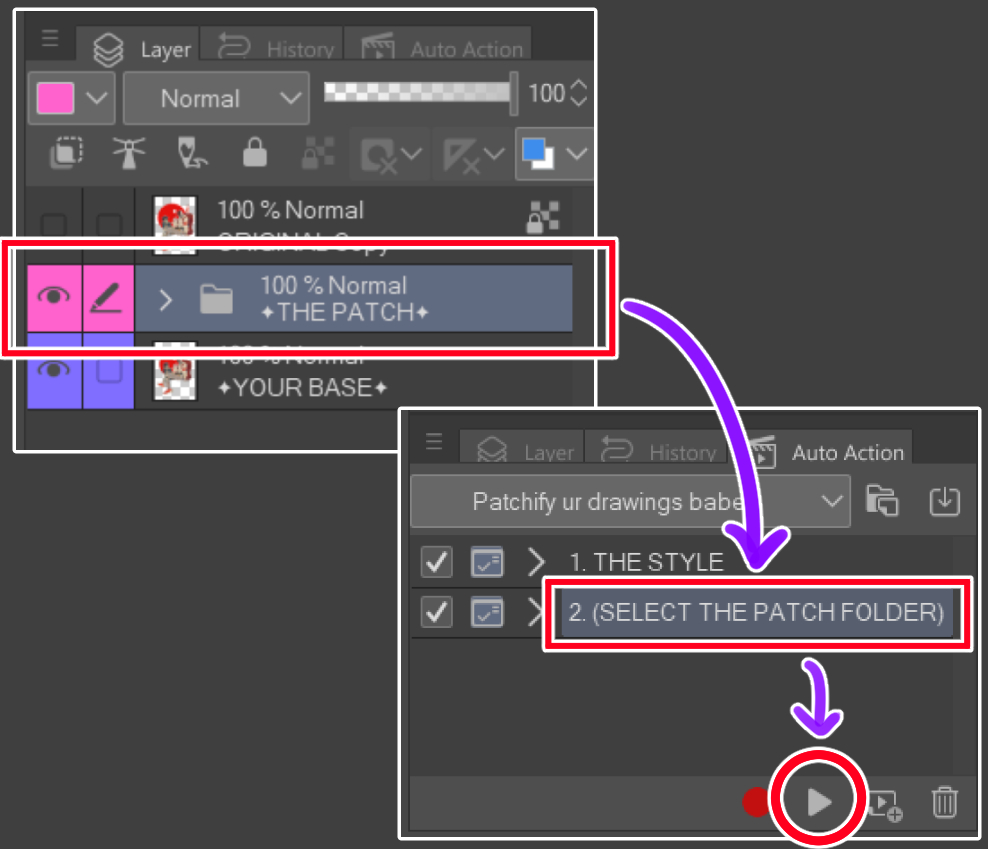
Pour plus d’effet, sélectionnez le dossier [THE PATCH] et appliquez le dossier [2. (SÉLECTIONNEZ LE DOSSIER PATCH)] Auto-action
6.
C’est un patch !! :D
Please note the default resolution is 300dpi :)
>How to:
1.
Select your image layer (if you'd like the patch to follow the shape, make sure the image is on a transparent background)
2.

Apply the [1. THE STYLE] auto-action
3.
Adjust the line and color setting as you'd like! (this will determine how messy/clean your patch looked like)
4.
You may adjust the border of the outer side of the patch on the layer property effect, changing the color or thickness etc.
5.

For extra effect, select the [THE PATCH] folder, and apply the [2. (SELECT THE PATCH FOLDER)] auto-action
6.
It's a patch!! :D


