

Pincel súper fácil de usar para dibujar plumas y alas emplumadas Super easy-to-use brush for drawing feathers and feathered wings
¡Hola!
¡Hice un pincel divertido para dibujar alas emplumadas! Te da la libertad de dibujar alas en diferentes poses, ángulos y colores. Es muy fácil de usar y funciona muy bien para el arte 2D.
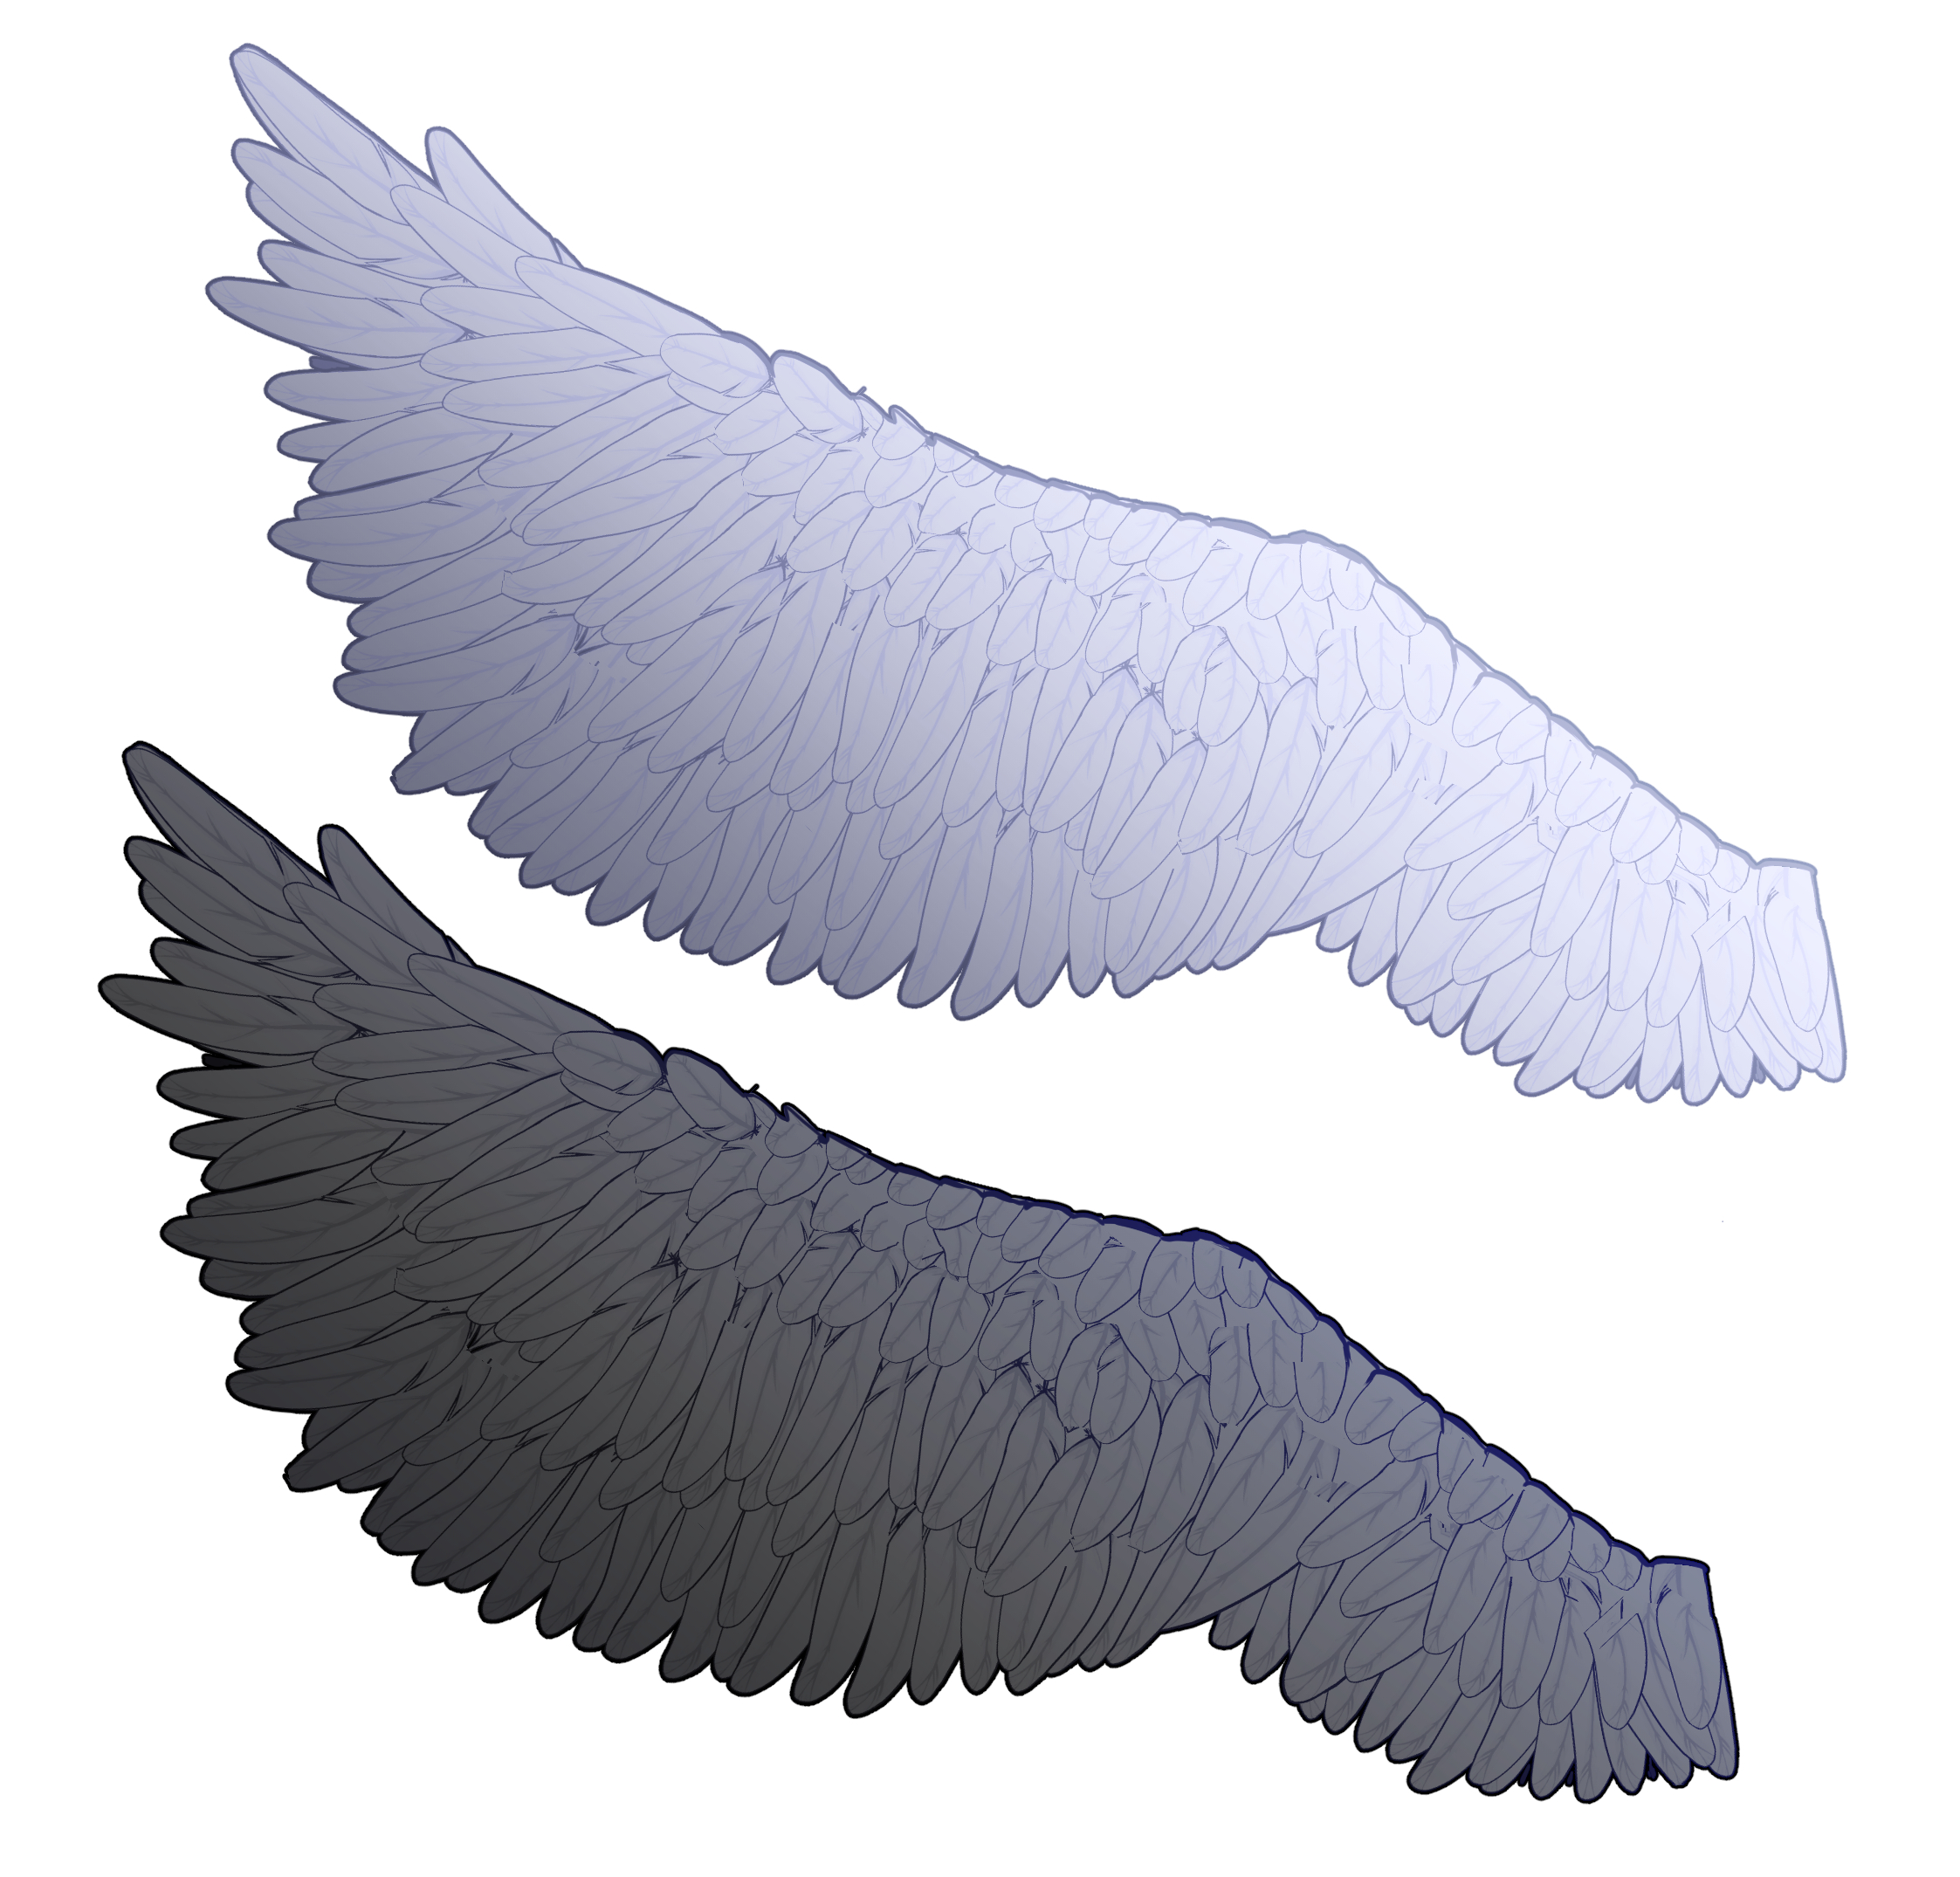
¡Hice un pincel divertido para dibujar alas emplumadas! Te da la libertad de dibujar alas en diferentes poses, ángulos y colores. Es muy fácil de usar y funciona muy bien para el arte 2D.

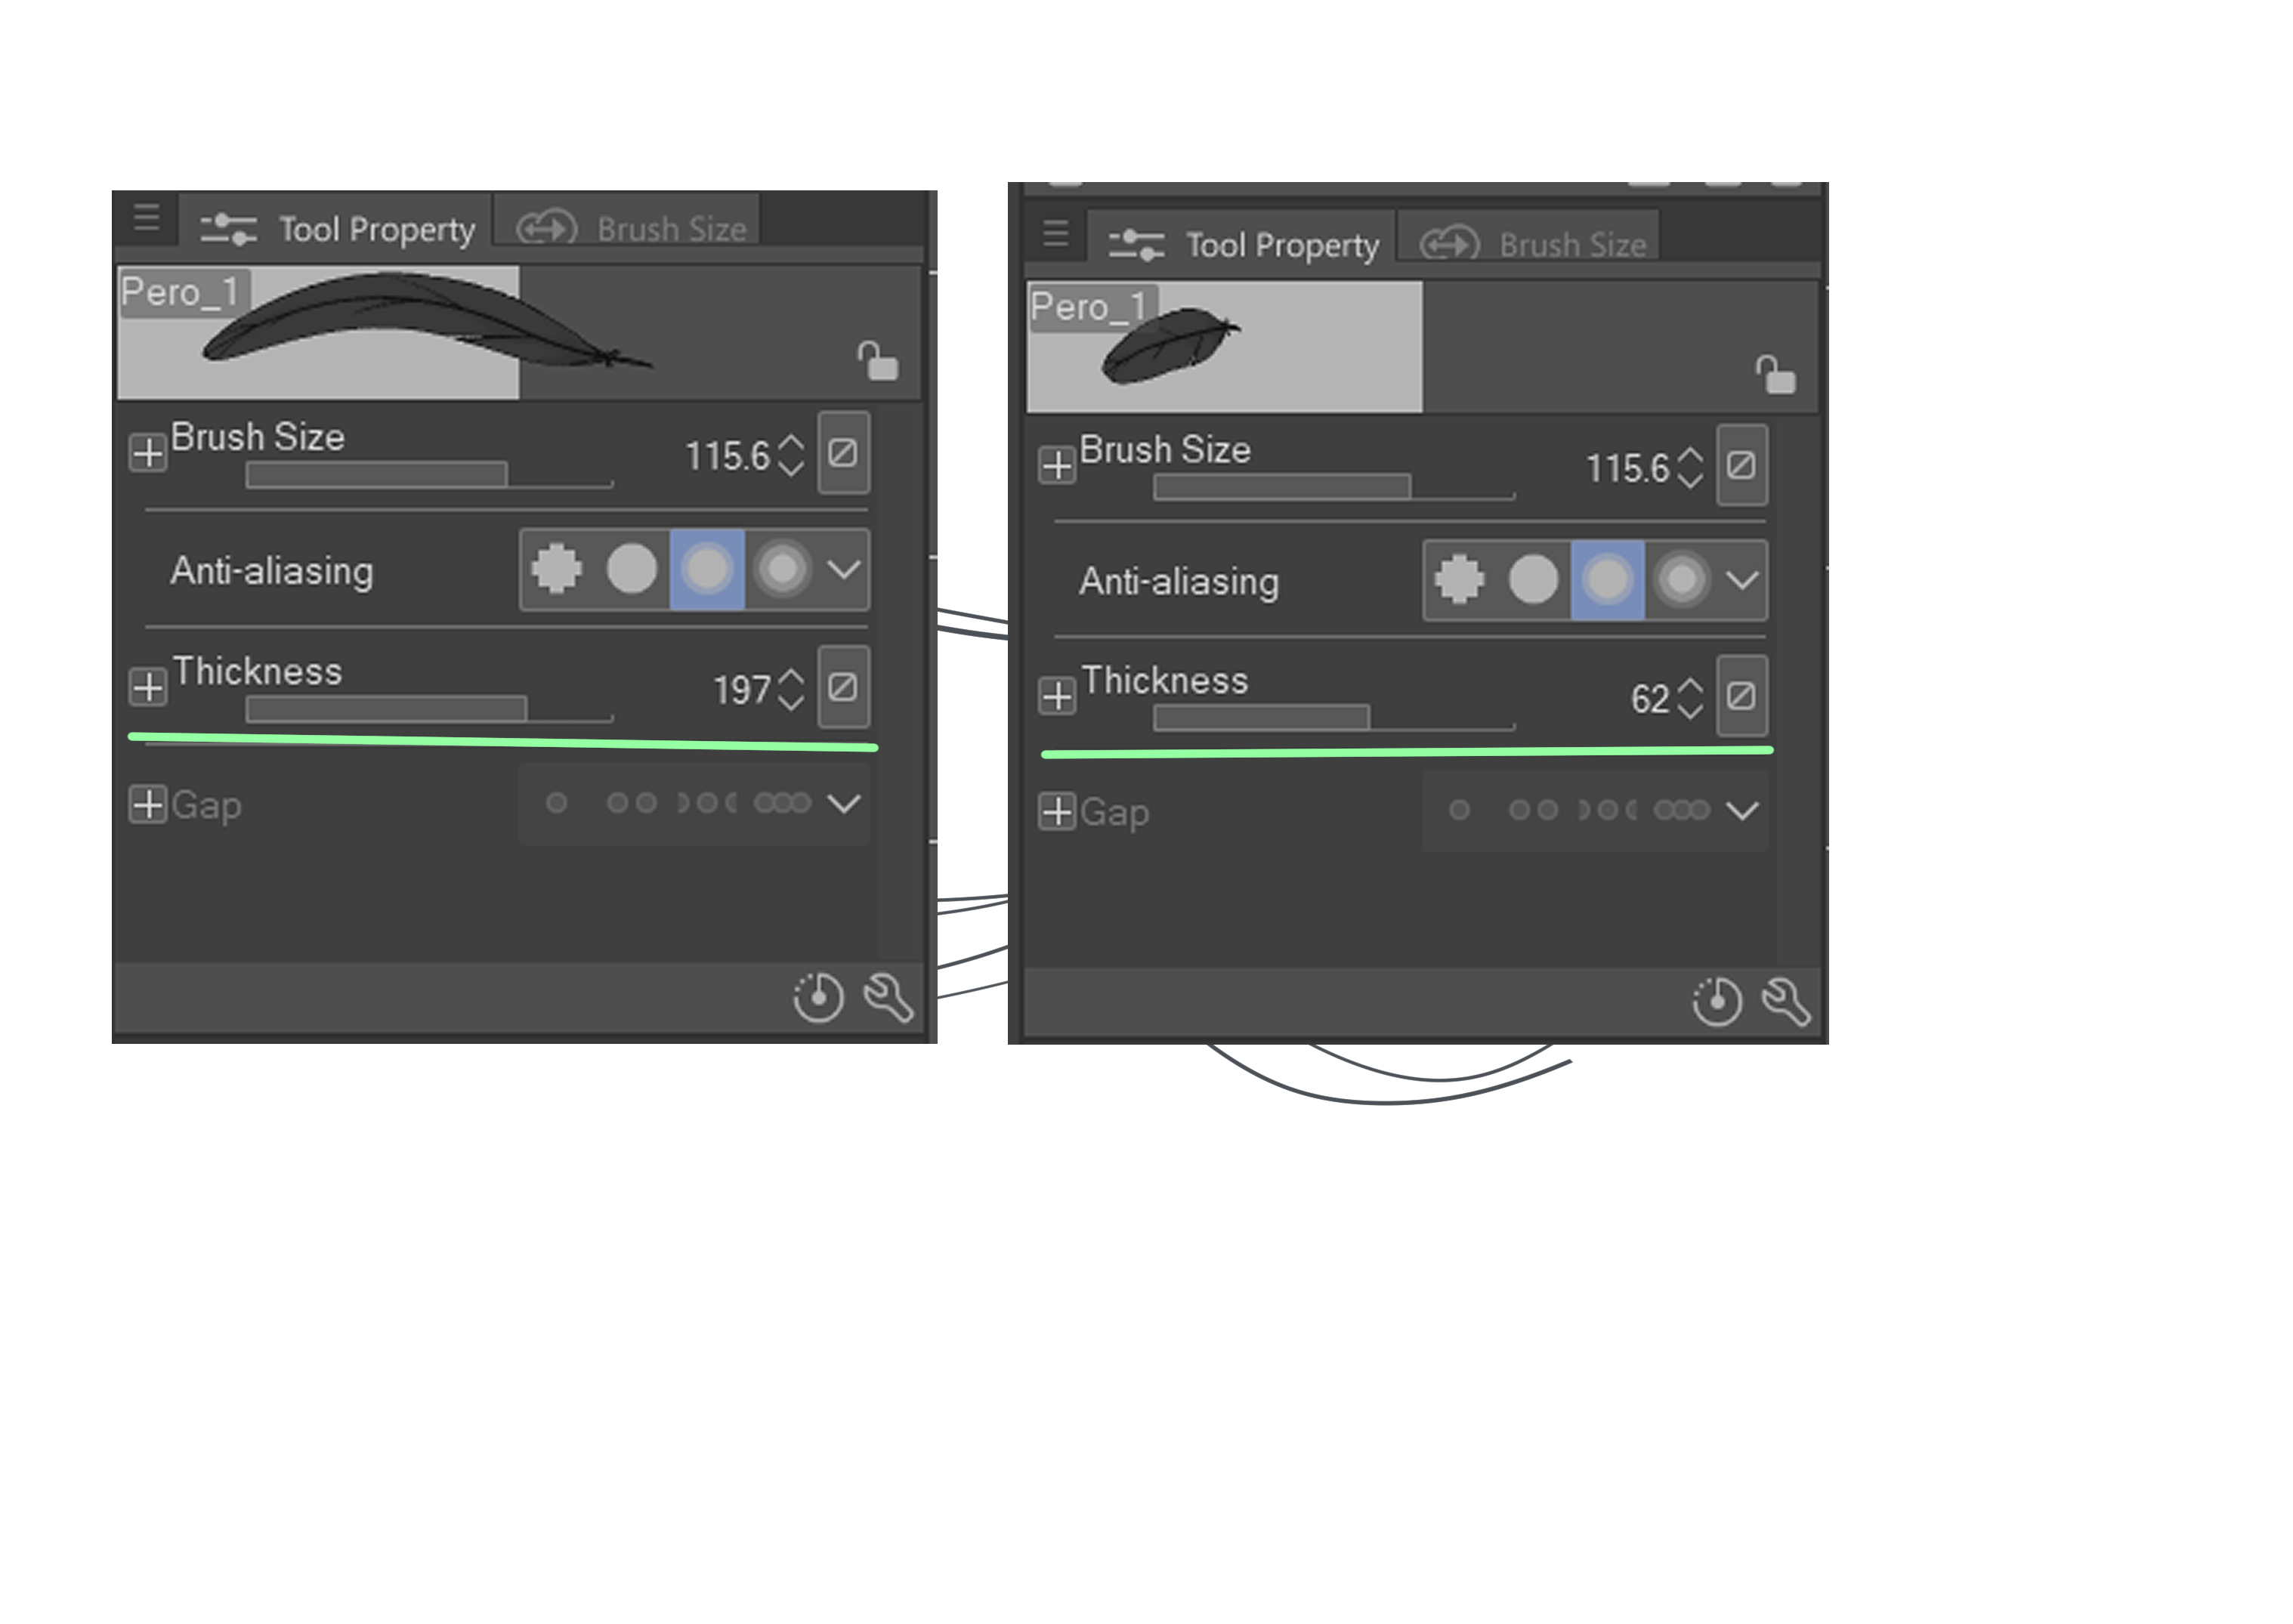
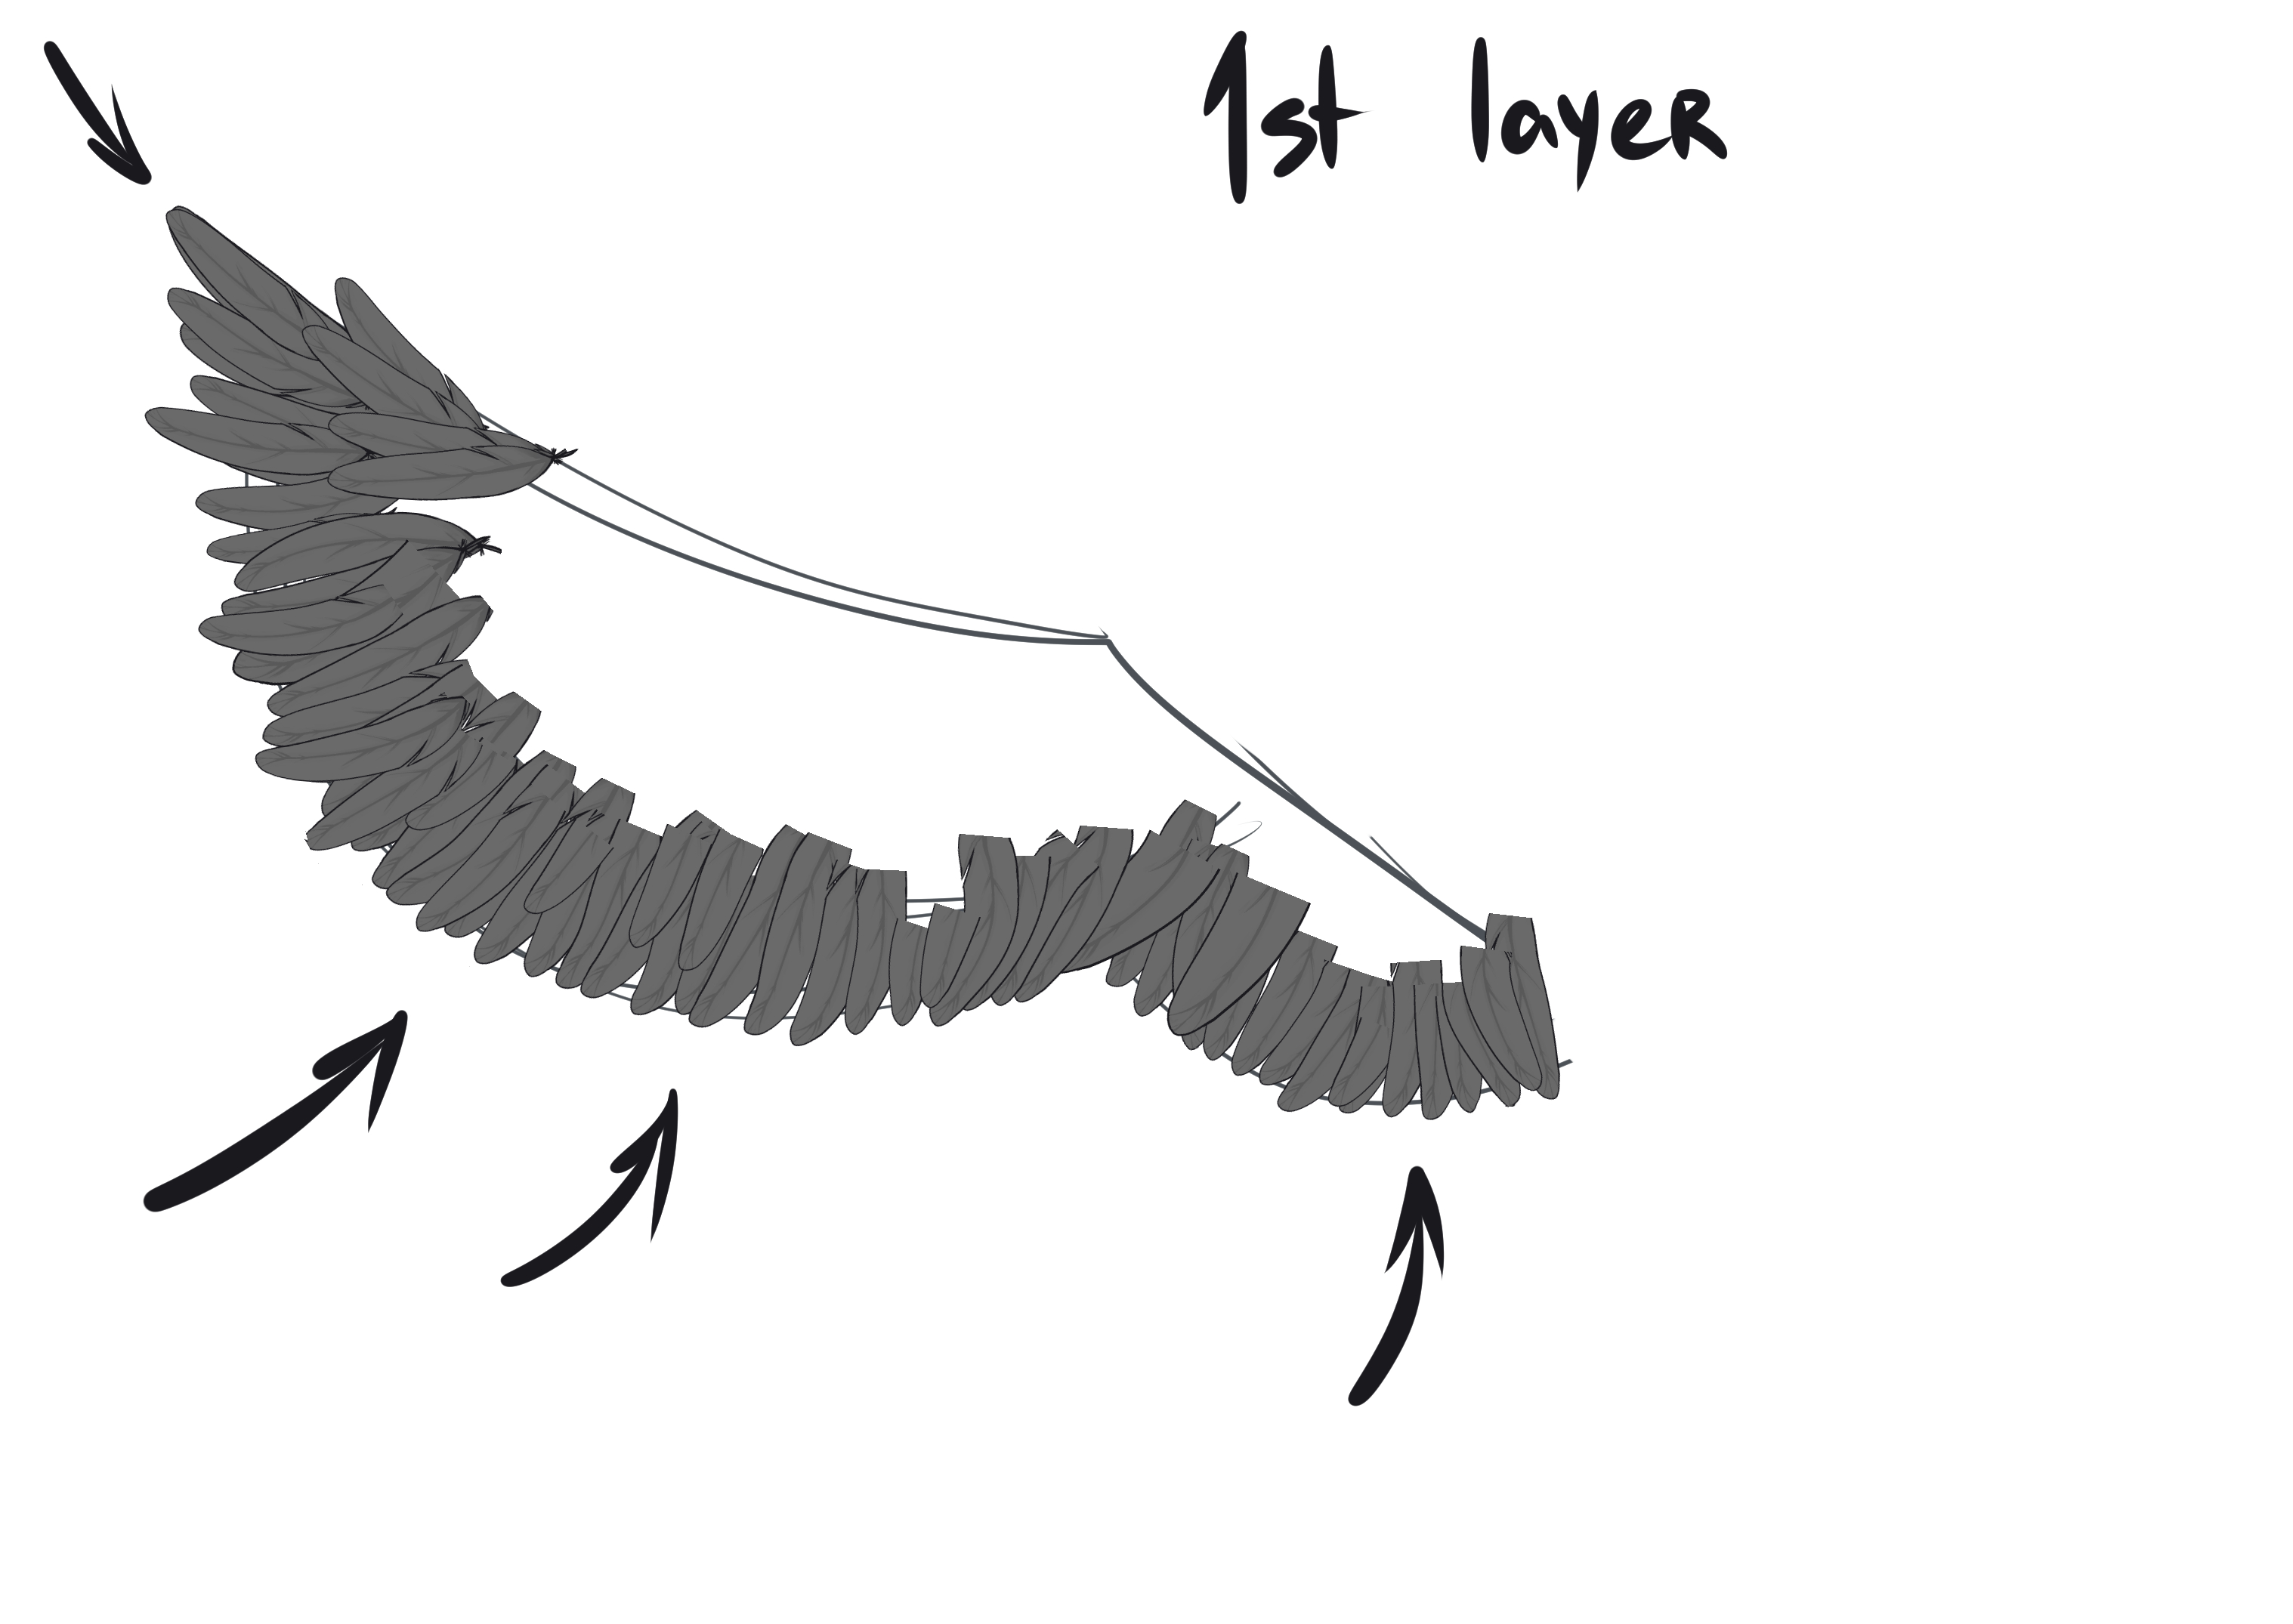
Comienza a dibujar las plumas de la capa inferior. Las plumas cerca de la base del ala son más cortas, mientras que las más largas están en las puntas. Puede ajustar la longitud del calado cambiando la configuración de Grosor en el panel de configuración del pincel.


Evite hacer que las plumas sean demasiado uniformes: varíe ligeramente su dirección y tamaño. Solo un poco rinde mucho. Esto agregará interés visual y evitará que las alas parezcan una pared plana.

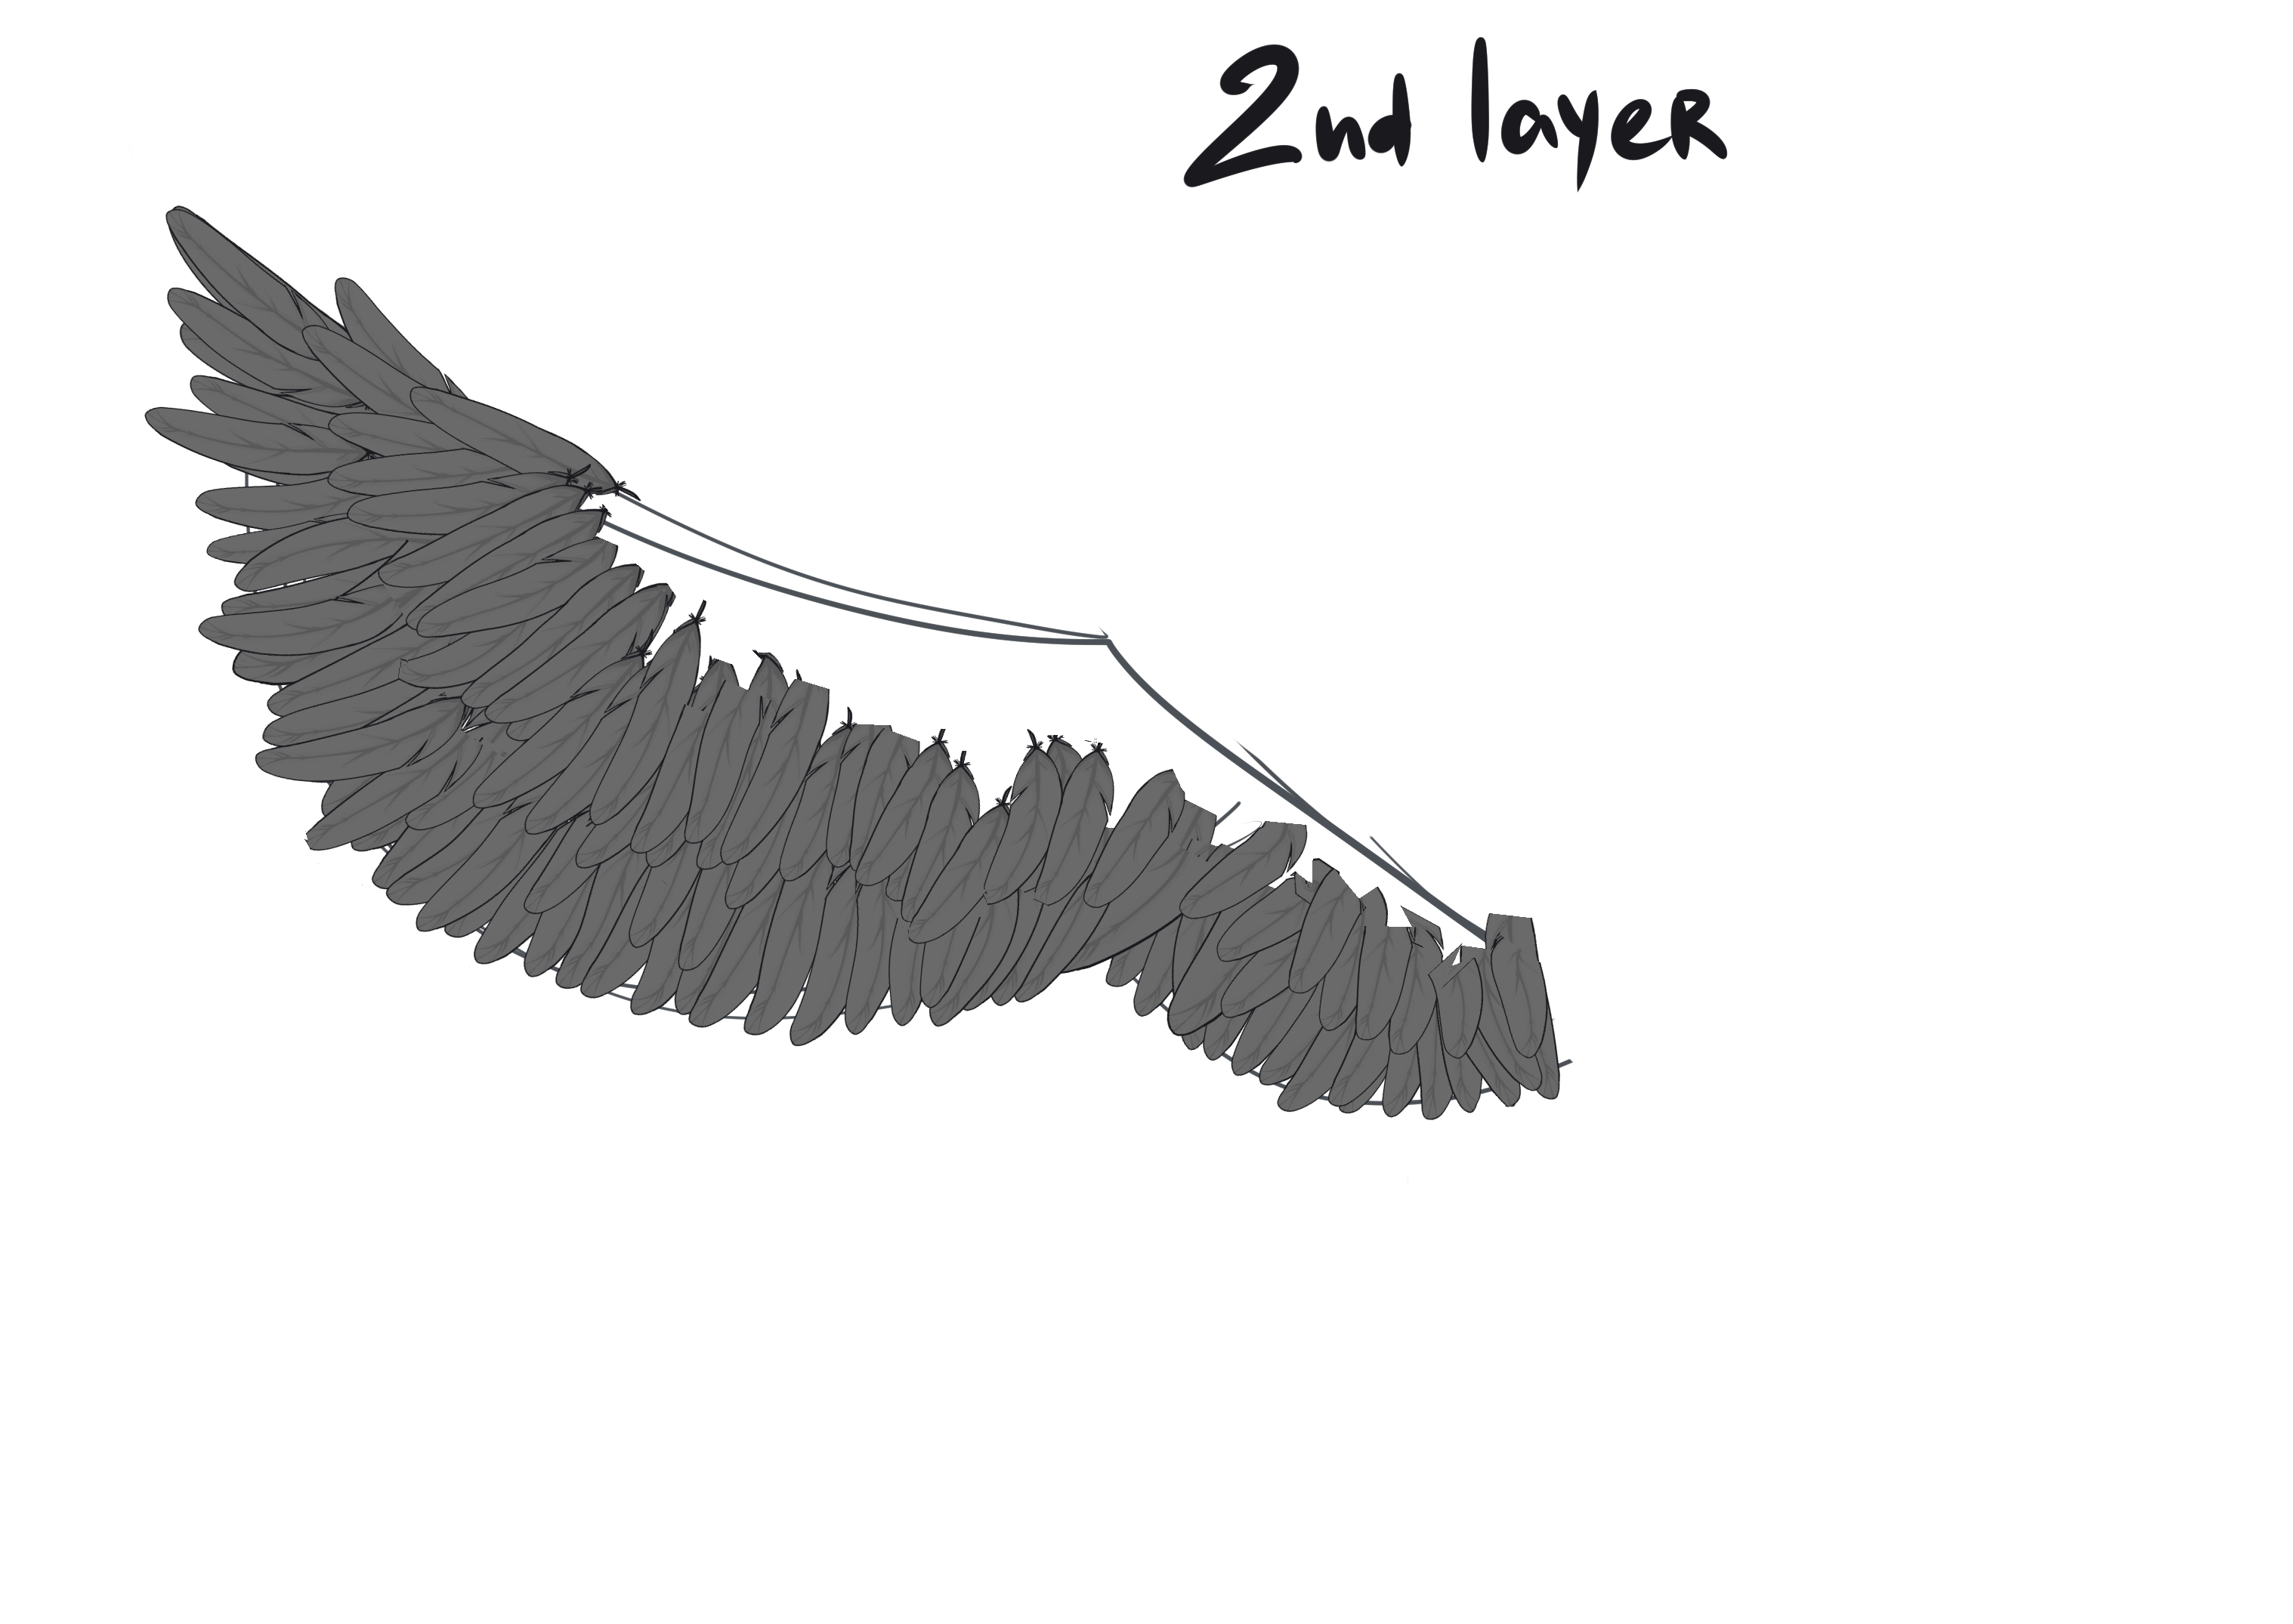
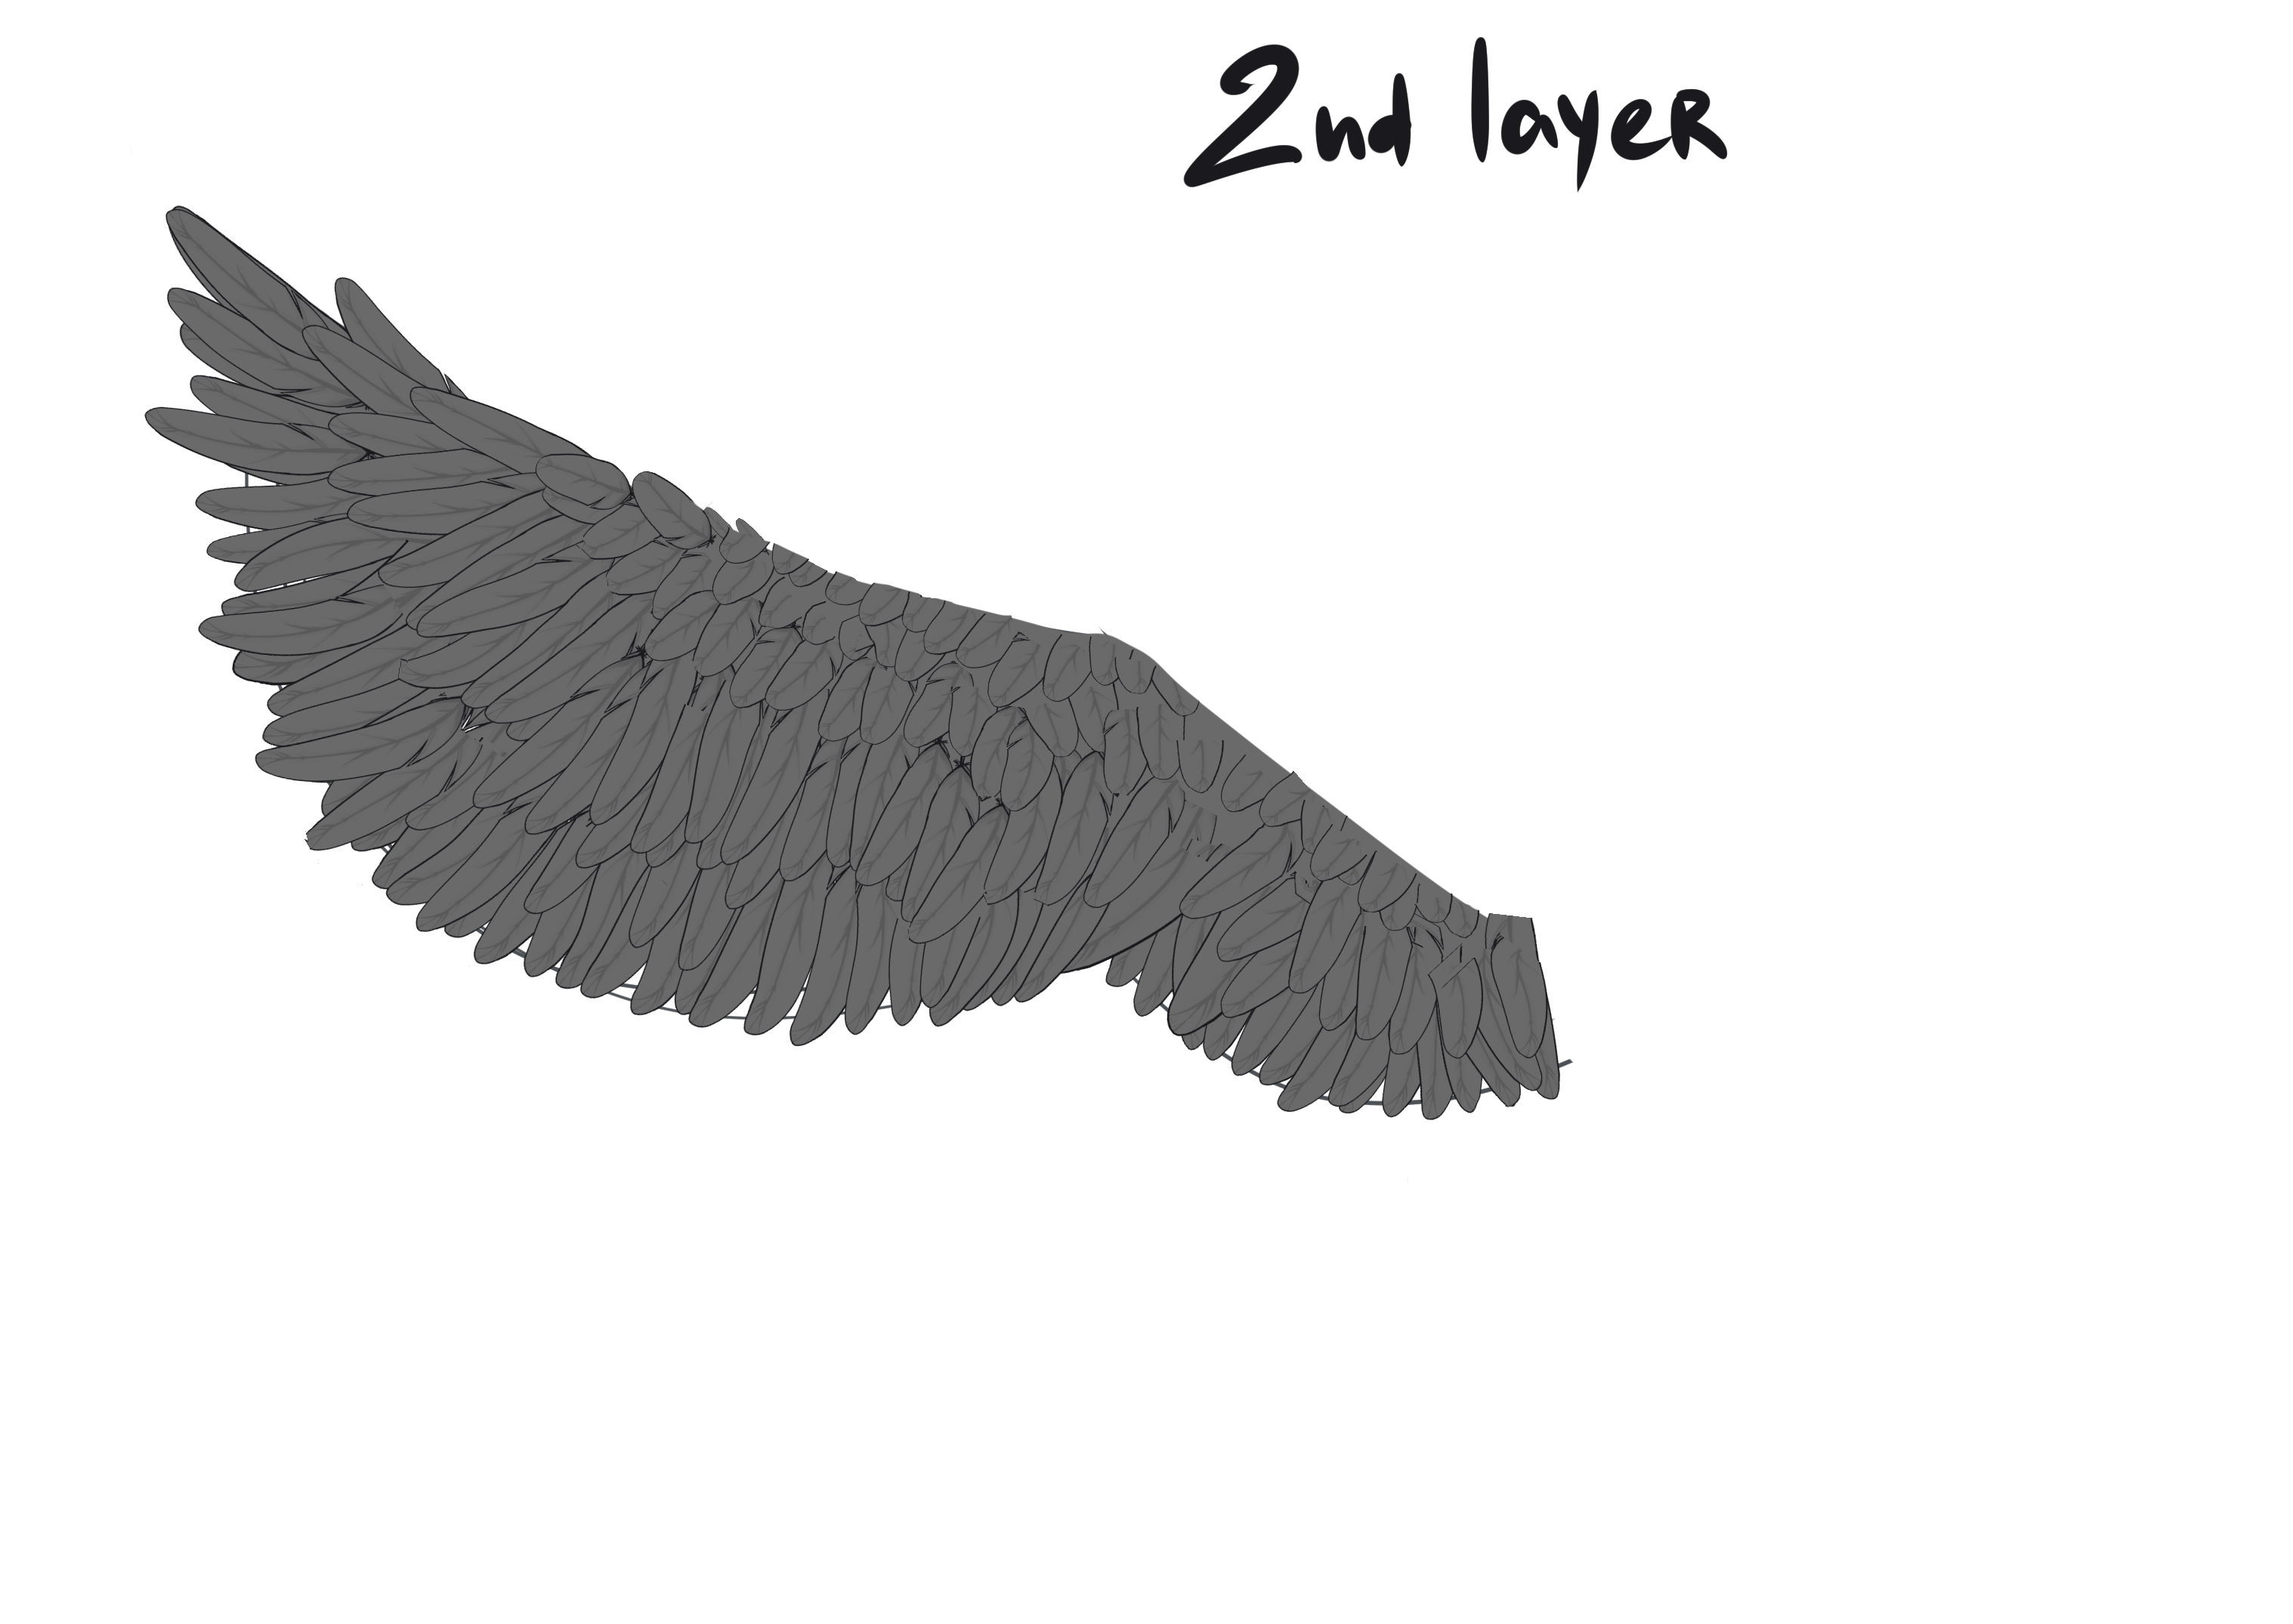
Al dibujar la segunda capa de plumas (deben ser un poco más cortas que la primera capa), asegúrese de superponer las bases de las plumas de la primera capa.

Las plumas más cortas están en la parte superior de las alas. Una vez que hayas terminado de dibujar las plumas, borra el exceso de líneas y agrega un contorno para el borde superior de las alas si es necesario. Este pincel cambia de color. Para utilizar esta función, seleccione el color principal y secundario en la paleta de colores. Esto le permite crear plumas en una amplia variedad de colores y tonos.
¡Espero que este pincel sea útil y te brinde alegría en tu obra de arte! 😊
Hi there!
I made a fun brush for drawing feathered wings! It gives you the freedom to draw wings in different poses, angles, and colors. It’s super easy to use and works great for 2D art.
I made a fun brush for drawing feathered wings! It gives you the freedom to draw wings in different poses, angles, and colors. It’s super easy to use and works great for 2D art.
Start drawing the feathers from the bottom layer. Feathers near the base of the wing are shorter, while the longest ones are at the tips. You can adjust the feather length by changing the Thickness setting in the brush settings panel.
Avoid making the feathers too uniform — slightly vary their direction and size. Just a little goes a long way. This will add visual interest and keep the wings from looking like a flat wall.
When drawing the second layer of feathers (they should be slightly shorter than the first layer), make sure to overlap the bases of the feathers from the first layer.
The shortest feathers are at the top part of the wings. Once you're done drawing the feathers, erase any excess lines and add an outline for the top edge of the wings if needed.This brush changes color. To use this feature, select both the main and sub color in the color palette. This allows you to create feathers in a wide variety of colors and shades.
I hope this brush will be helpful and bring you joy in your artwork! 😊


Más materiales de bentomi7


Materiales populares de Pinceles


Nuevos materiales


Insignias
-
 MVP ◆Estos usuarios han contribuido en gran medida a la gestión de la comunidad, al publicar multitud de útiles respuestas a las preguntas planteadas. Una vez cada tres meses, los MVP son seleccionados en base a los puntos obtenidos durante ese período y, en consecuencia, son reconocidos por su esfuerzo.
 -
 New Valuable Player (NVP) ◆Son las personas que más han contribuido a la comunidad después de los MVP. Este galardón se otorga según los puntos conseguidos a los usuarios que aún no han obtenido ningún premio MVP.
 -
 Especialista oficial ◆Elegidos de entre todos los MVP, quienes ya han demostrado ser de inestimable ayuda, esto es un testimonio de su excepcional apoyo para con la comunidad. Tras un minucioso escrutinio, son nombrados por Celsys para ocupar dicho cargo.Nota: Anteriormente denominados "evangelistas".
 -
 Moderador oficial de Celsys ◆Los moderadores son miembros del personal de Celsys que pueden comunicarse en japonés y otros idiomas. No son expertos en software o ilustración, por lo que no pueden responder directamente a las preguntas. Sin embargo, tratarán de asegurarse de que la comunicación entre usuarios de distintas lenguas sea tan fluida y comprensible como sea posible.
 -
 Cuenta oficial de CelsysCuenta oficial del administrador