

Esta es una herramienta de acción automática para delinear imágenes. This is an Auto Action tool to outline pictures.
Arrastre desde los materiales descargados a la acción automática y se mostrará bajo el nombre de Contorno. Hay 6 variaciones de esta herramienta.

1. Convertir modelo 3D en una "capa ráster"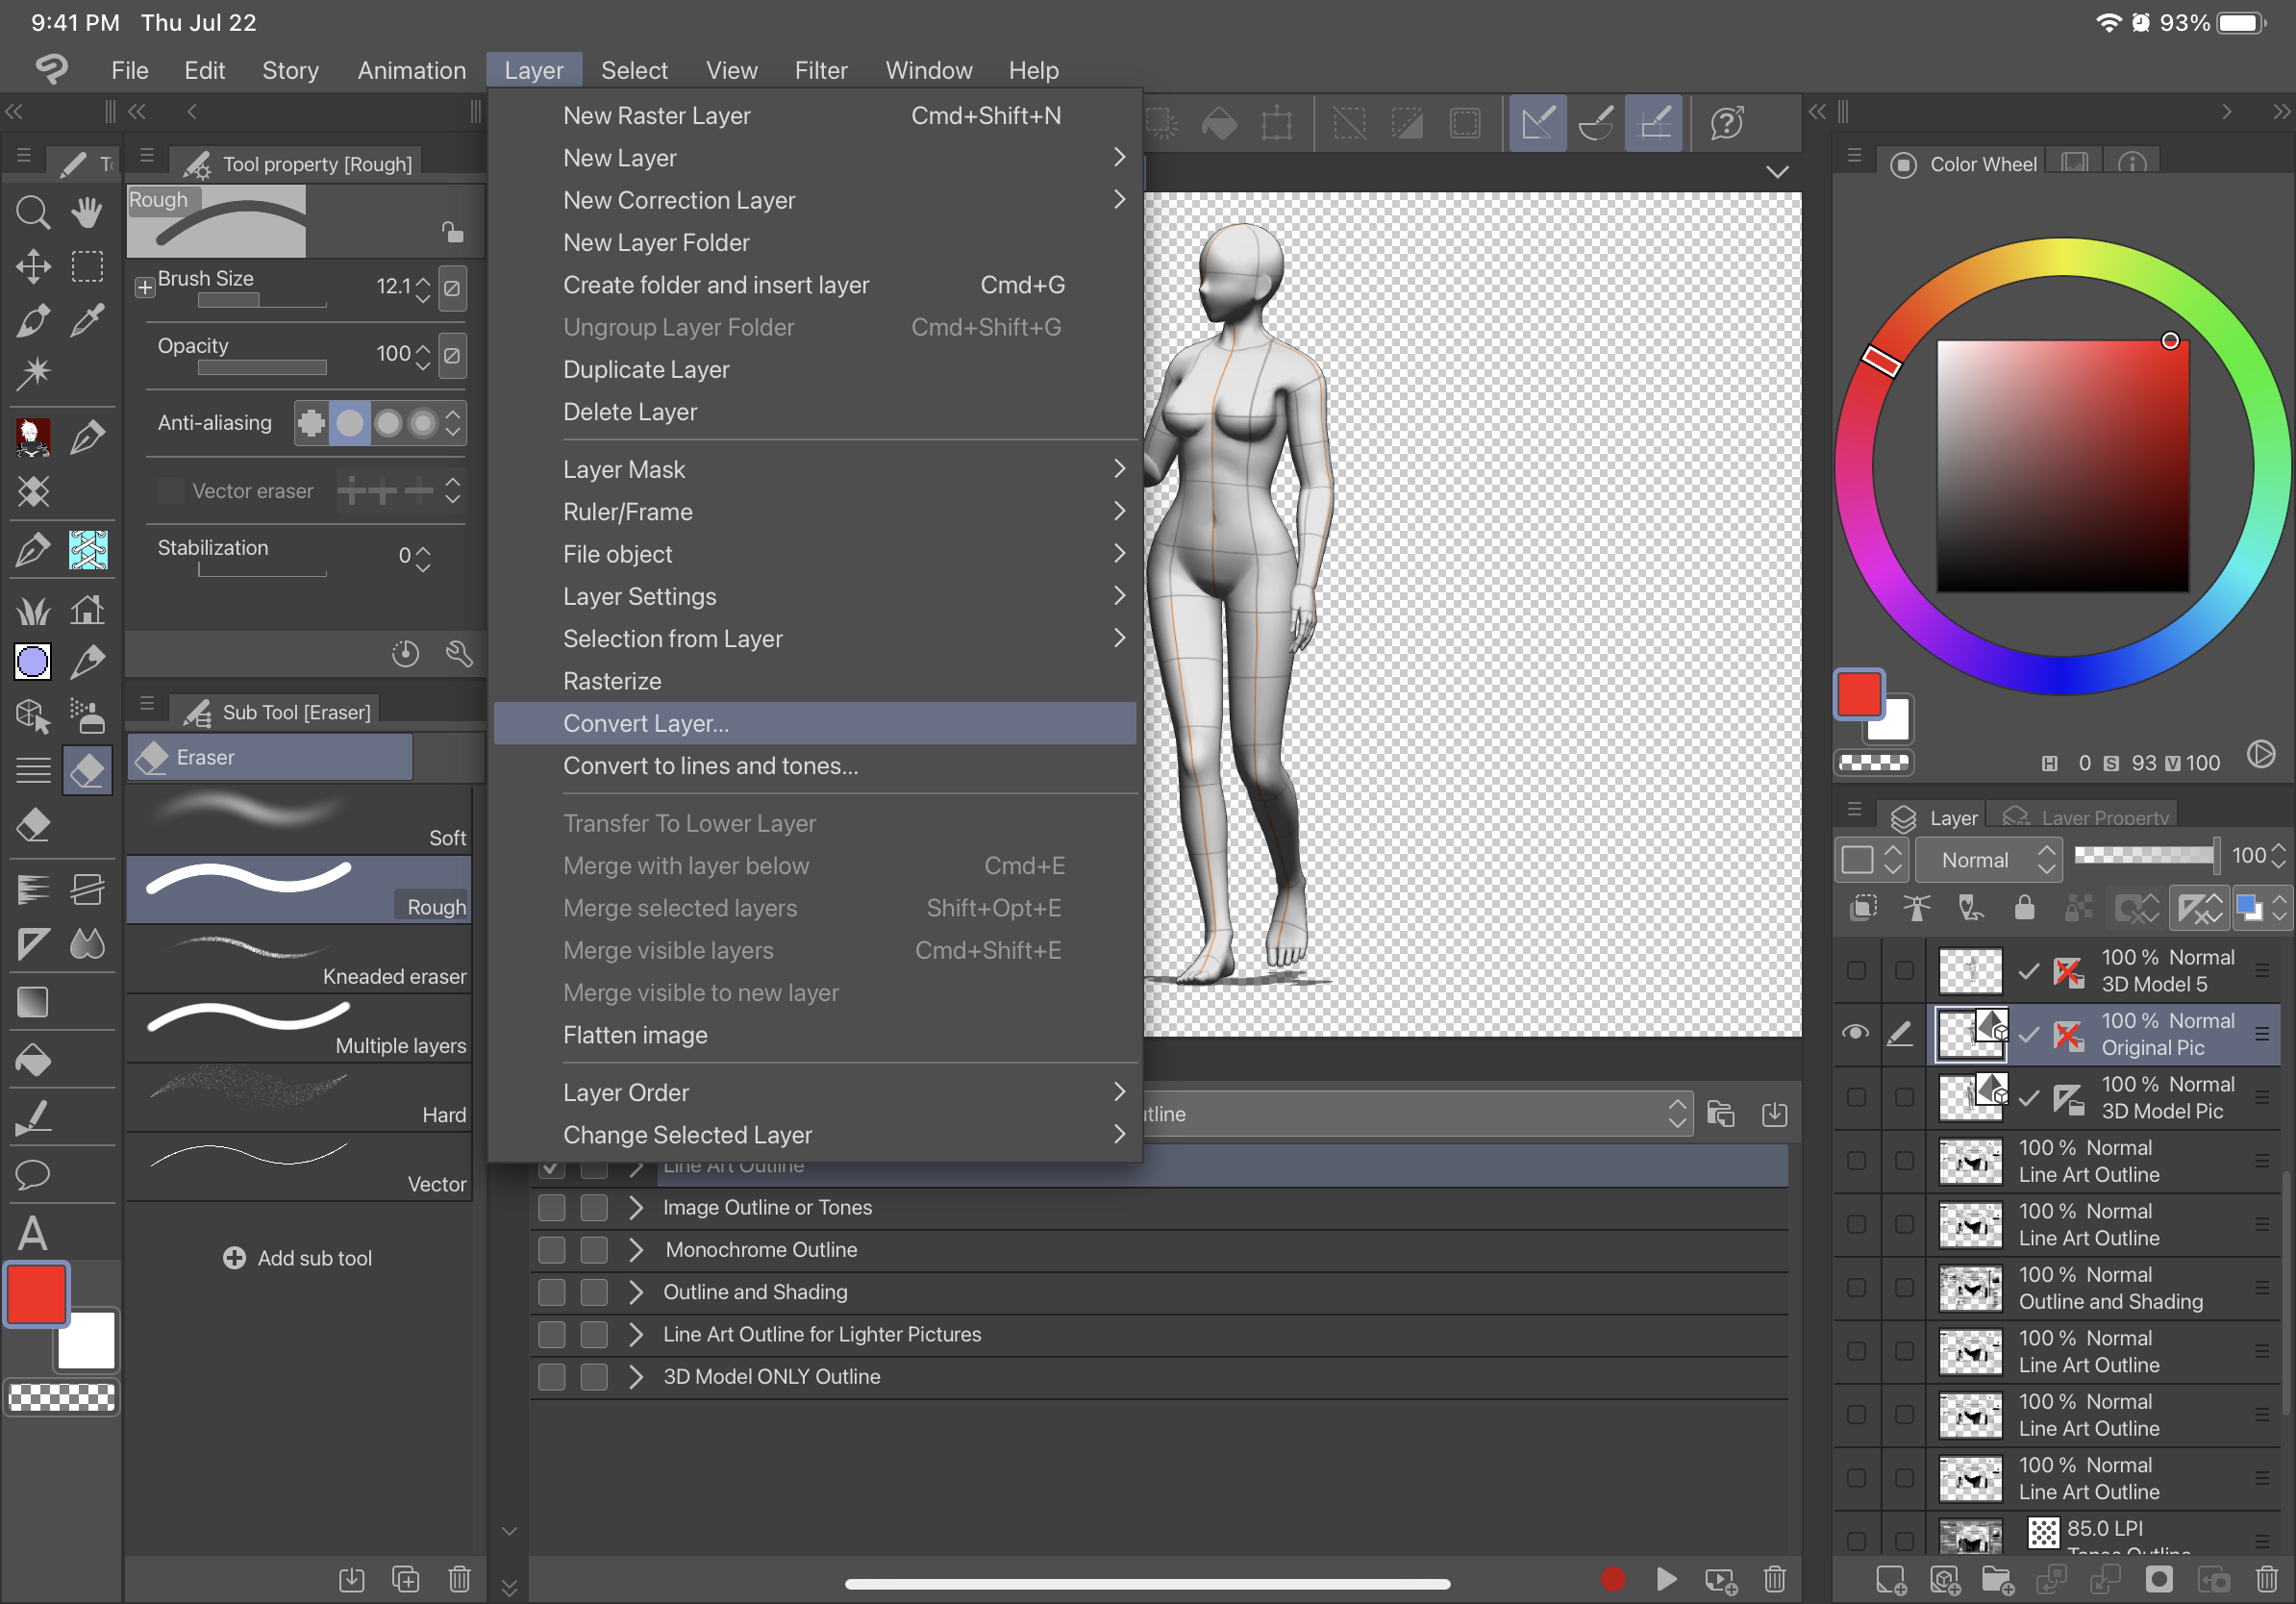

descripción:
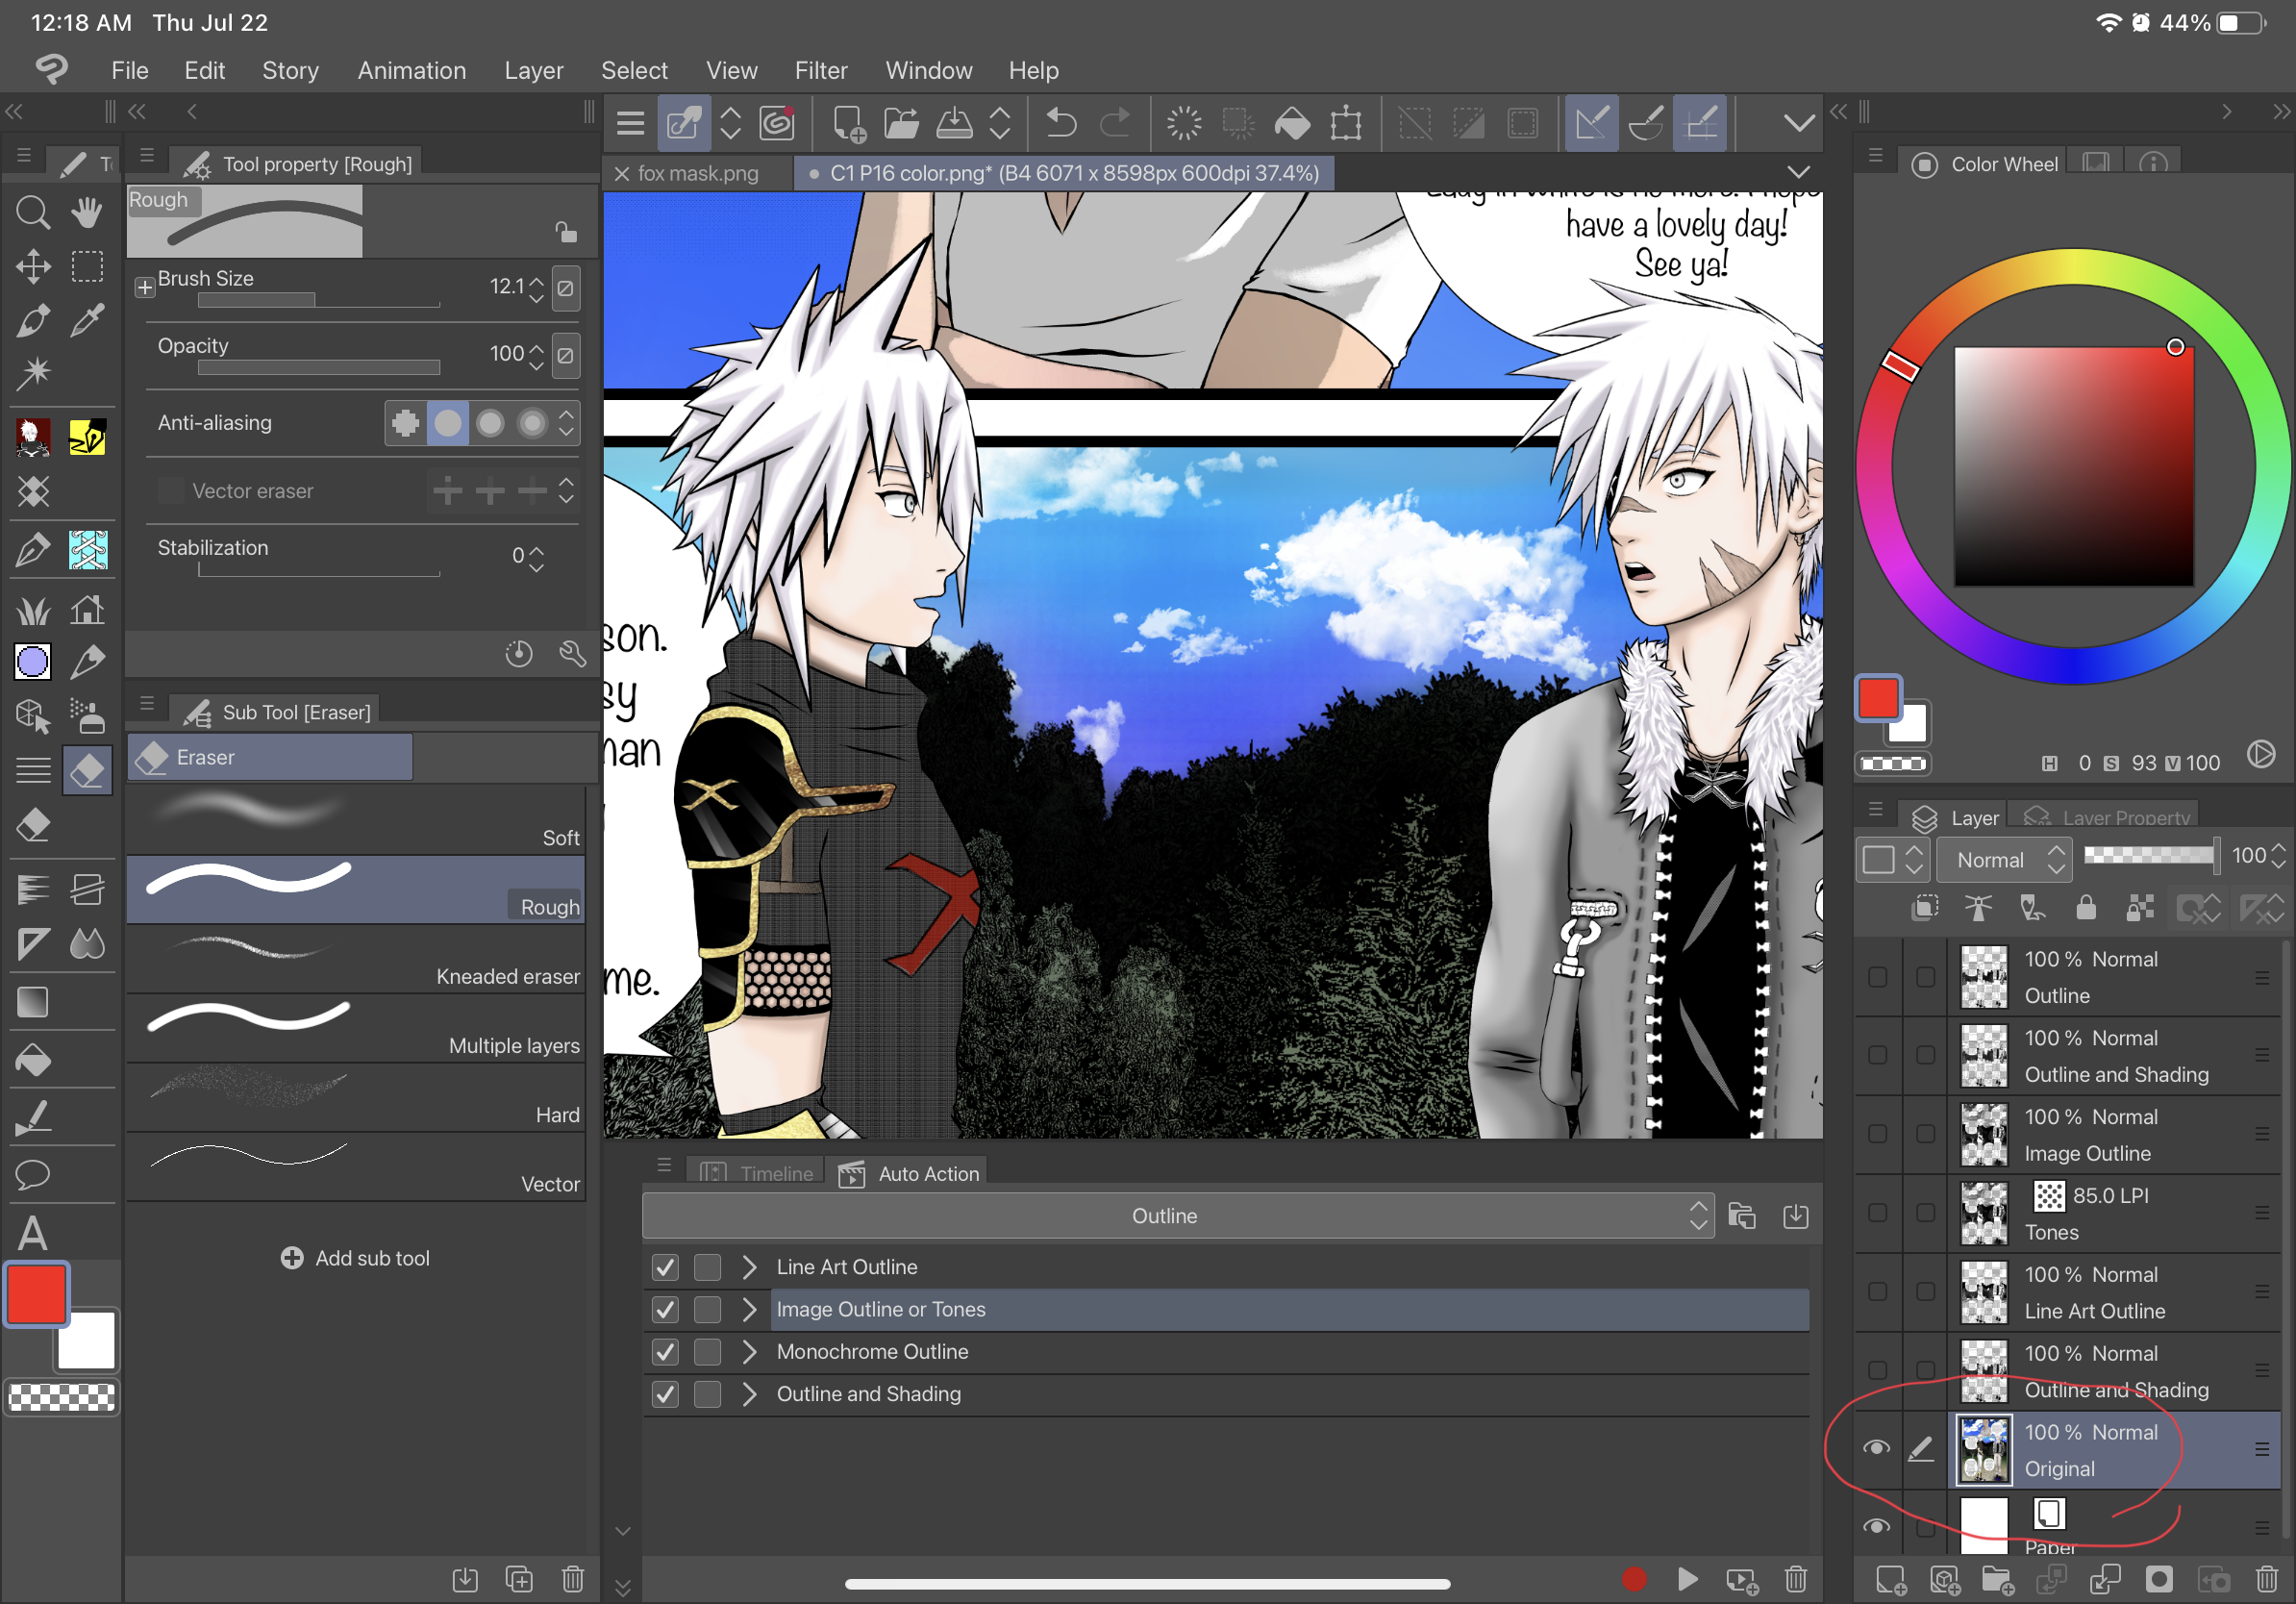
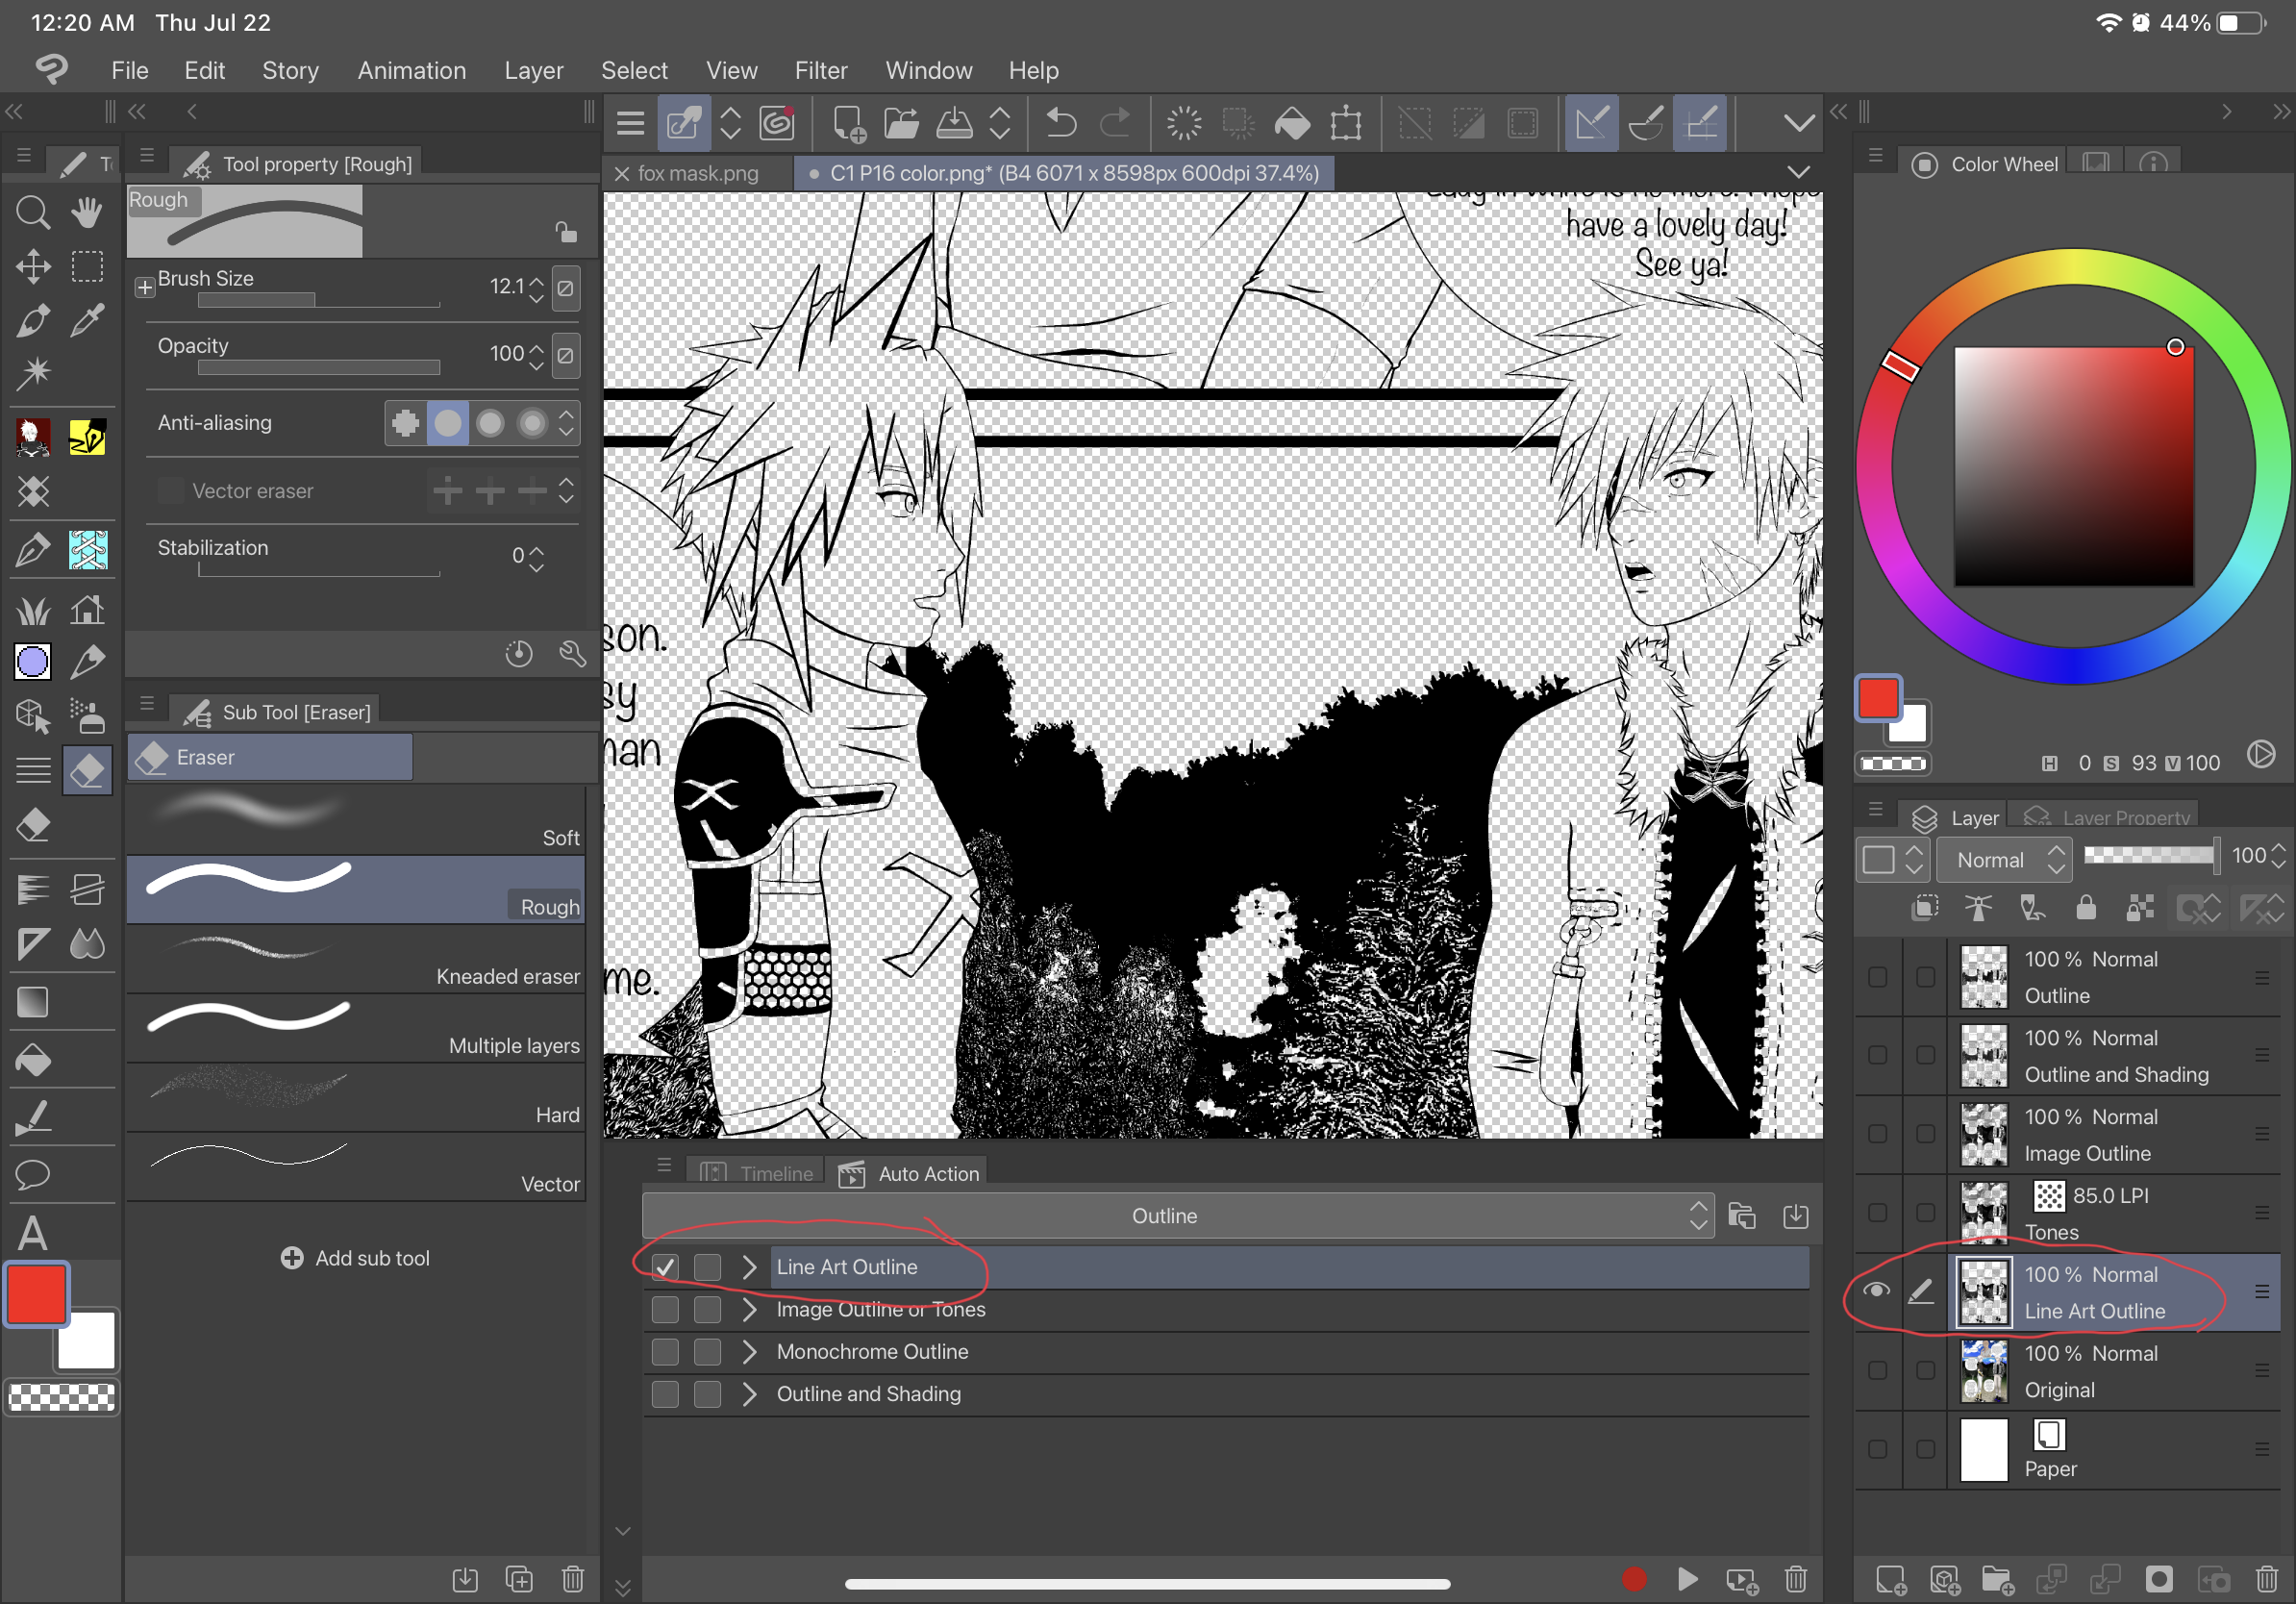
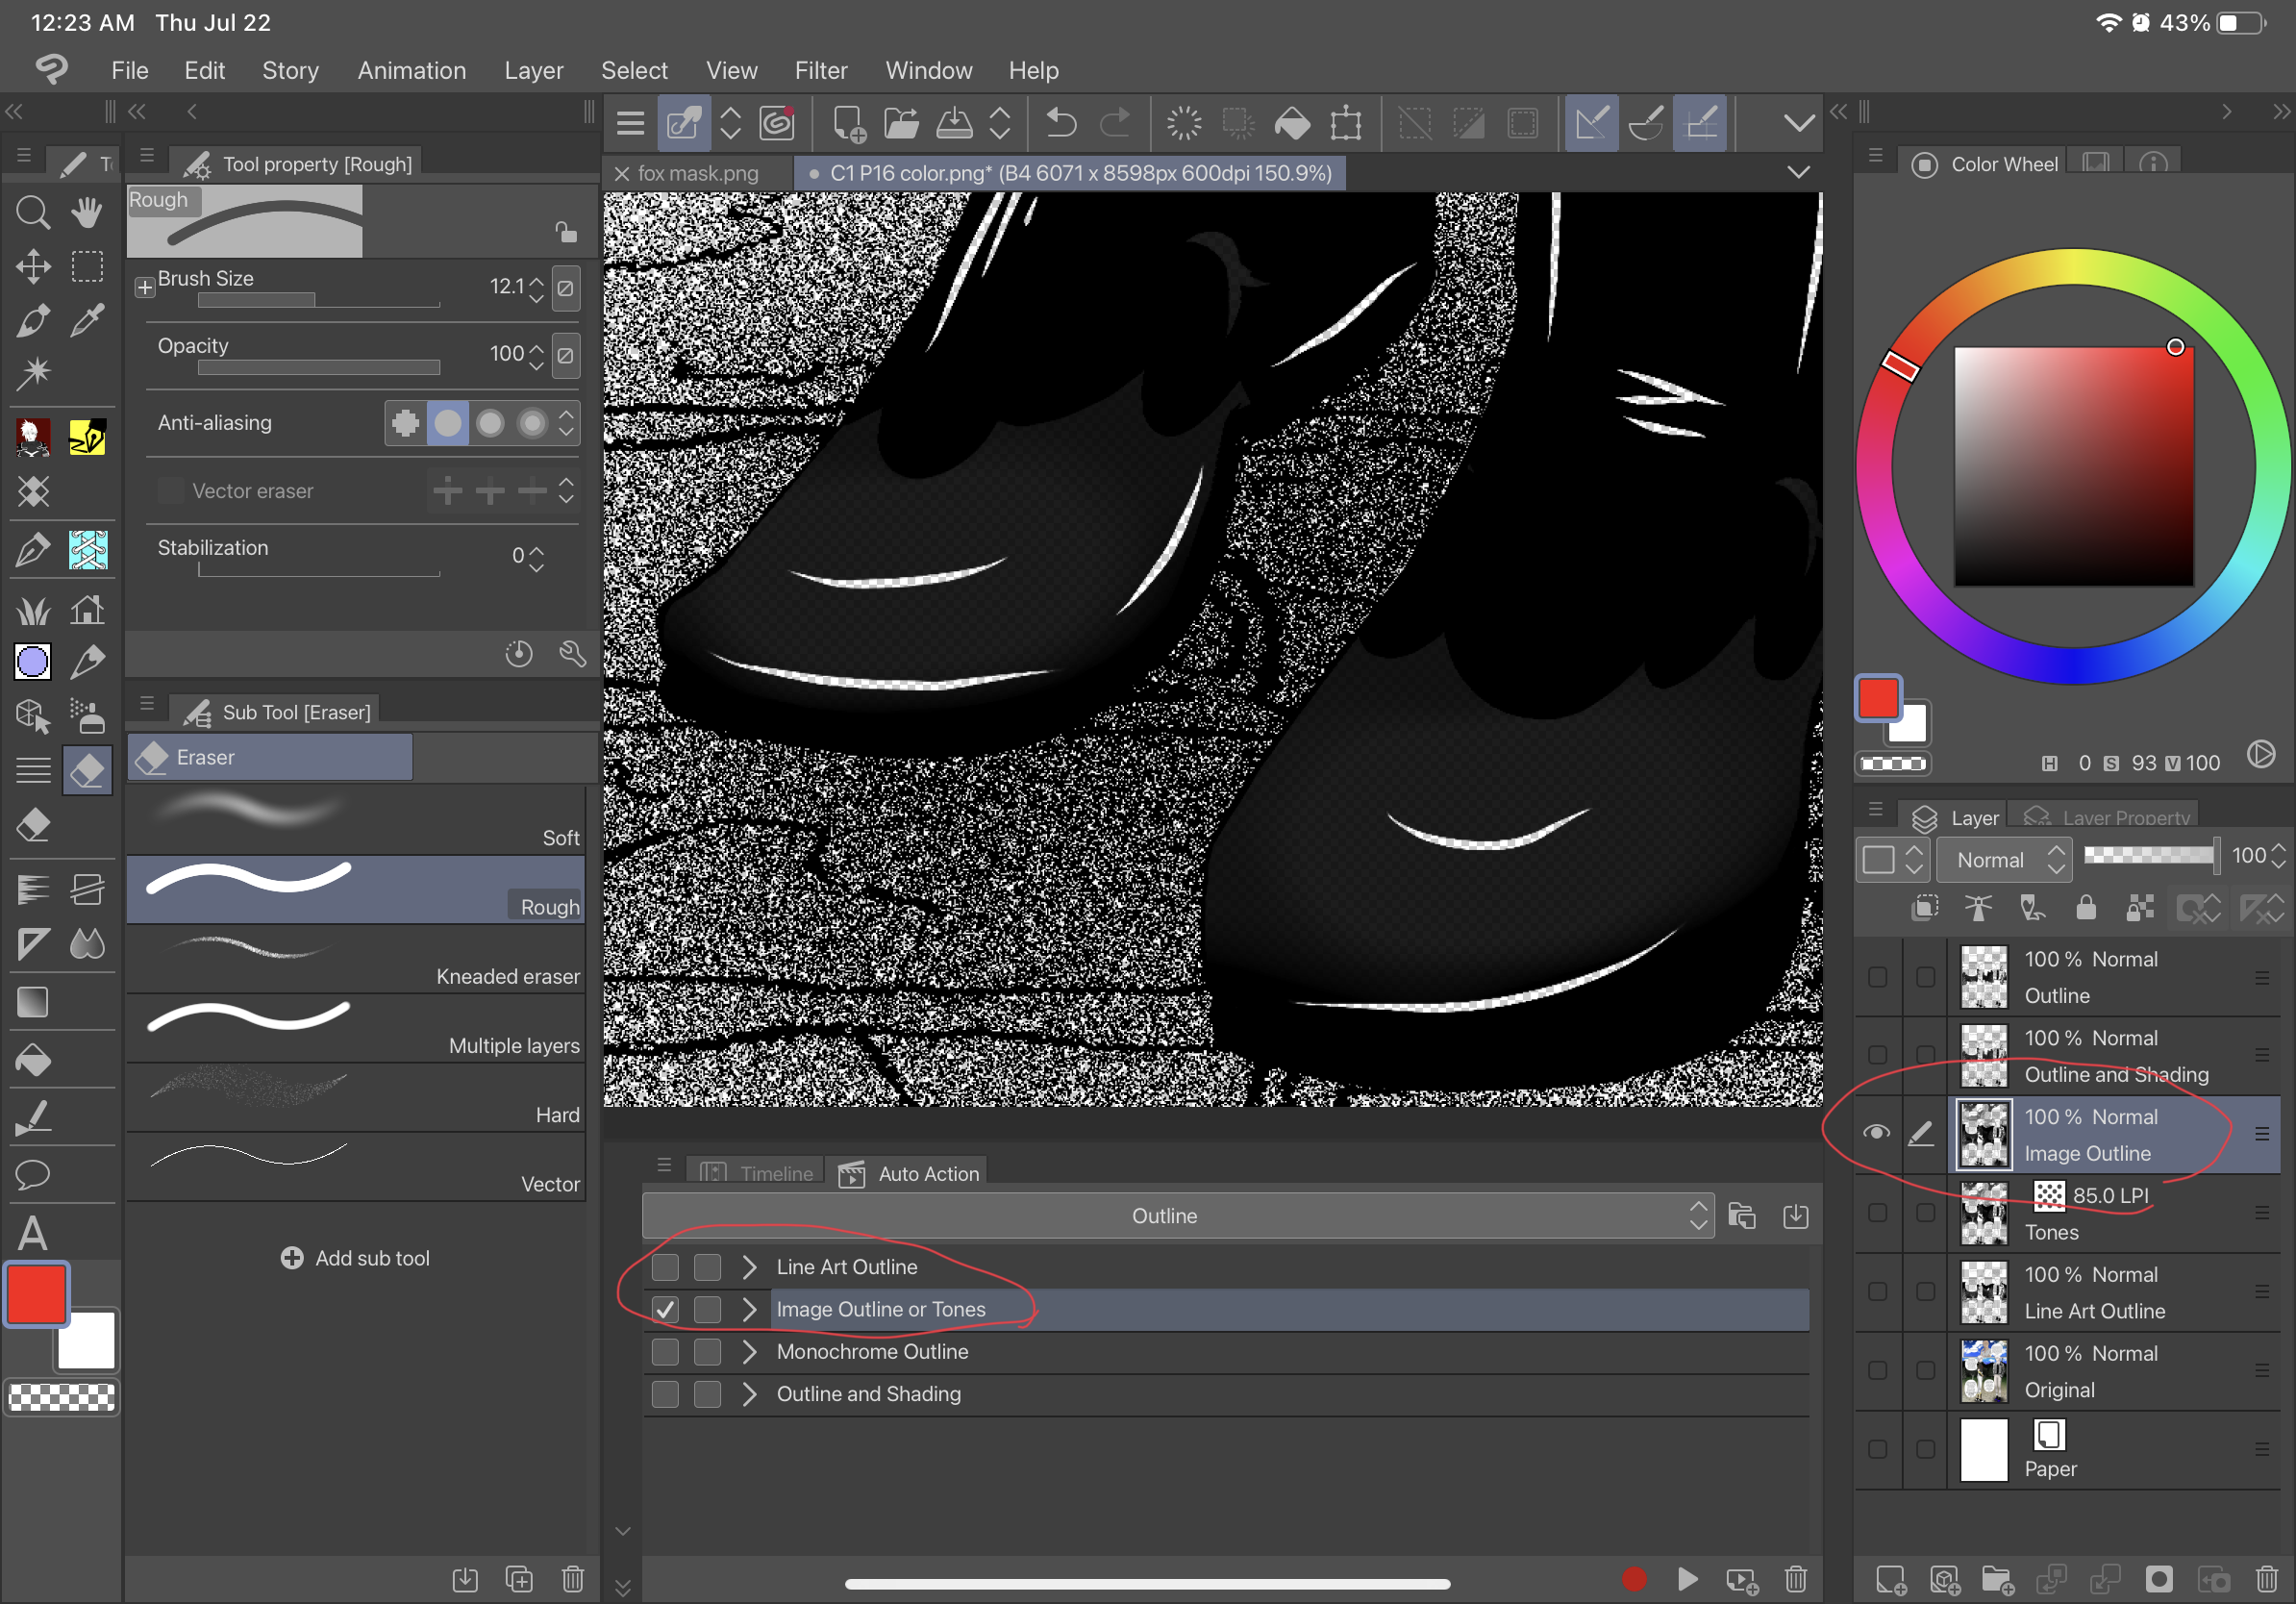
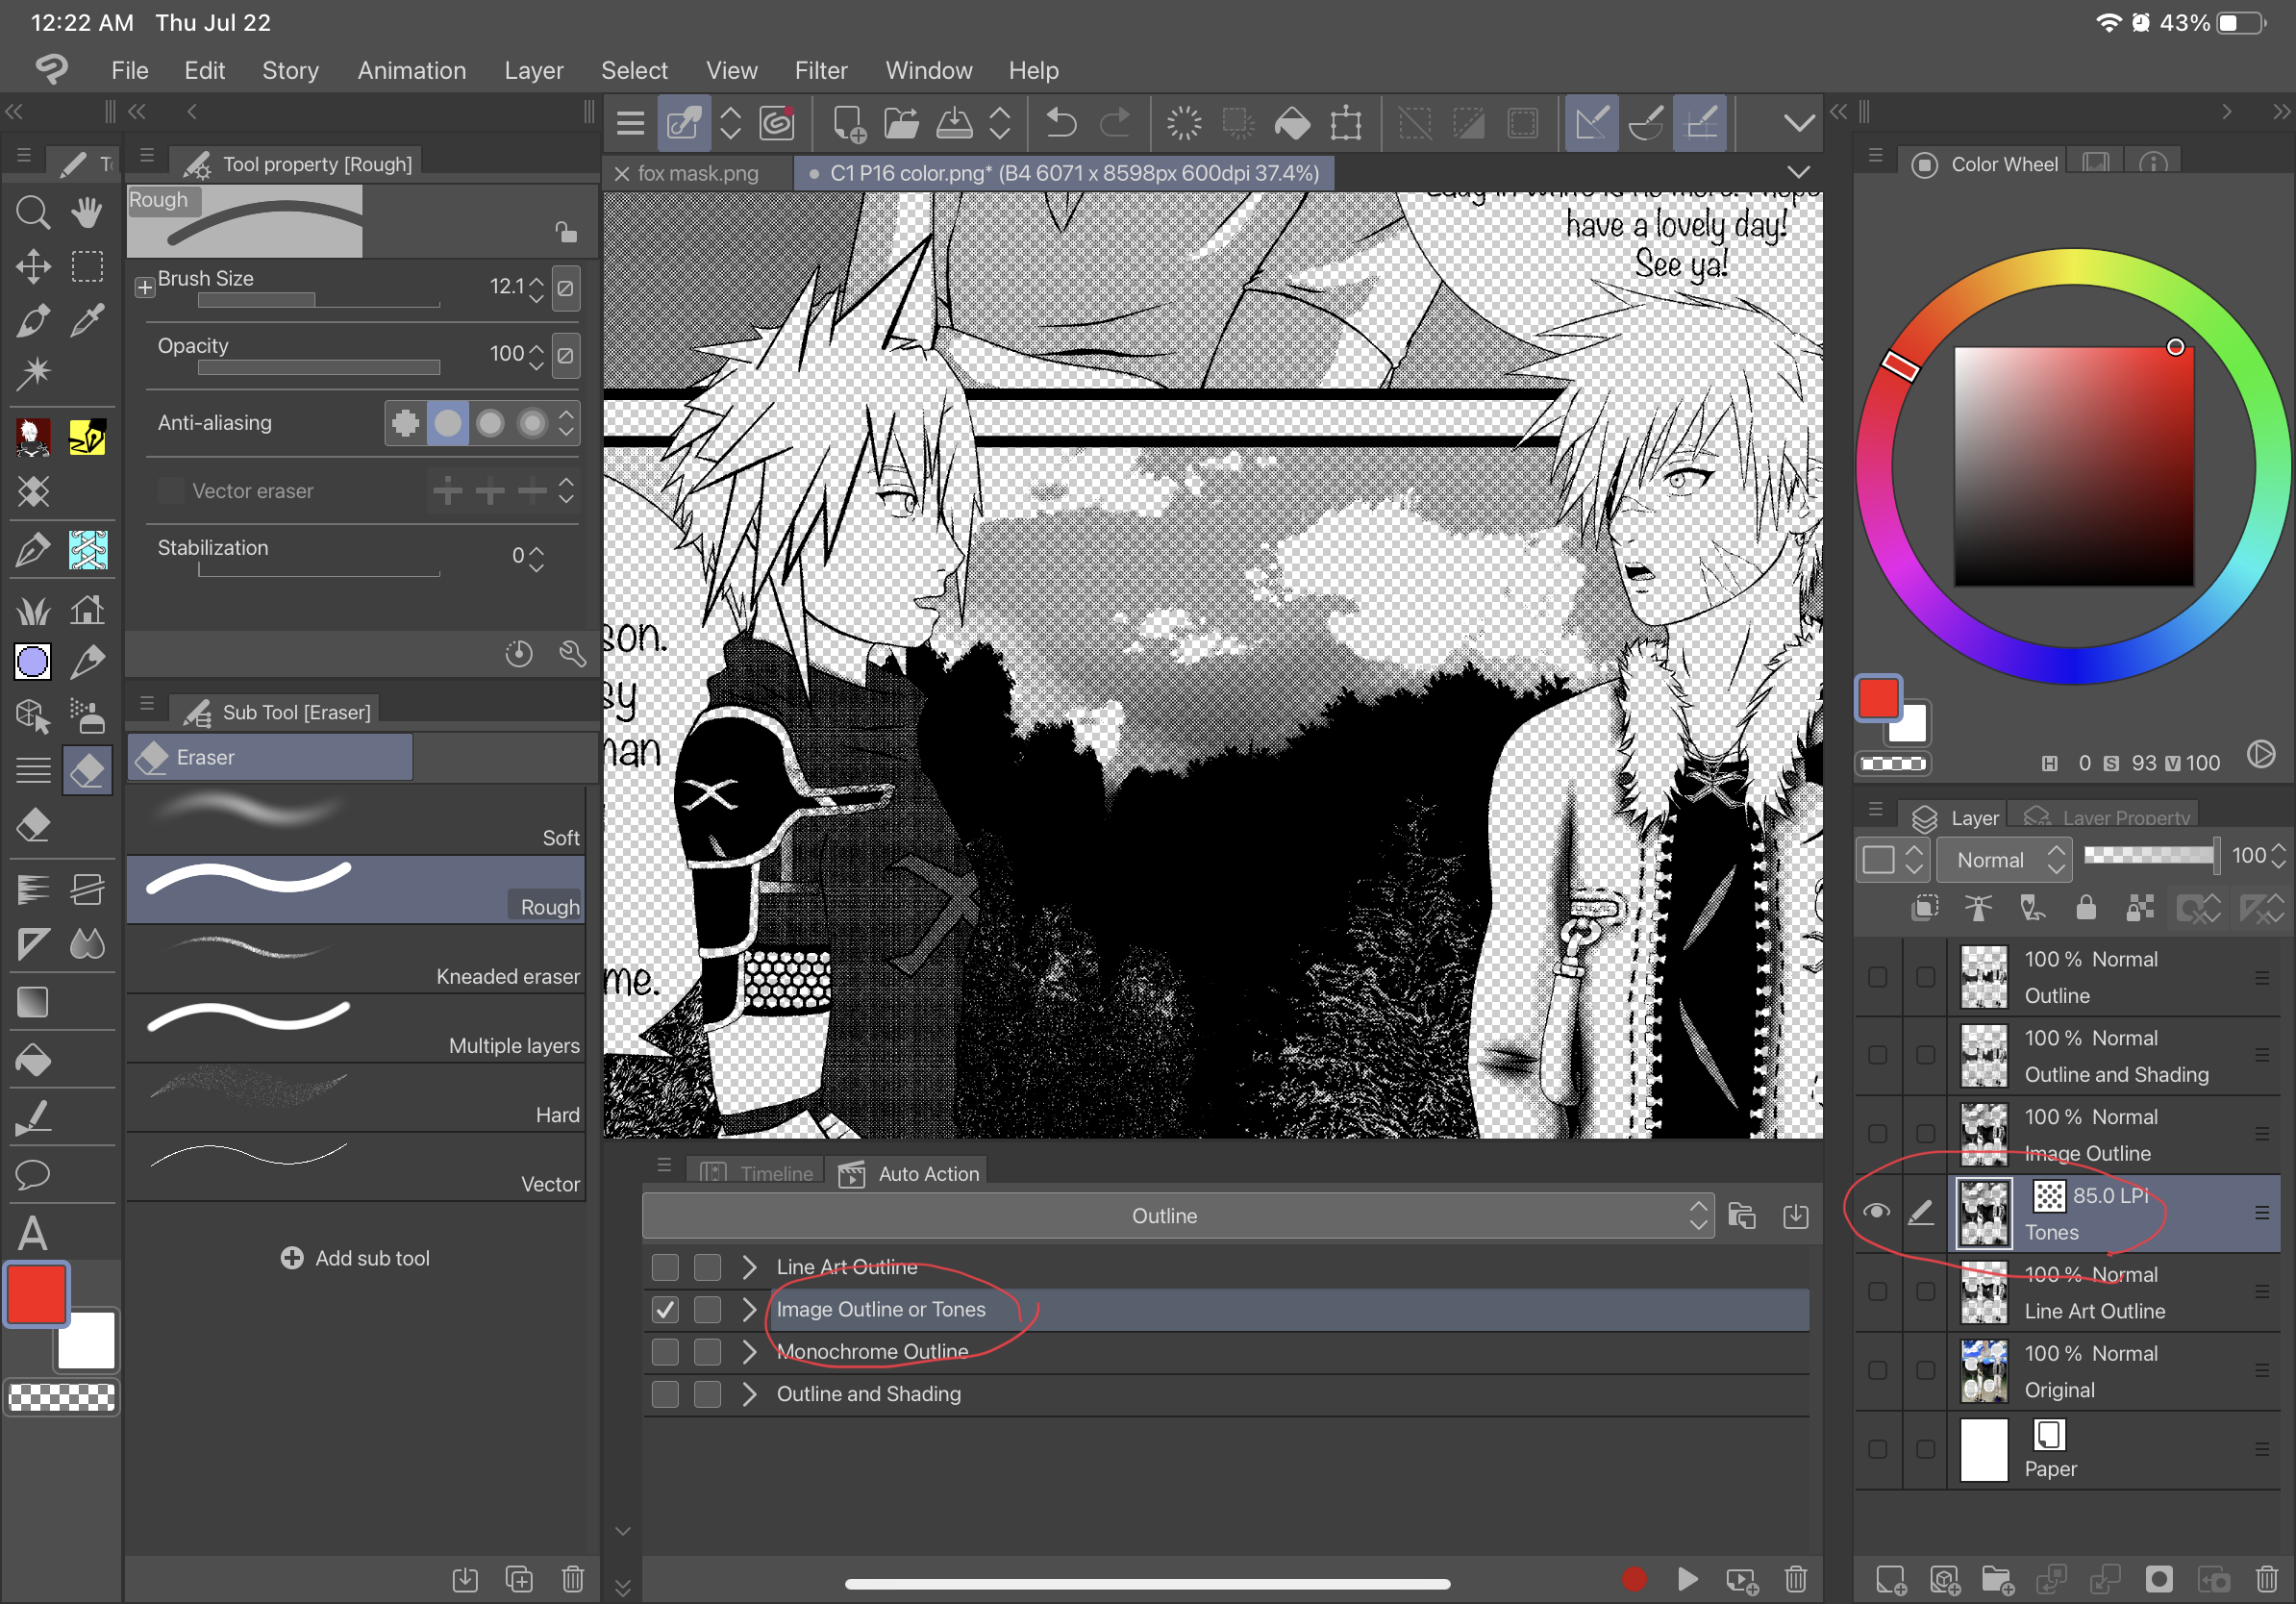
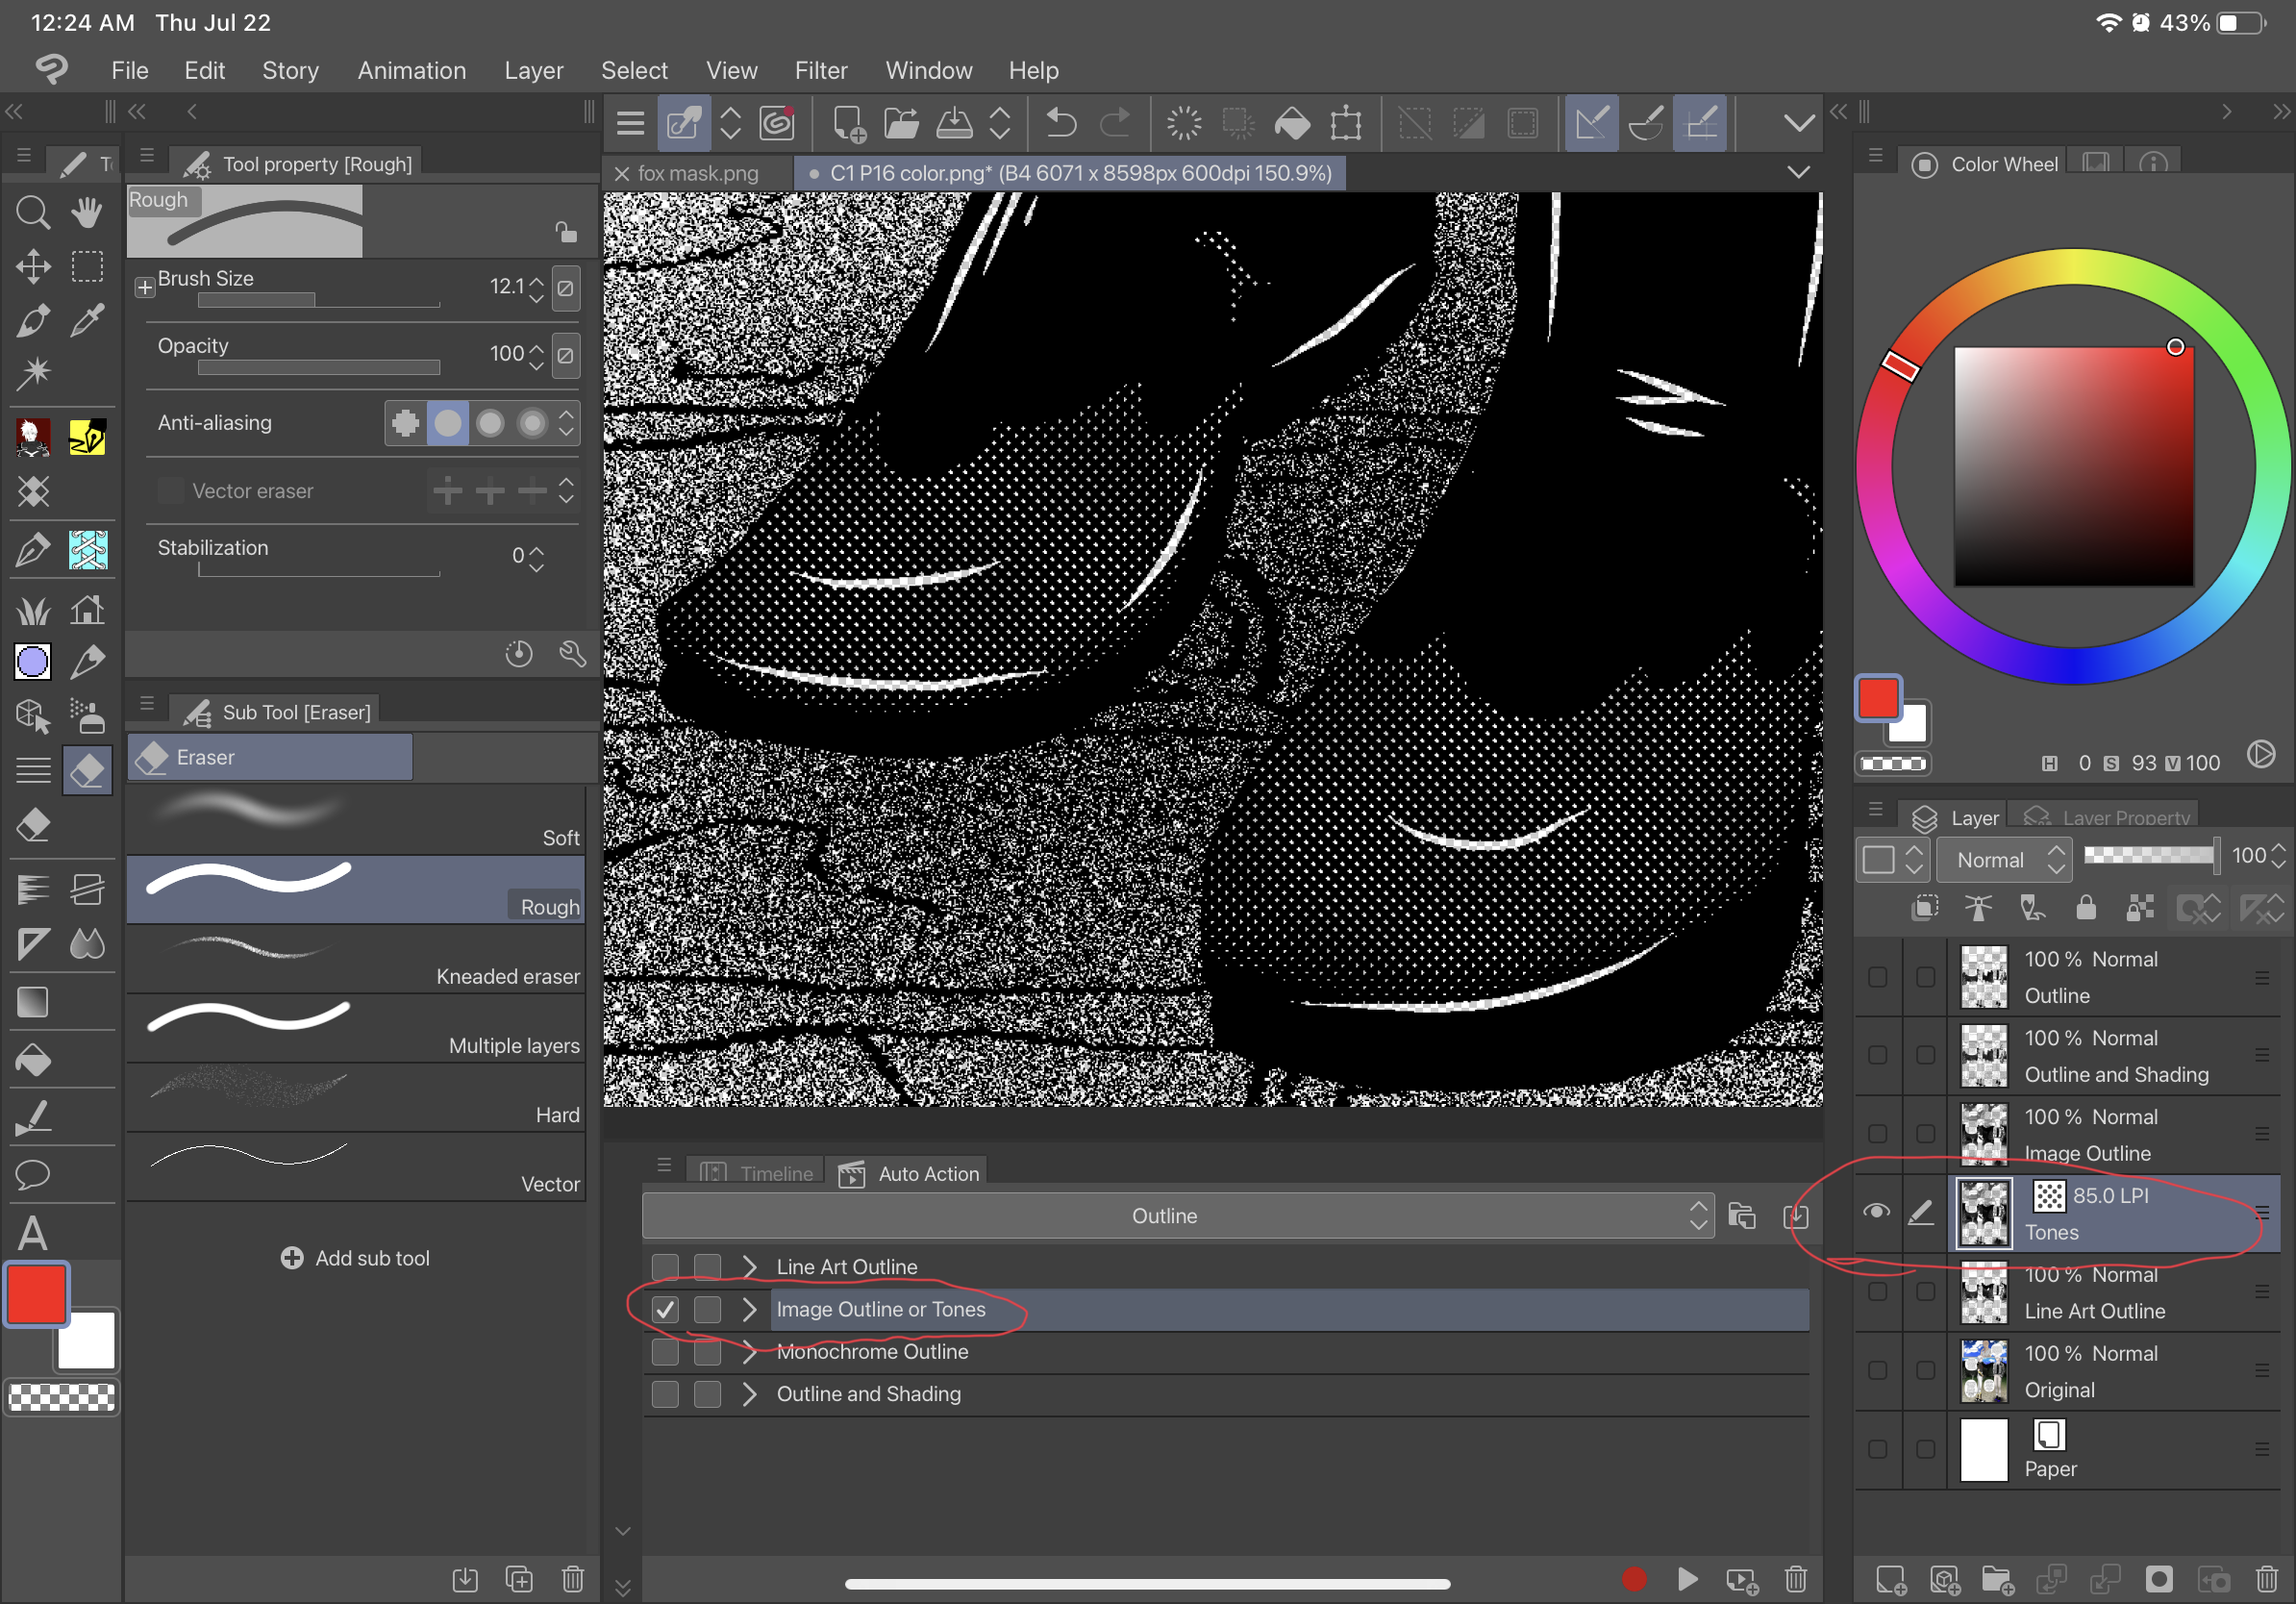
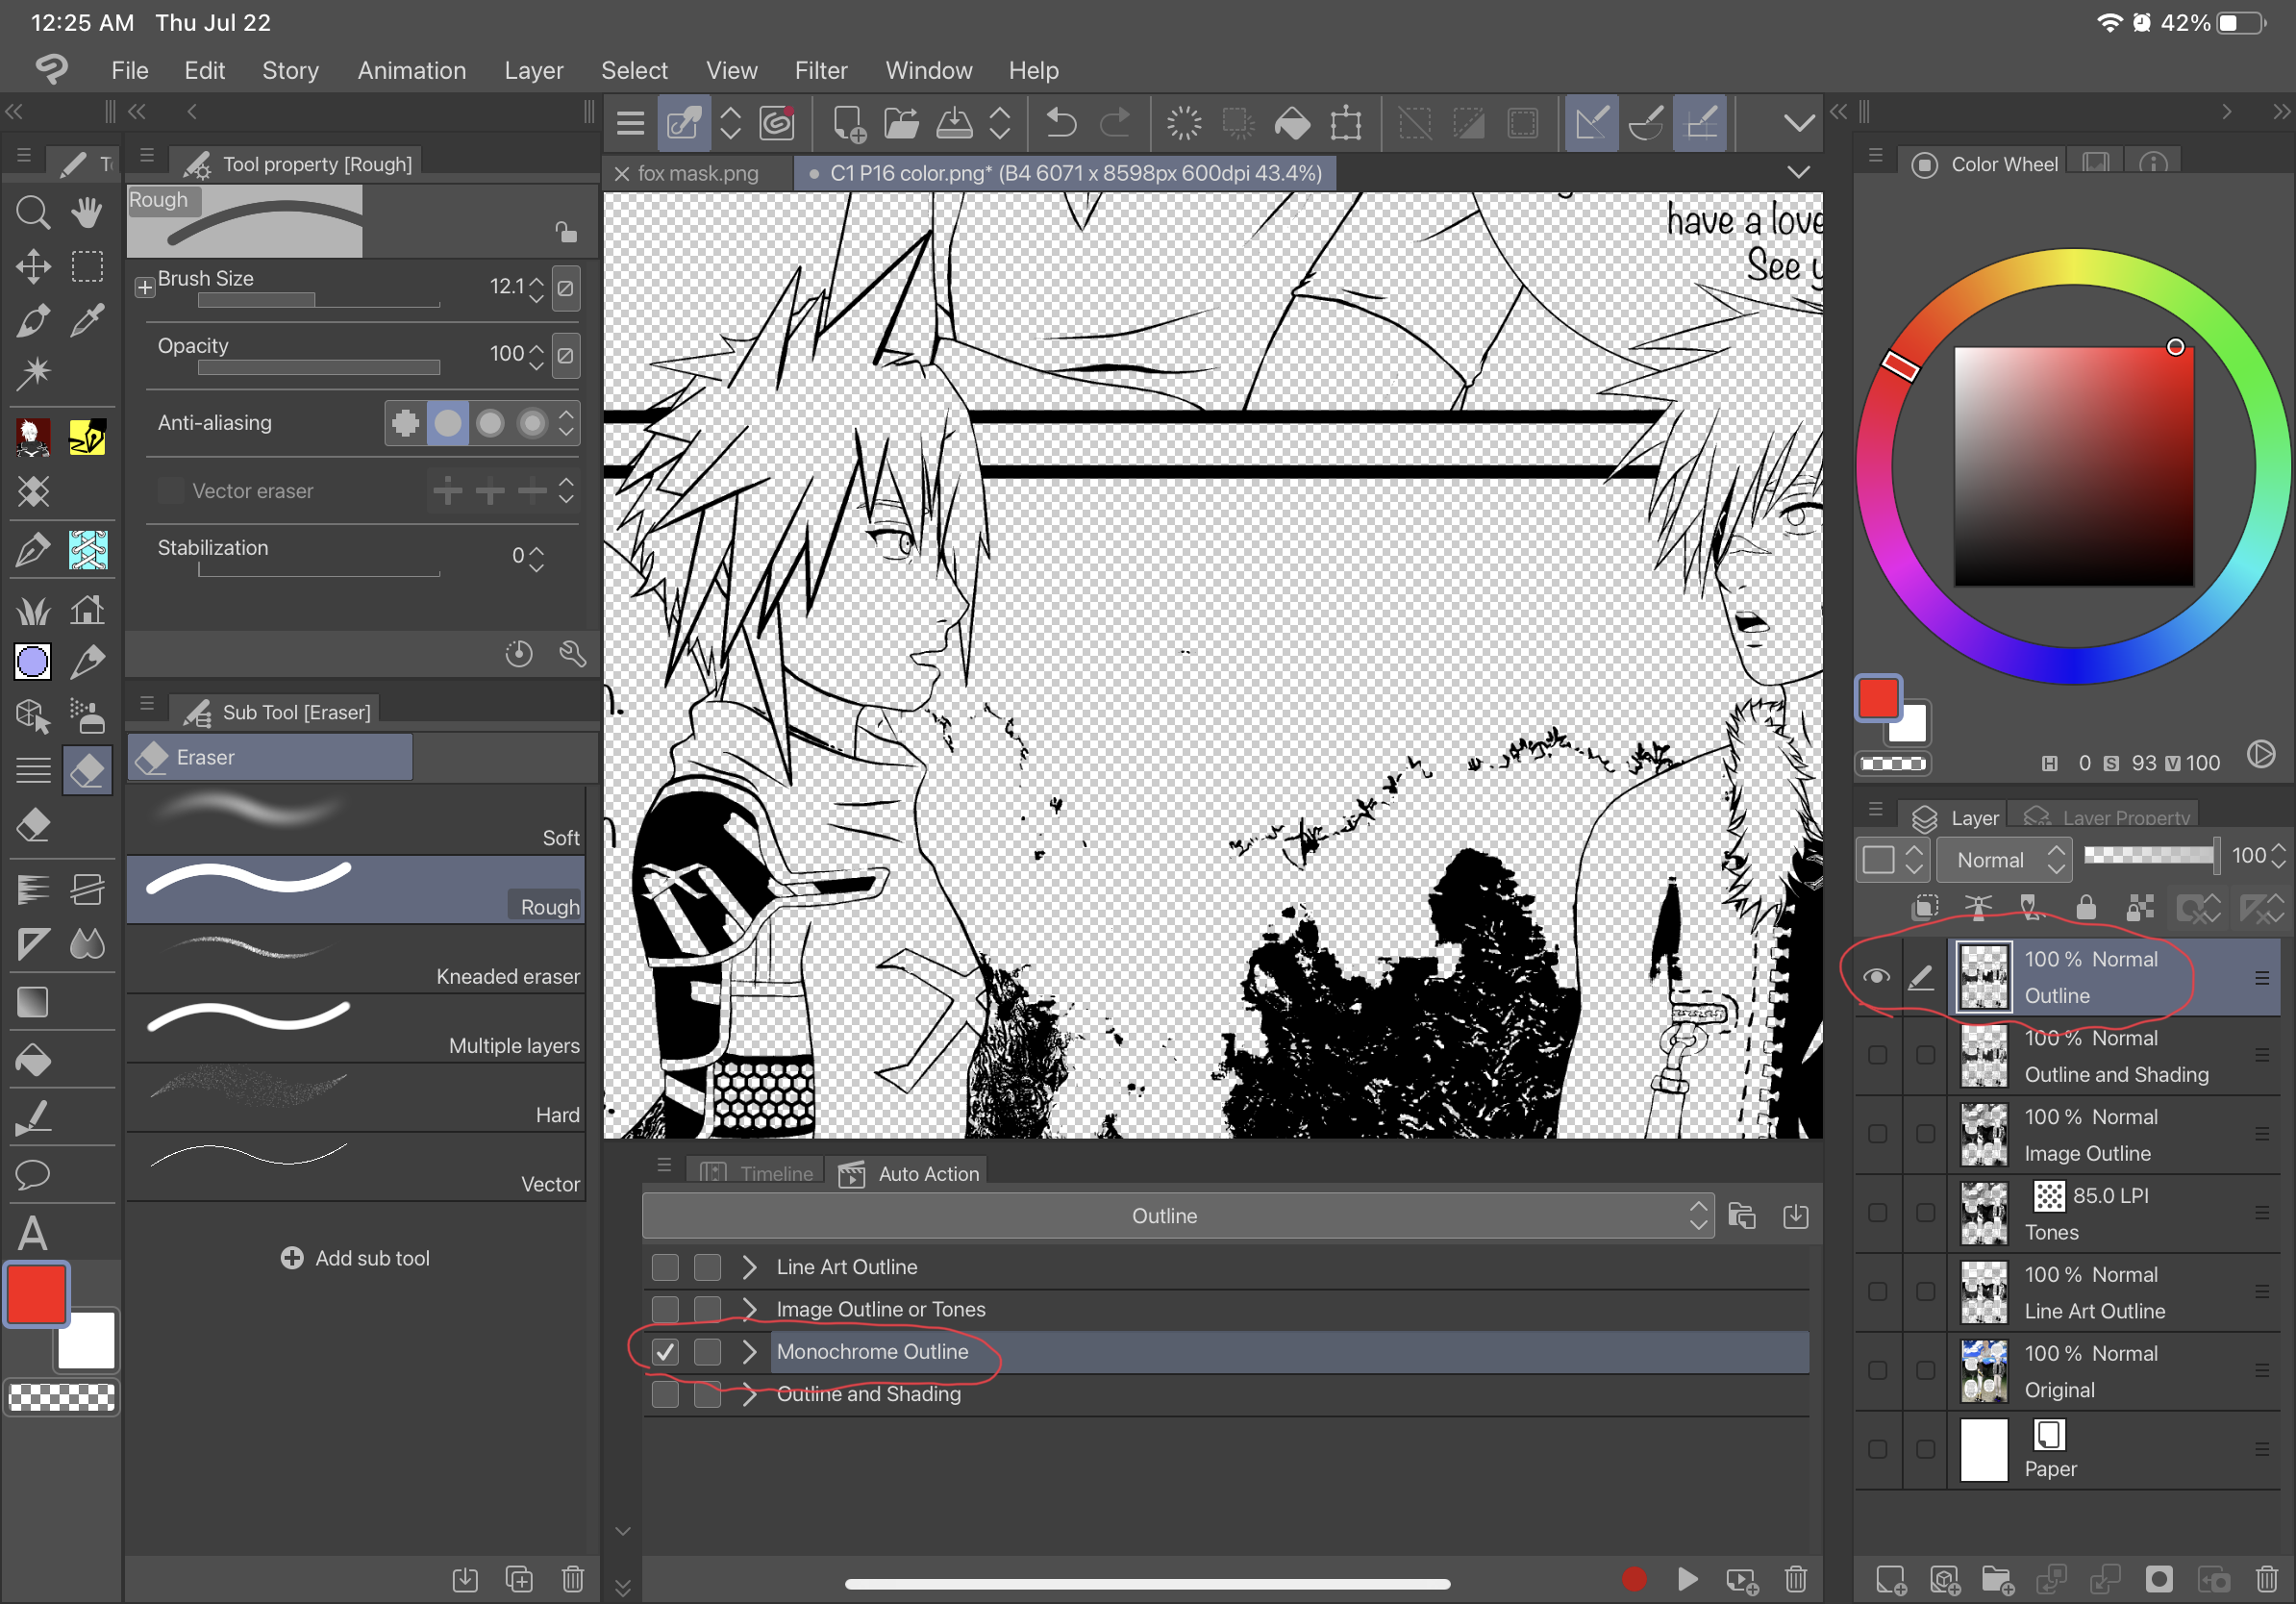
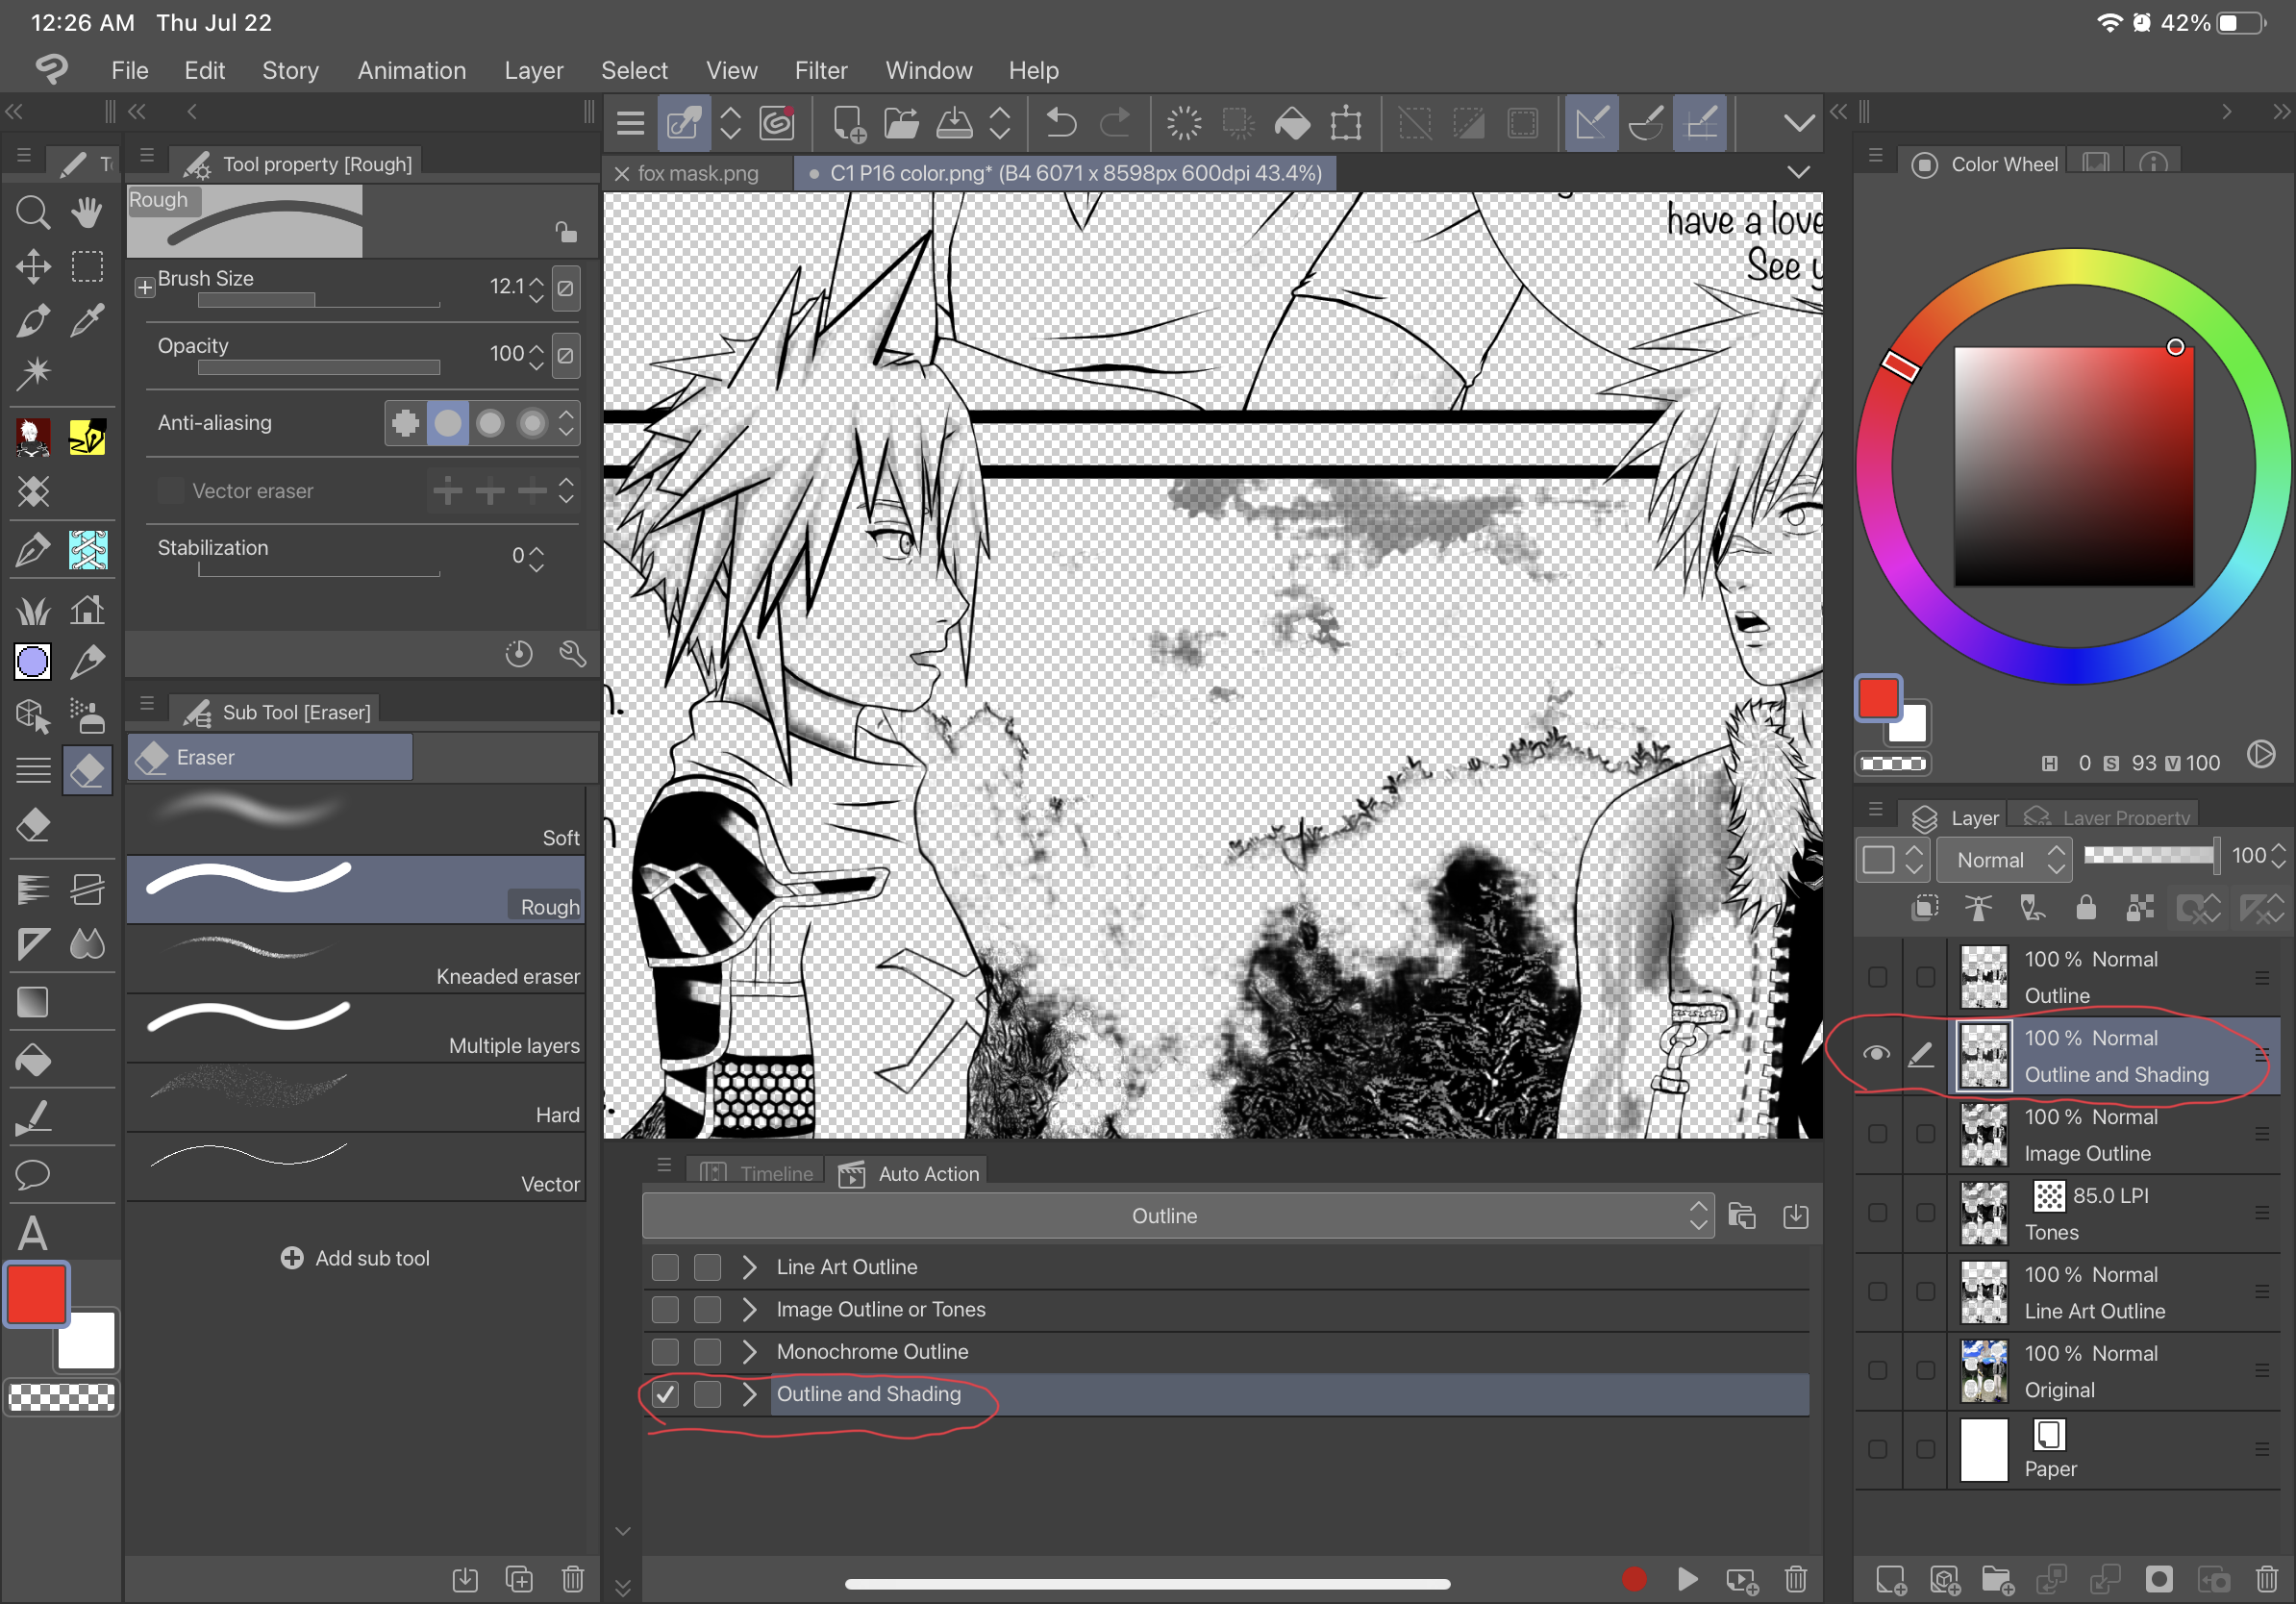
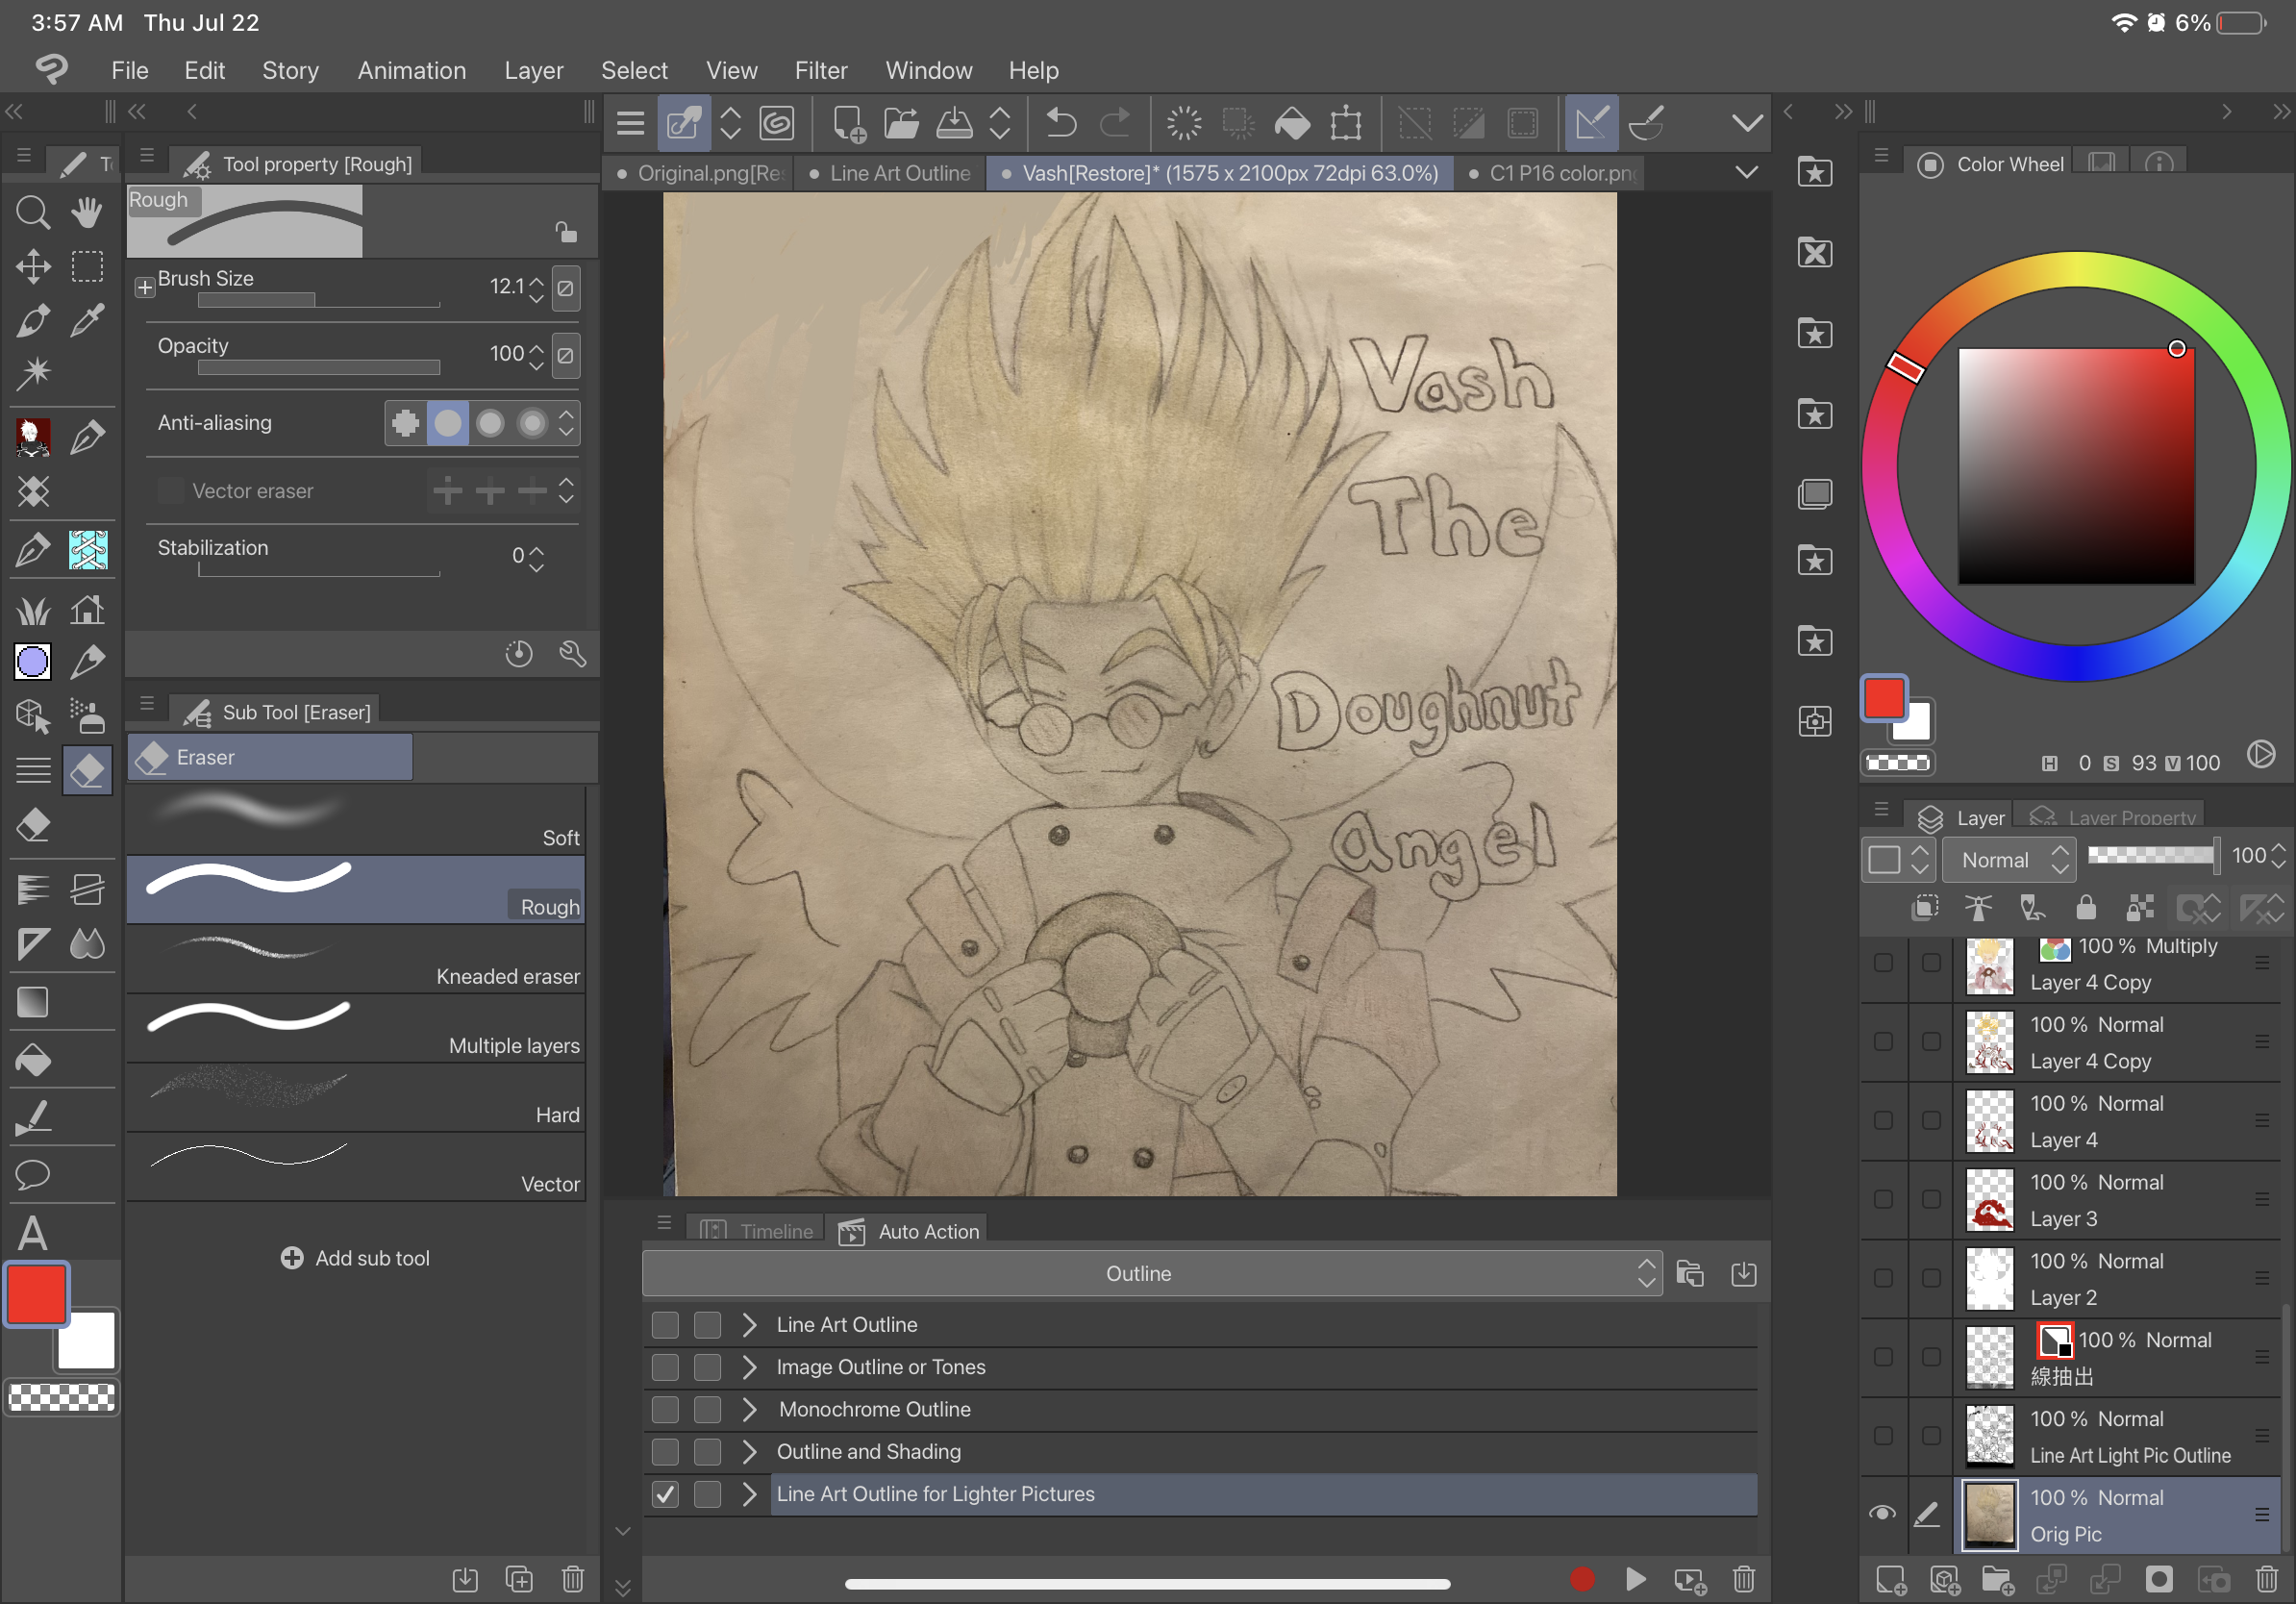
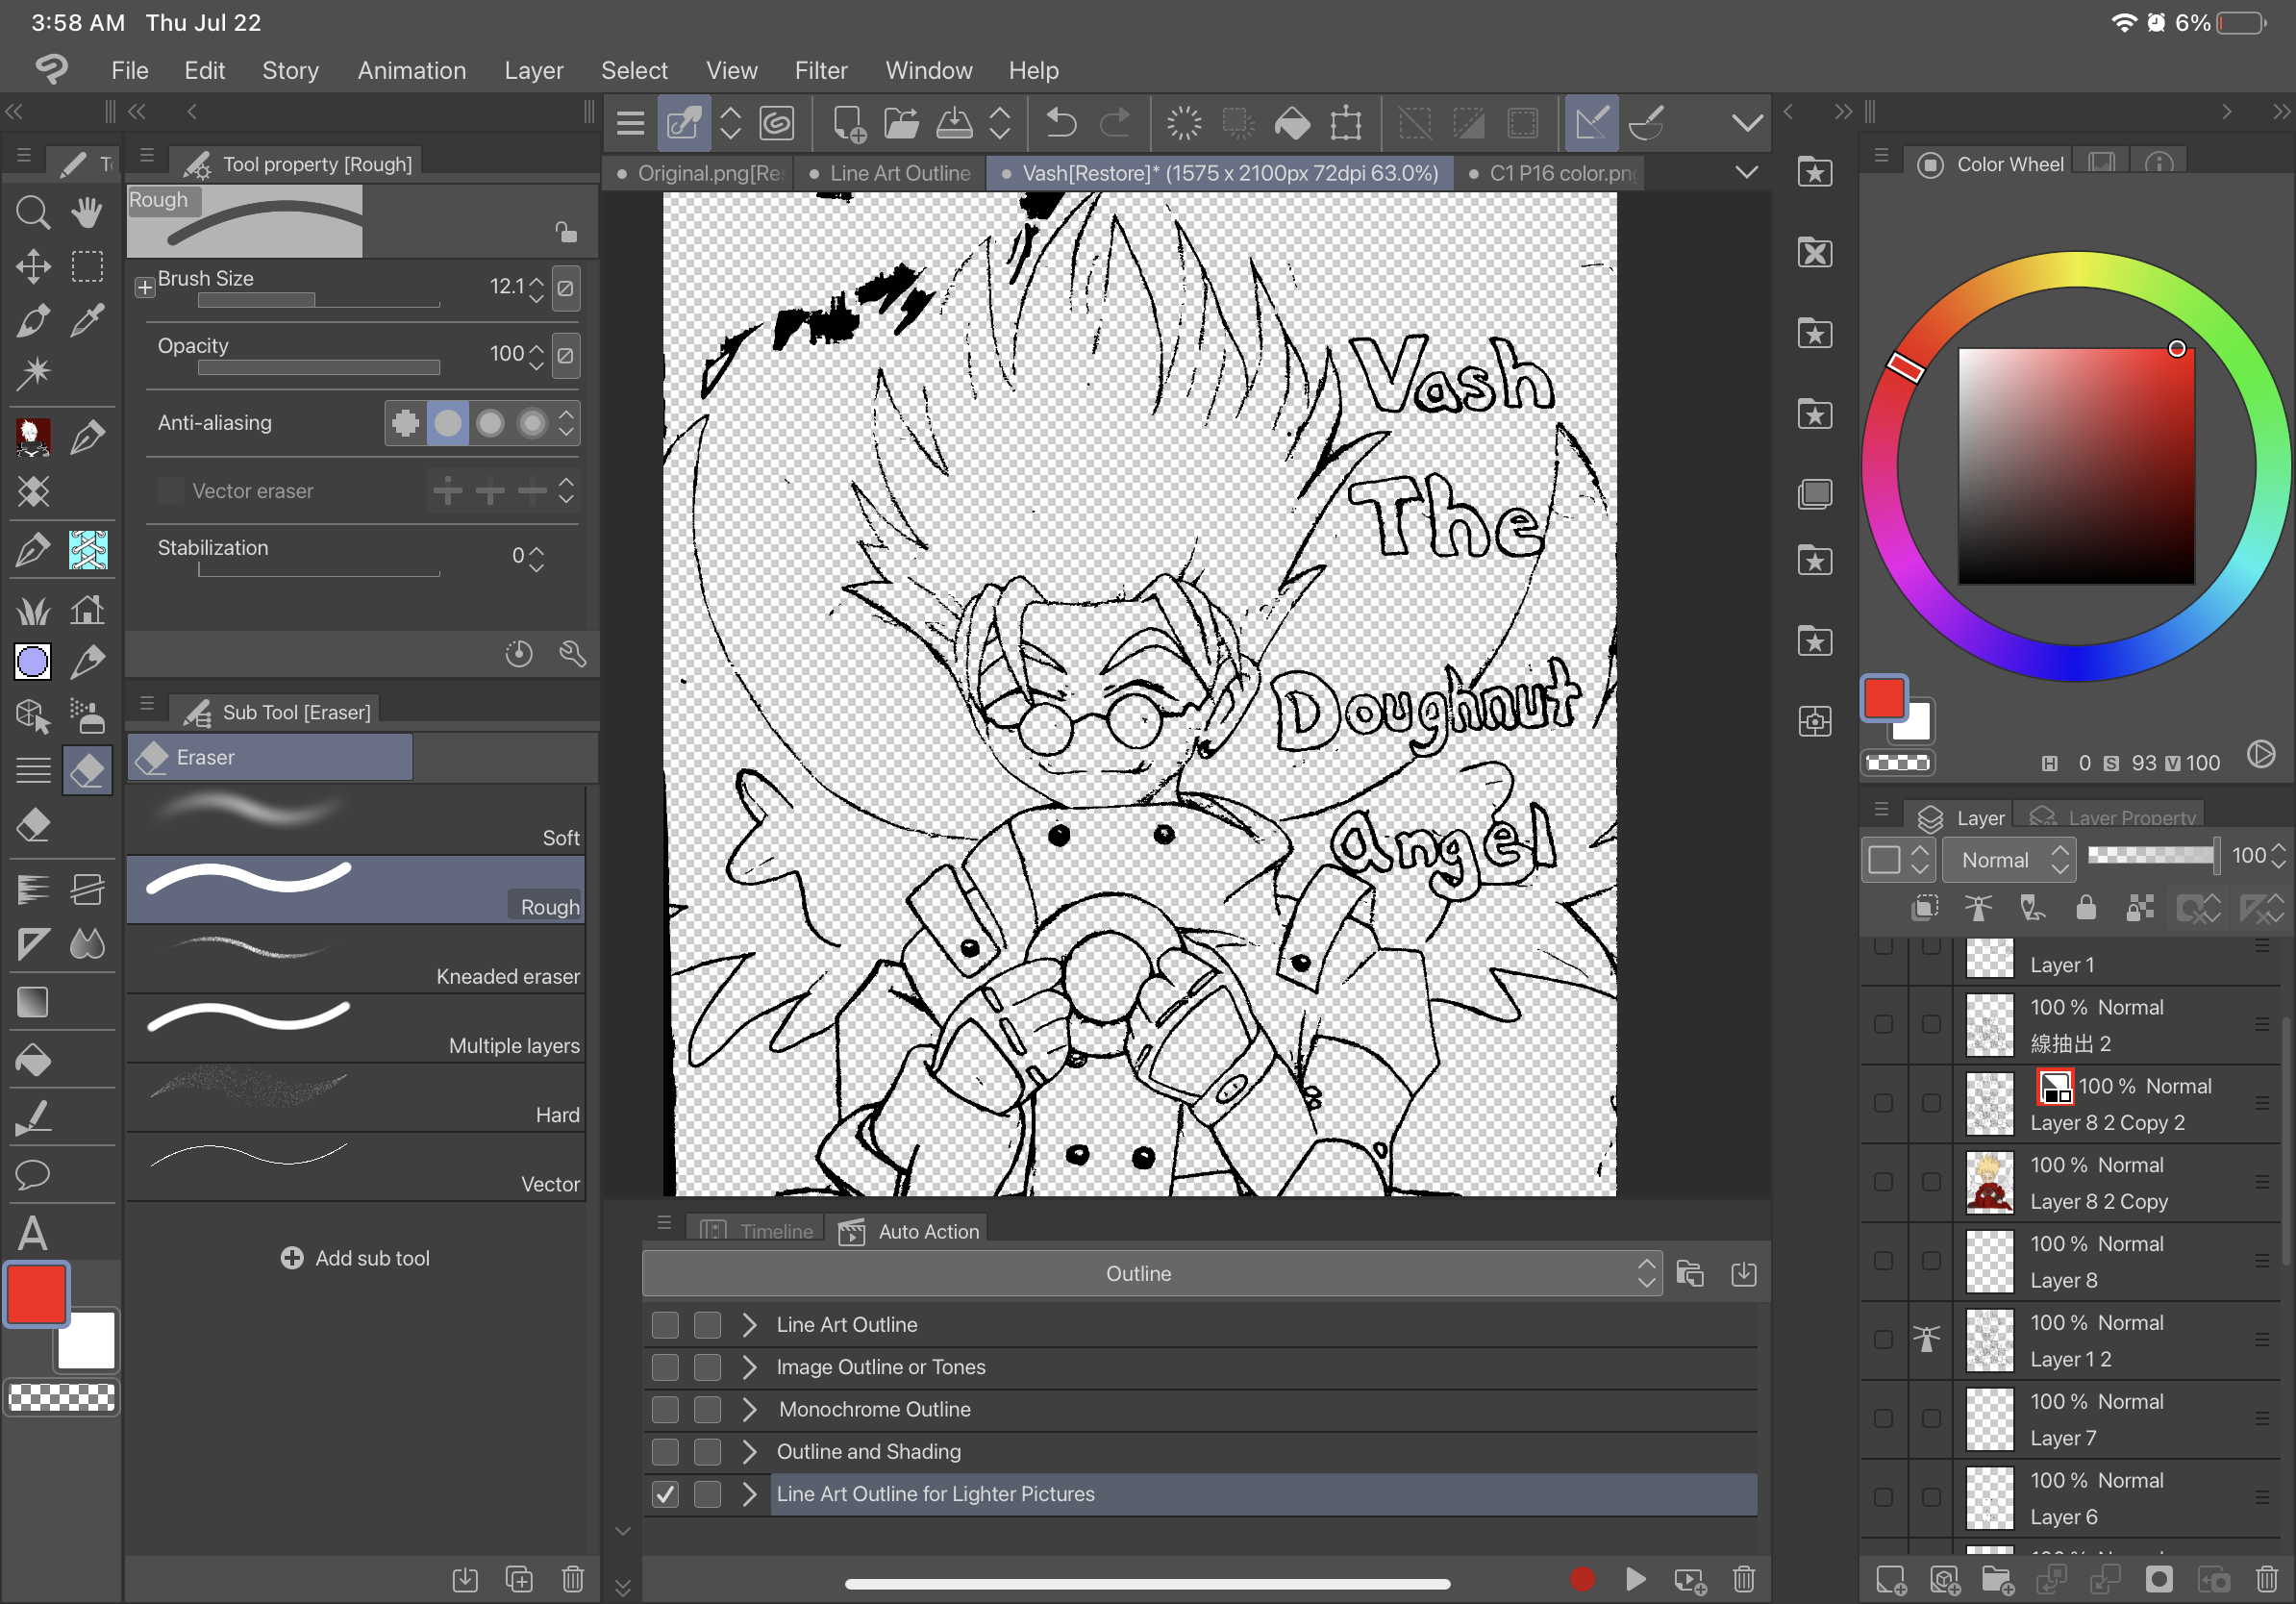
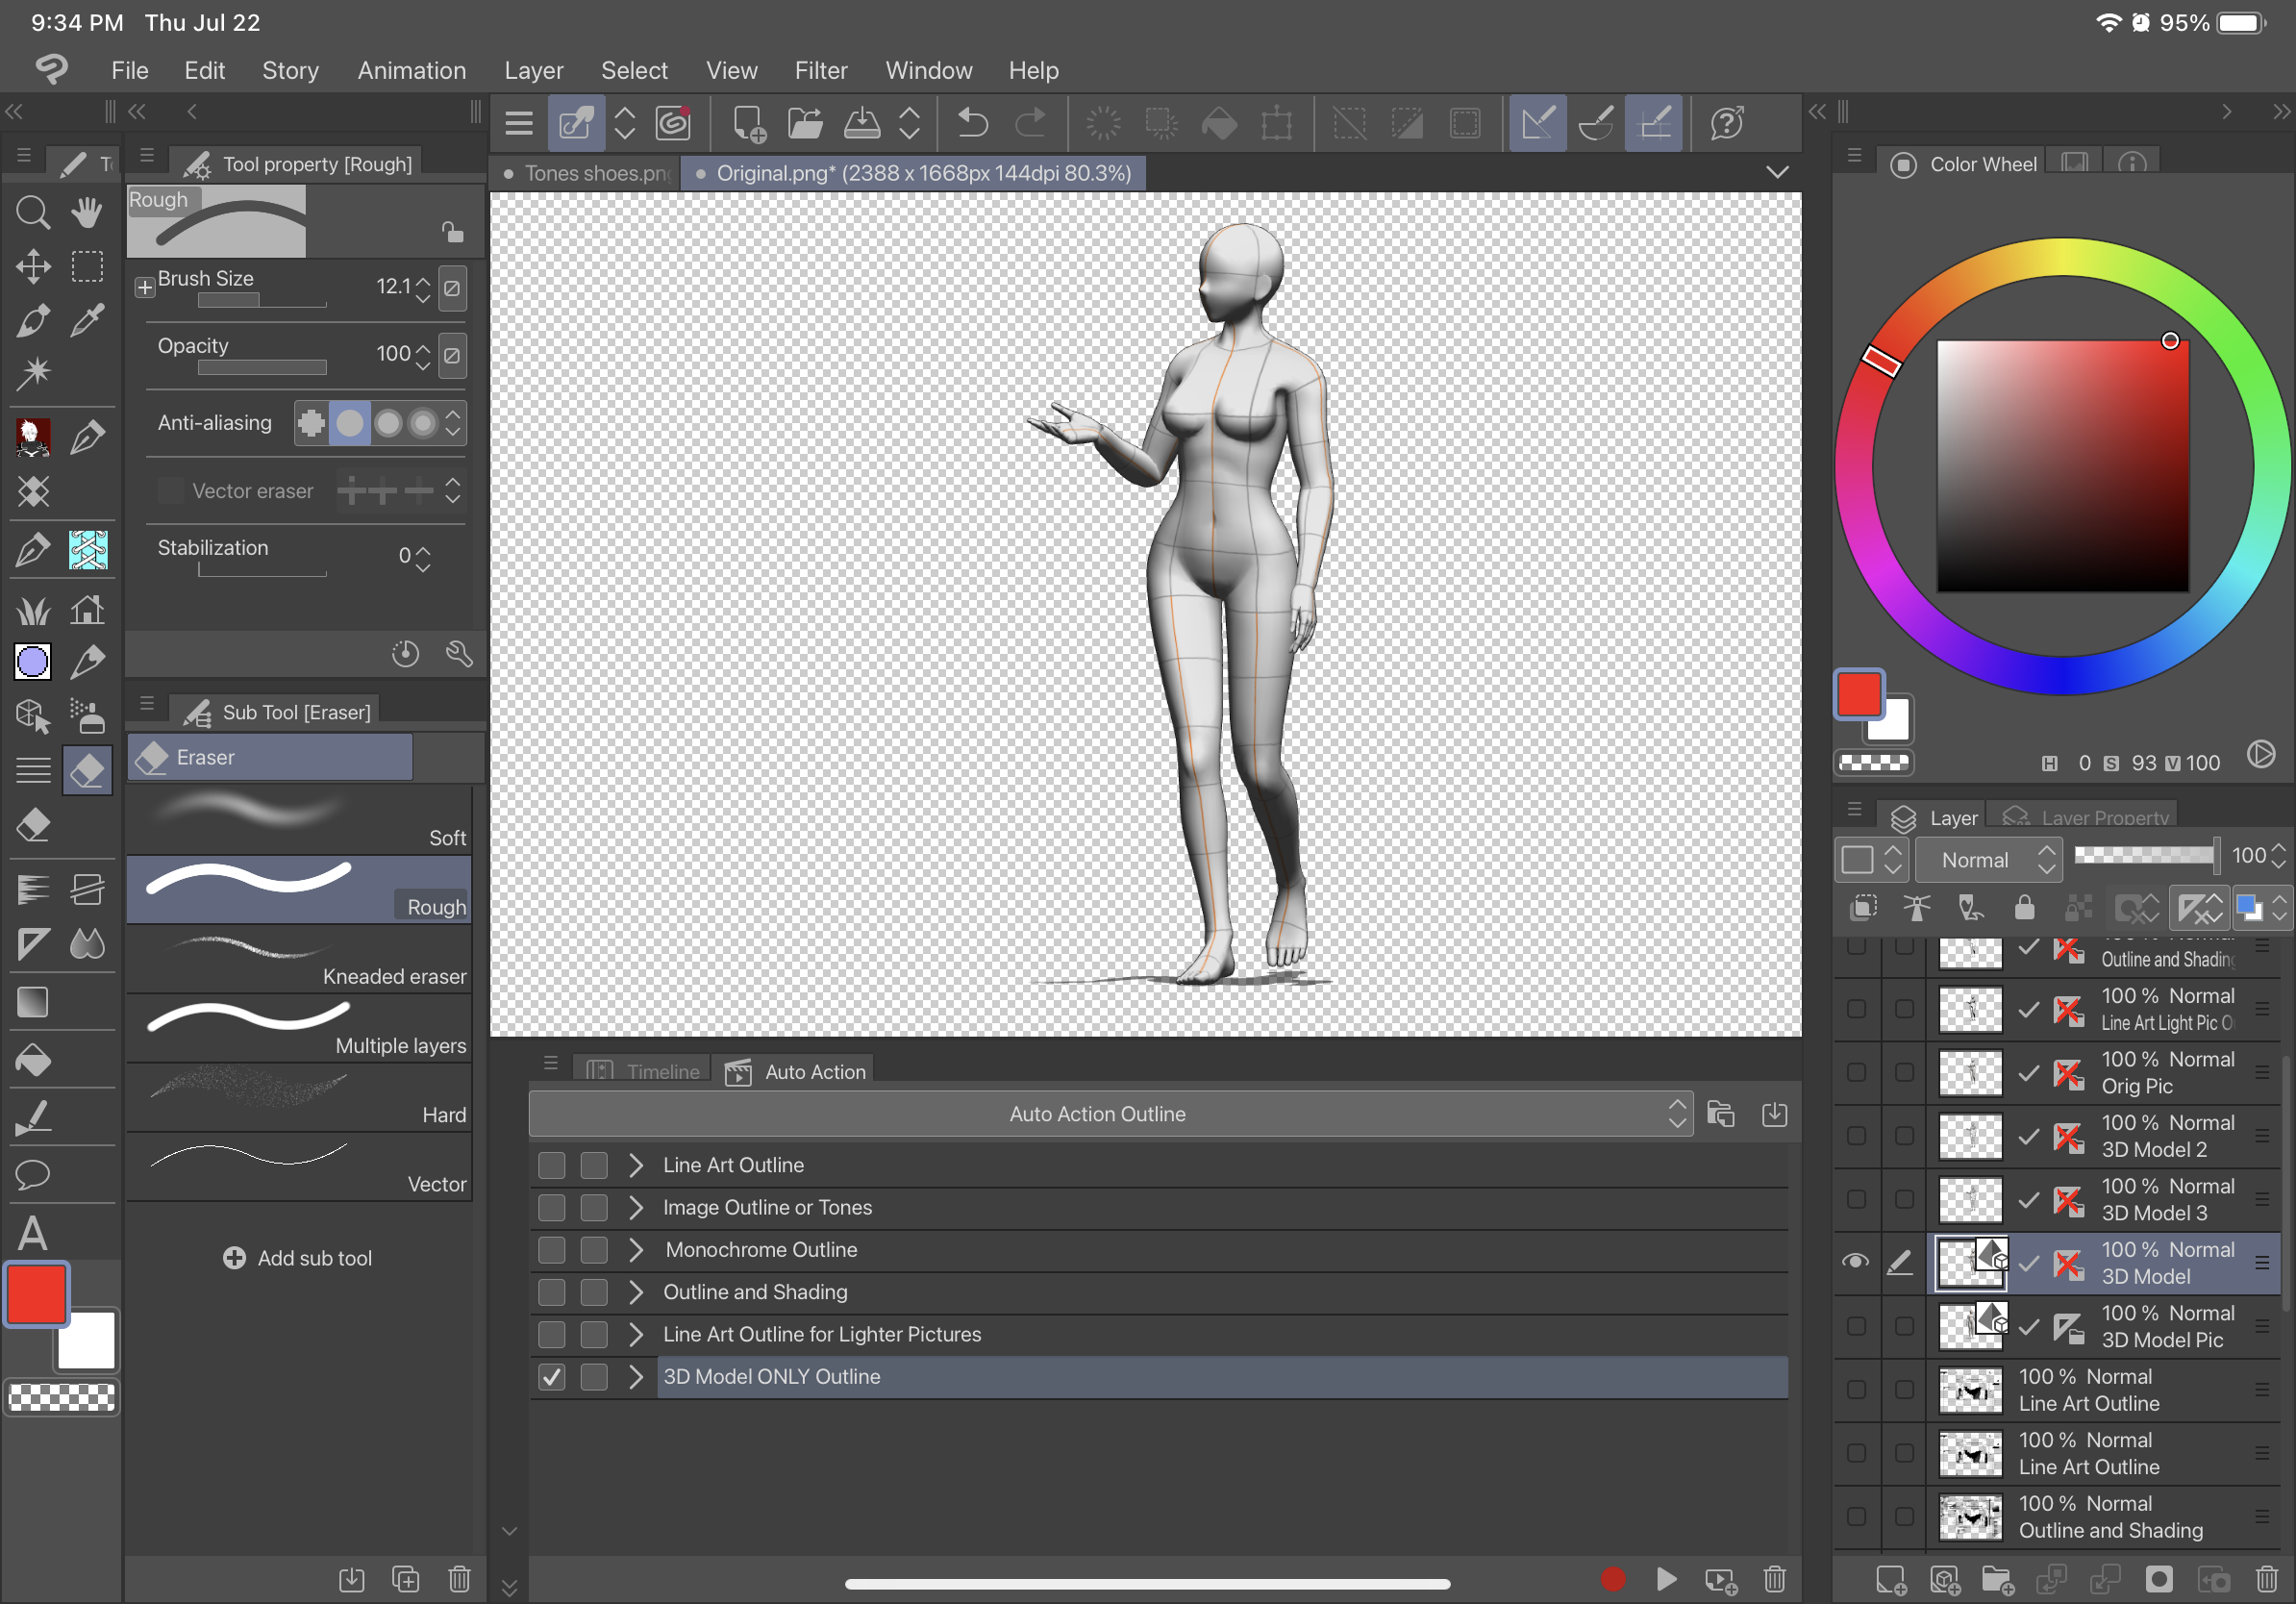
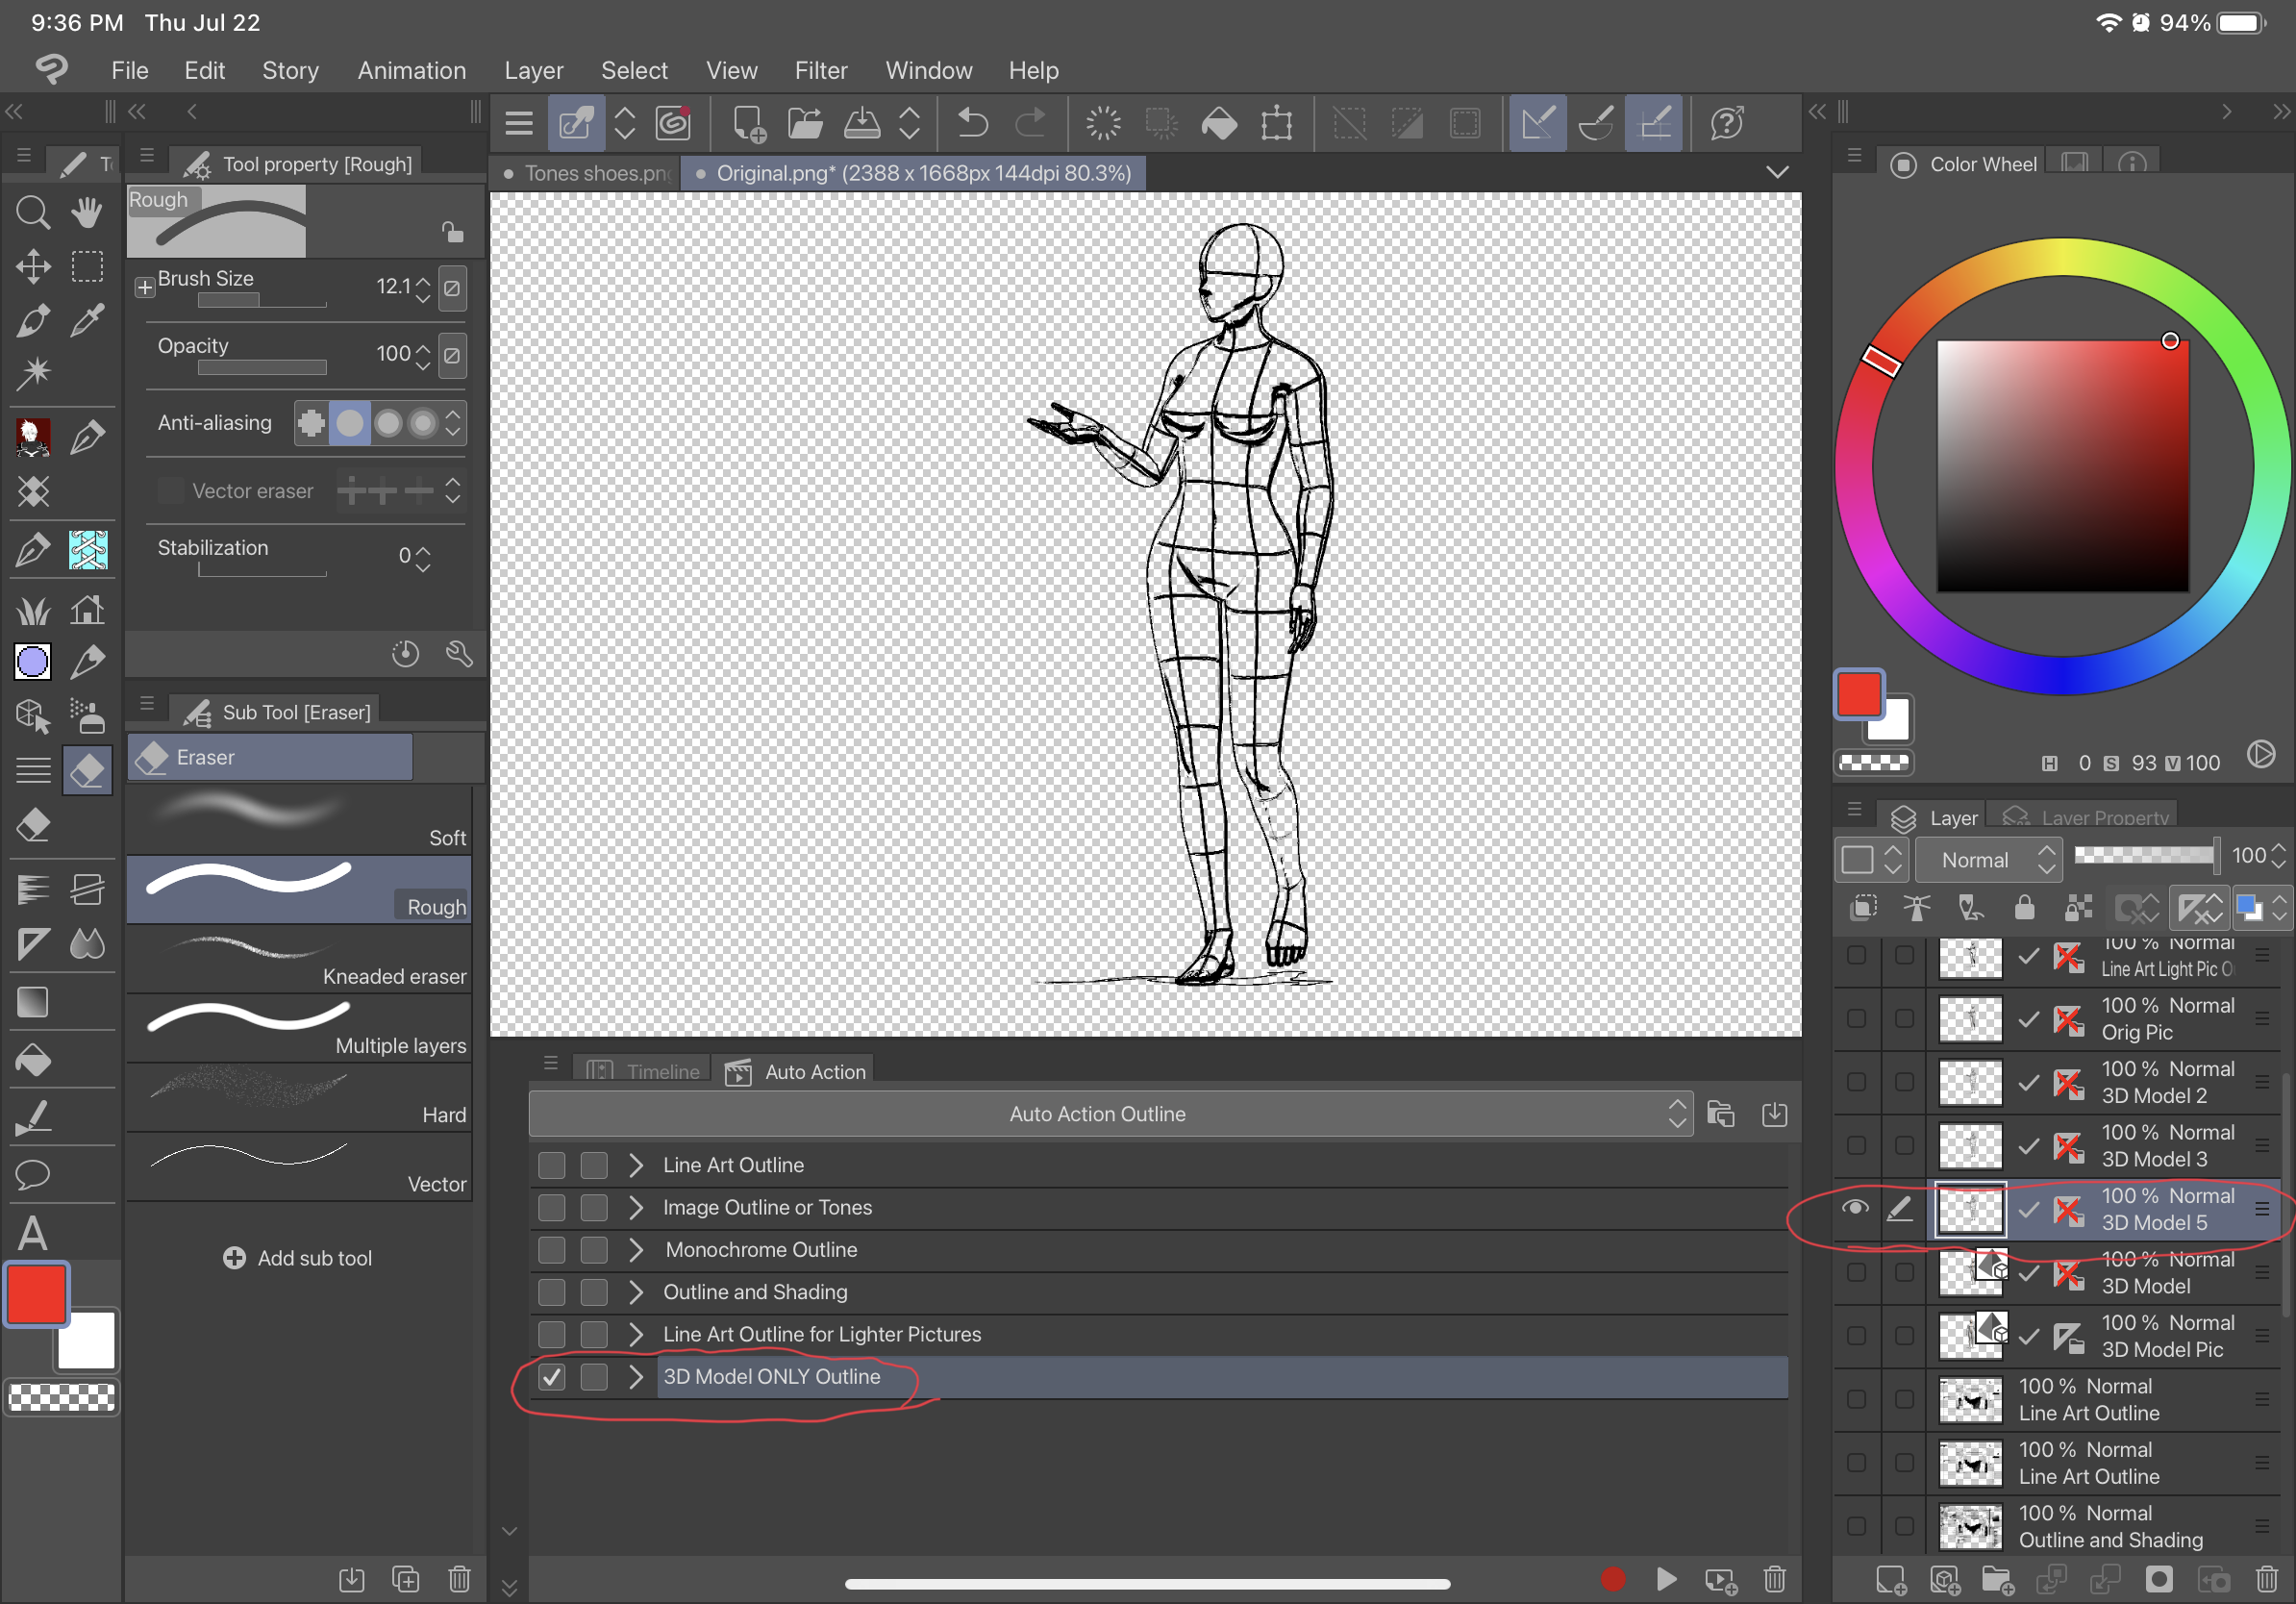
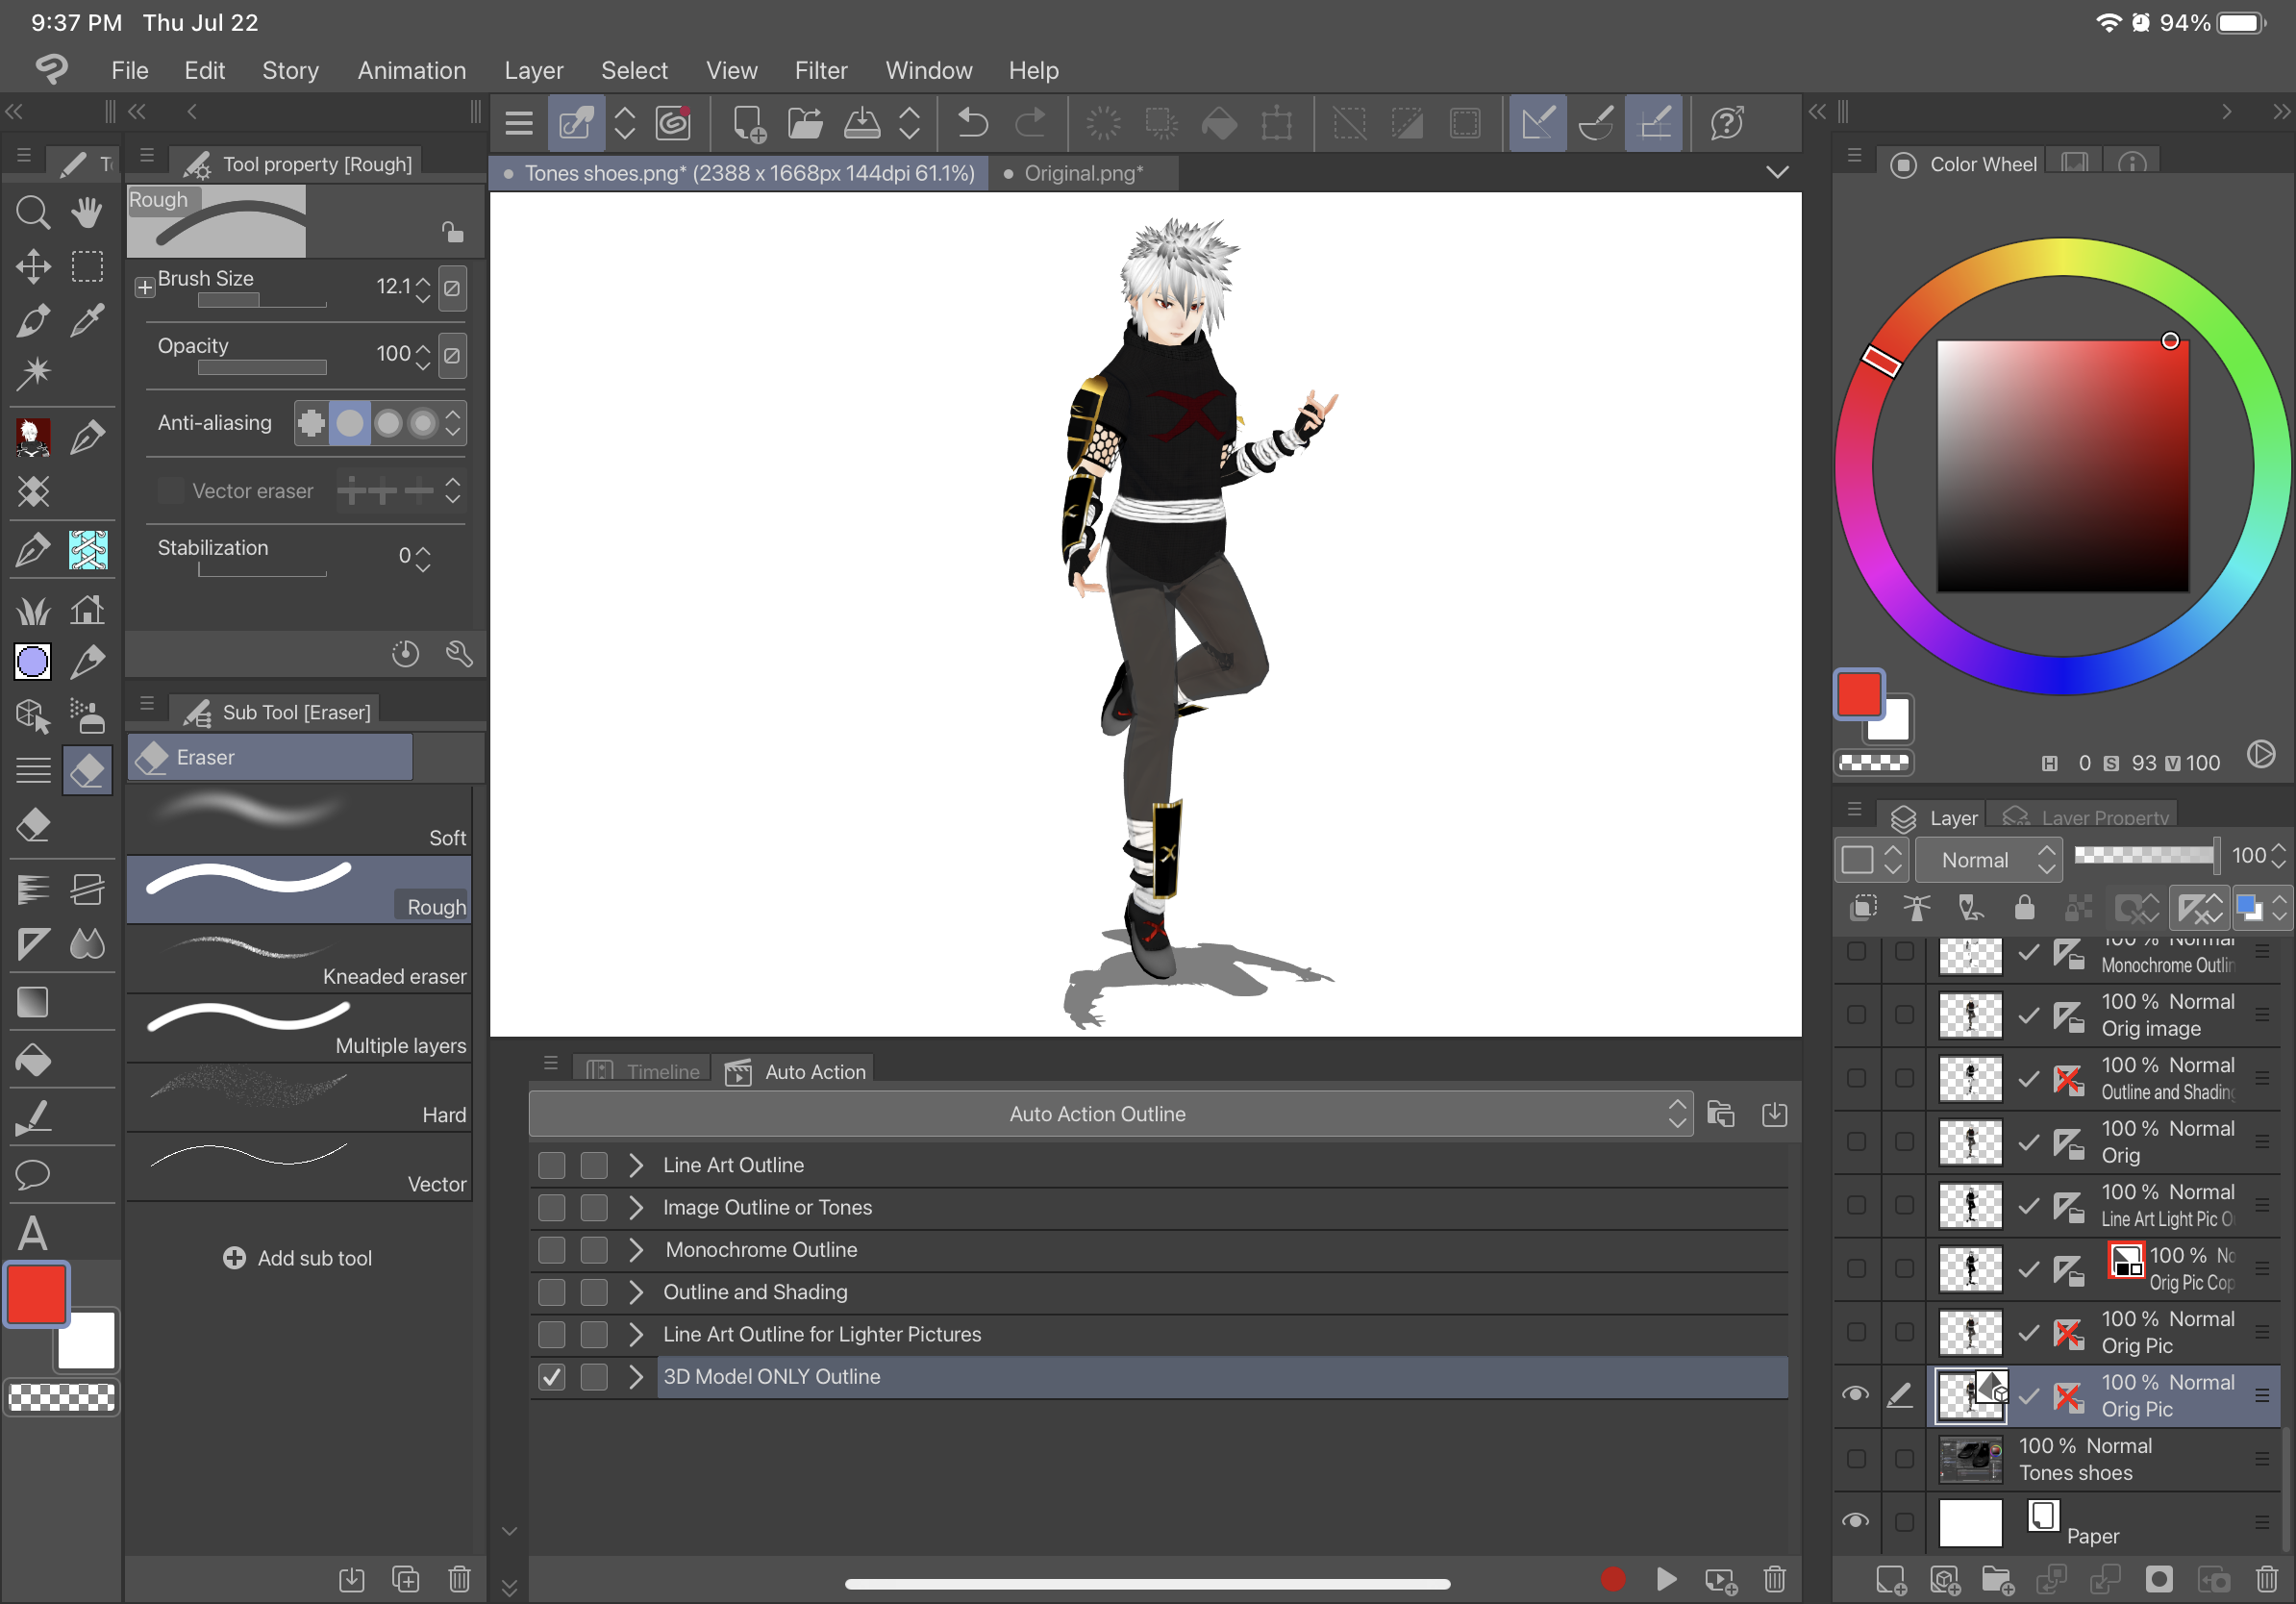
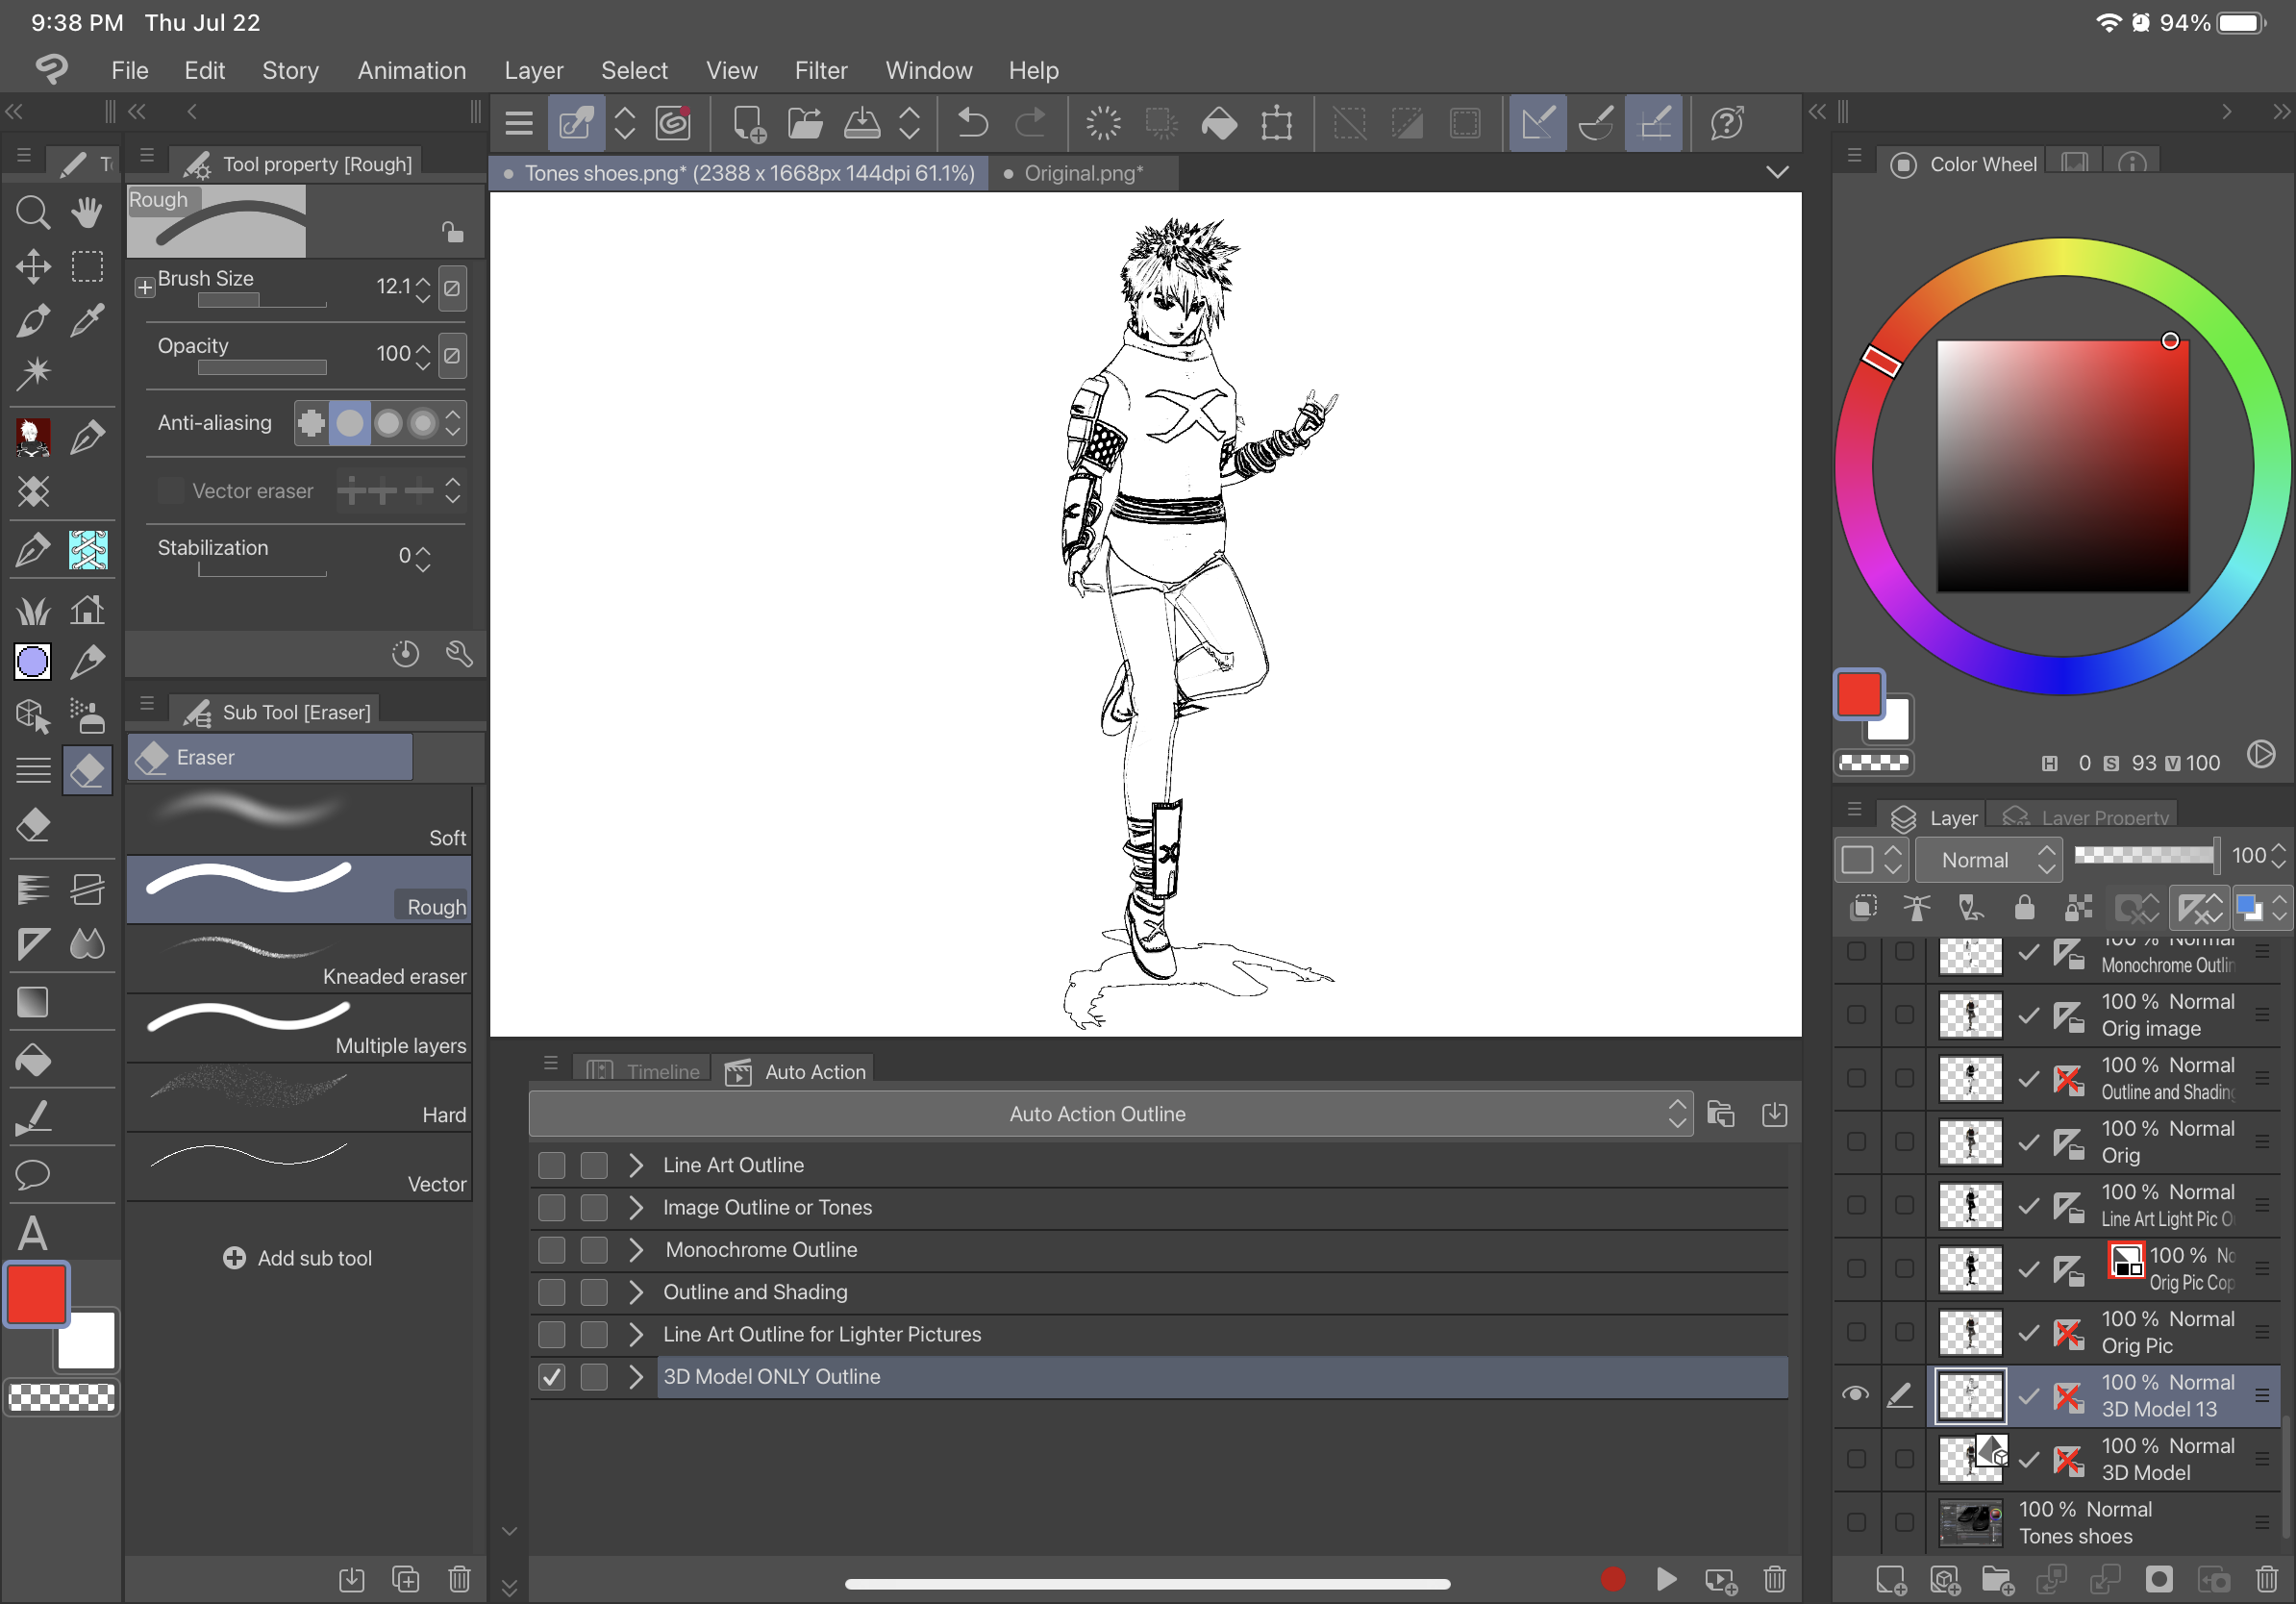
La primera acción automática, Line Art Outline, delineará la imagen sin ningún sombreado y será un tipo de contorno de Line Art negro sobre un fondo transparente. La segunda acción automática, Contorno de imagen o Tono, establecerá la imagen en gris y le dará a la imagen un fondo transparente y tendrá una segunda imagen con tono. La tercera acción automática, Contorno monocromo, delineará la imagen sin ningún tipo de sombreado y será un contorno negro sobre un fondo transparente. La cuarta acción automática Esquema y Sombreado, delineará su imagen con sombreado y tendrá un fondo transparente. El quinto esquema de arte de línea para imágenes más ligeras, es para imágenes extremadamente ligeras y creará un contorno similar a la primera acción automática. La sexta acción automática Esquema solo de modelo 3D, creará un contorno de capa ráster con un fondo transparente directamente desde una capa con un modelo 3D ("ESQUEMA SOLO MODELO 3D" SOLO FUNCIONARÁ CON CAPAS CON MODELOS 3D y no funcionará con una imagen como capas ráster desde las que comenzar). A continuación se muestra la diferencia entre estos diferentes contornos.
Texto original en:

Esquema de arte lineal:

Contorno o tono de la imagen:
Esquema de la imagen:


Tono:


Contorno monocromo:

Esquema y sombreado:

Esquema de arte lineal para imágenes más ligeras:
Antes de-

Después de-

Esquema de solo modelo 3D: (USAR DIRECTAMENTE EN UN MODELO 3D SOLAMENTE)
Antes de-

Después de-

Antes de-

Después de-

INSTRUCCIONES- PARA UTILIZAR TODAS LAS ACCIONES AUTOMÁTICAS CON UN MODELO 3D (EXCEPTO El contorno del modelo 3D solamente):


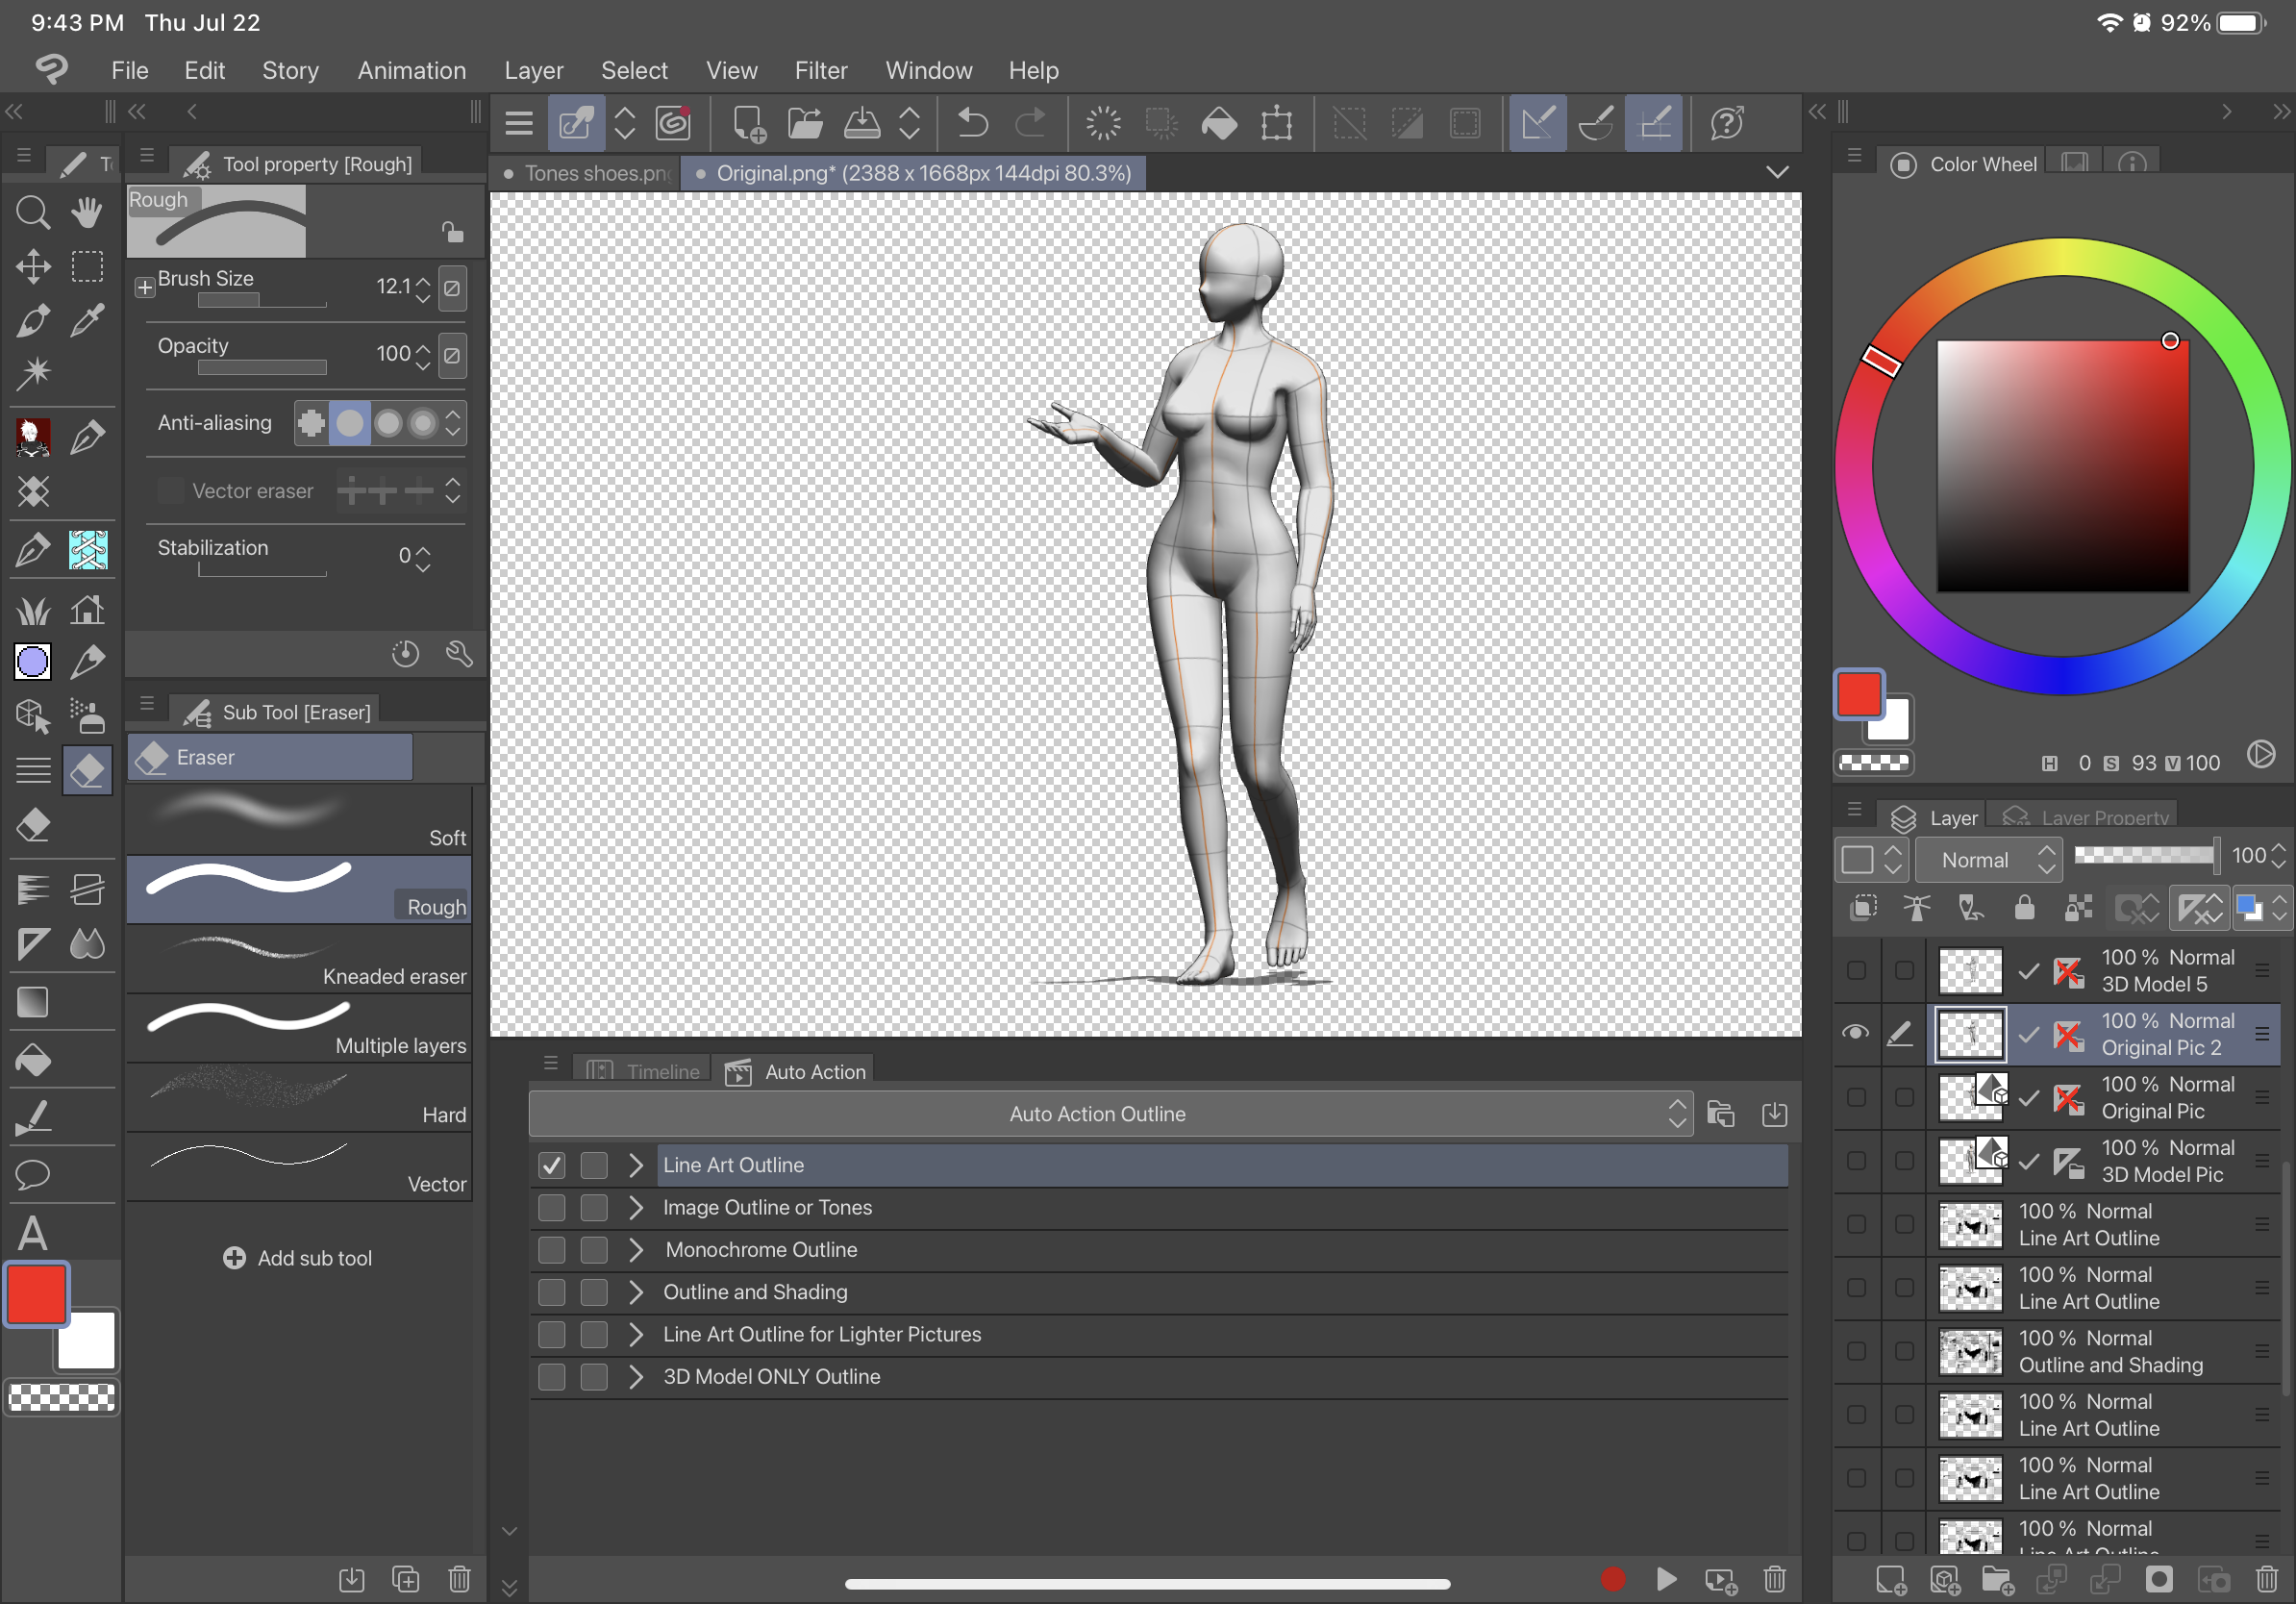
2. Haga clic en la capa ráster que acaba de crear y use la Acción automática
ANTES-

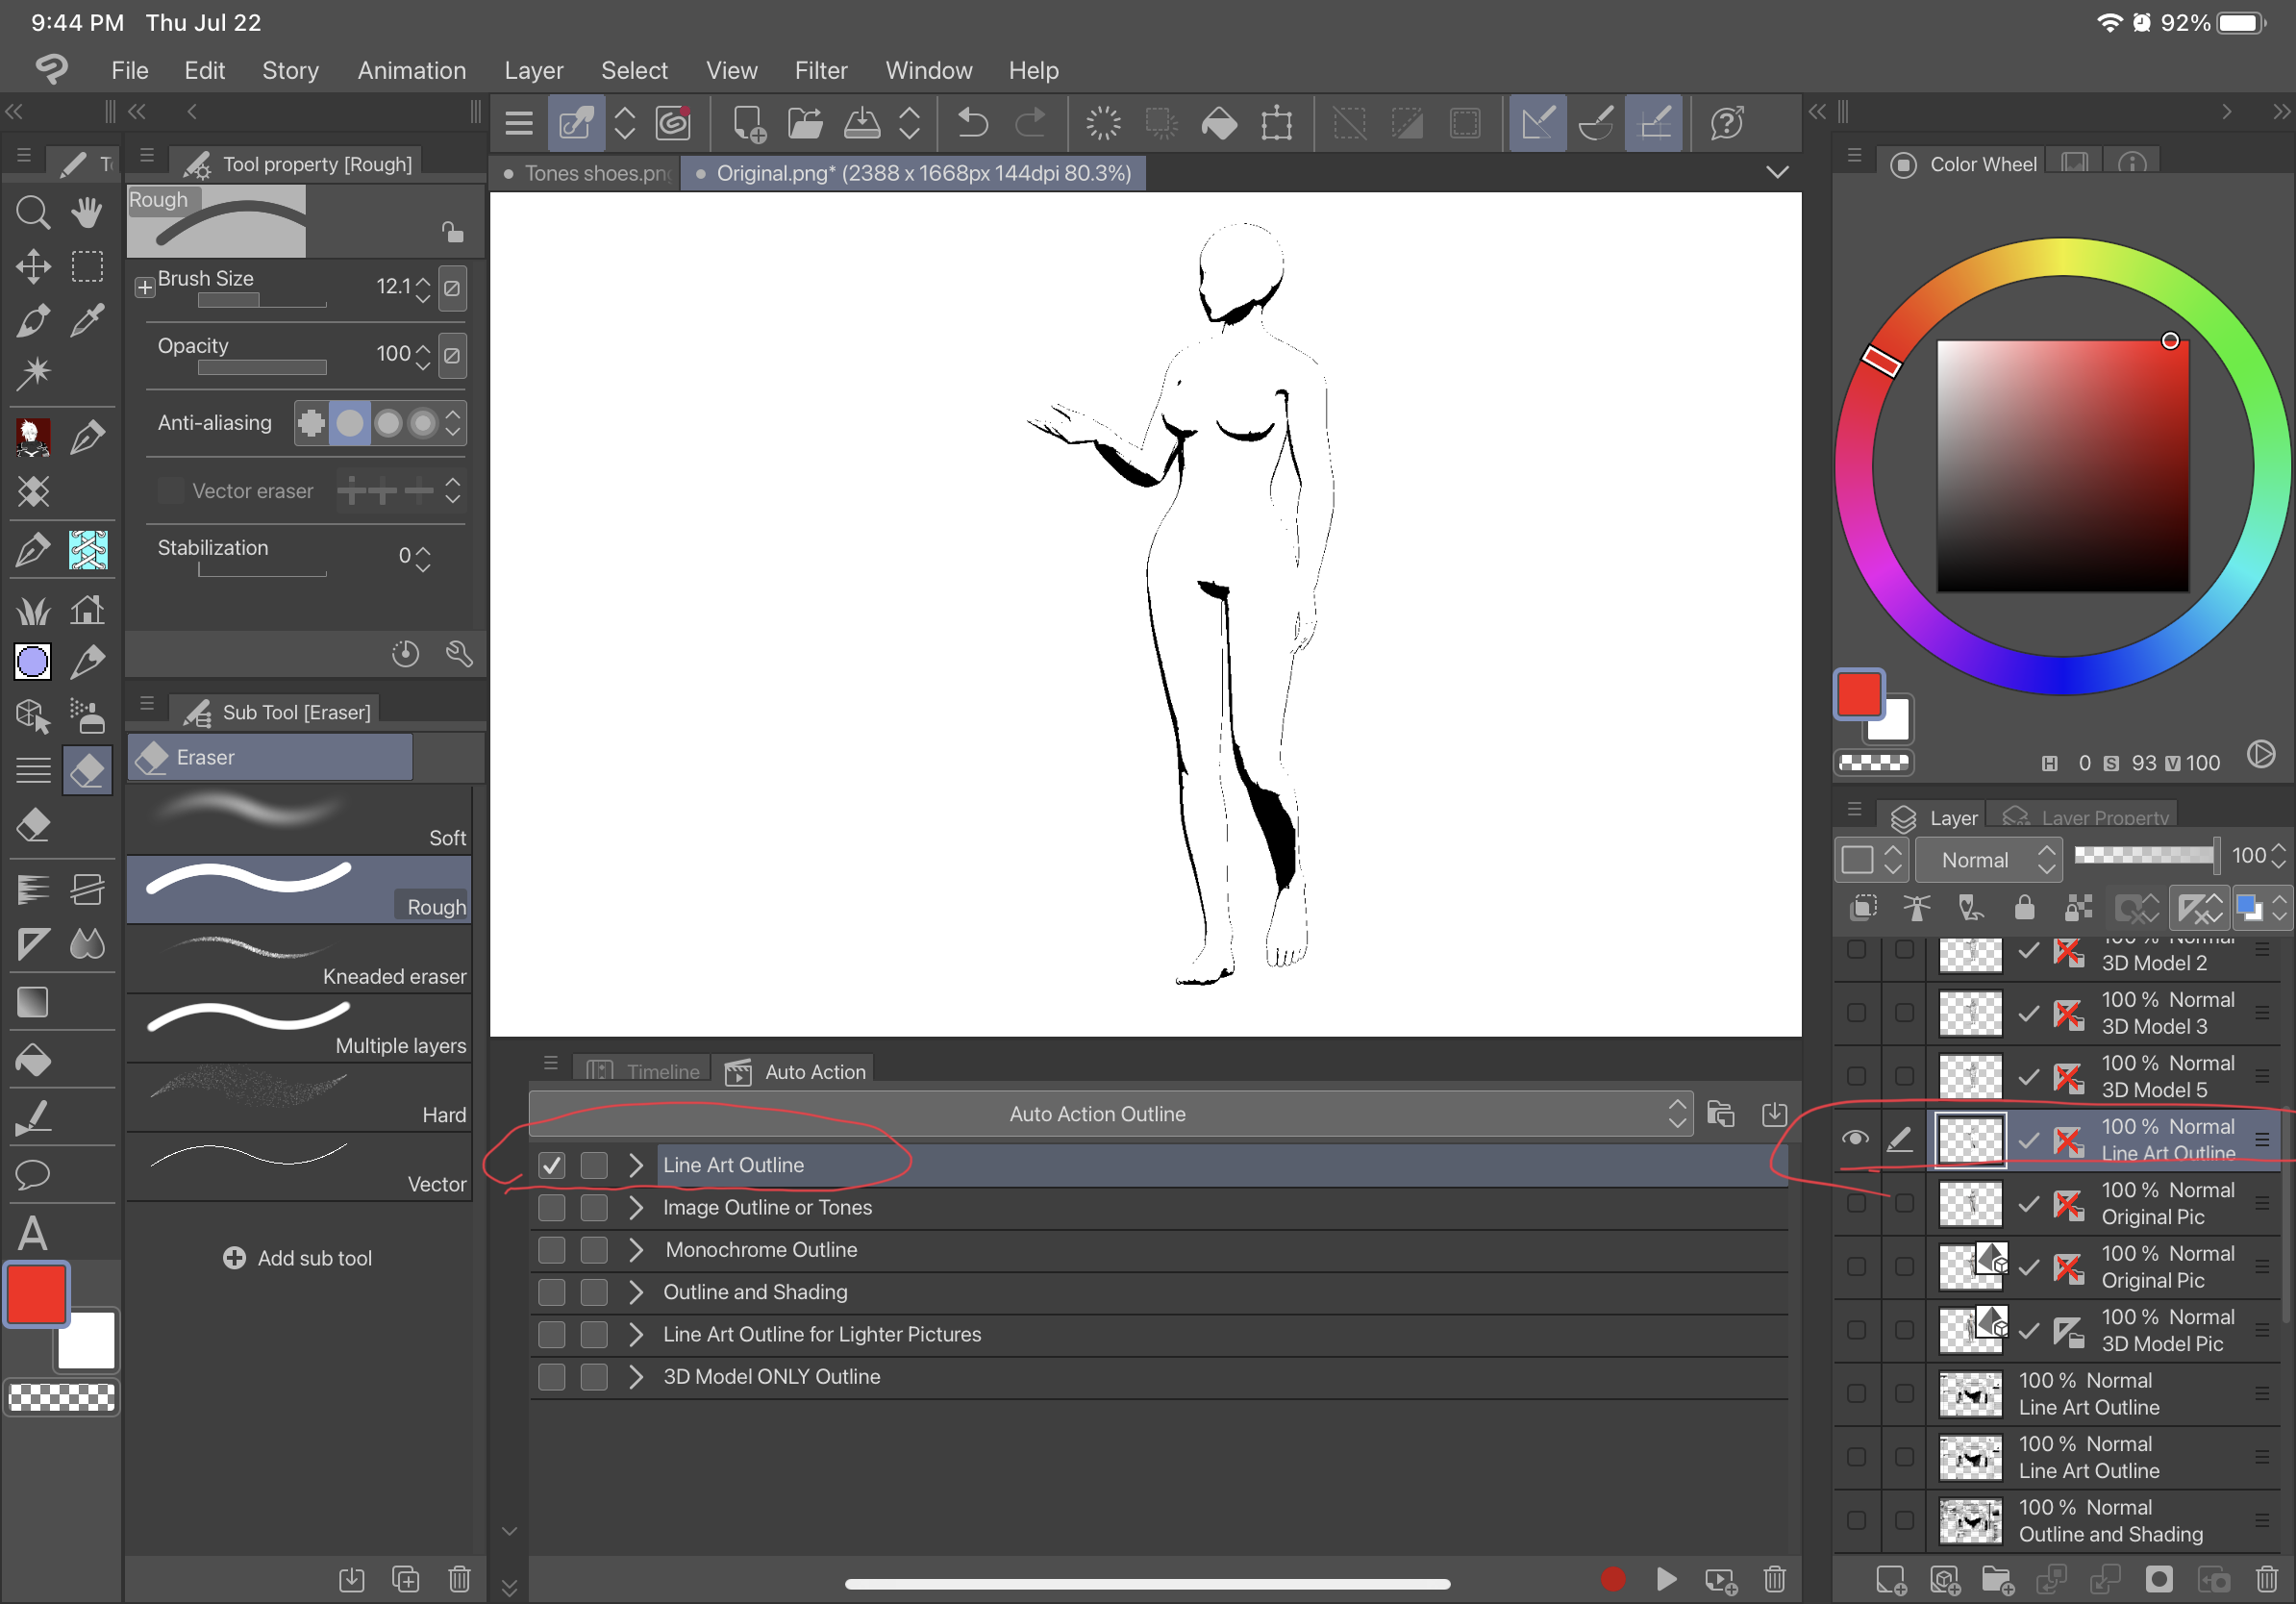
AFTER- (esto es con Line Art Outline)

Drag from downloaded materials into auto action and it will show up under the name Outline. There are 6 variations of this tool.
Description:
The first auto action, Line Art Outline, will outline the picture without any shading and will be a black Line Art type of outline against a transparent background. The second auto action, Image Outline or Tone, will set the image grey and give the image a transparent background and have a second image with tone. The third auto action, Monochrome Outline, will outline the picture without any shading and will be a black outline against a transparent background. The fourth auto action Outline and Shading, will Outline your picture with shading and have a transparent background. The fifth one Line Art Outline for Lighter Pictures, is for extremely light pictures and will create a outline similar to the first auto action. The sixth auto action 3D Model Only Outline, will create a raster layer outline with a transparent background directly from a layer with a 3D model (“3D MODEL ONLY OUTLINE” WILL ONLY WORK WITH LAYERS WITH 3D MODELS and won’t work with a picture such as raster layers to start from). Below is the difference between these different outlines.
Original:
Line Art Outline:
Image Outline or Tone:
Image Outline:
Tone:
Monochrome Outline:
Outline and Shading:
Line Art Outline for Lighter Pictures:
Before-
After-
3D Model Only Outline: (USE DIRECTLY ON A 3D MODEL ONLY)
Before-
After-
Before-
After-
INSTRUCTIONS-TO USE ALL AUTO ACTIONS WITH A 3D MODEL (EXCEPT 3D Model Only Outline):
1. Convert 3D Model into a “Raster Layer”
2. Click On the Raster Layer you just created and use the Auto Action
BEFORE-
AFTER- (this is with Line Art Outline)
Versión antigua


Más materiales de VenariArtist


Materiales populares de Acciones automáticas


Nuevos materiales


Insignias
-
 MVP ◆Estos usuarios han contribuido en gran medida a la gestión de la comunidad, al publicar multitud de útiles respuestas a las preguntas planteadas. Una vez cada tres meses, los MVP son seleccionados en base a los puntos obtenidos durante ese período y, en consecuencia, son reconocidos por su esfuerzo.
 -
 New Valuable Player (NVP) ◆Son las personas que más han contribuido a la comunidad después de los MVP. Este galardón se otorga según los puntos conseguidos a los usuarios que aún no han obtenido ningún premio MVP.
 -
 Especialista oficial ◆Elegidos de entre todos los MVP, quienes ya han demostrado ser de inestimable ayuda, esto es un testimonio de su excepcional apoyo para con la comunidad. Tras un minucioso escrutinio, son nombrados por Celsys para ocupar dicho cargo.Nota: Anteriormente denominados "evangelistas".
 -
 Moderador oficial de Celsys ◆Los moderadores son miembros del personal de Celsys que pueden comunicarse en japonés y otros idiomas. No son expertos en software o ilustración, por lo que no pueden responder directamente a las preguntas. Sin embargo, tratarán de asegurarse de que la comunicación entre usuarios de distintas lenguas sea tan fluida y comprensible como sea posible.
 -
 Cuenta oficial de CelsysCuenta oficial del administrador