
Cupcakes 3D a 2D con acción automática (3D to 2D Cupcakes with Auto Action) 3D to 2D Cupcakes with Auto Action
Content ID:1826121
-
1 345

Los cupcakes 3D se pueden convertir en ilustraciones de manga 2D con Auto Action 3D Cupcakes can be turned into 2D manga illustrations with Auto Action
Modelé cupcakes, un pastel y un doilie en Blender, luego los convertí en modelos que se pueden usar en Clip Studio Paint EX. Hice una acción automática para facilitar este proceso.
Vea el tutorial aquí: https://www.youtube.com/watch?v=o3cwi7v1gNI
Para obtener mejores resultados:
Antes de la acción automática, después de caer en el modelo 3D, haga clic en su SUB TOOL DETAIL (que parece una llave inglesa).
Vaya a Contorno y engrandece el ancho del contorno.
Esto sacará a relucir los contornos para el modelo 3D y hará que se vea muy bien!

Para obtener tutorial sobre cómo usar con la acción automática personalizada, visite este vínculo a un ejemplo de 4 minutos:
Si desea un paso a paso, lea a continuación.
Uso de acción automática:
Nota: Esto hace que el proceso vaya más rápido, aunque es posible que tenga que realizar ajustes después.
1) Arrastre y suelte sus modelos 3D. Colóquelos en el ángulo deseado.
2) Vaya a la subherramienta del modelo 3D, ajuste el contorno y la iluminación. Se pueden encontrar en las opciones "Contorno" y "Fuente de luz".
3) Duplique la capa. Una capa debe ser para tonos, y la segunda es para Lineart. La capa de tono debe estar en la parte superior.
4) Seleccione la Capa de Tono, luego vaya al Conjunto de Acción Automática "CAKE_SET_AUTOACTION" y pulse "cake_3dmodel_part02_tone". Haga clic en el botón "reproducir". Debería renderizar.
5) Seleccione la Capa de trazado de líneas, luego vaya al Conjunto de acción automática y seleccione "cake_3dmodel_partt01_binarization". Haz clic en Reproducir y se renderizará.
6) ¡Hecho! (Nota: Hay un contorno en el panel de capas, puede eliminarlo si lo desea. )
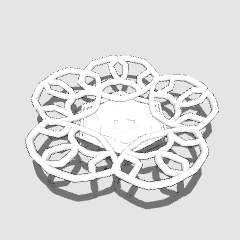
La imagen siguiente se completó con acciones automáticas con frecuencia de tono reducida.

Paso a paso para aquellos que solo quieren los modelos:
1) Después de ajustar el modelo y aplicar el contorno en las propiedades de la subherramienta, rasterice la capa y elimine la regla.
2) Vaya a EDIT->TONAL CORRECTION->HUE/SATURATION/LUMINOSITY y gire la saturación hasta que no haya más color.
3) Duplique la capa. Haz una capa para Tone y la otra para Lineart.
Para capa de tono:
-Vaya a EDICIÓN ->CORRECCIÓN TONAL->POSTERIZACIÓN y reduzca los pasos hasta solo los tonos más básicos. Recomiendo 2-5.
-A continuación, aplique propiedades de tono a la capa, reducir la frecuencia del tono. Gire la capa Tone de normal para multiplicarse.
Para capa lineart:
-Ir a EDICIÓN ->CORRECCIÓN TONAL -> BINARIZACIÓN
-Elija el umbral que es mejor para su lineart.
Resultado: Hacer esto a mano permite un mayor control. Tanto la acción automática como la que realiza este paso a paso tienen sus ventajas.

I modeled cupcakes, a cake, and a doilie in Blender, then I converted them to models that can be used in Clip Studio Paint EX. I made an auto action to make this process easier.
Watch tutorial here: https://www.youtube.com/watch?v=o3cwi7v1gNI
For best results:
Before the auto action, after dropping in your 3D model, click on it's SUB TOOL DETAIL (that looks like a wrench).
Go to Outline and uncrease the outline width.
This will bring out the outlines for the 3D model and make it look really good!
For tutorial on how to use with the custom auto action, visit this link to a 4 minute example:
If you want a step by step, read below.
Using Auto Action:
Note: This makes the process go faster, though you might have to make adjustments afterwards.
1) Drag and drop your 3D Models. Position them to desired angle.
2) Go to the Sub tool on the 3D model, adjust outline and lighting. They can be found in the "Outline" and "Light Source" options.
3) Duplicate the layer. One layer should be for Tones, and the second is for Lineart. Tone layer should be on top.
4) Select the Tone Layer, then go to the Auto Action Set "CAKE_SET_AUTOACTION" and press "cake_3dmodel_part02_tone". Click the "play" button. It should render.
5) Select the Lineart Layer, then go to the Auto Action set and select "cake_3dmodel_partt01_binarization". Click play and it will render.
6) Done! (Note: There is an outline on the layer panel, you can remove it if you like. )
Image below was completed with Auto Actions with reduced tone frequency.
Step by Step for those who only want the models:
1) After adjusting the model and applying the outline in the sub tool properties, rasterize the layer and delete the ruler.
2) Go to EDIT->TONAL CORRECTION->HUE/SATURATION/LUMINOSITY and turn the saturation all the way down until there is no more color.
3) Duplicate the Layer. Make one layer for Tone and the other for Lineart.
For Tone Layer:
-Go to EDIT ->TONAL CORRECTION->POSTERIZATION and reduce the steps down to only the most basic tones. I reccomend 2-5.
-Then apply Tone properties to layer, reduce the frequency of the tone. Turn Tone layer from normal to multiply.
For Lineart Layer:
-Go to EDIT ->TONAL CORRECTION -> BINARIZATION
-Choose the threshold that is best for your lineart.
Result: Doing this by hand allows for more control. Both the auto action and doing this step by step have their advantages.
Categoría 1 Category 1


Más materiales de Lillie7321


Materiales populares de Catálogos de materiales


Nuevos materiales


Insignias
-
 MVP ◆Estos usuarios han contribuido en gran medida a la gestión de la comunidad, al publicar multitud de útiles respuestas a las preguntas planteadas. Una vez cada tres meses, los MVP son seleccionados en base a los puntos obtenidos durante ese período y, en consecuencia, son reconocidos por su esfuerzo.
 -
 New Valuable Player (NVP) ◆Son las personas que más han contribuido a la comunidad después de los MVP. Este galardón se otorga según los puntos conseguidos a los usuarios que aún no han obtenido ningún premio MVP.
 -
 Especialista oficial ◆Elegidos de entre todos los MVP, quienes ya han demostrado ser de inestimable ayuda, esto es un testimonio de su excepcional apoyo para con la comunidad. Tras un minucioso escrutinio, son nombrados por Celsys para ocupar dicho cargo.Nota: Anteriormente denominados "evangelistas".
 -
 Moderador oficial de Celsys ◆Los moderadores son miembros del personal de Celsys que pueden comunicarse en japonés y otros idiomas. No son expertos en software o ilustración, por lo que no pueden responder directamente a las preguntas. Sin embargo, tratarán de asegurarse de que la comunicación entre usuarios de distintas lenguas sea tan fluida y comprensible como sea posible.
 -
 Cuenta oficial de CelsysCuenta oficial del administrador