
Fessel Besser Bromine + Gradient Set (Fetlock Better Bromines + Gradient Set) Fetlock Better Bromines + Gradient Set
Content ID:2169088
-
412

Eine automatische Aktion, um den "Brom-Trick" mit Verlaufskarten auszuführen, sowie eine kleine Auswahl an Farbverläufen, die anschließend verwendet werden können. An auto action to do the 'bromine trick' with gradient maps, as well as a small selection of gradients to use afterwards.
Möchten Sie einen Brom-Hack, mit dem Sie darunter kolorieren können, ohne einen Haufen Unsinn zu machen, um Ihr Kunstwerk vorzubereiten?
Sind Sie unentschlossen, welche Bromfarbe Sie wollen?
Hier ist ein Paket für dich!
1. Eine Ebenenvorlage, die unter einer ziemlich einfachen Prämisse funktioniert: Im Grunde besteht jeder einzelne Brom-Trick darin, fünftausend Schritte zu machen, um das zu tun, was eine Gradientenkarte und ein paar Ordner mit den richtigen Einstellungen in so etwas wie ... Zwei Sekunden.
2. Ein Set von Verläufen, die speziell auf das Ordnerset abgestimmt sind, falls du noch nicht viele Verlaufskartensätze hast und das Aussehen der Standard-Karten von CSP nicht magst. Um diese zu verwenden, anstatt das, was zuerst auftaucht , tauscht man einfach um, welcher Farbverlauf im Ordner verwendet wird.


FAQ:
F: Ich benutze die Brom-Schicht, aber die Farben funktionieren nicht richtig.
A: Prüfe, ob du auf der Bromlinien-Schicht reines Schwarz verwendest. Außerdem funktionieren Pinsel mit Maserung oder Transparenz am besten mit diesem Trick! Ein G-Pen oder eine andere ähnliche feste 100%-Opazitätslinie zeigt nur leichte Farbveränderungen. Das gesagt, könnte das gut funktionieren, um interessante traditionelle Cel-Effekte zu erzeugen, wenn man die Linien dupliziert und das darunterliegende Duplikat gaussisch verschwimmt.
F: Ich kann keine Farbe verwenden, alles wird Bromfarben...

F: Mir gefällt dieser Effekt, aber ich möchte den Brom-Effekt in verschiedenen Farben pro Kunstwerk darstellen können. Gibt es eine Möglichkeit, das zu machen?
A: Ja, aber es wird unordentlich werden; Du musst mehrere Ordner haben, wobei jedes 'Stück' (Kleidung, Haut) getrennt ist. Man hätte also einen lila Brom-Trick-Linienordner und einen, der in einem anderen eine beigefarbene Farbe hat, oder so ähnlich.
A: Setze die Werkzeuge auf 'Referenzebene' statt auf 'alle Ebenen' und setze 'Hier Linien zeichnen' als Referenz, oder schalte vorübergehend die Sichtbarkeit der 'Weiß behalten'-Ebene aus, während du das betreffende Werkzeug benutzt, und schalte sie danach wieder ein. Die Ebene 'Weiß behalten' ist standardmäßig als Entwurf gesetzt, um diese Probleme von vornherein zu vermeiden.

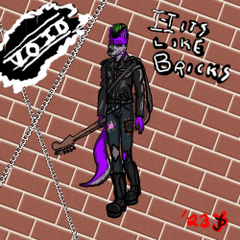
Damit ... Viel Spaß! (Die in diesen Beispielen dargestellte Figur ist mein, und meine schlampige Handschrift ist meine.)
Want a bromine hack that will allow you to do coloring underneath without doing a bunch of nonsense to get your artwork prepped?
Indecisive about what color of bromine you want?
Here's a pack for you!
1. A layer template that works under a pretty simple premise : basically every single bromine trick out there is doing five thousand steps to do what a gradient map and a couple folders with the right settings could do in like... two seconds.
2. A set of gradients specifically tuned to what the folder set does, just in case you don't have a lot of gradient map sets already, and don't like the look of CSP's default ones. To use these instead of what initially pops in just swap which gradient is being used in the folder.
FAQ :
Q: I'm using the bromine layer, but the colors aren't working right.
A: Check to make sure that you're using pure black on the bromine lines layer. Additionally, brushes with grain or transparency are the ones that work best with this trick! A G-pen or any other similar solid 100% opacity line will only have mild color changes. That being said, that could work well for making interesting traditional cel effects, if you duplicate the lines and gaussian blur the duplicate underneath.
Q: I'm not able to use color, everything is turning out bromine color...
Q: I like this effect, but I would like to be able to do the bromine effect in different colors per piece of art. Is there a way to do this?
A: Yes, but it will get cluttered; you will need to have multiple folders, with each 'piece' (clothes, skin) separated out. So you'd have a purple bromine trick linework folder, and one that has a tan color in another one, or whatnot.
A: Set the tools to 'Reference Layer' instead of 'all layers', and set 'Draw Lines Here' as the reference, or temporarily toggle the visibility of the 'Keep White' layer off while using the tool in question, and turn it back on after you do so. The 'Keep White' layer is set as a Draft by default to avoid these issues in the first place.
With that... Have fun! (Character depicted in these examples is mine, and my sloppy handwriting is mine)
Die Brome The Bromines


Protokoll aktualisieren
eine weitere Erklärung hinzugefügt, wie man häufige Probleme beim Funktionieren des Bromeffekts beheben kann, da einige Teile der Erklärung beim ersten Hochladen vergessen wurden. added further explanation of how to fix common problems with getting the bromine effect to work, as some portions of the explanation were forgotten on the initial upload.


Weitere Materialien von AMORPHAGE


Beliebte Materialien zu „Materialkatalog“


Neue Materialien


-
 MVP ◆Dieser Nutzer hat einen großen Beitrag zur Verwaltung der Community geleistet, indem er viele großartige Antworten auf die gestellten Fragen veröffentlicht hat. Alle drei Monate werden die MVPs auf der Grundlage der in diesem Zeitraum erworbenen Punkte ermittelt und entsprechend anerkannt.
 -
 New Valuable Player (NVP) ◆Die NVP-Auszeichnung geht an die Nutzer, die nach den MVP den größten Beitrag zur Community geleistet haben. Sie werden basierend auf den gesammelten Punkten unter denjenigen ausgewählt, die bisher noch nicht als MVP ausgezeichnet wurden.
 -
 Offizielle Experten ◆Ausgewählt aus allen MVP-Preisträgern, die bereits ein Zeichen für Exzellenz sind, zeugt diese Auszeichnung von herausragender Korrespondenz in der Community. Nach sorgfältiger Prüfung werden sie von CELSYS ernannt und übernehmen ihre Position.* Vorherige Bezichnung: Evangelist
 -
 Offizieller Moderator von CELSYS ◆Moderatoren sind offizielle CELSYS-Mitarbeiter, die fließend Japanisch und verschiedene andere Sprachen sprechen. Moderatoren sind keine Experten der Software oder Illustrationen und können daher nicht direkt auf Ihre Fragen antworten. Aber Moderatoren bieten Unterstützung in Kommunikation und Sprache, um sicherzustellen, dass alle reibungslos miteinander kommunizieren können.
 -
 Offizieller Account von CELSYSDer offizielle Administrator-Account