

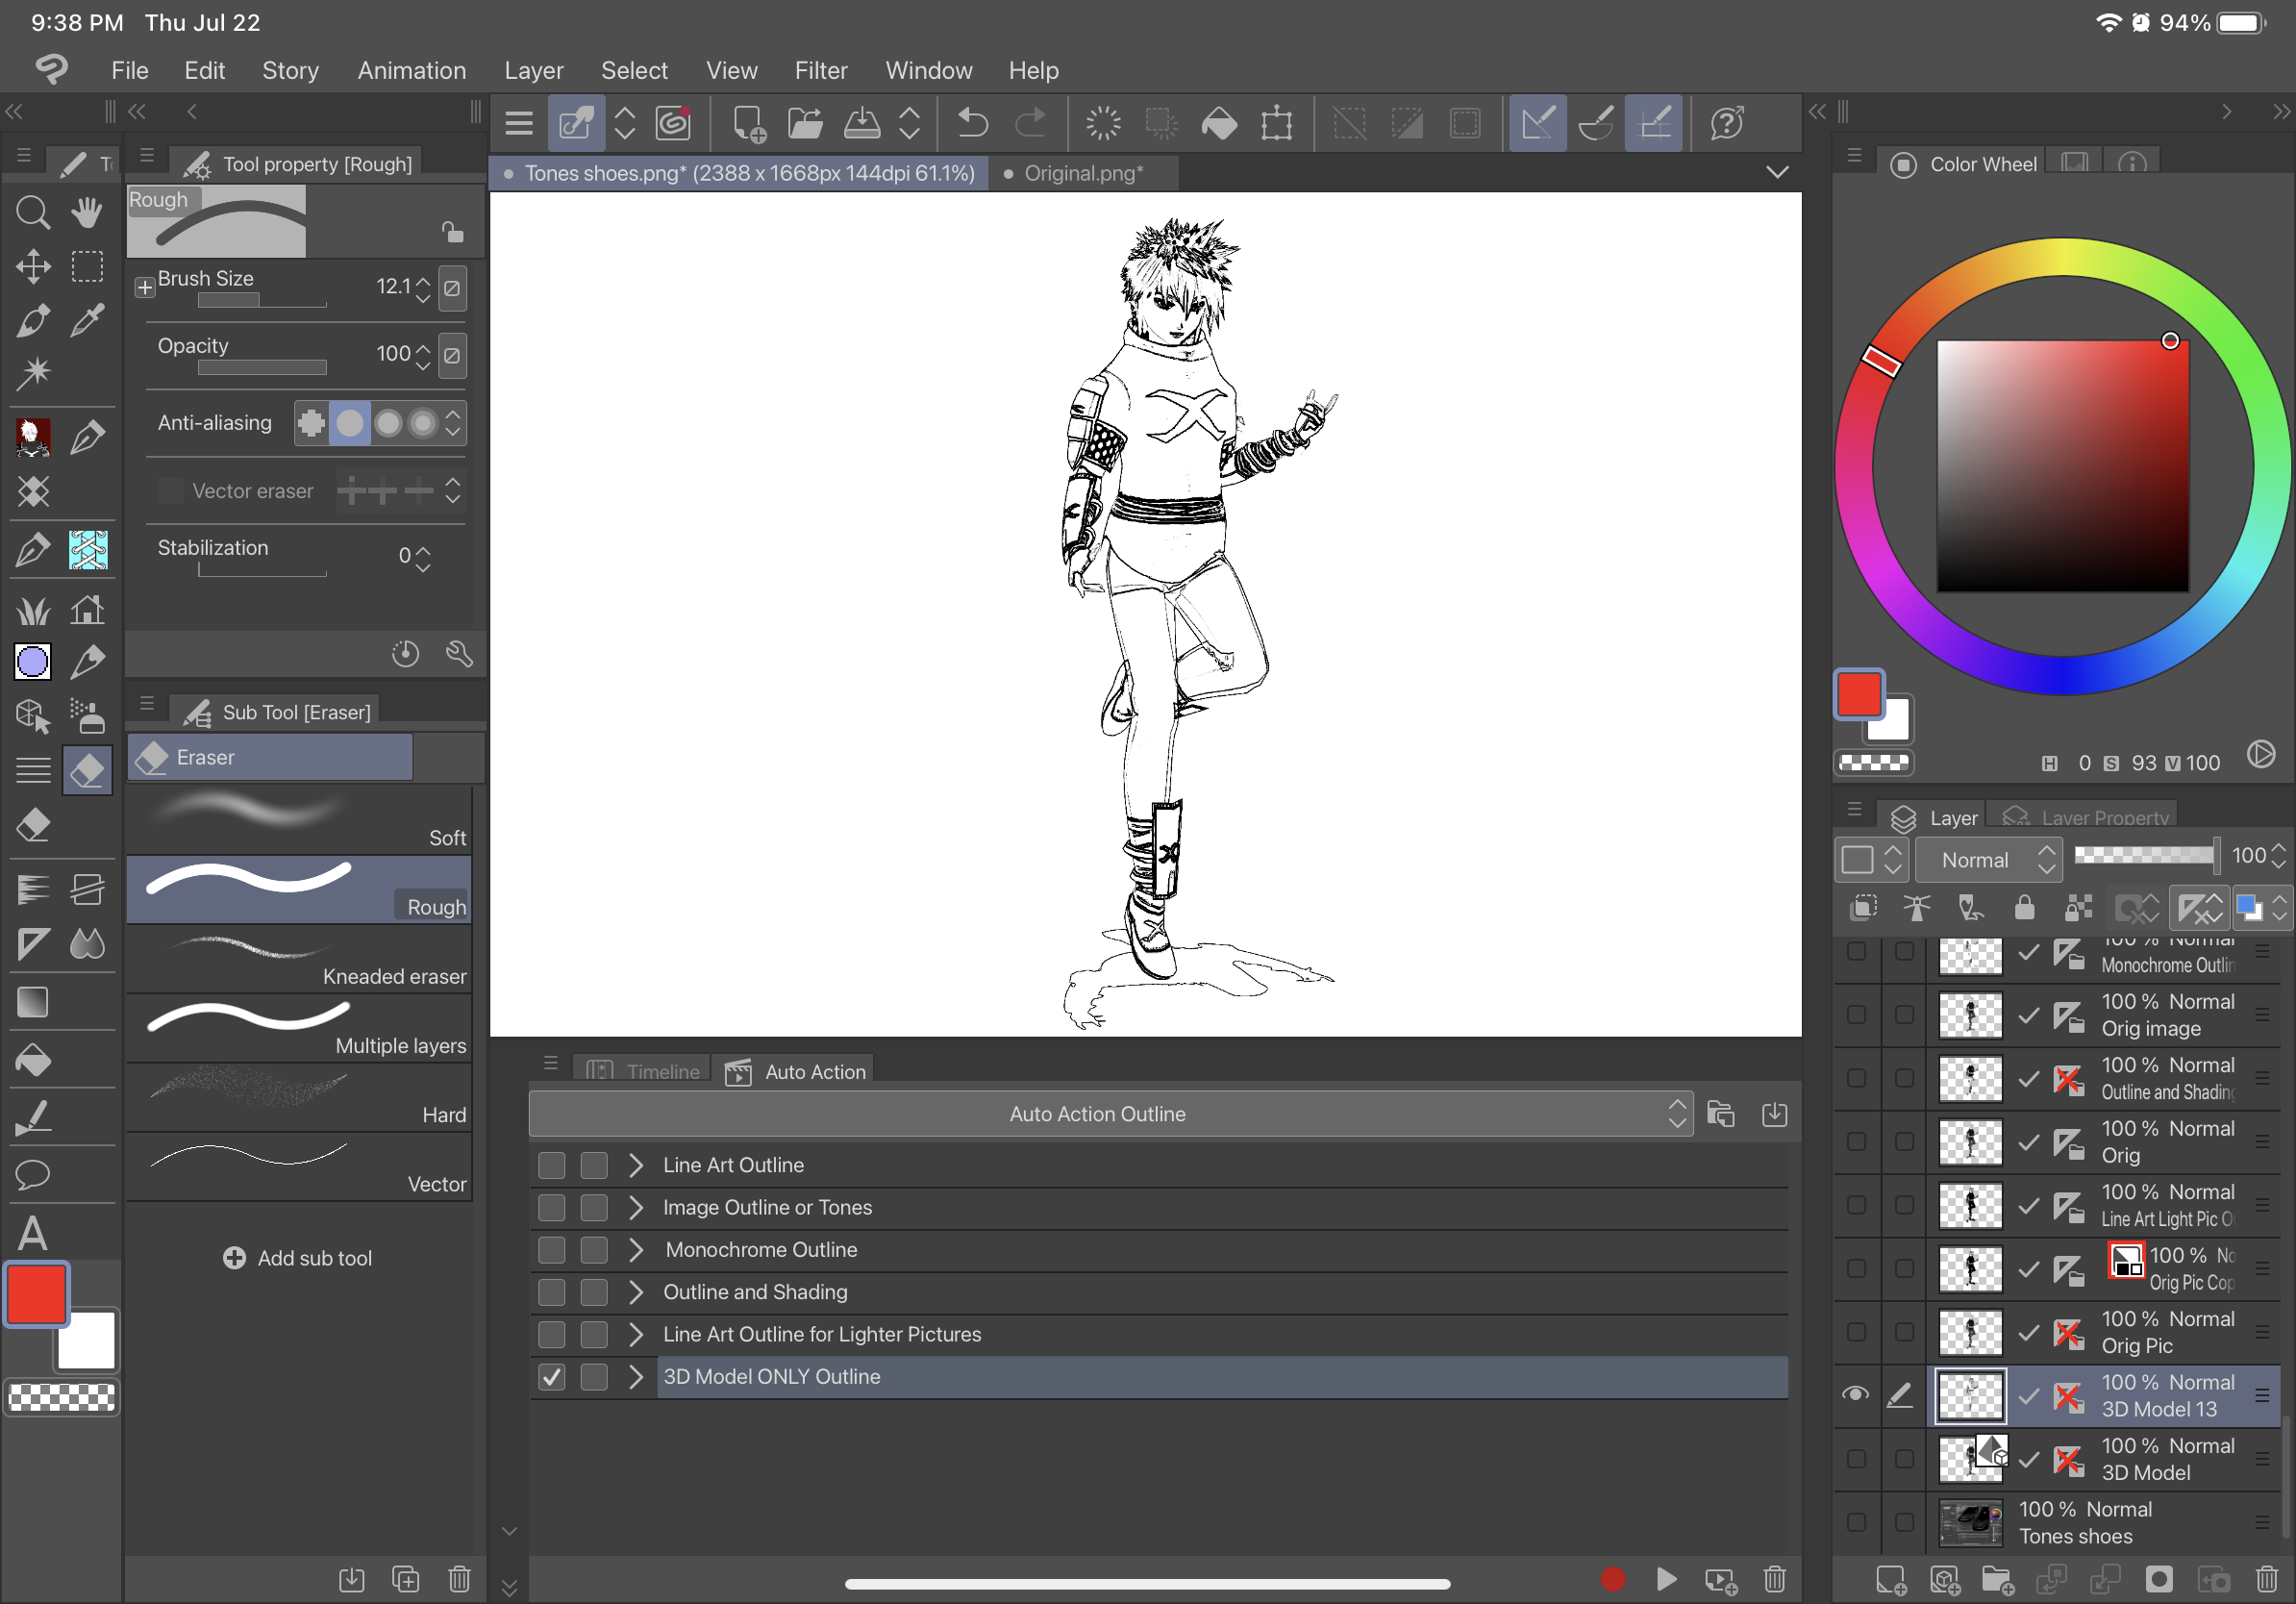
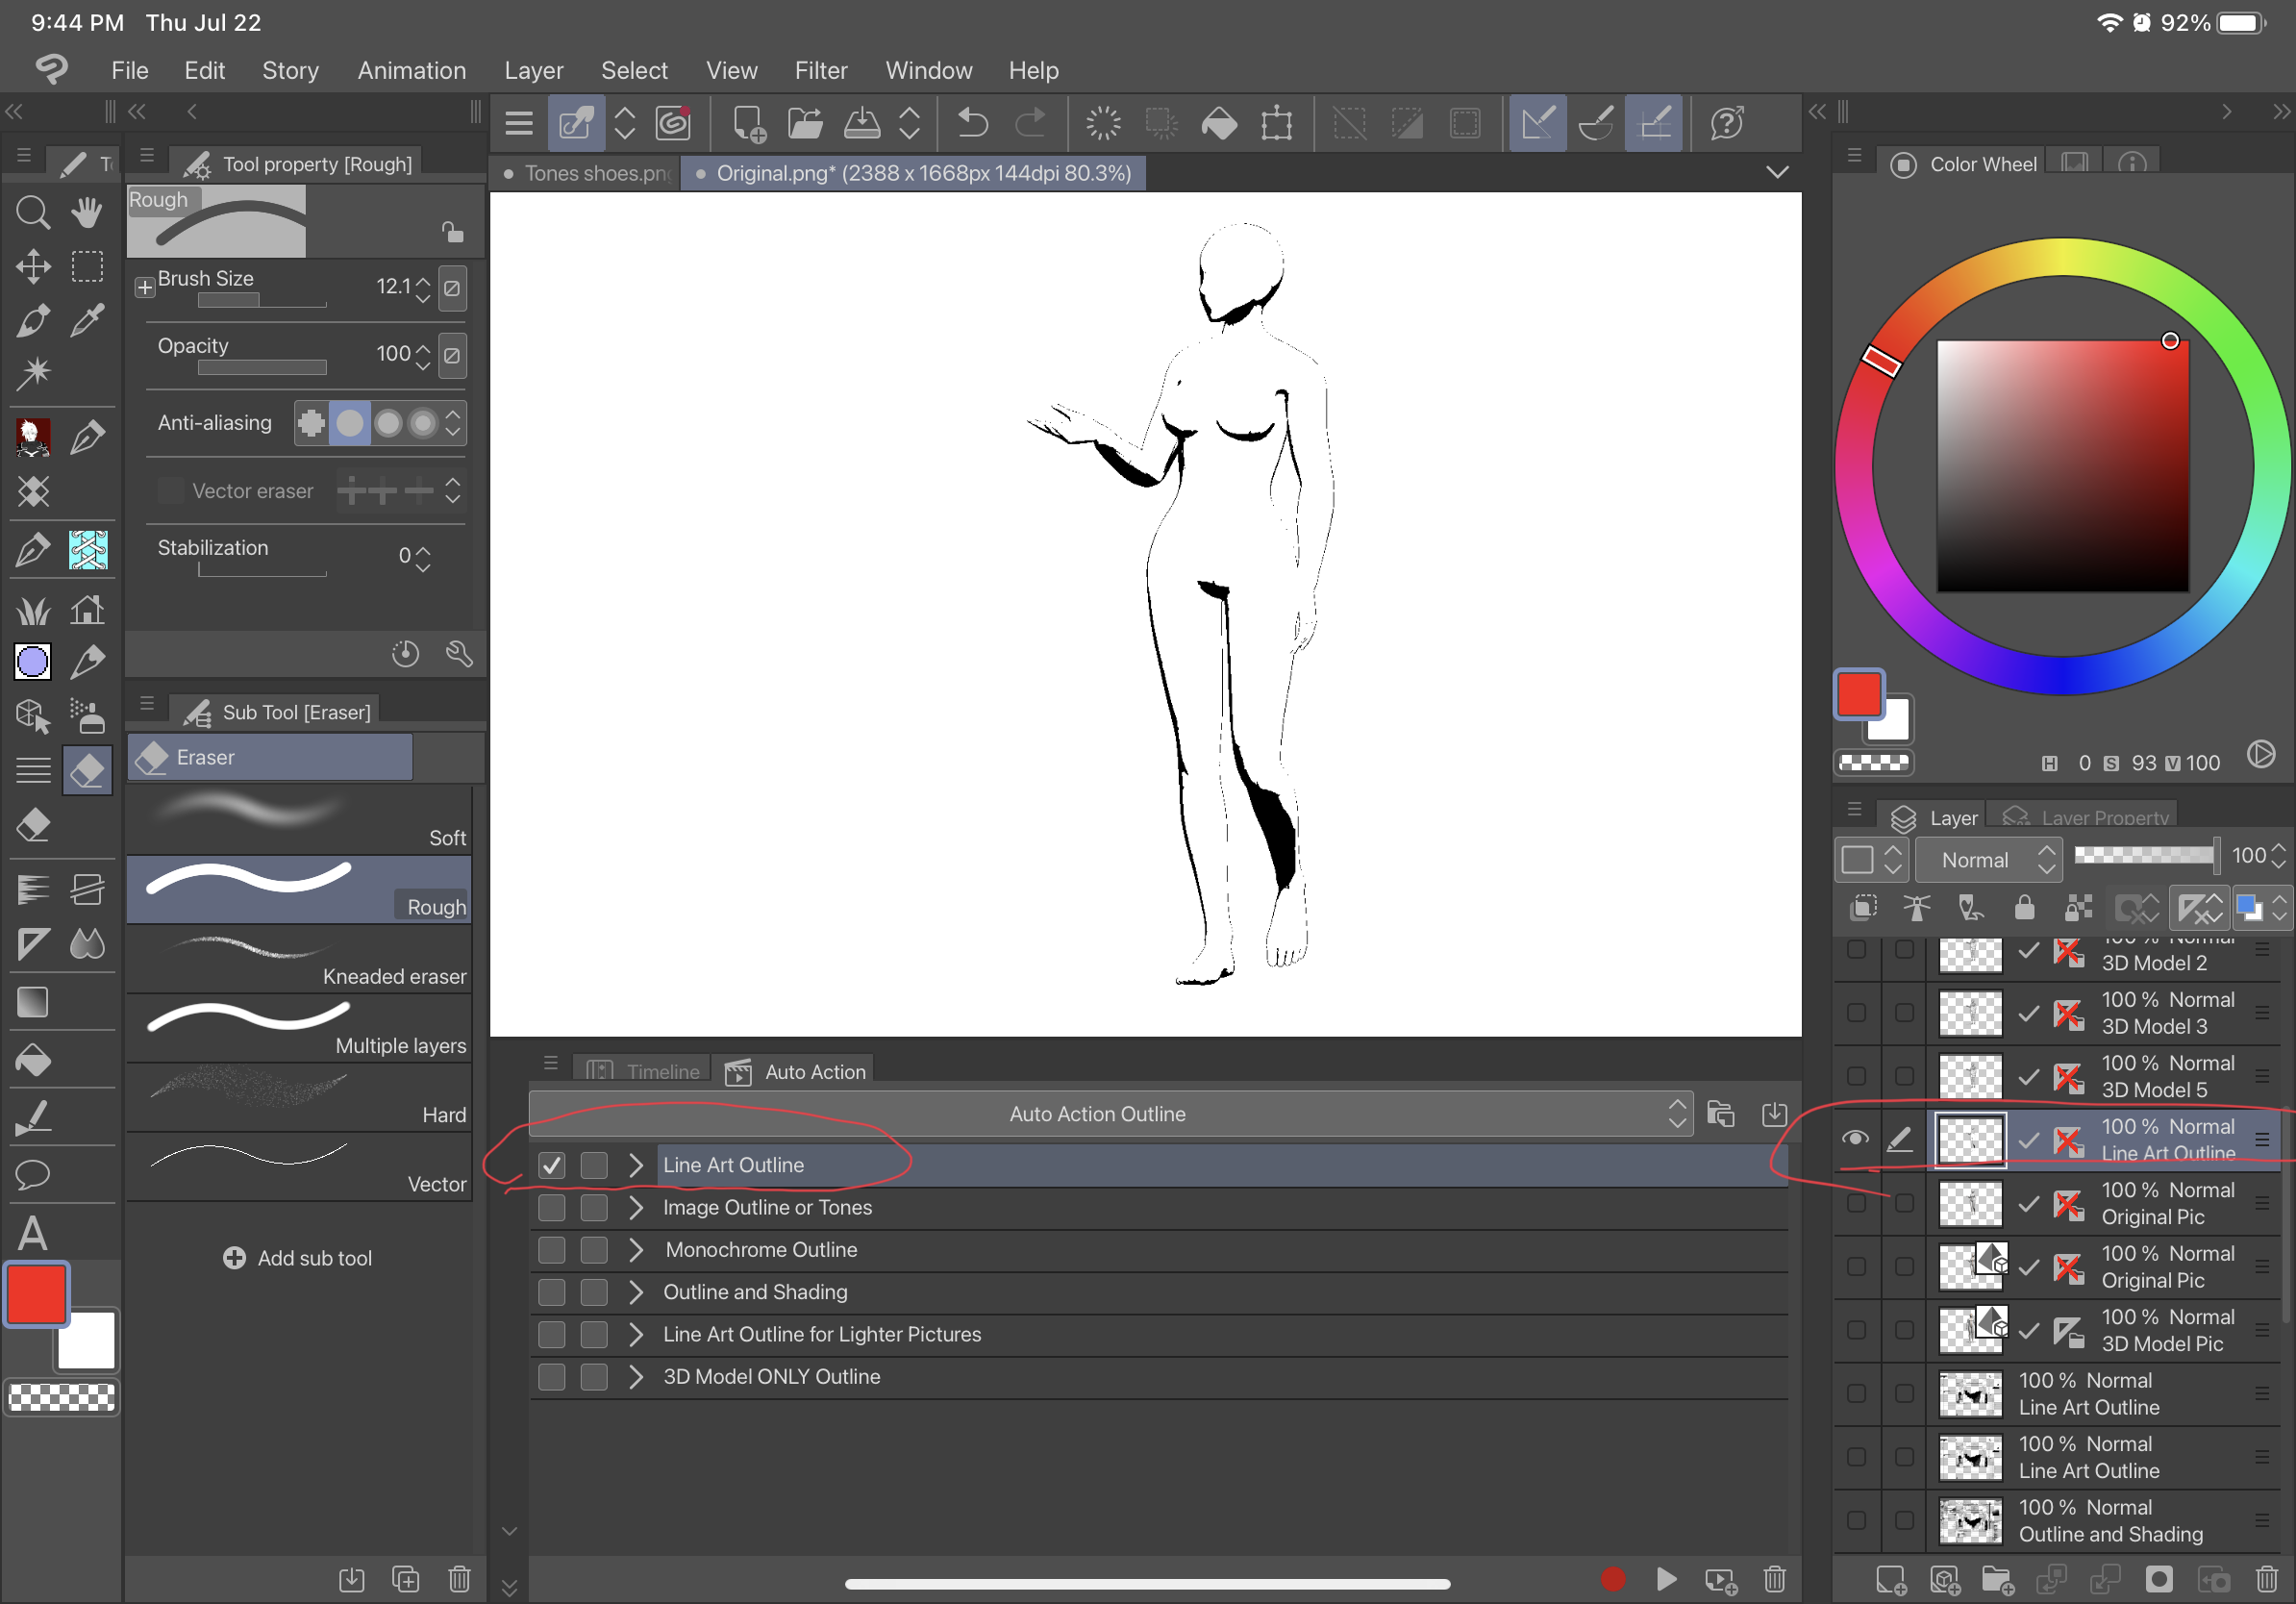
Dies ist ein Auto-Action-Werkzeug, um Bilder zu skizzieren. This is an Auto Action tool to outline pictures.
Ziehen Sie von heruntergeladenen Materialien in die automatische Aktion und es wird unter dem Namen Outline angezeigt. Es gibt 6 Variationen dieses Tools.

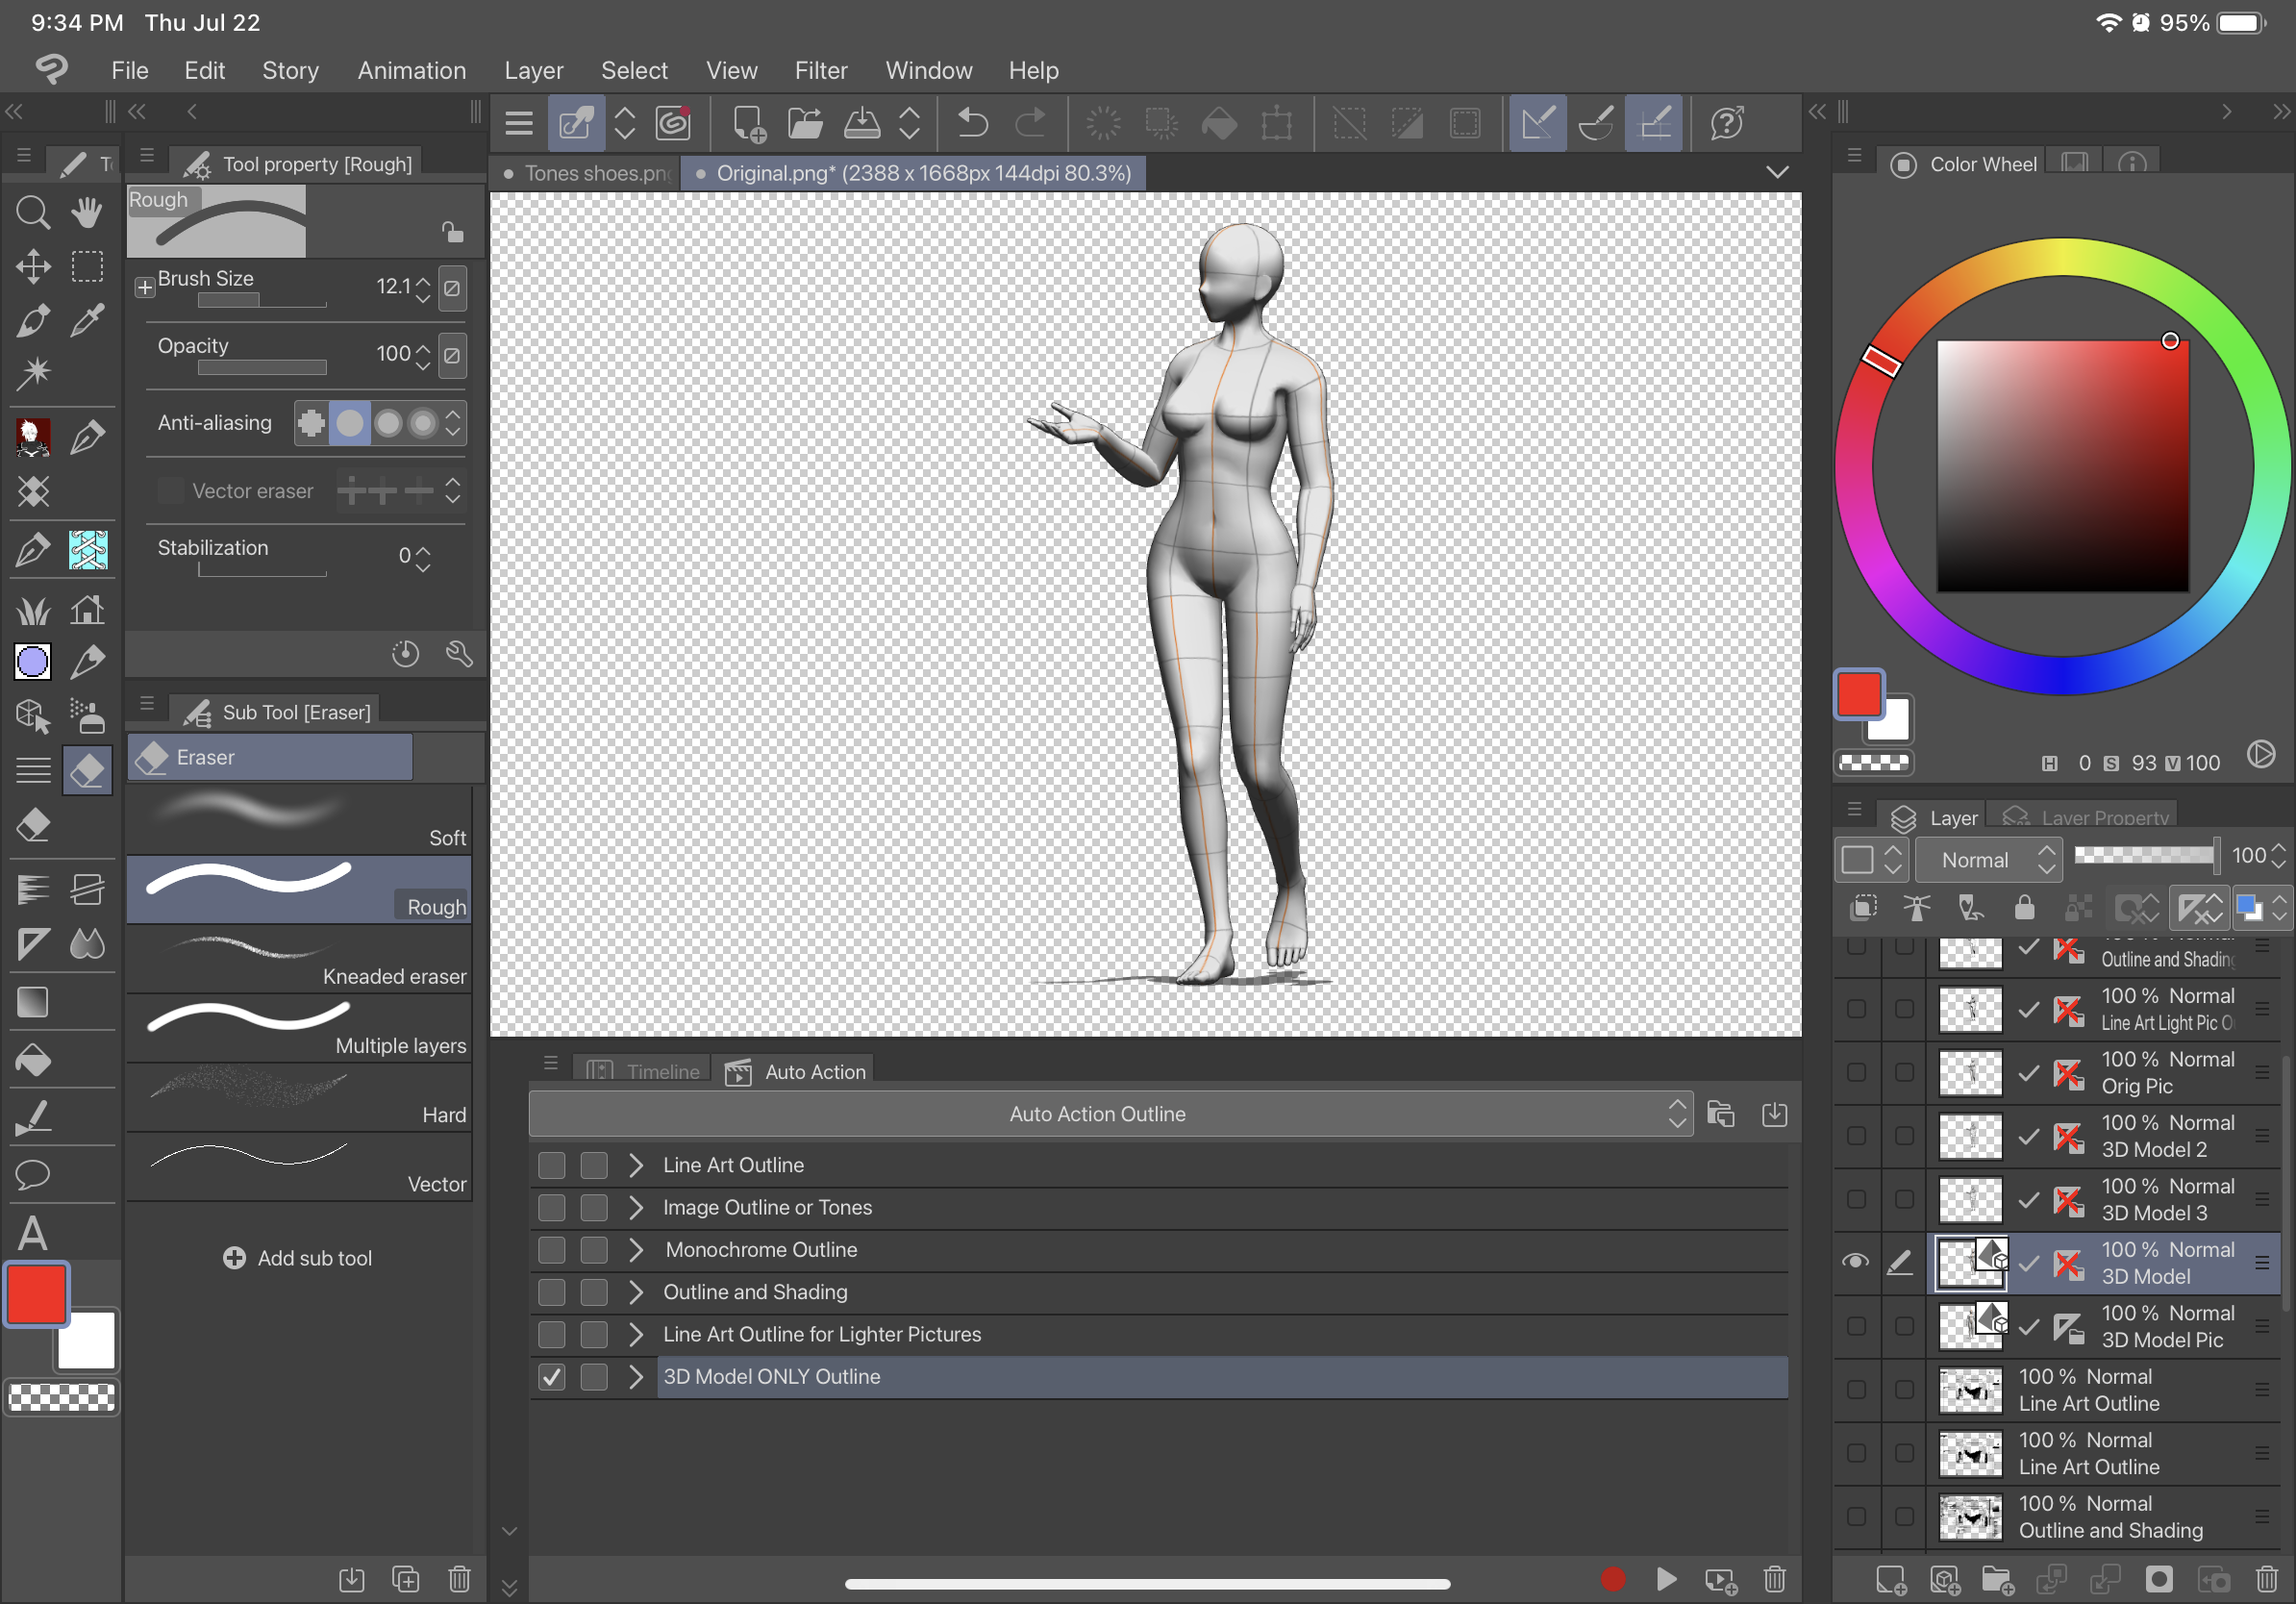
1. Konvertieren Sie das 3D-Modell in eine "Raster-Ebene"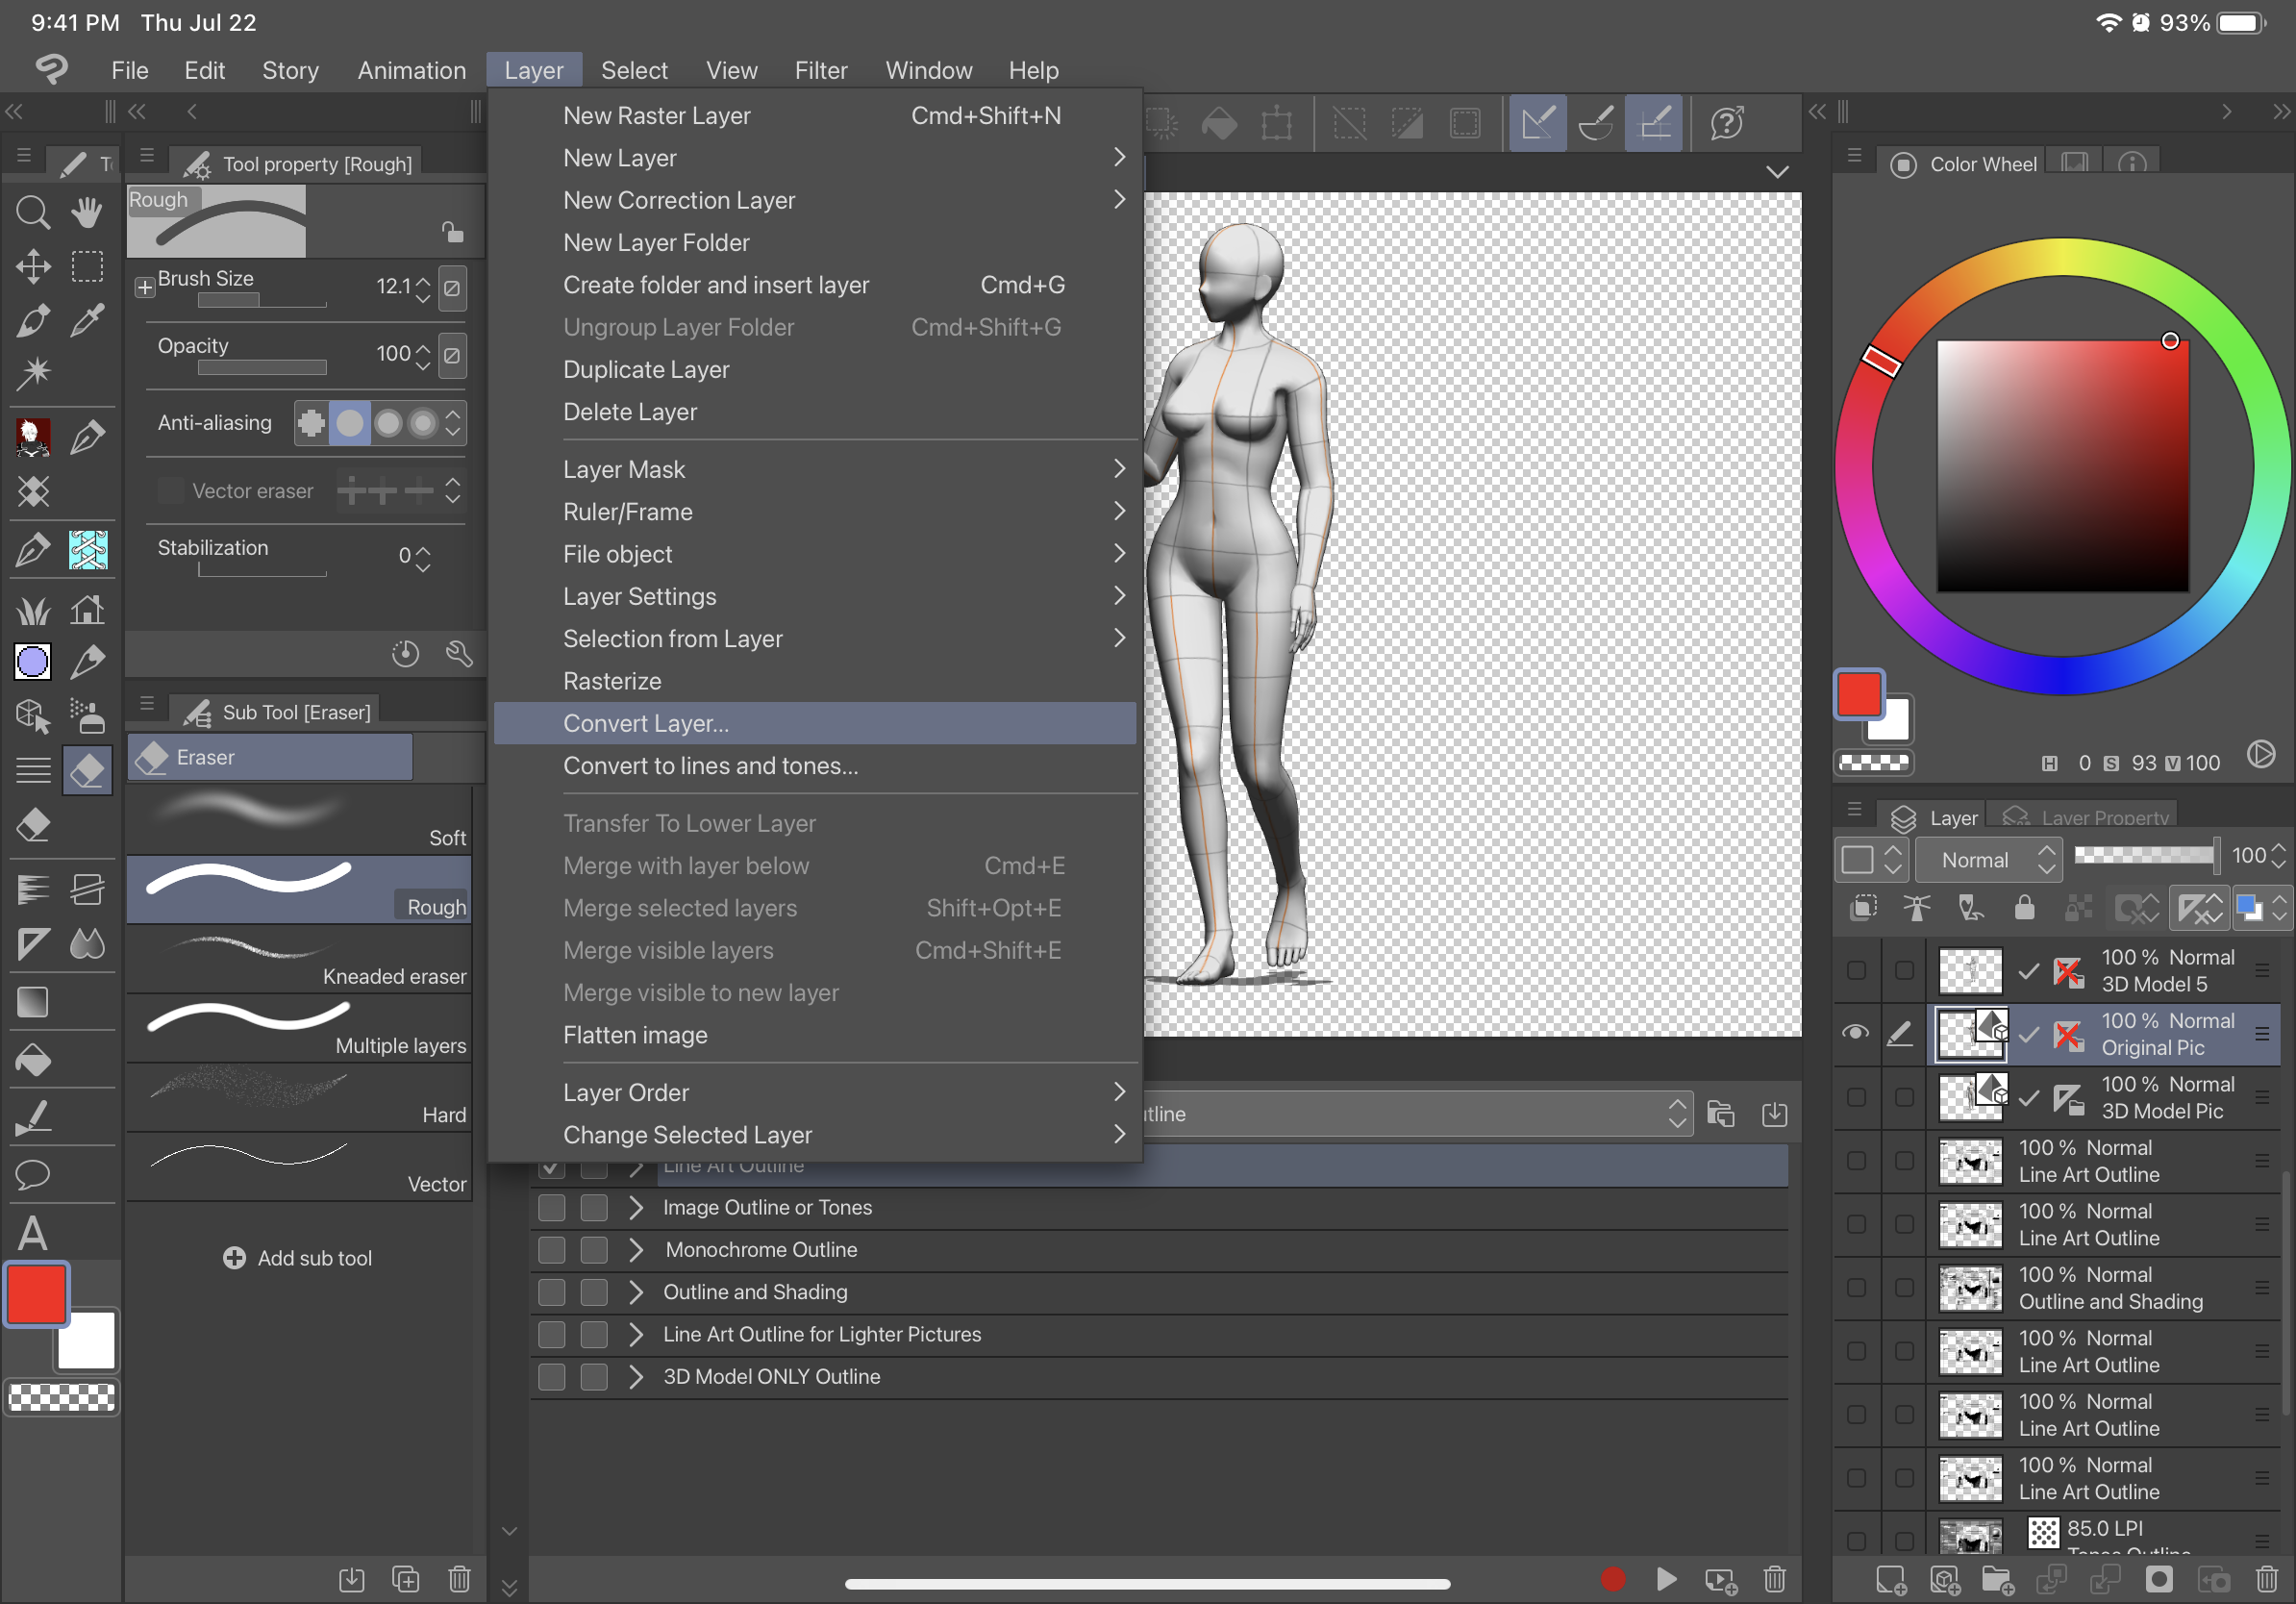
Beschreibung:
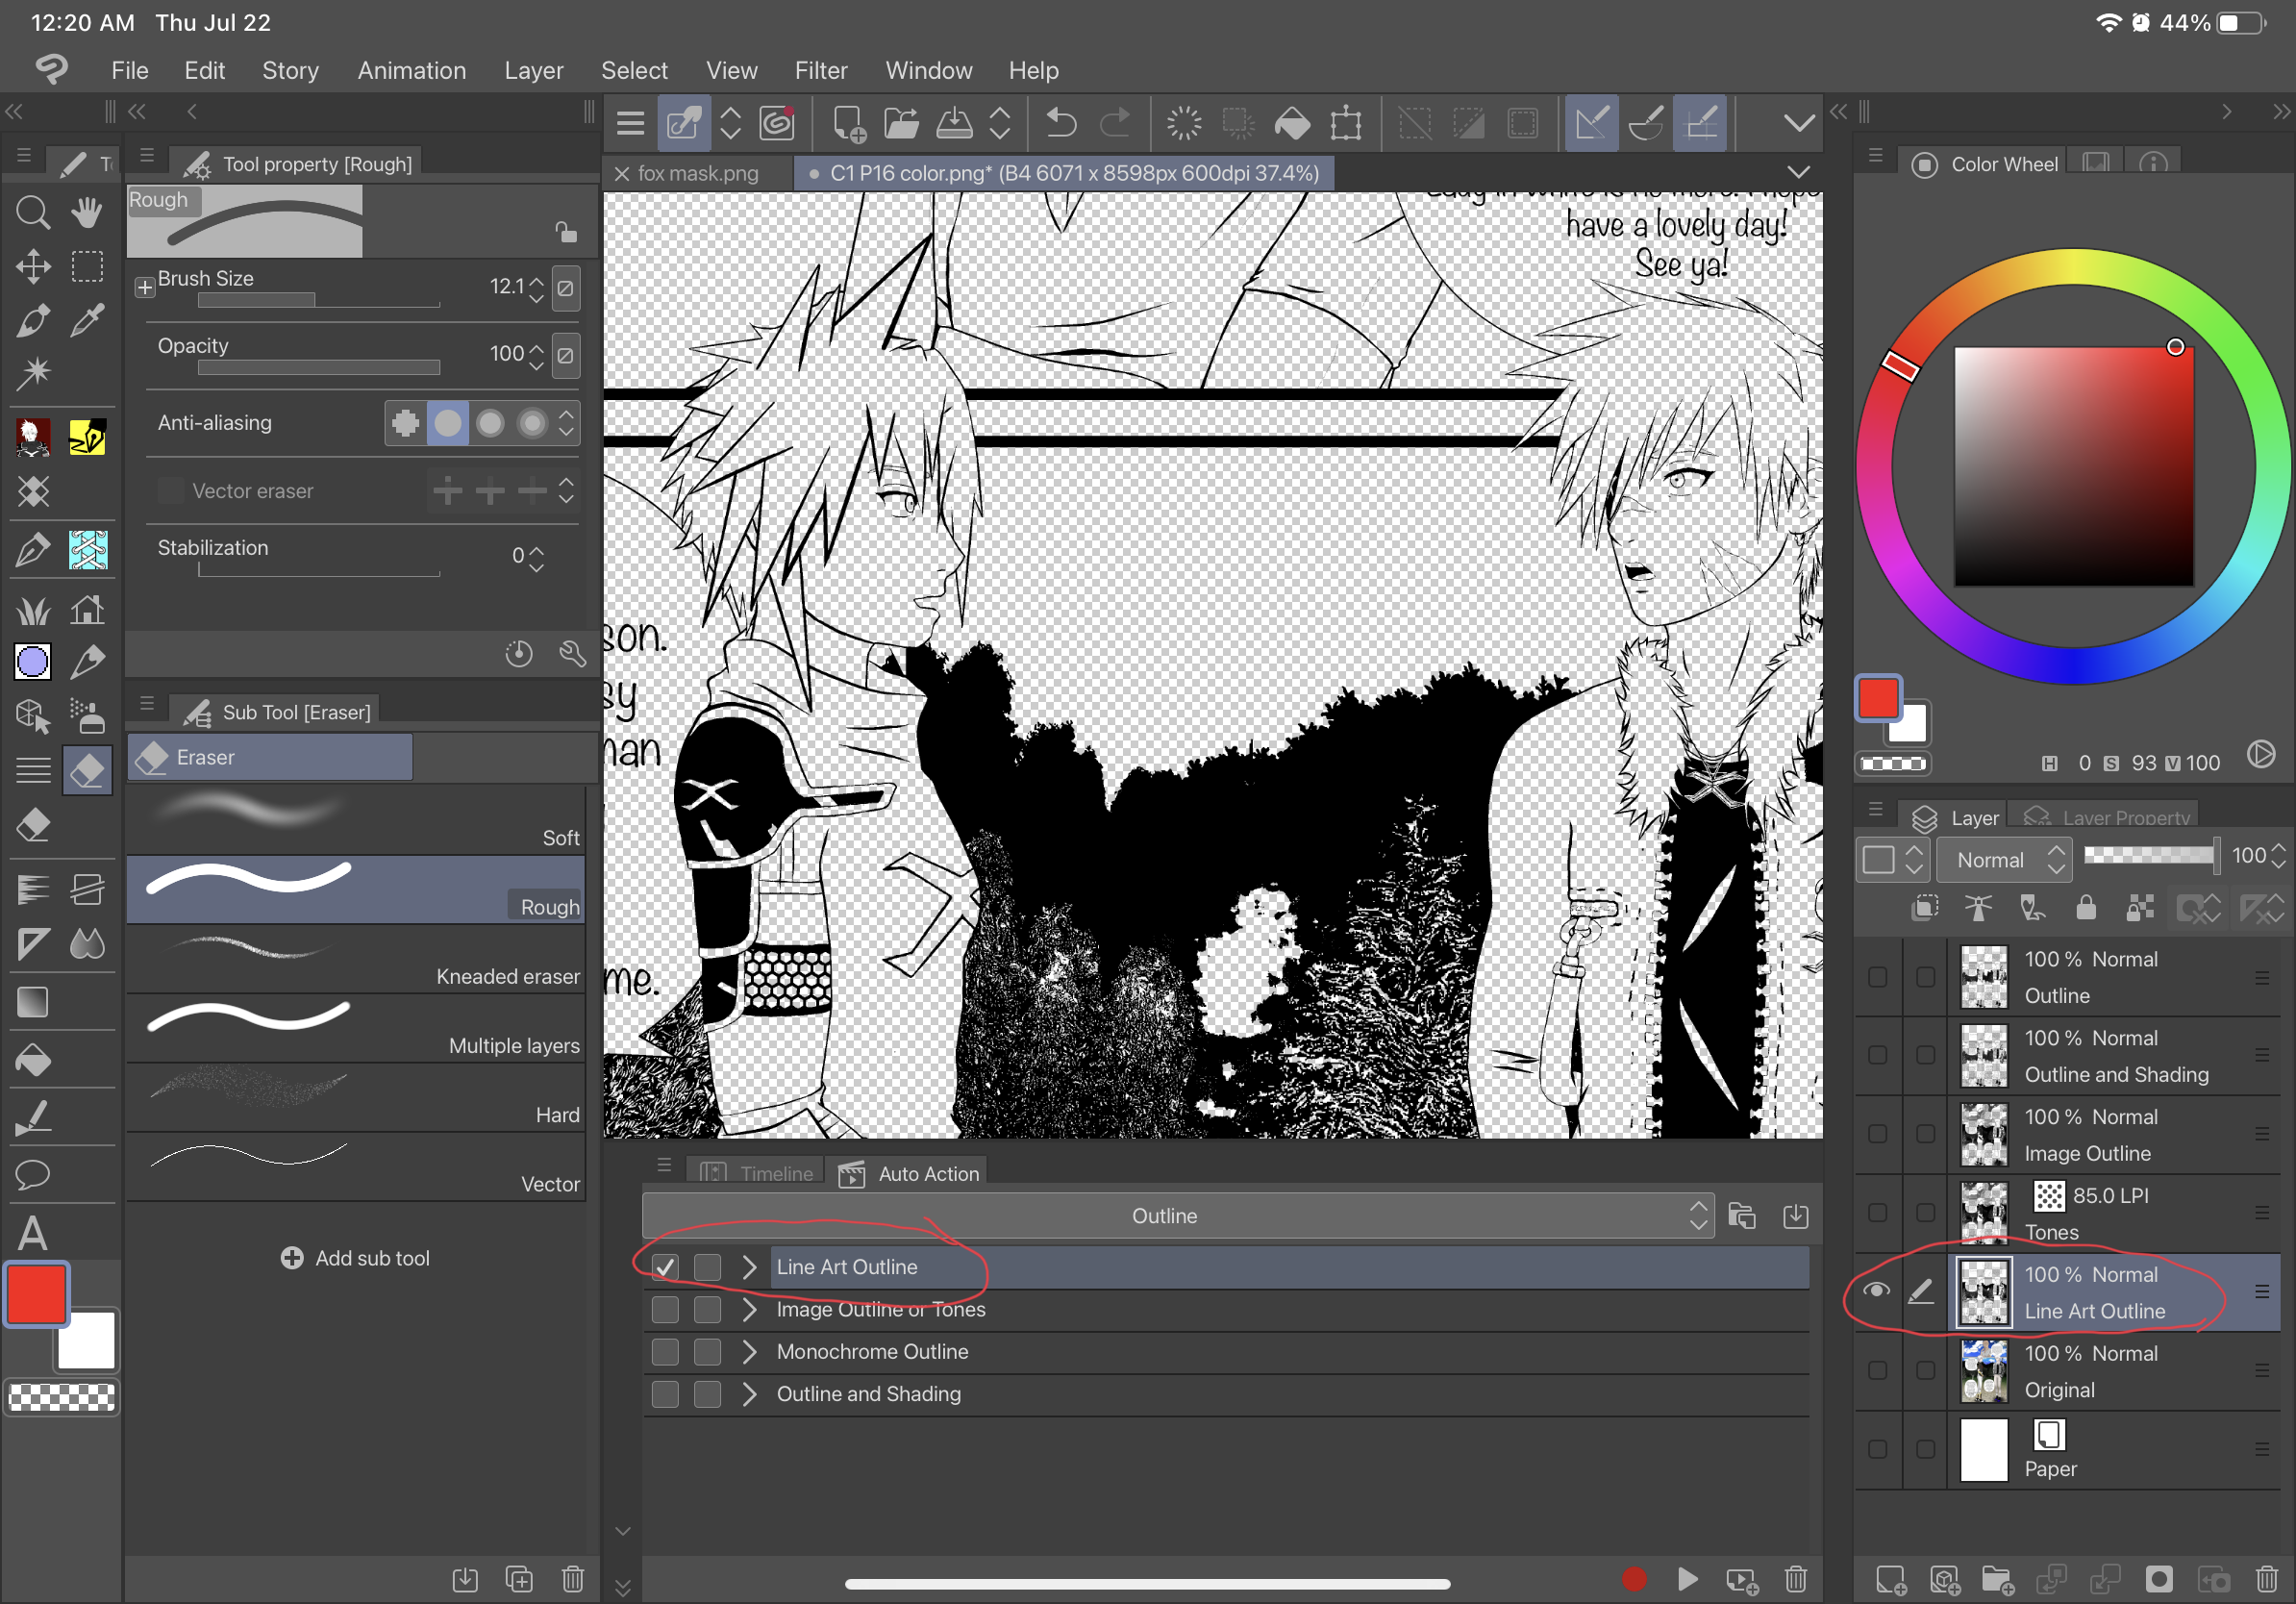
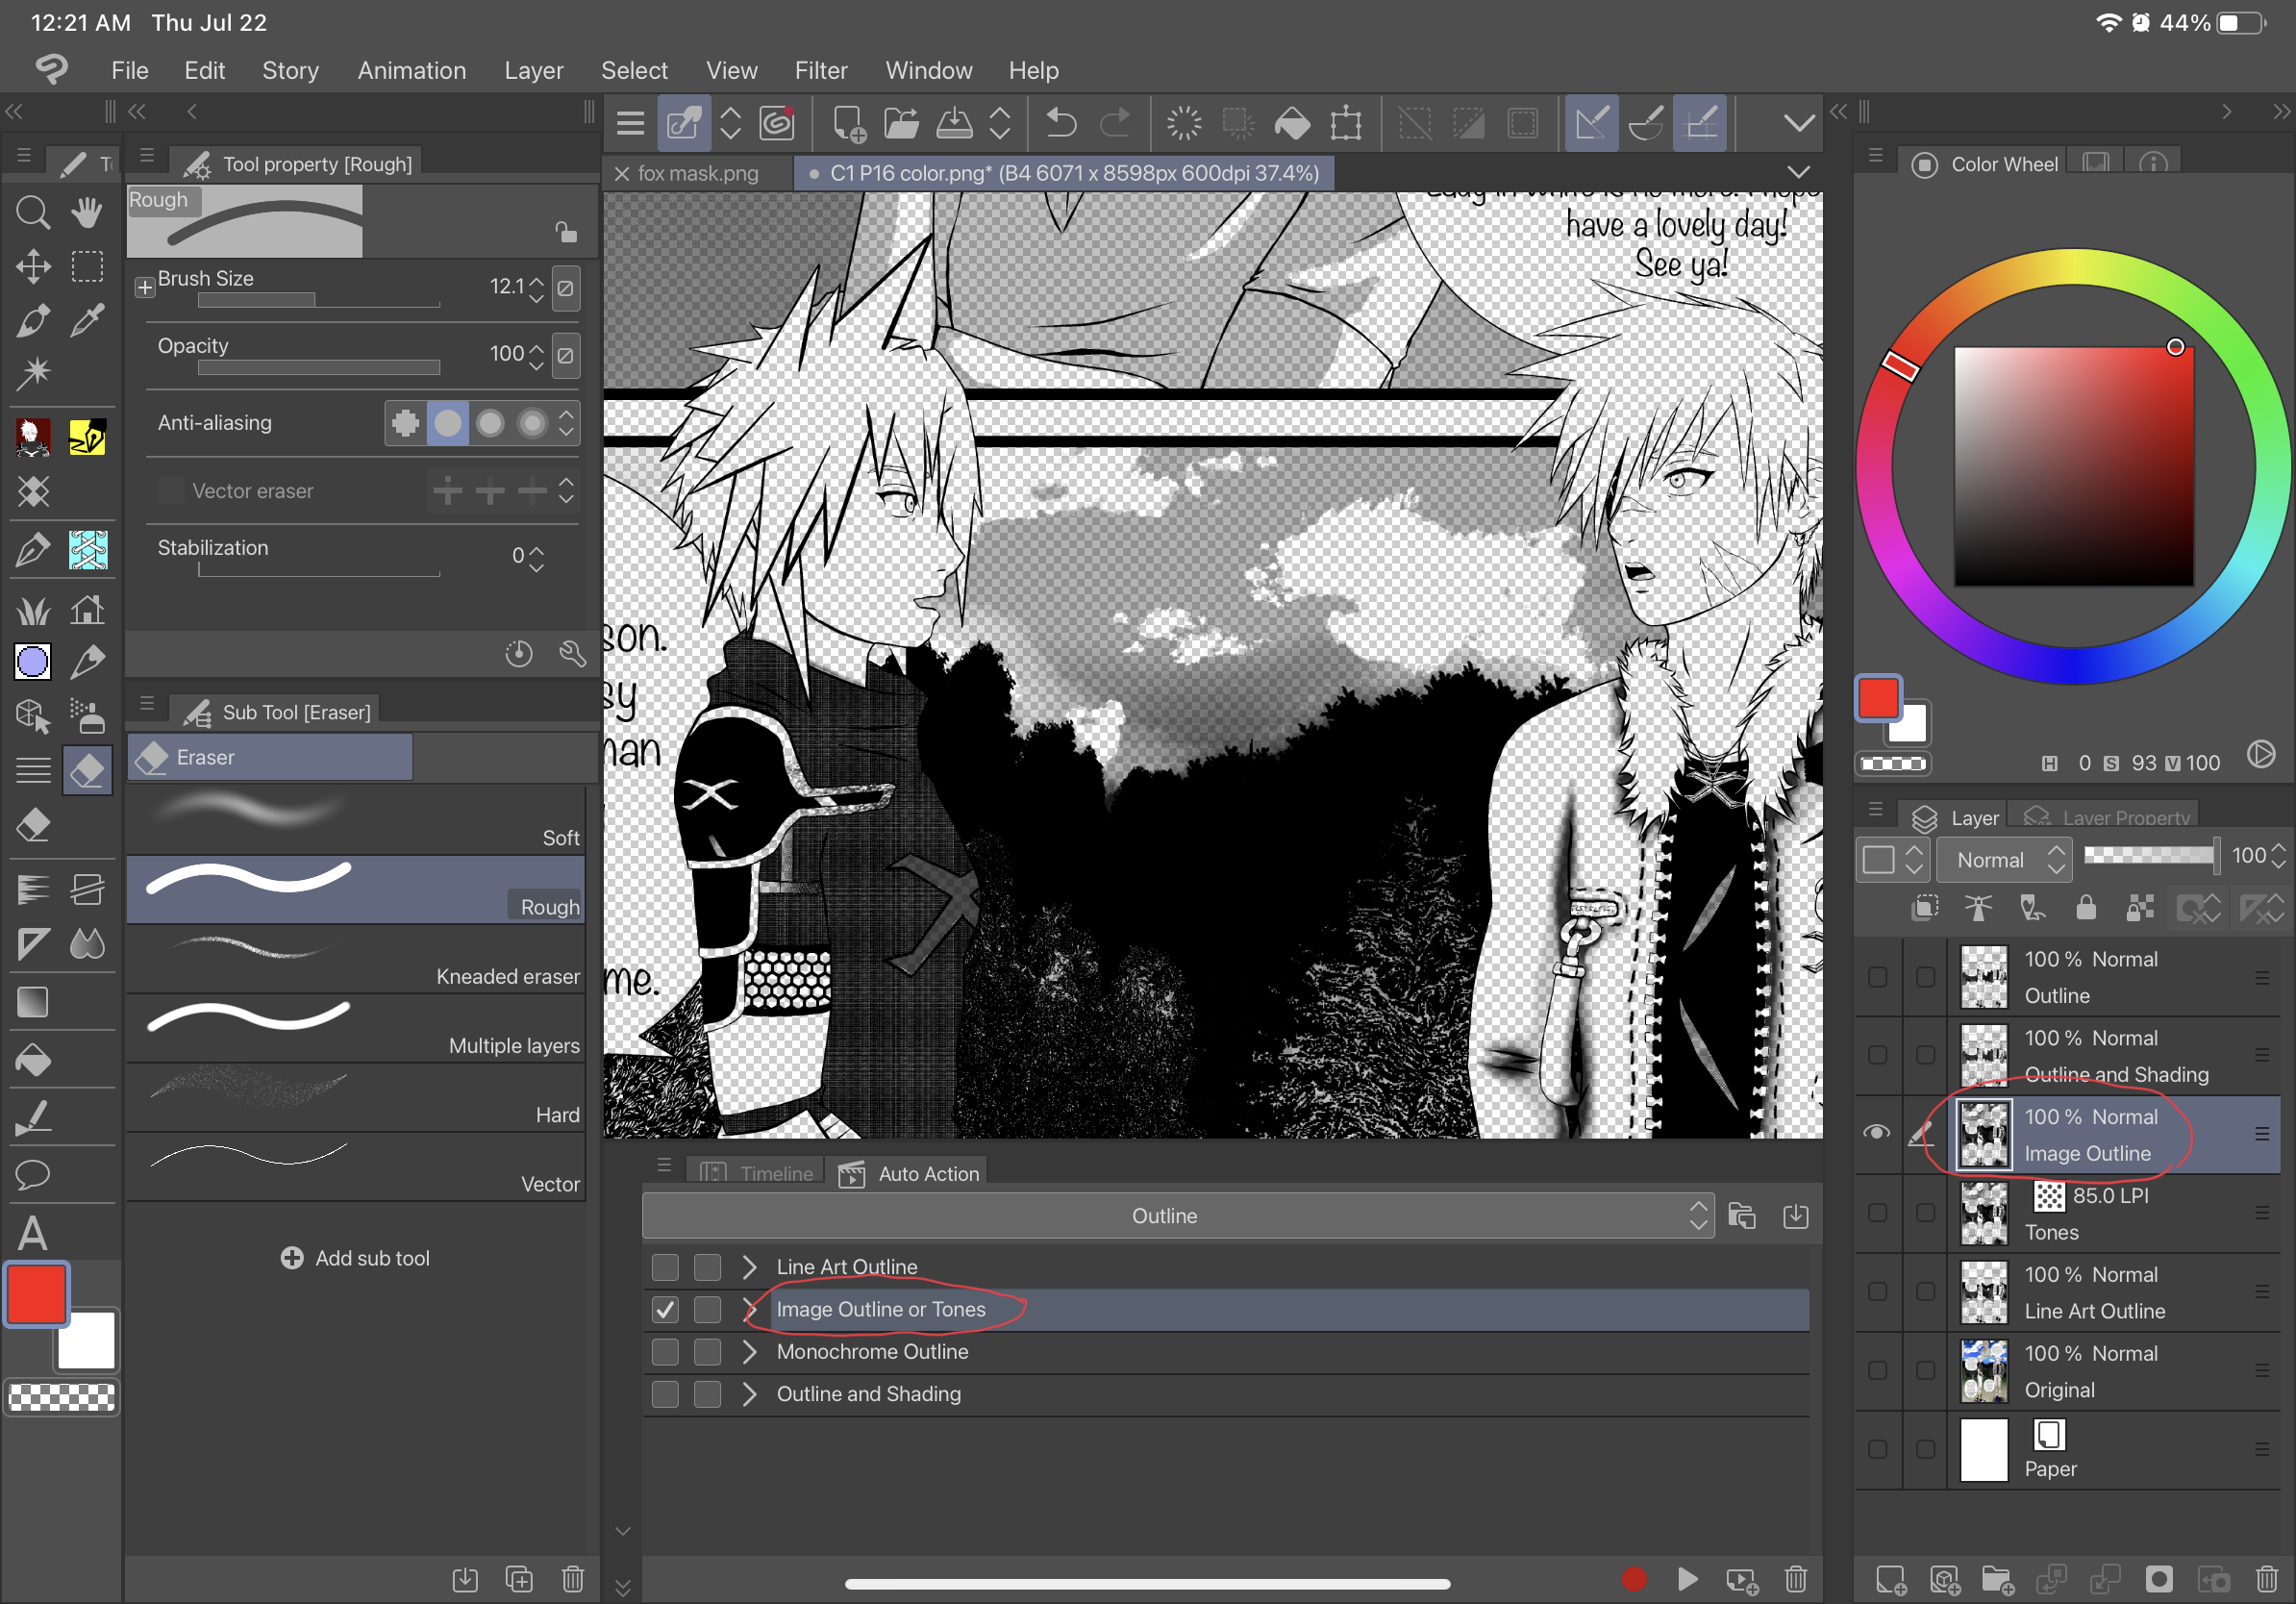
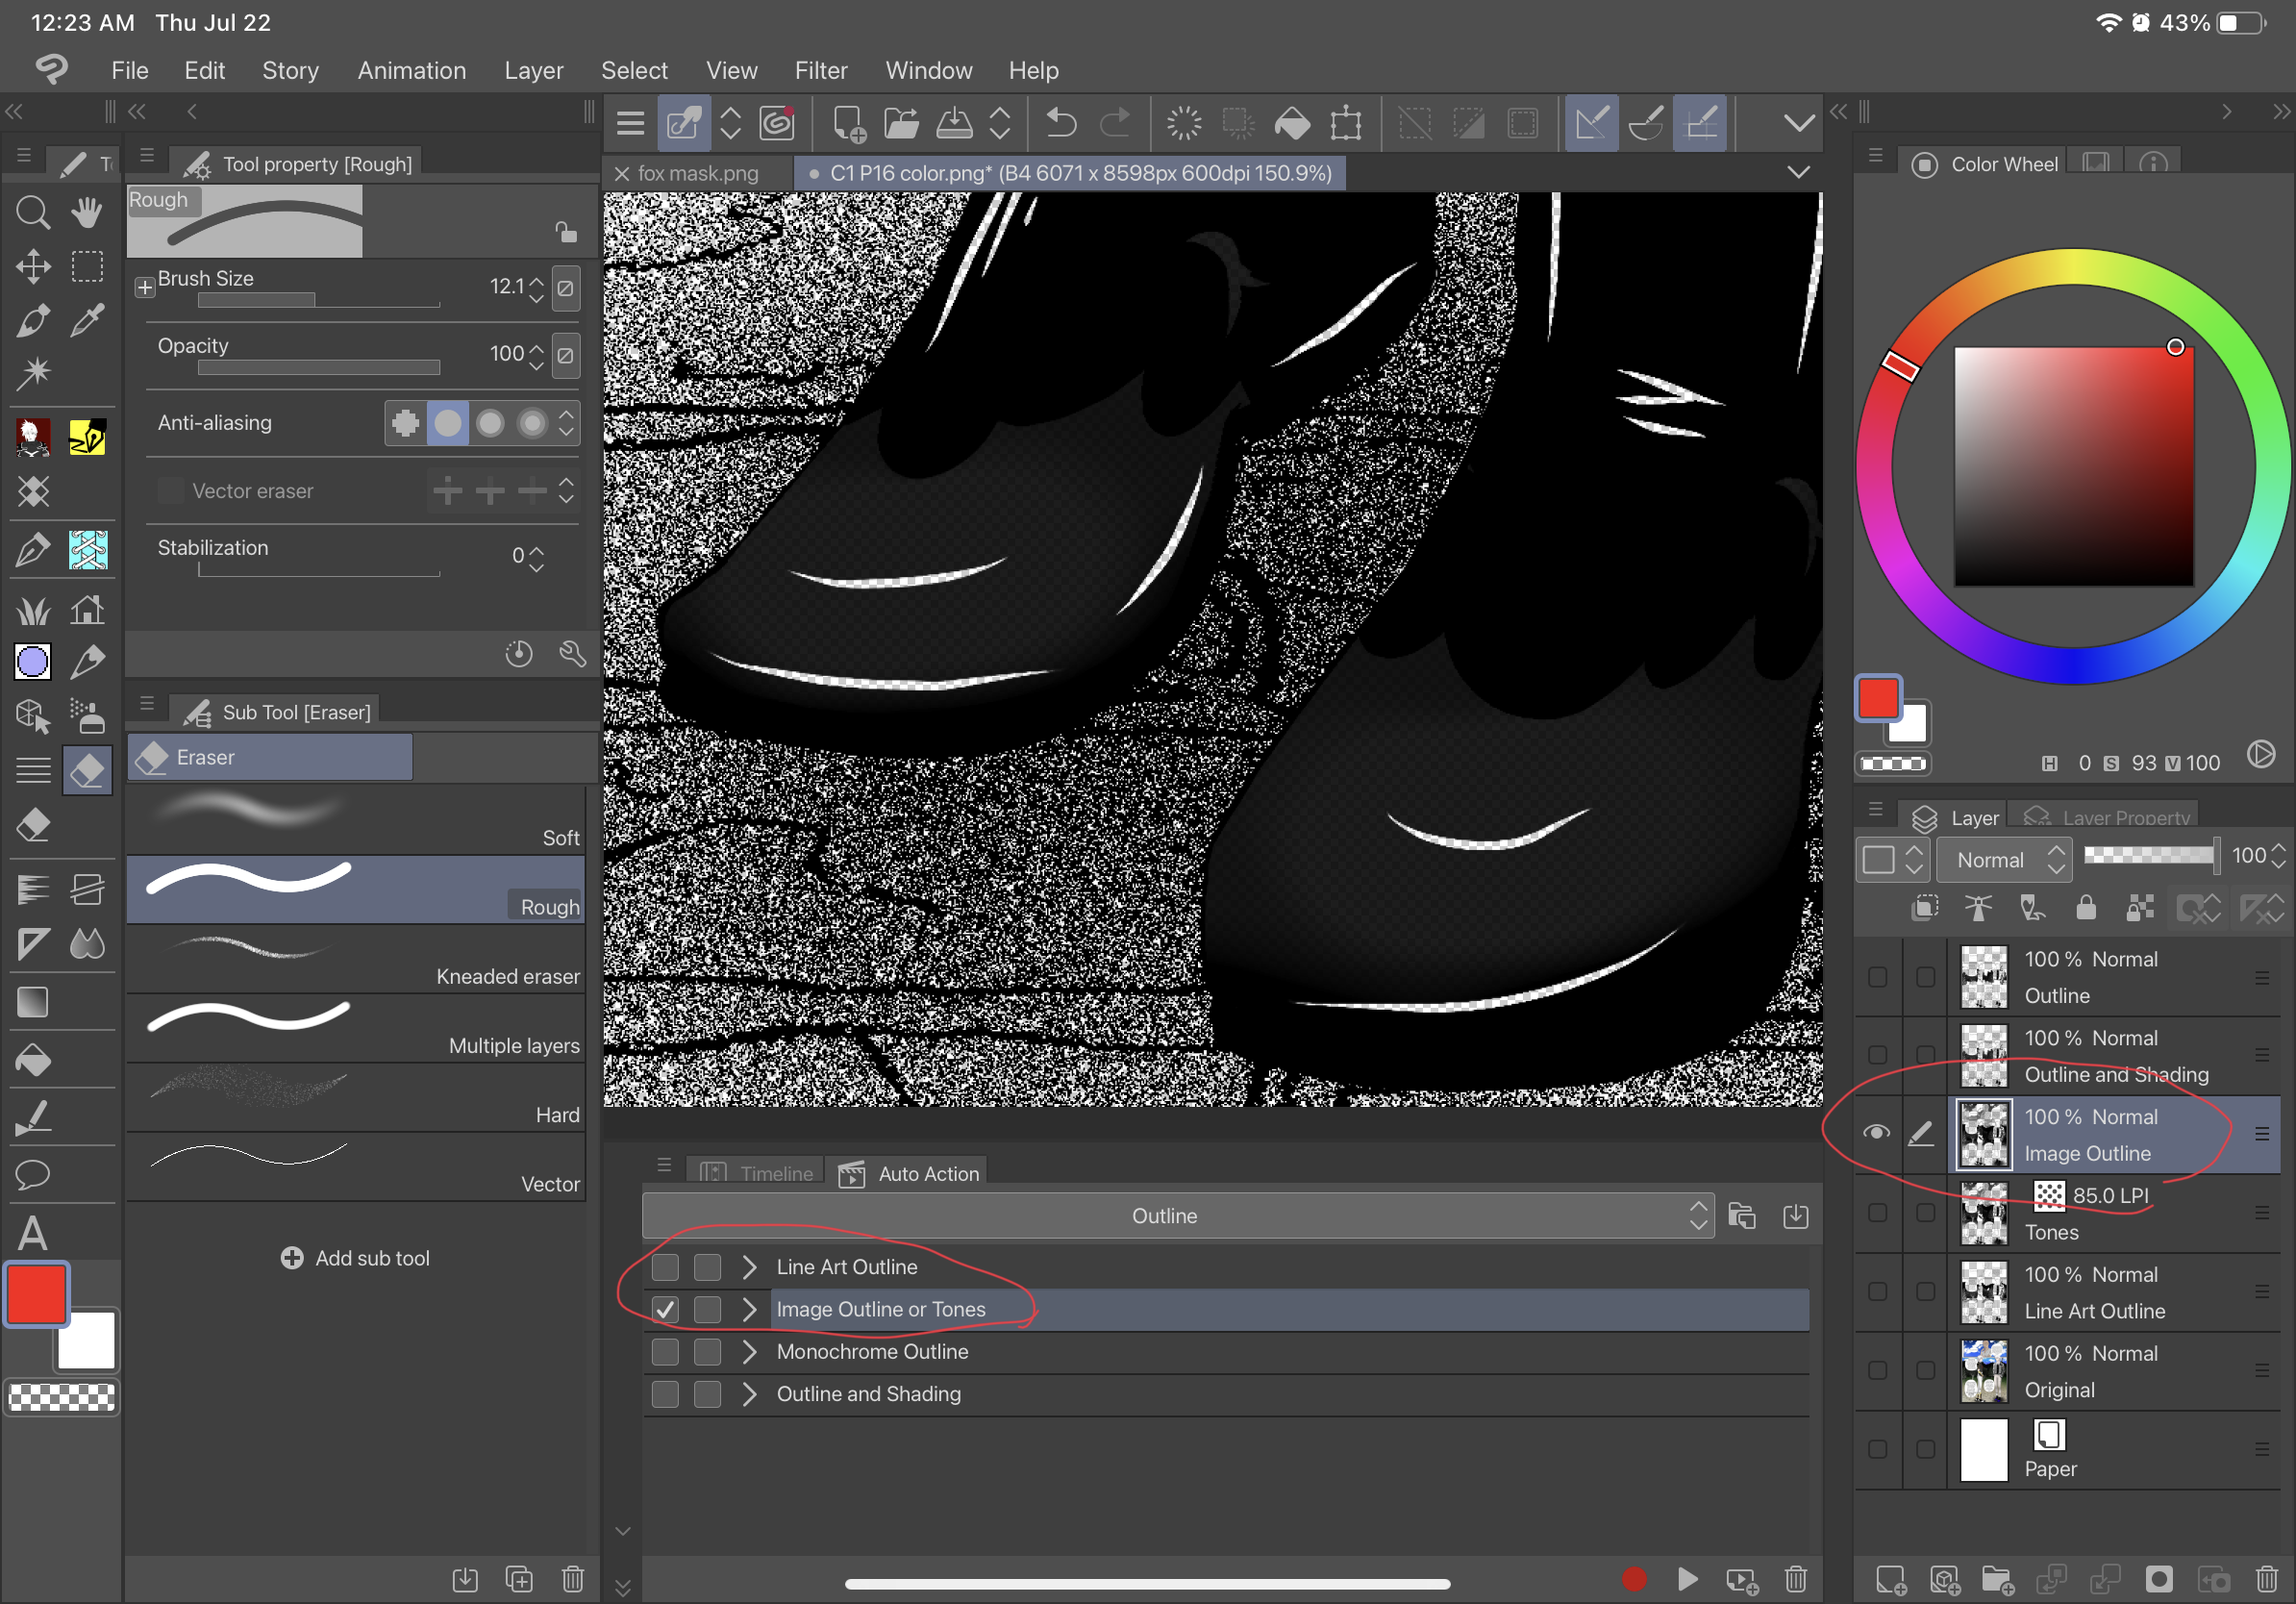
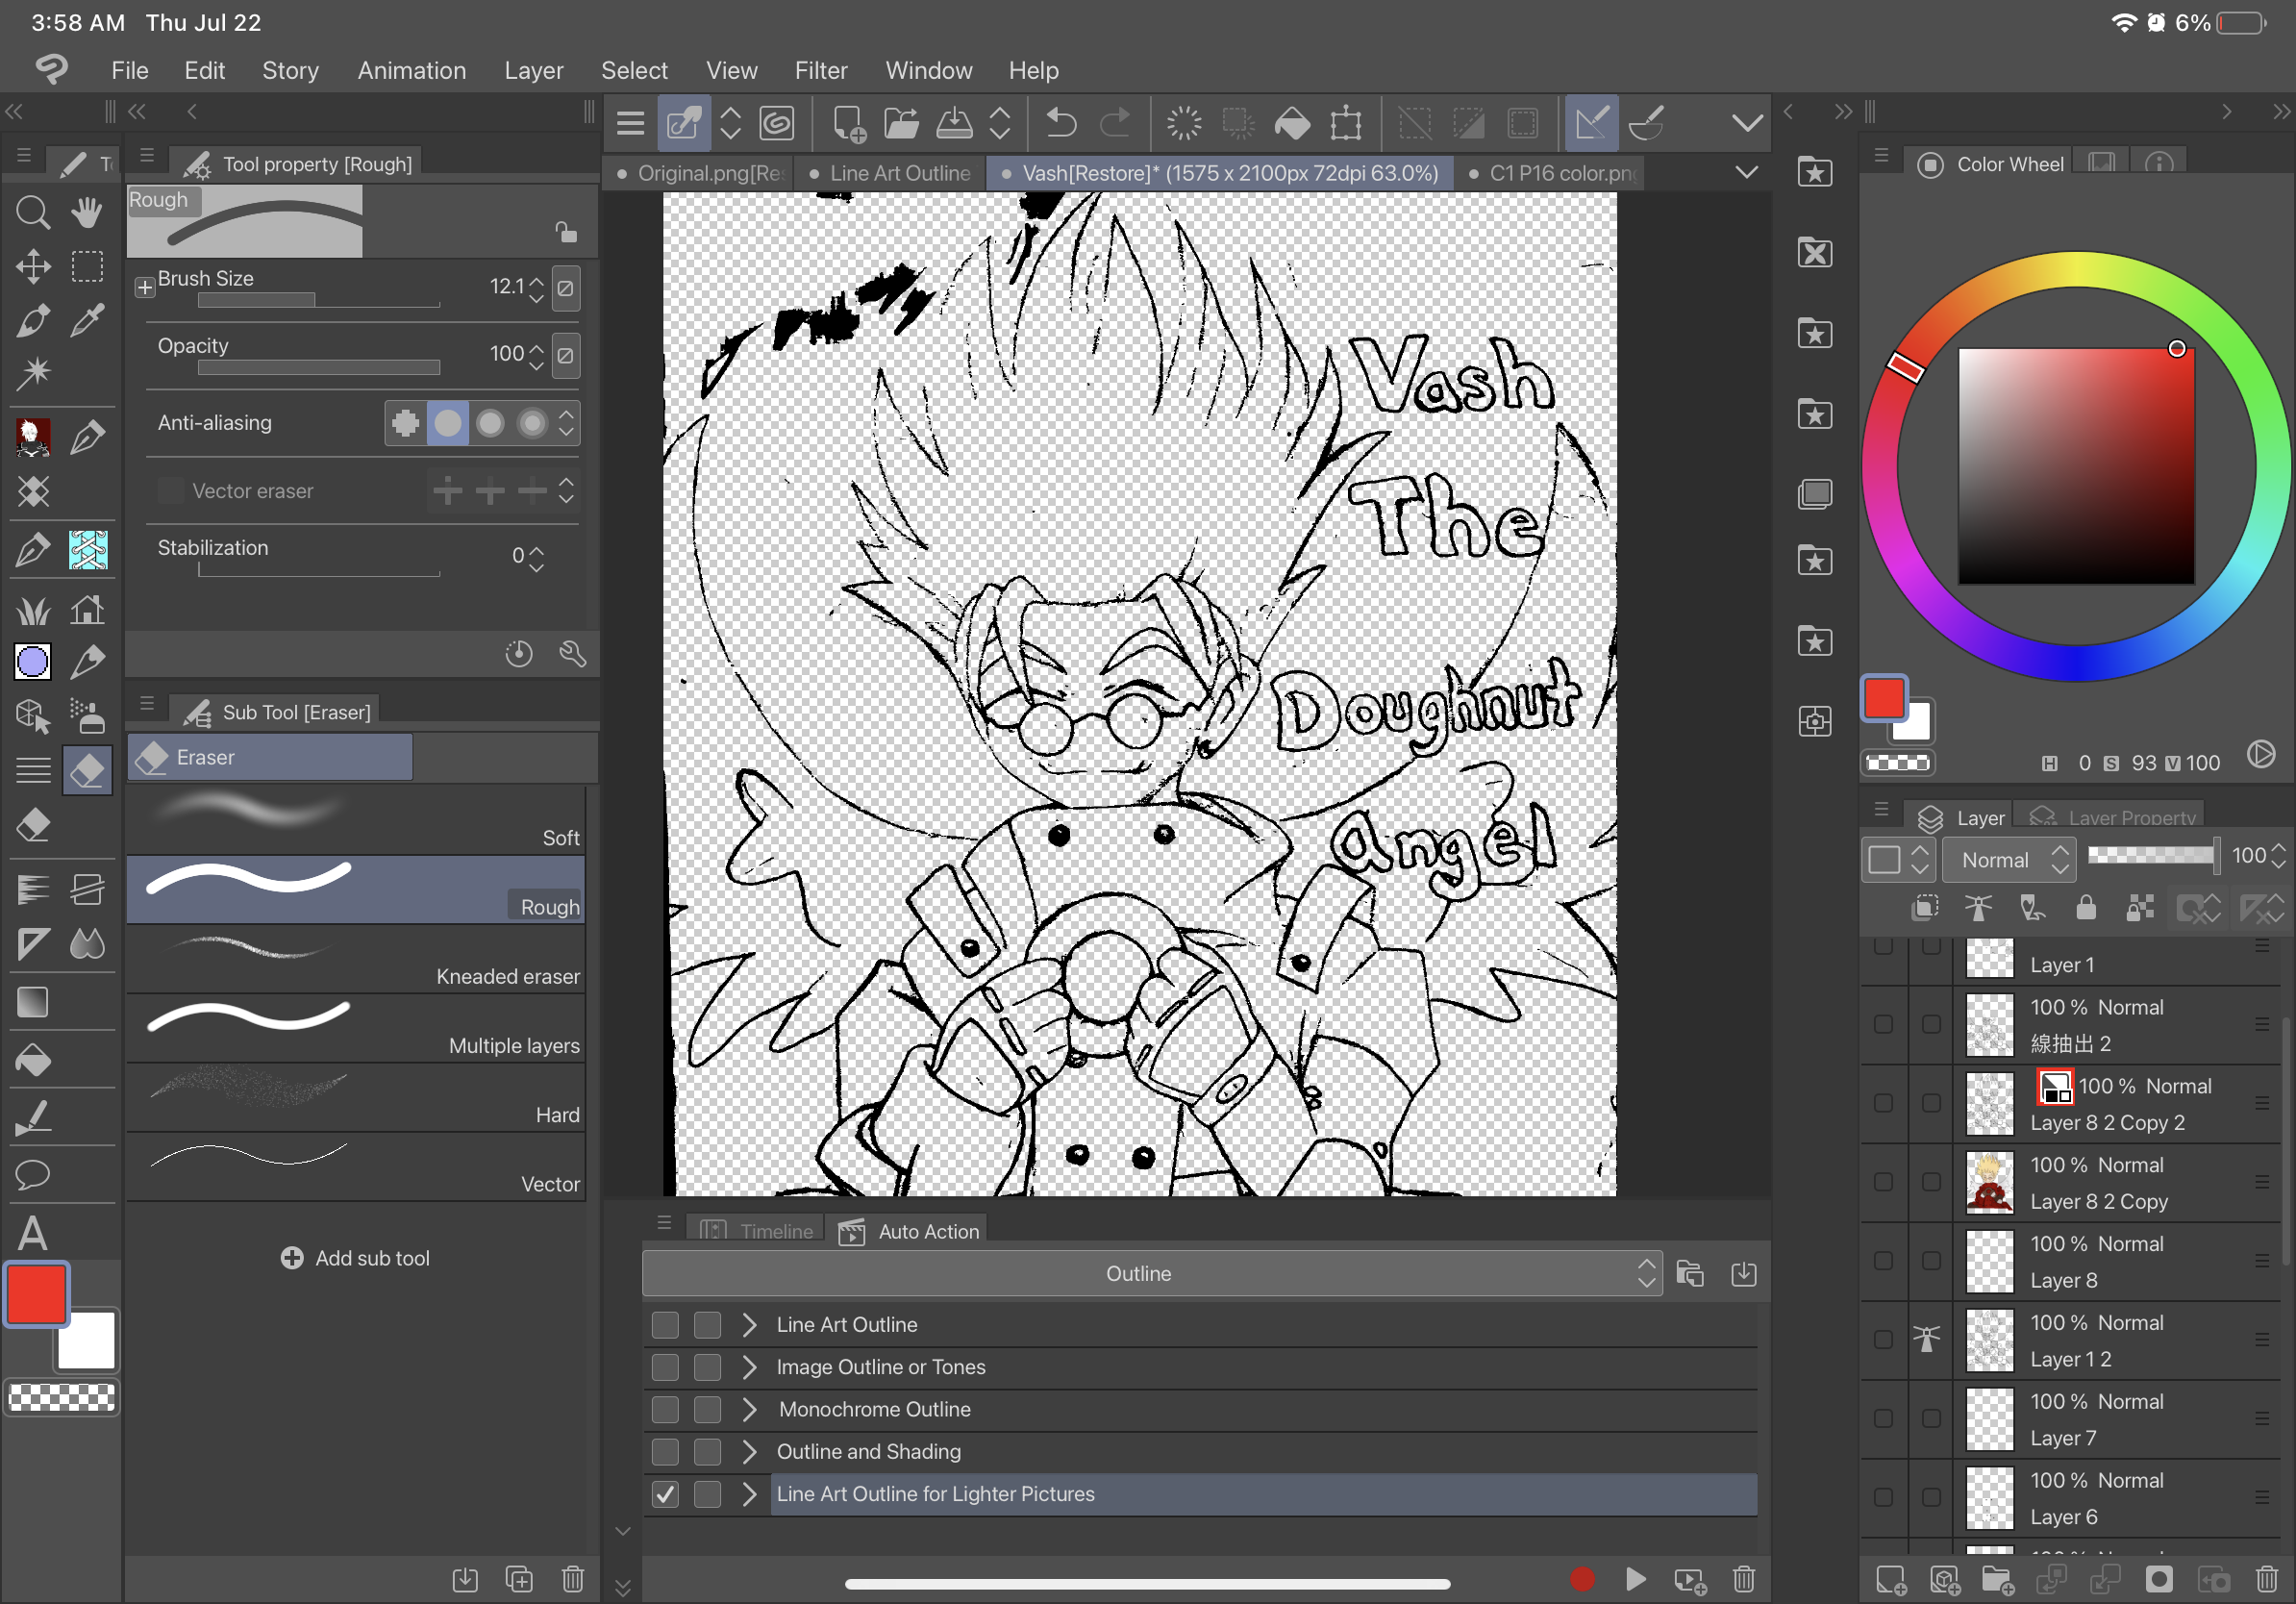
Die erste automatische Aktion, Line Art Outline, umreißt das Bild ohne Schattierung und ist eine schwarze Line Art-Kontur vor einem transparenten Hintergrund. Die zweite automatische Aktion, Image Outline oder Tone, setzt das Bild grau und verleiht dem Bild einen transparenten Hintergrund und ein zweites Bild mit Ton. Die dritte automatische Aktion, Monochrome Outline, umreißt das Bild ohne Schattierung und ist ein schwarzer Umriss vor einem transparenten Hintergrund. Die vierte auto action Outline and Shading, wird Ihr Bild mit Schattierung umreißen und einen transparenten Hintergrund haben. Die fünfte Line Art Outline für leichtere Bilder ist für extrem leichte Bilder und erstellt eine Kontur, die der ersten automatischen Aktion ähnelt. Die sechste automatische Aktion 3D-Modell Nur Gliederung, erstellt eine Raster-Ebenen-Kontur mit einem transparenten Hintergrund direkt aus einer Ebene mit einem 3D-Modell ("3D-MODELL NUR UMRISS" FUNKTIONIERT NUR MIT EBENEN MIT 3D-MODELLEN und funktioniert nicht mit einem Bild wie Raster-Ebenen, von denen aus sie beginnen können). Im Folgenden finden Sie den Unterschied zwischen diesen verschiedenen Umrissen.
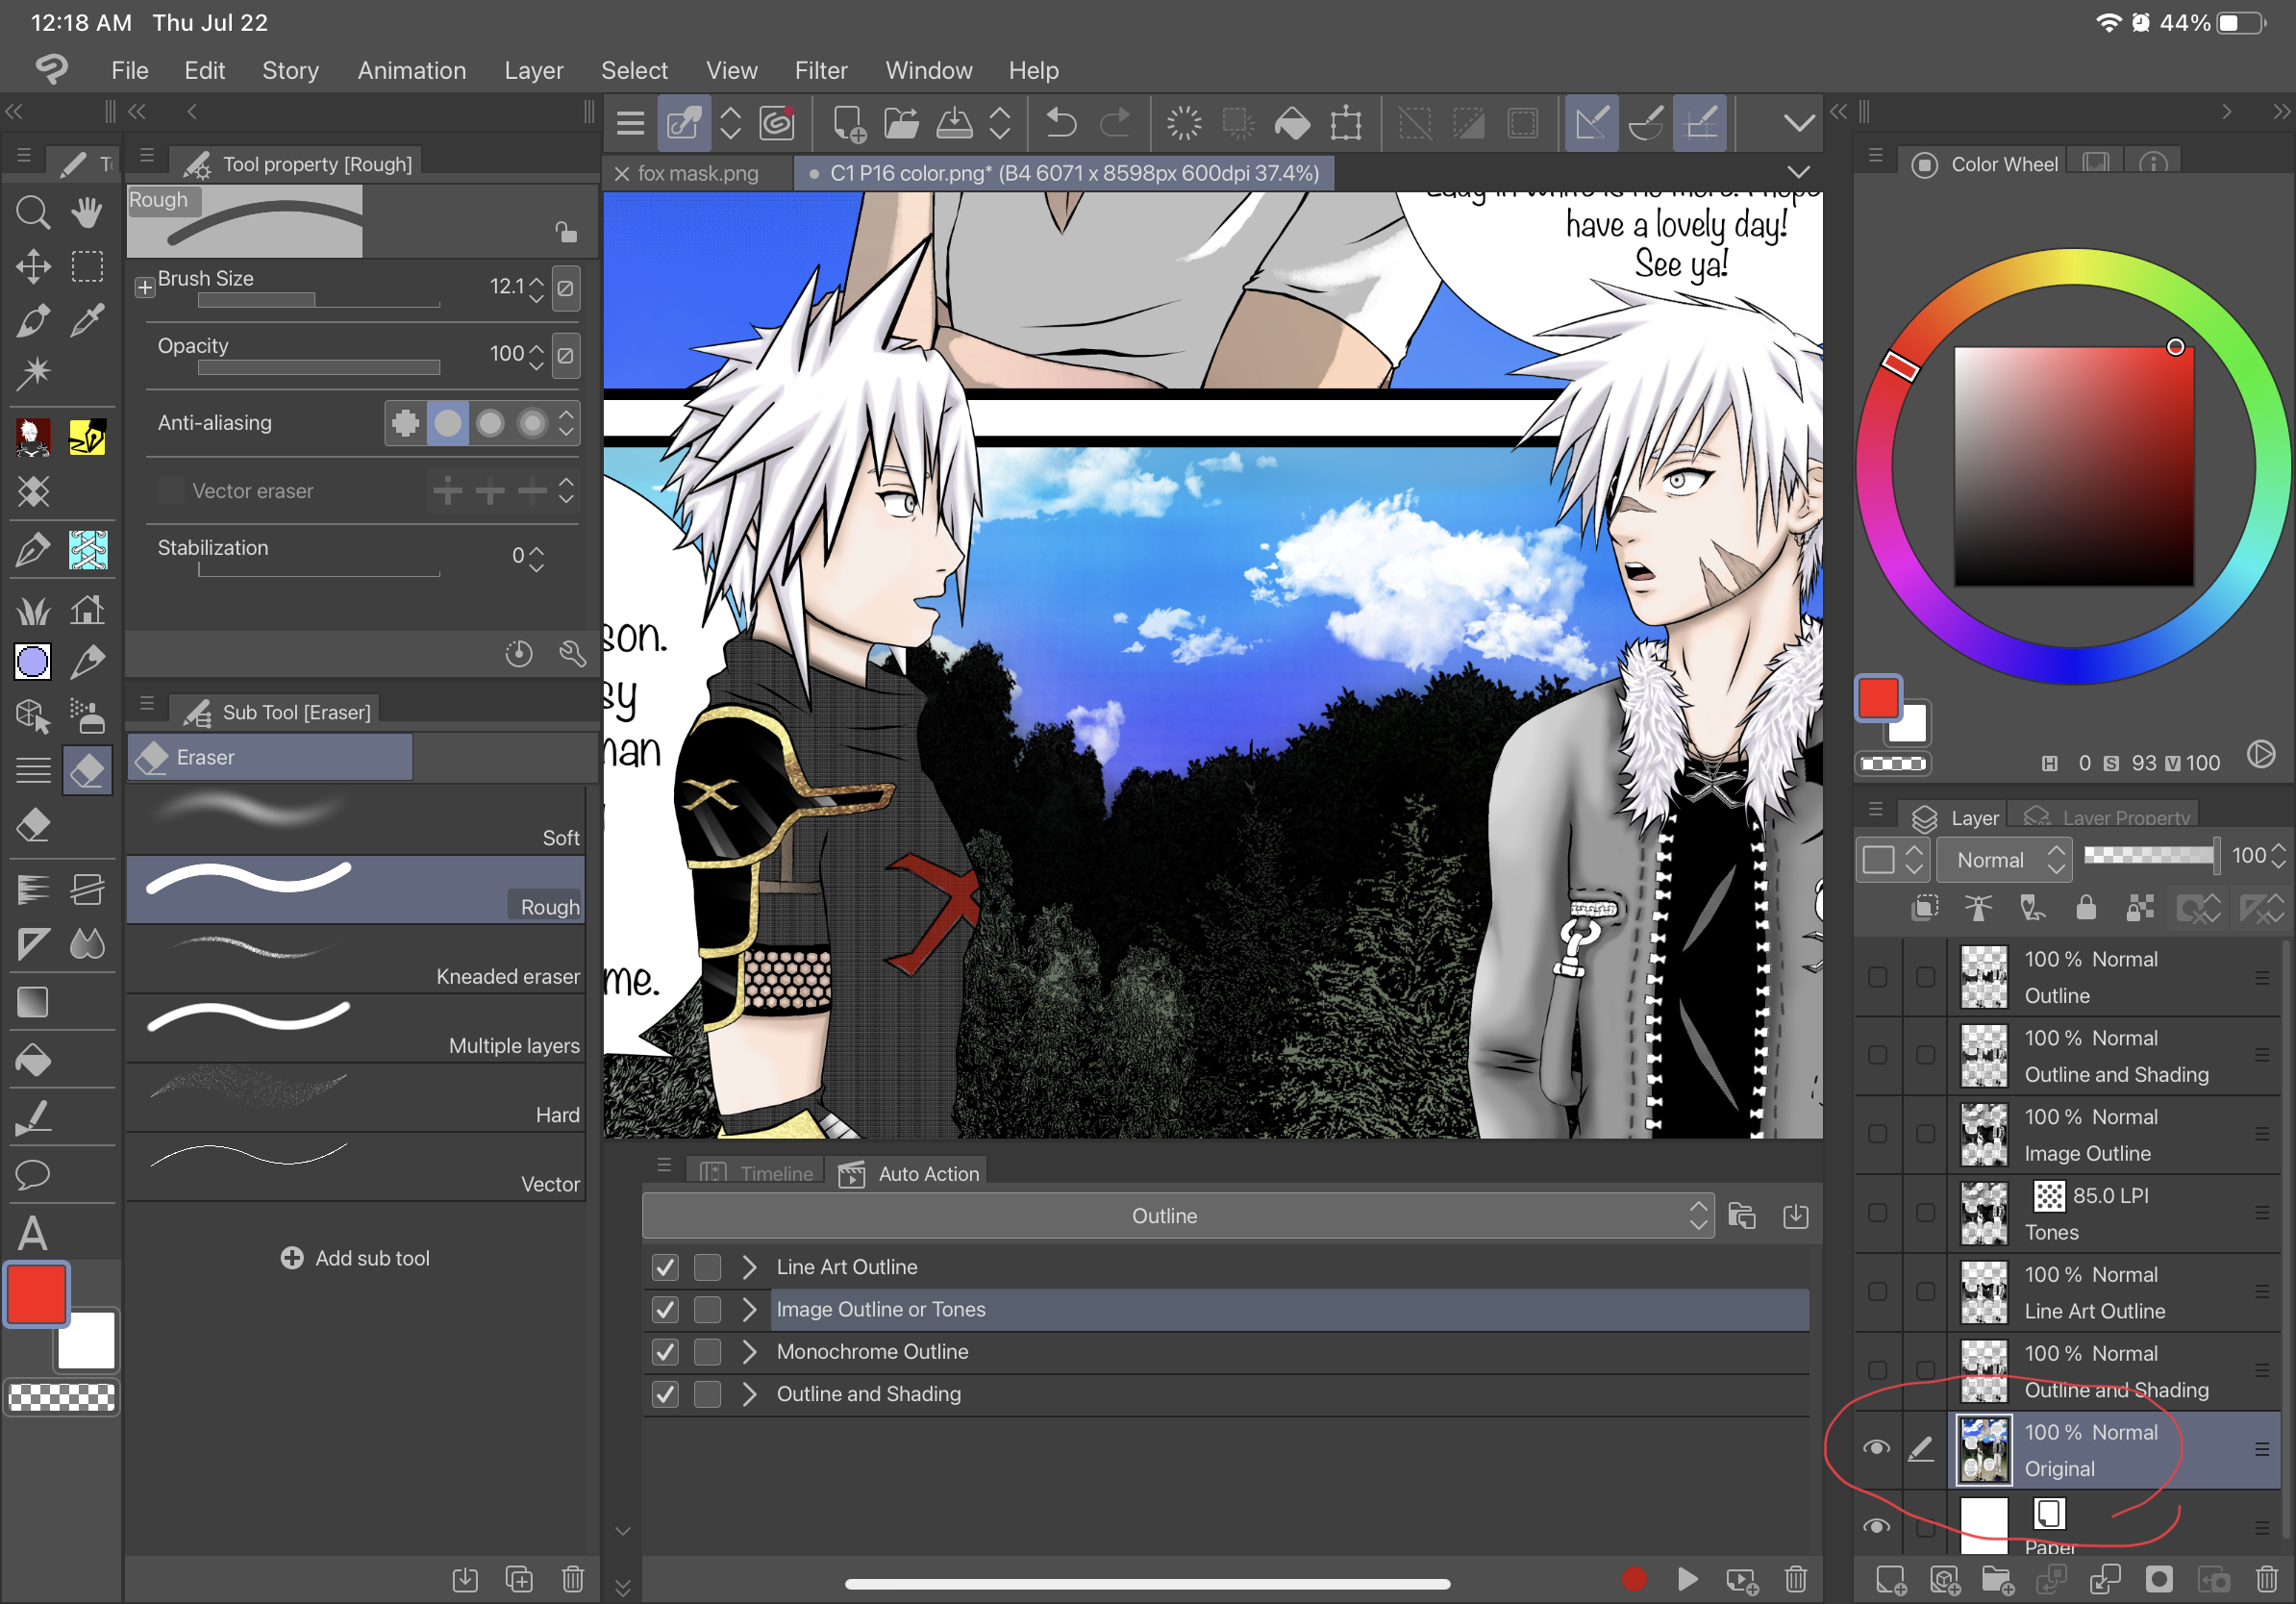
Original:

Line Art Gliederung:

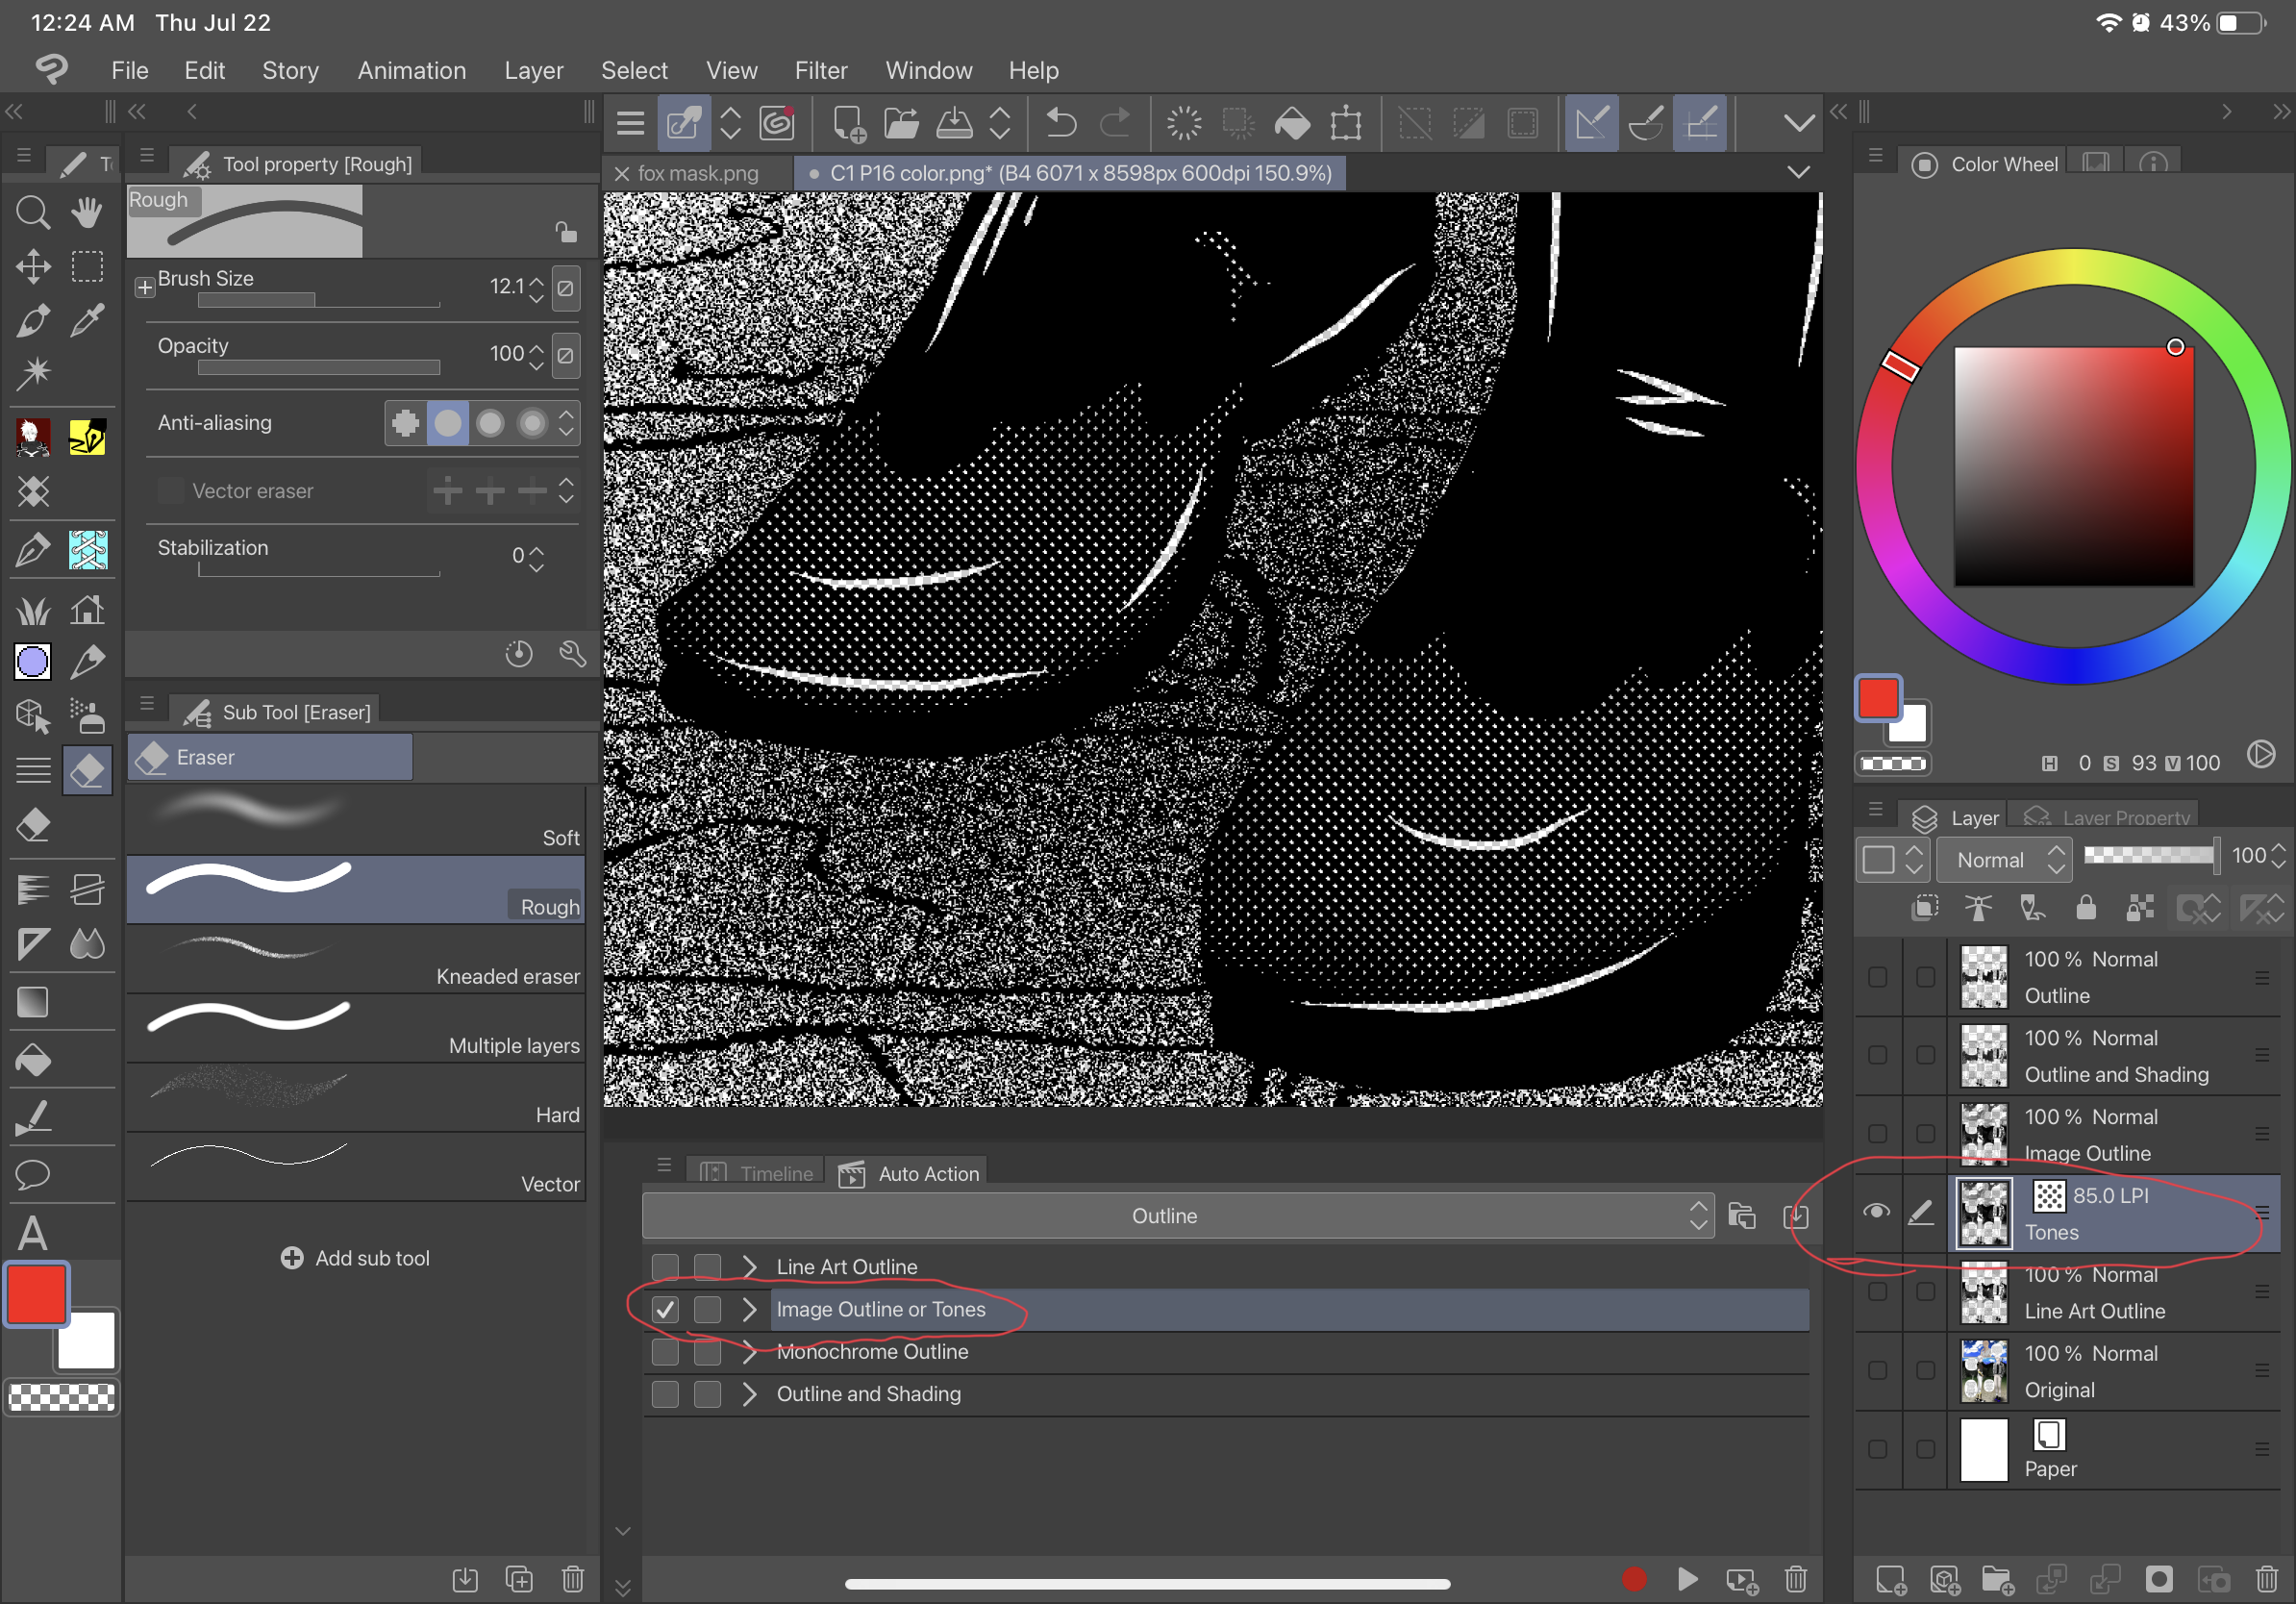
Bildgliederung oder Ton:
Bildgliederung:


Ton:


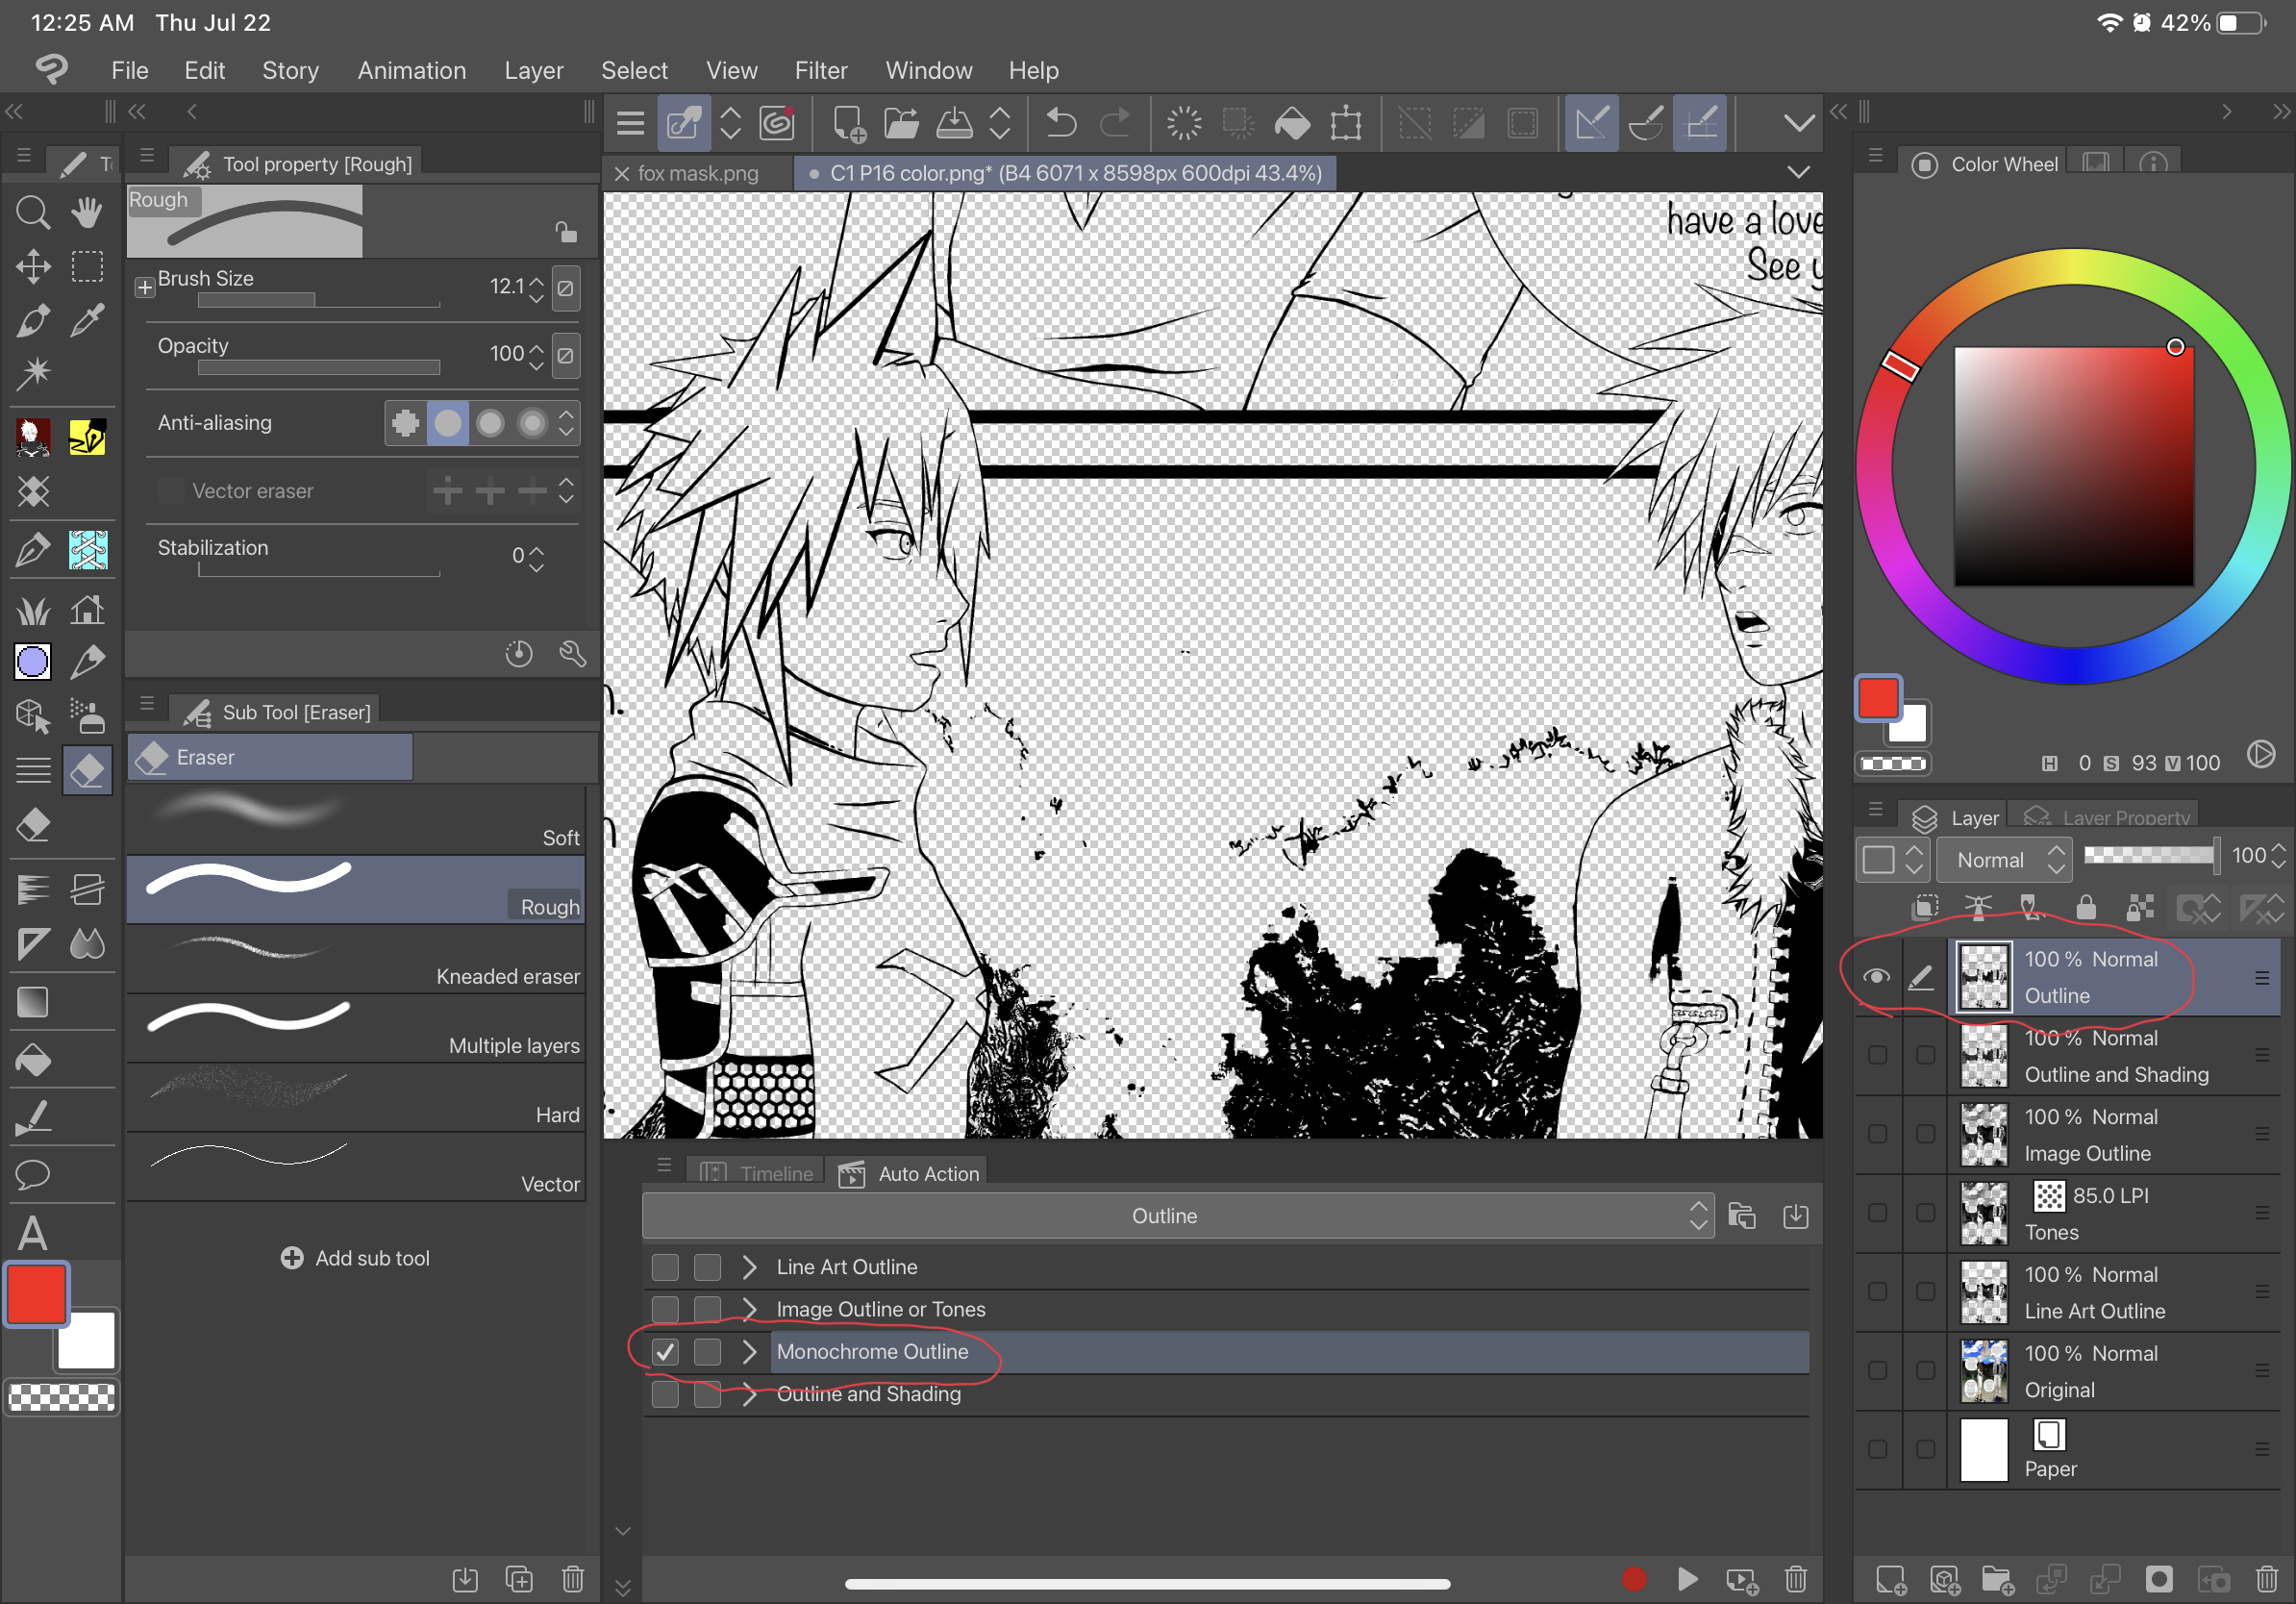
Monochrome Gliederung:

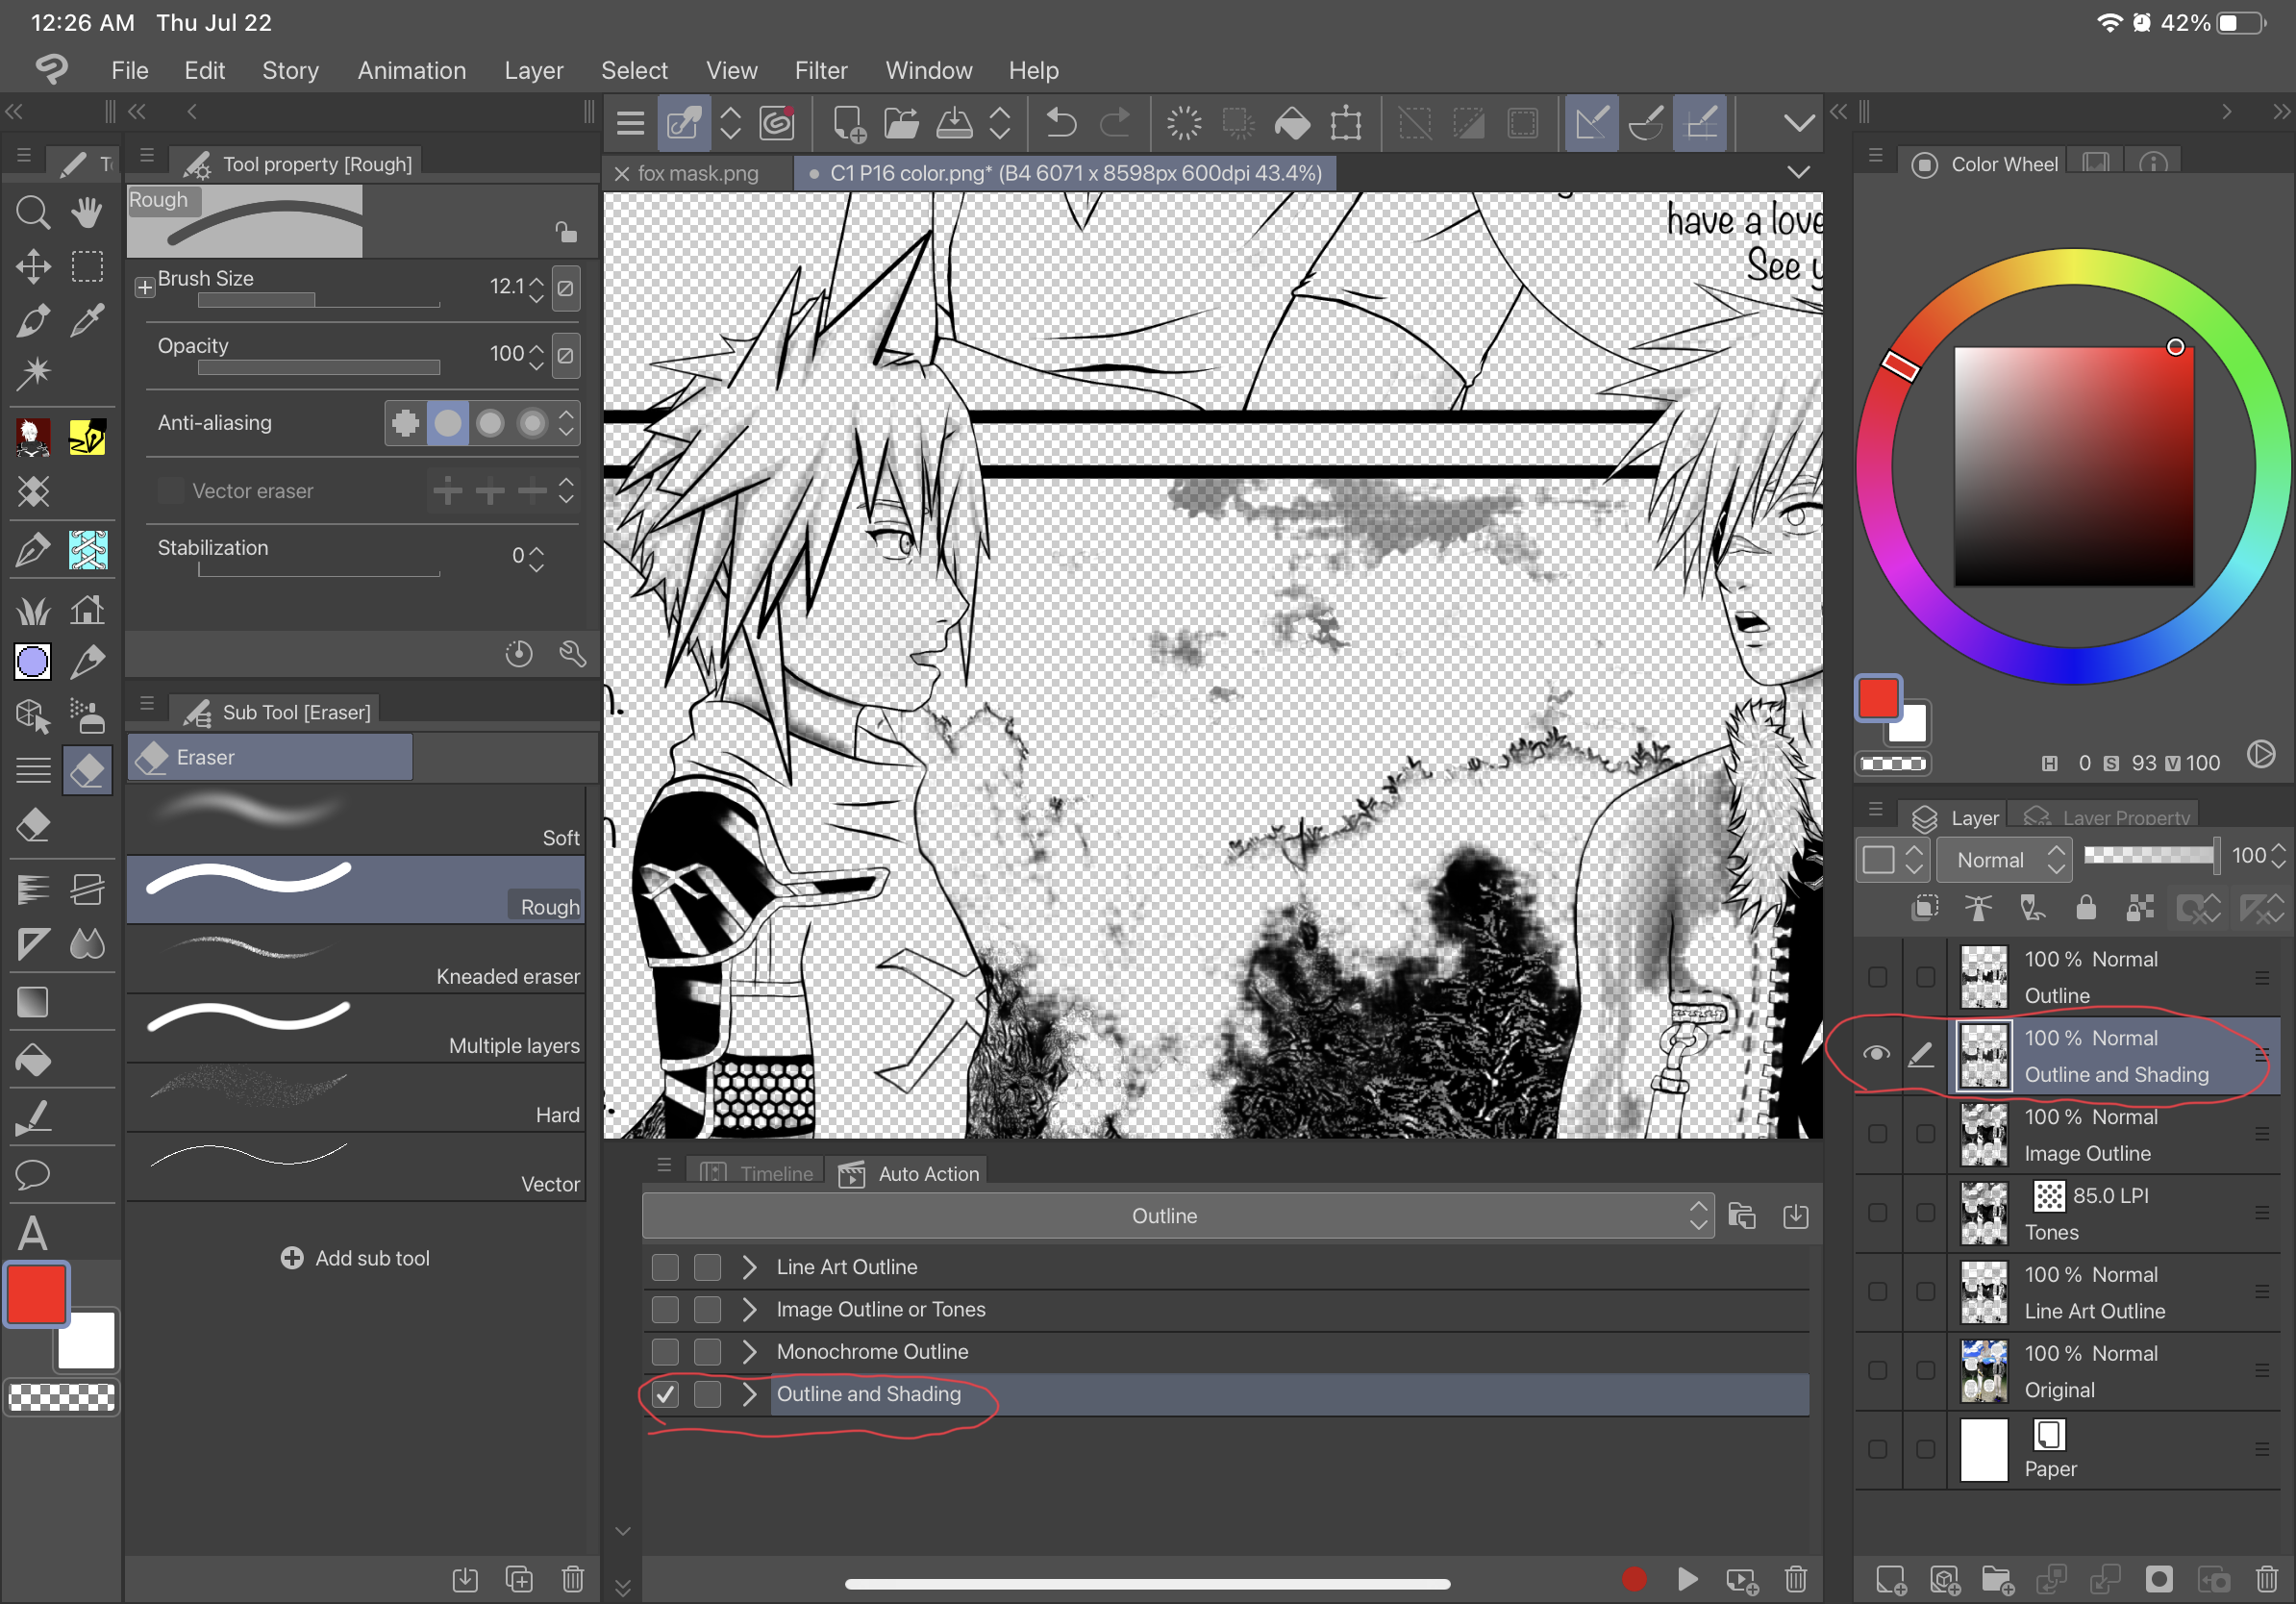
Gliederung und Schattierung:

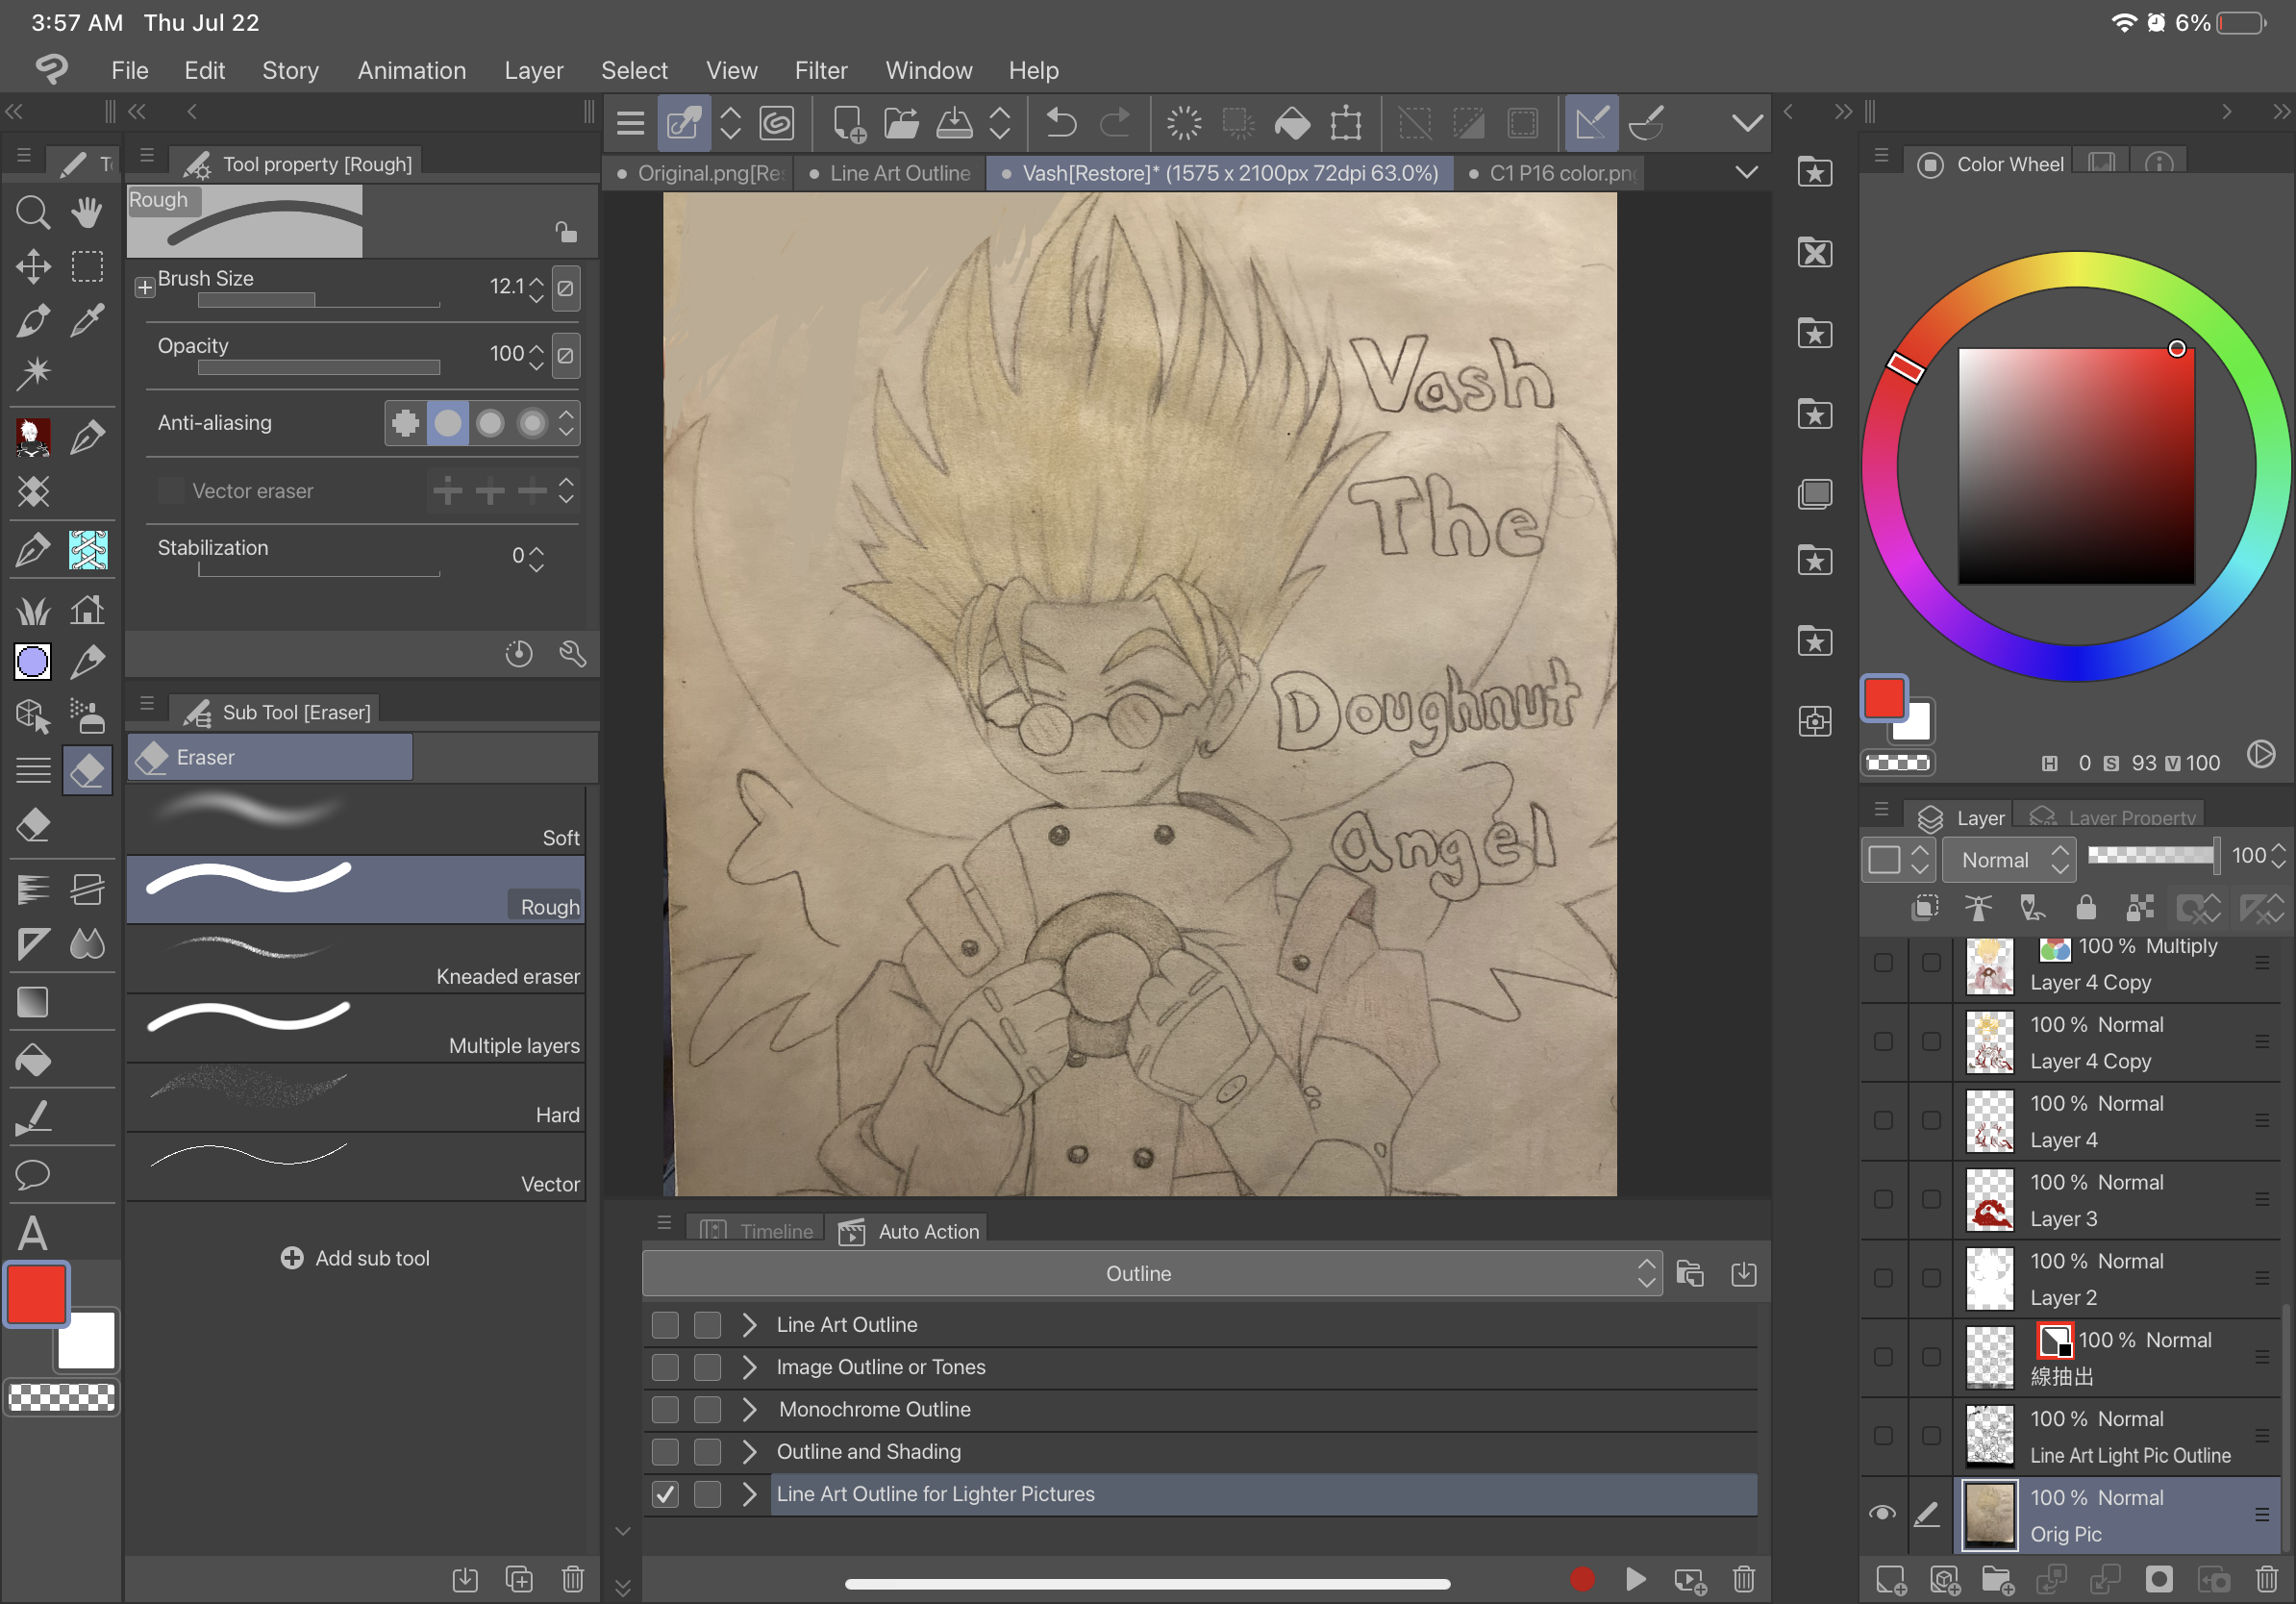
Line Art Outline für hellere Bilder:
Vorher-

Nach-

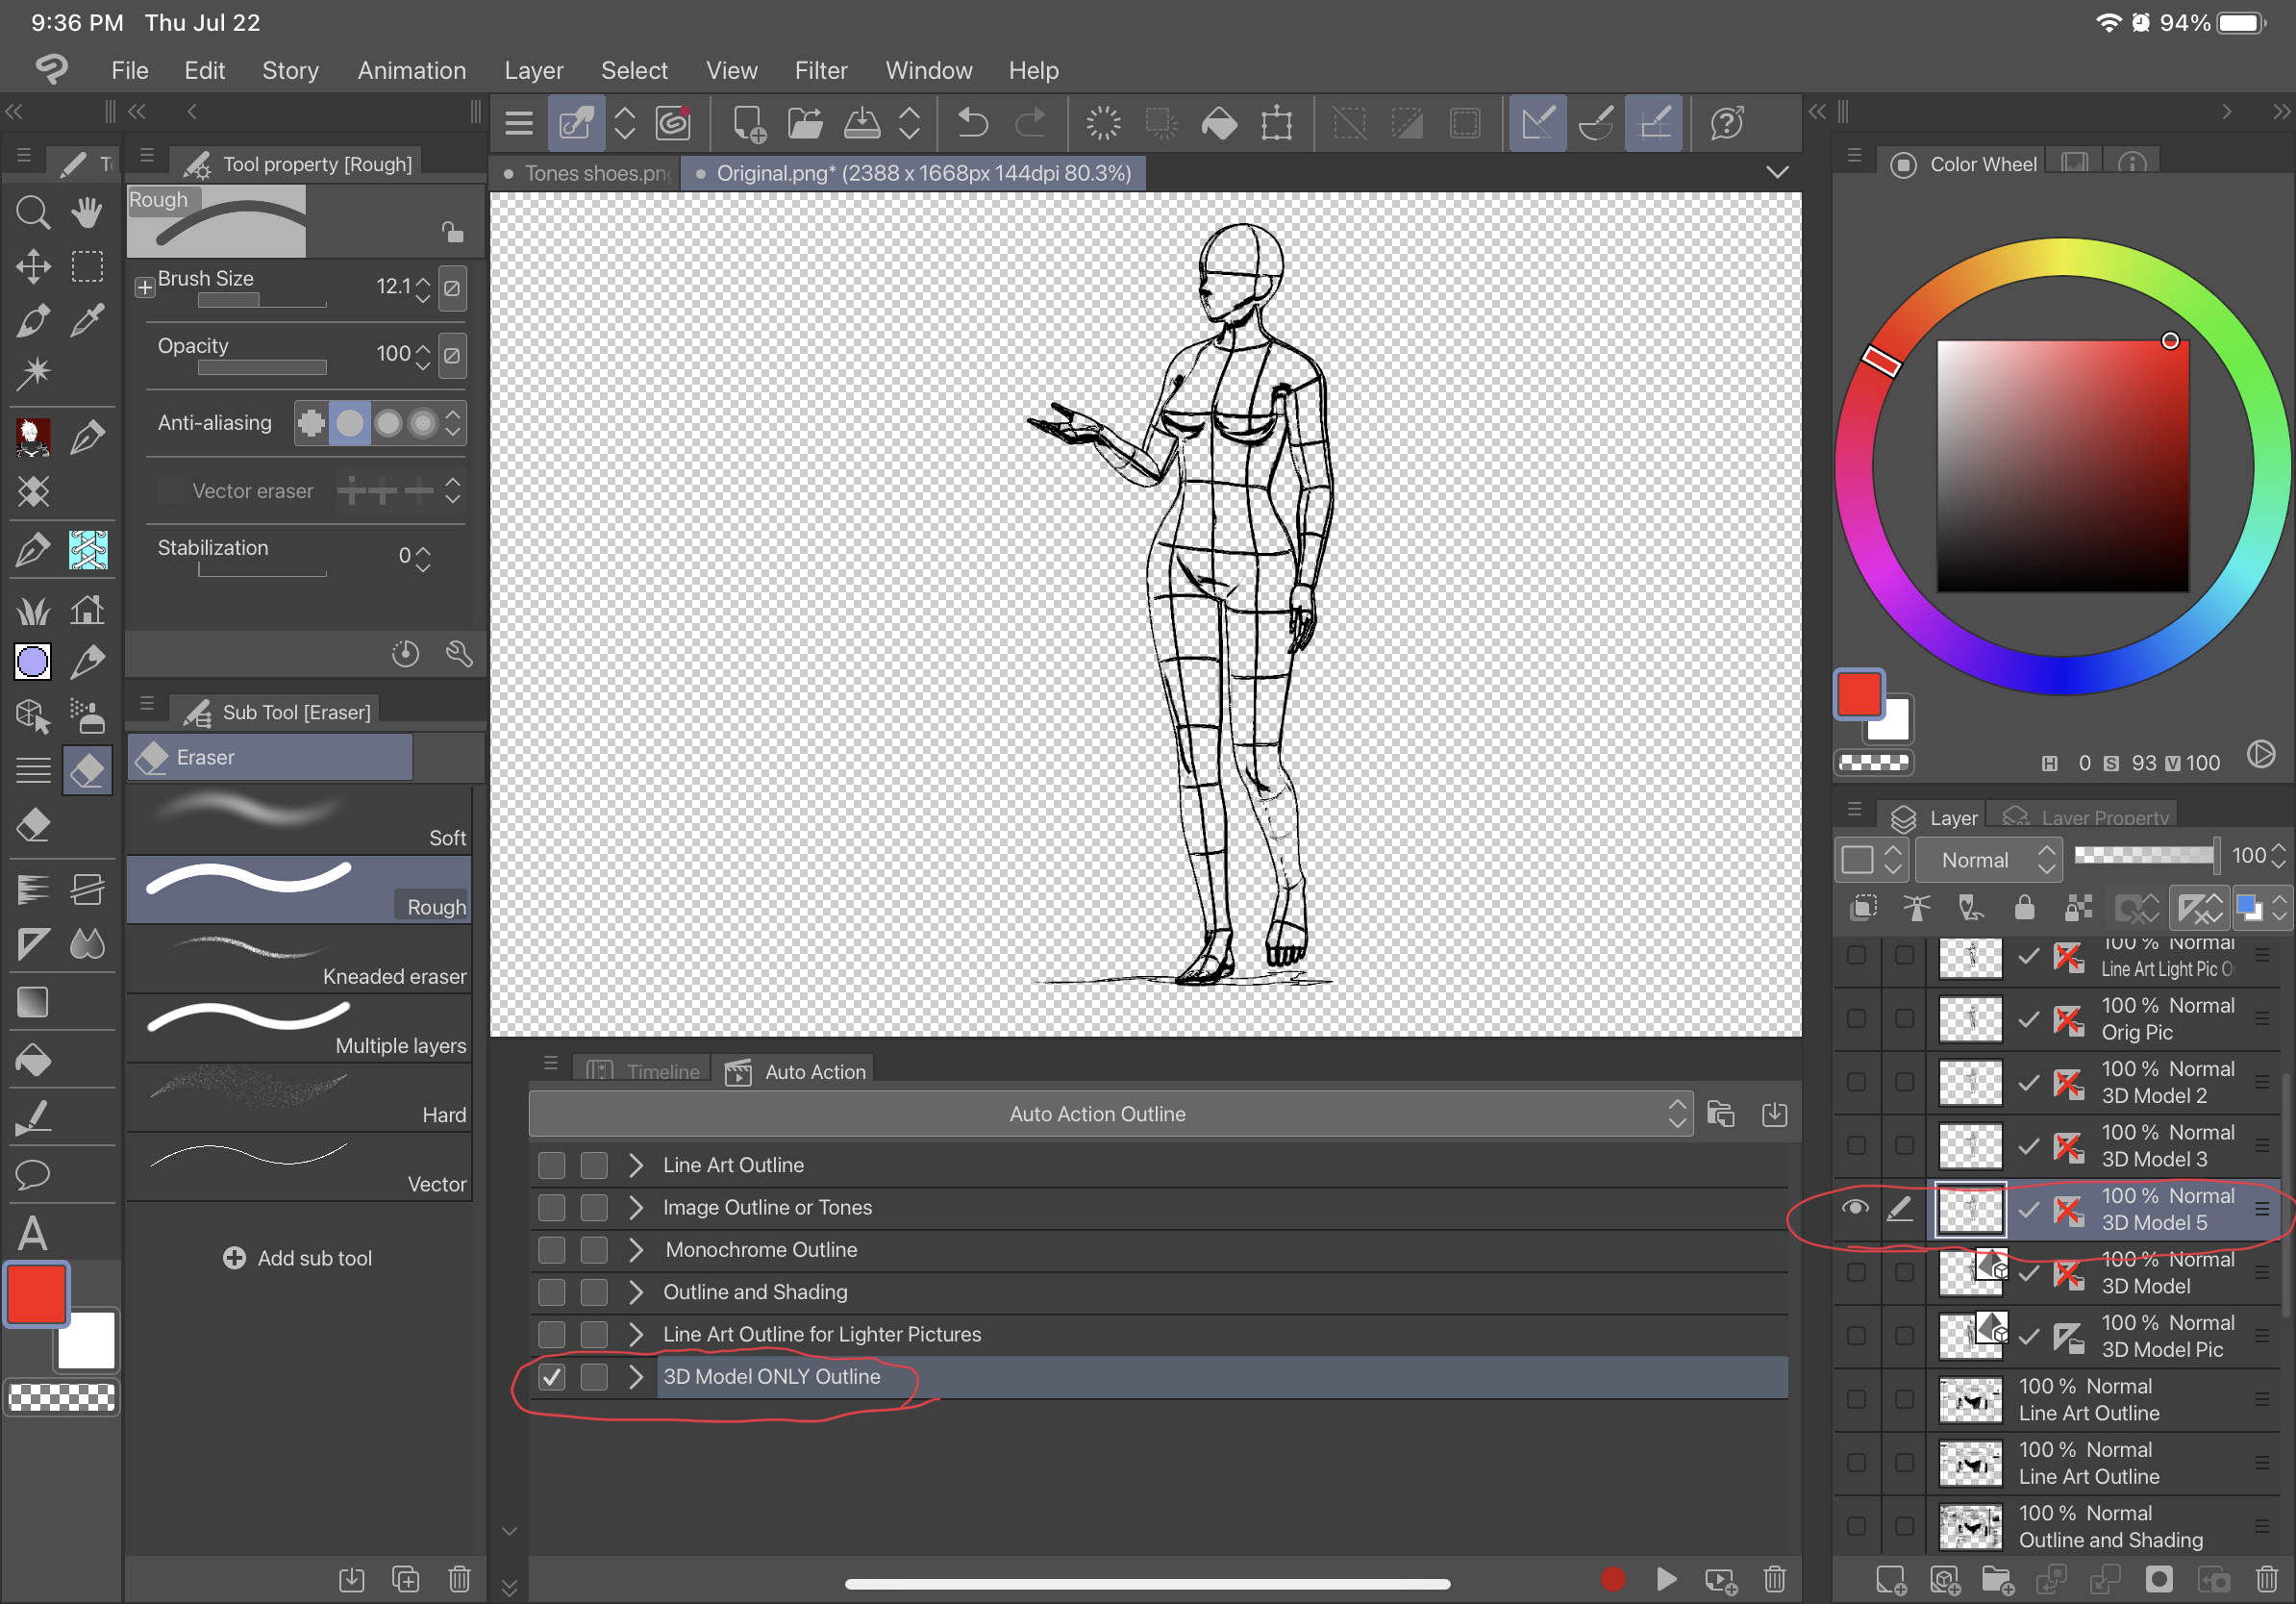
Nur 3D-Modellgliederung: (NUR DIREKT AUF EINEM 3D-MODELL VERWENDEN)
Vorher-

Nach-

Vorher-

Nach-

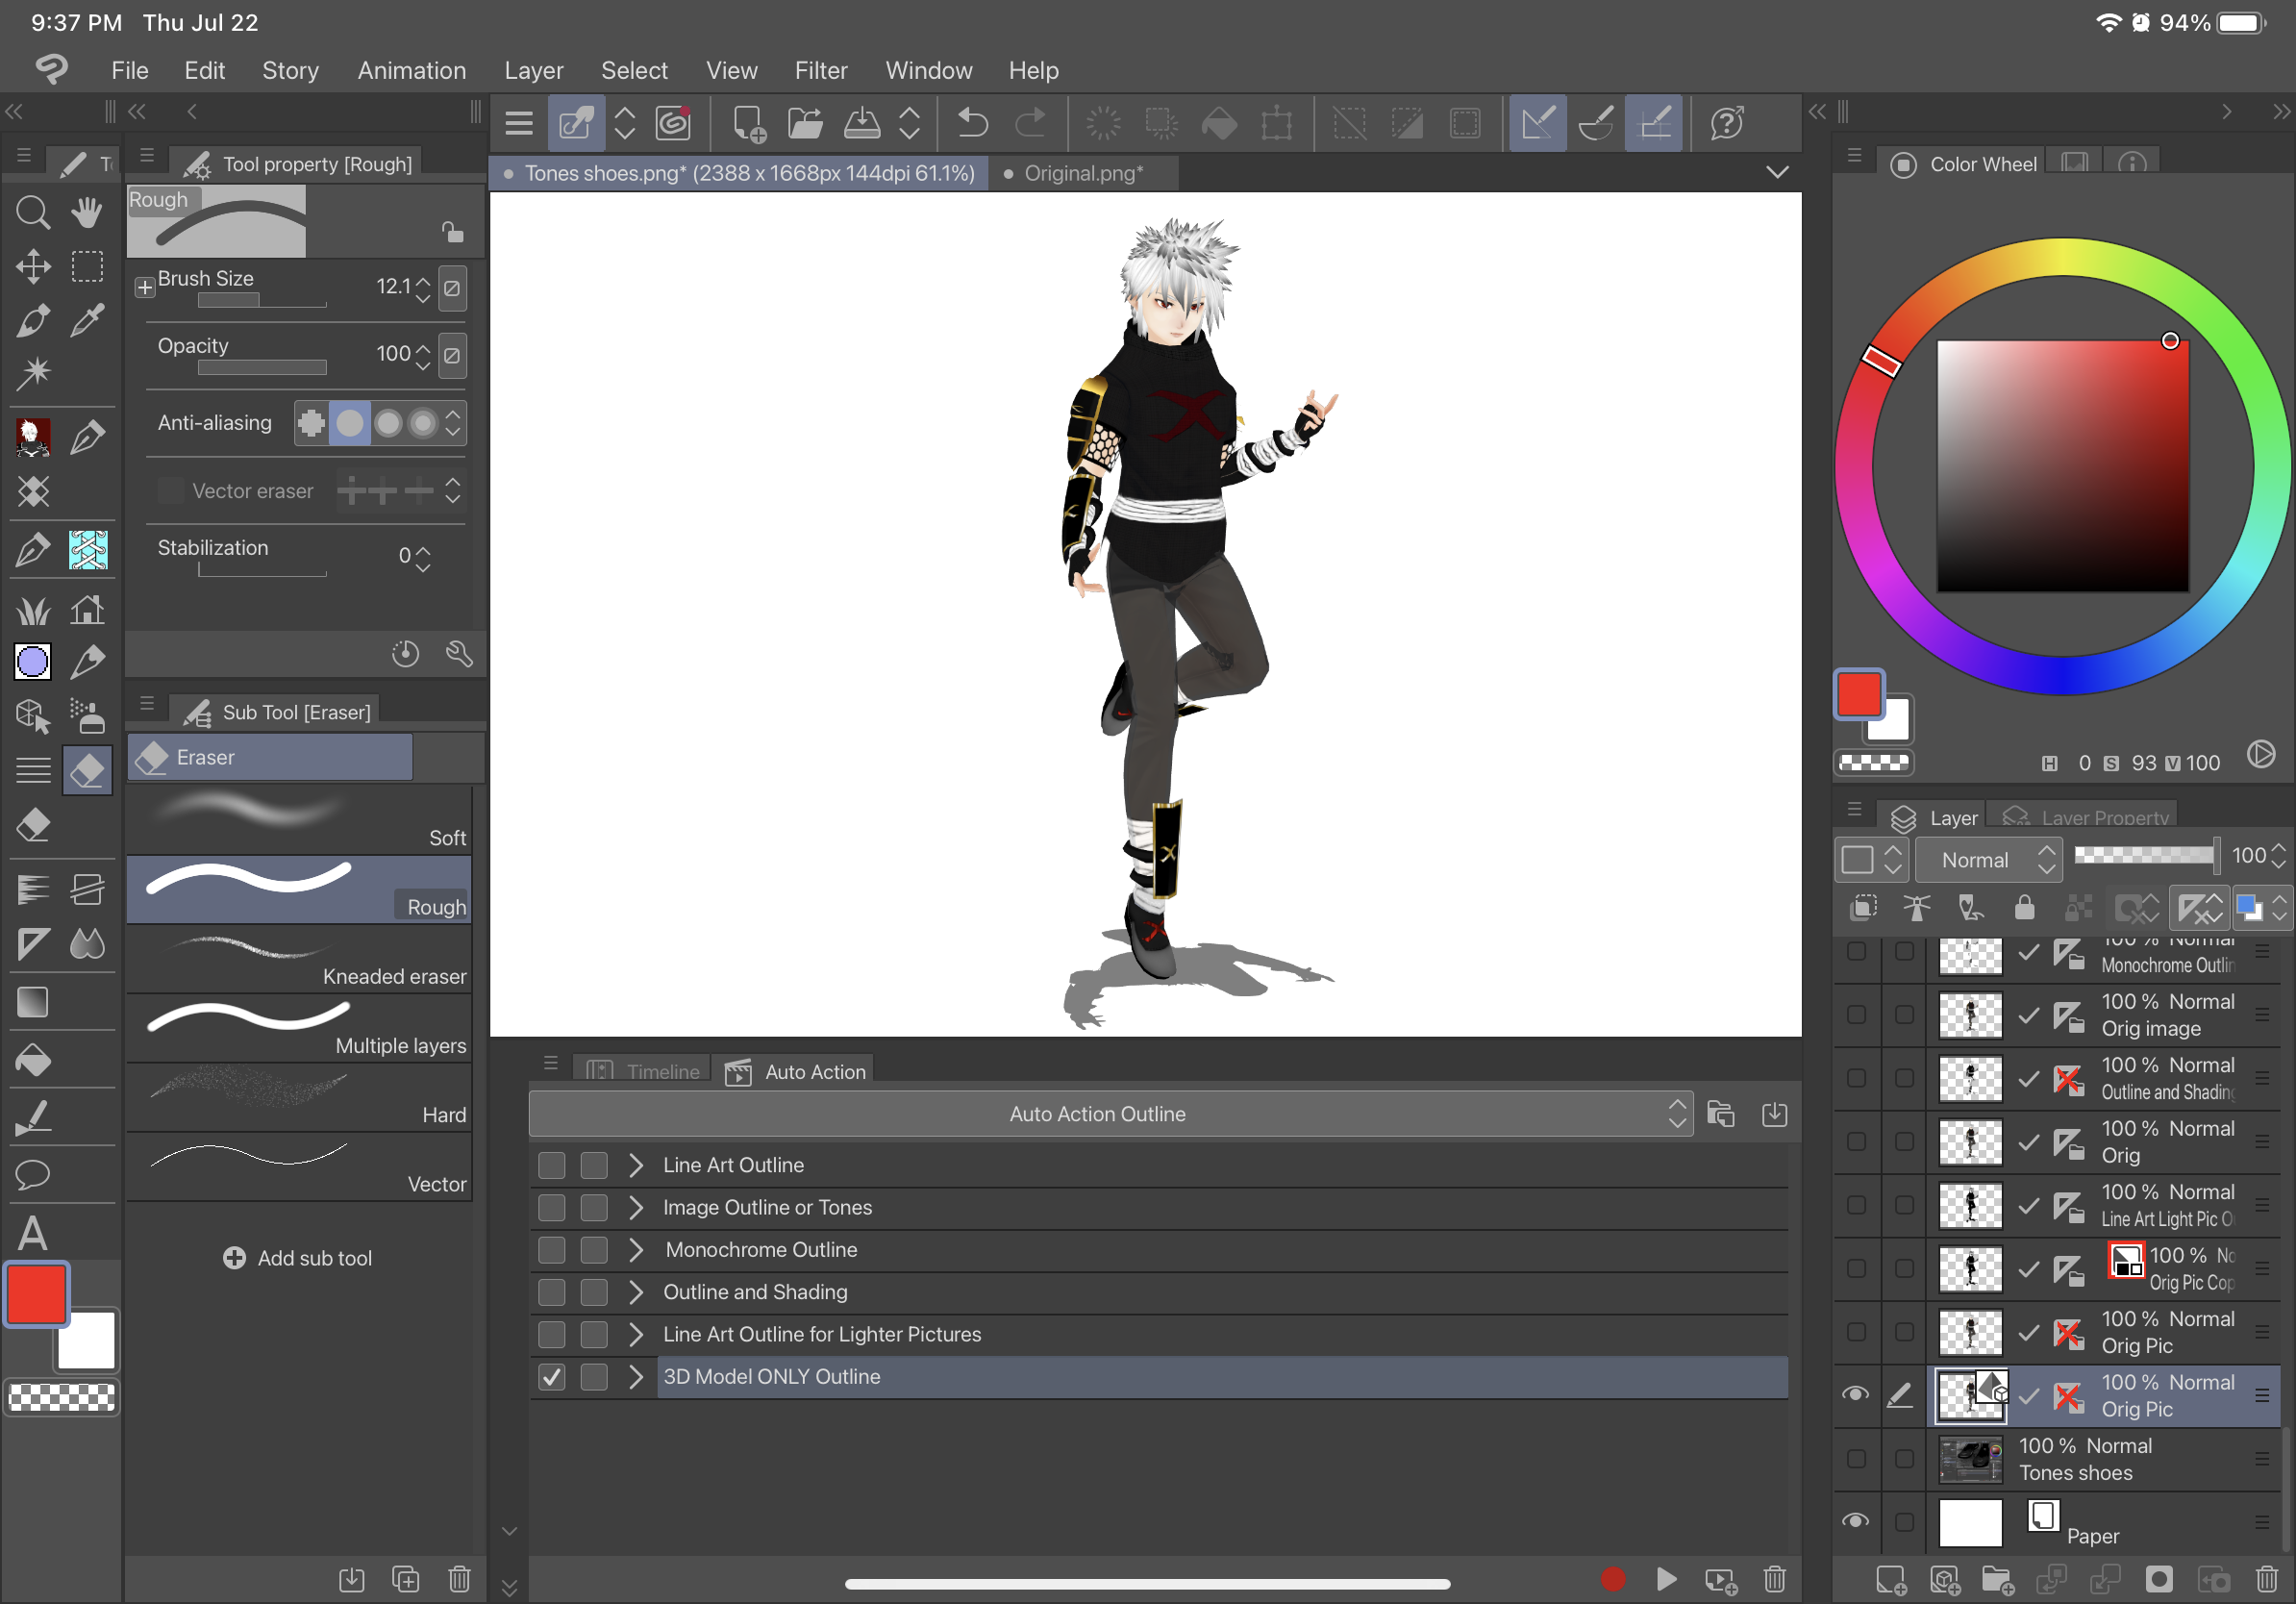
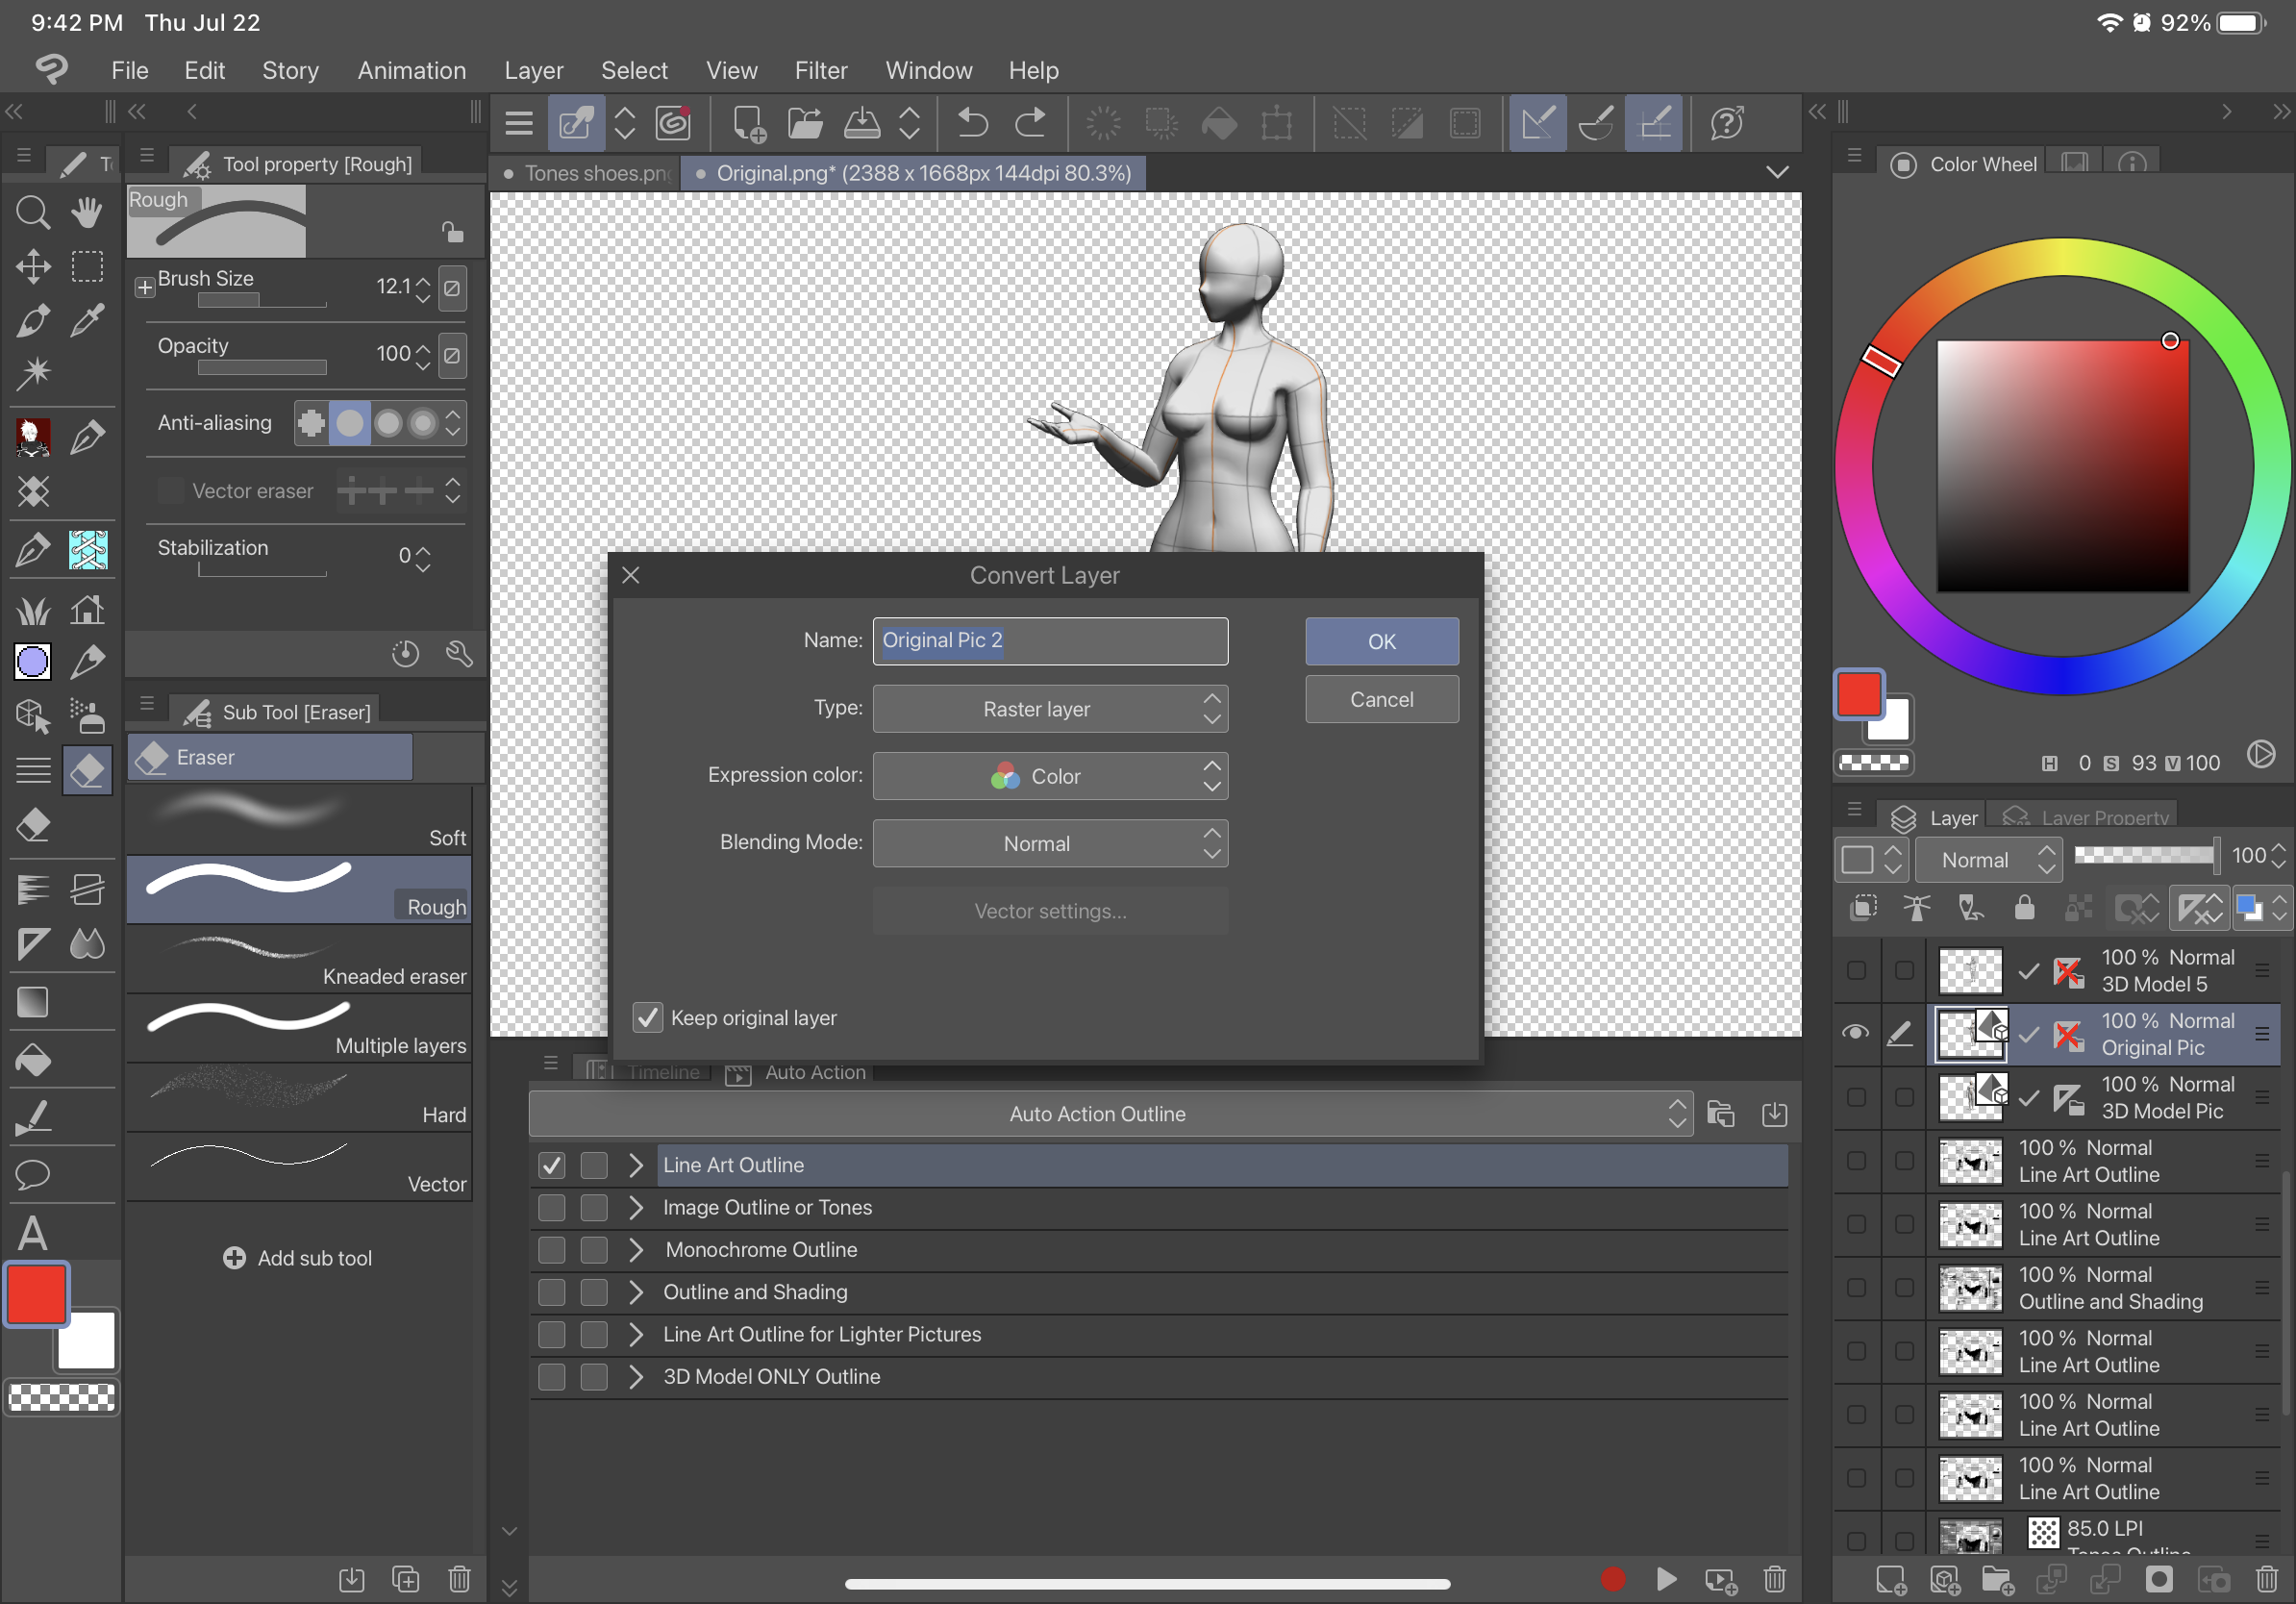
ANLEITUNG- SO VERWENDEN SIE ALLE AUTOMATISCHEN AKTIONEN MIT EINEM 3D-MODELL (AUßER 3D-Modell nur Gliederung):


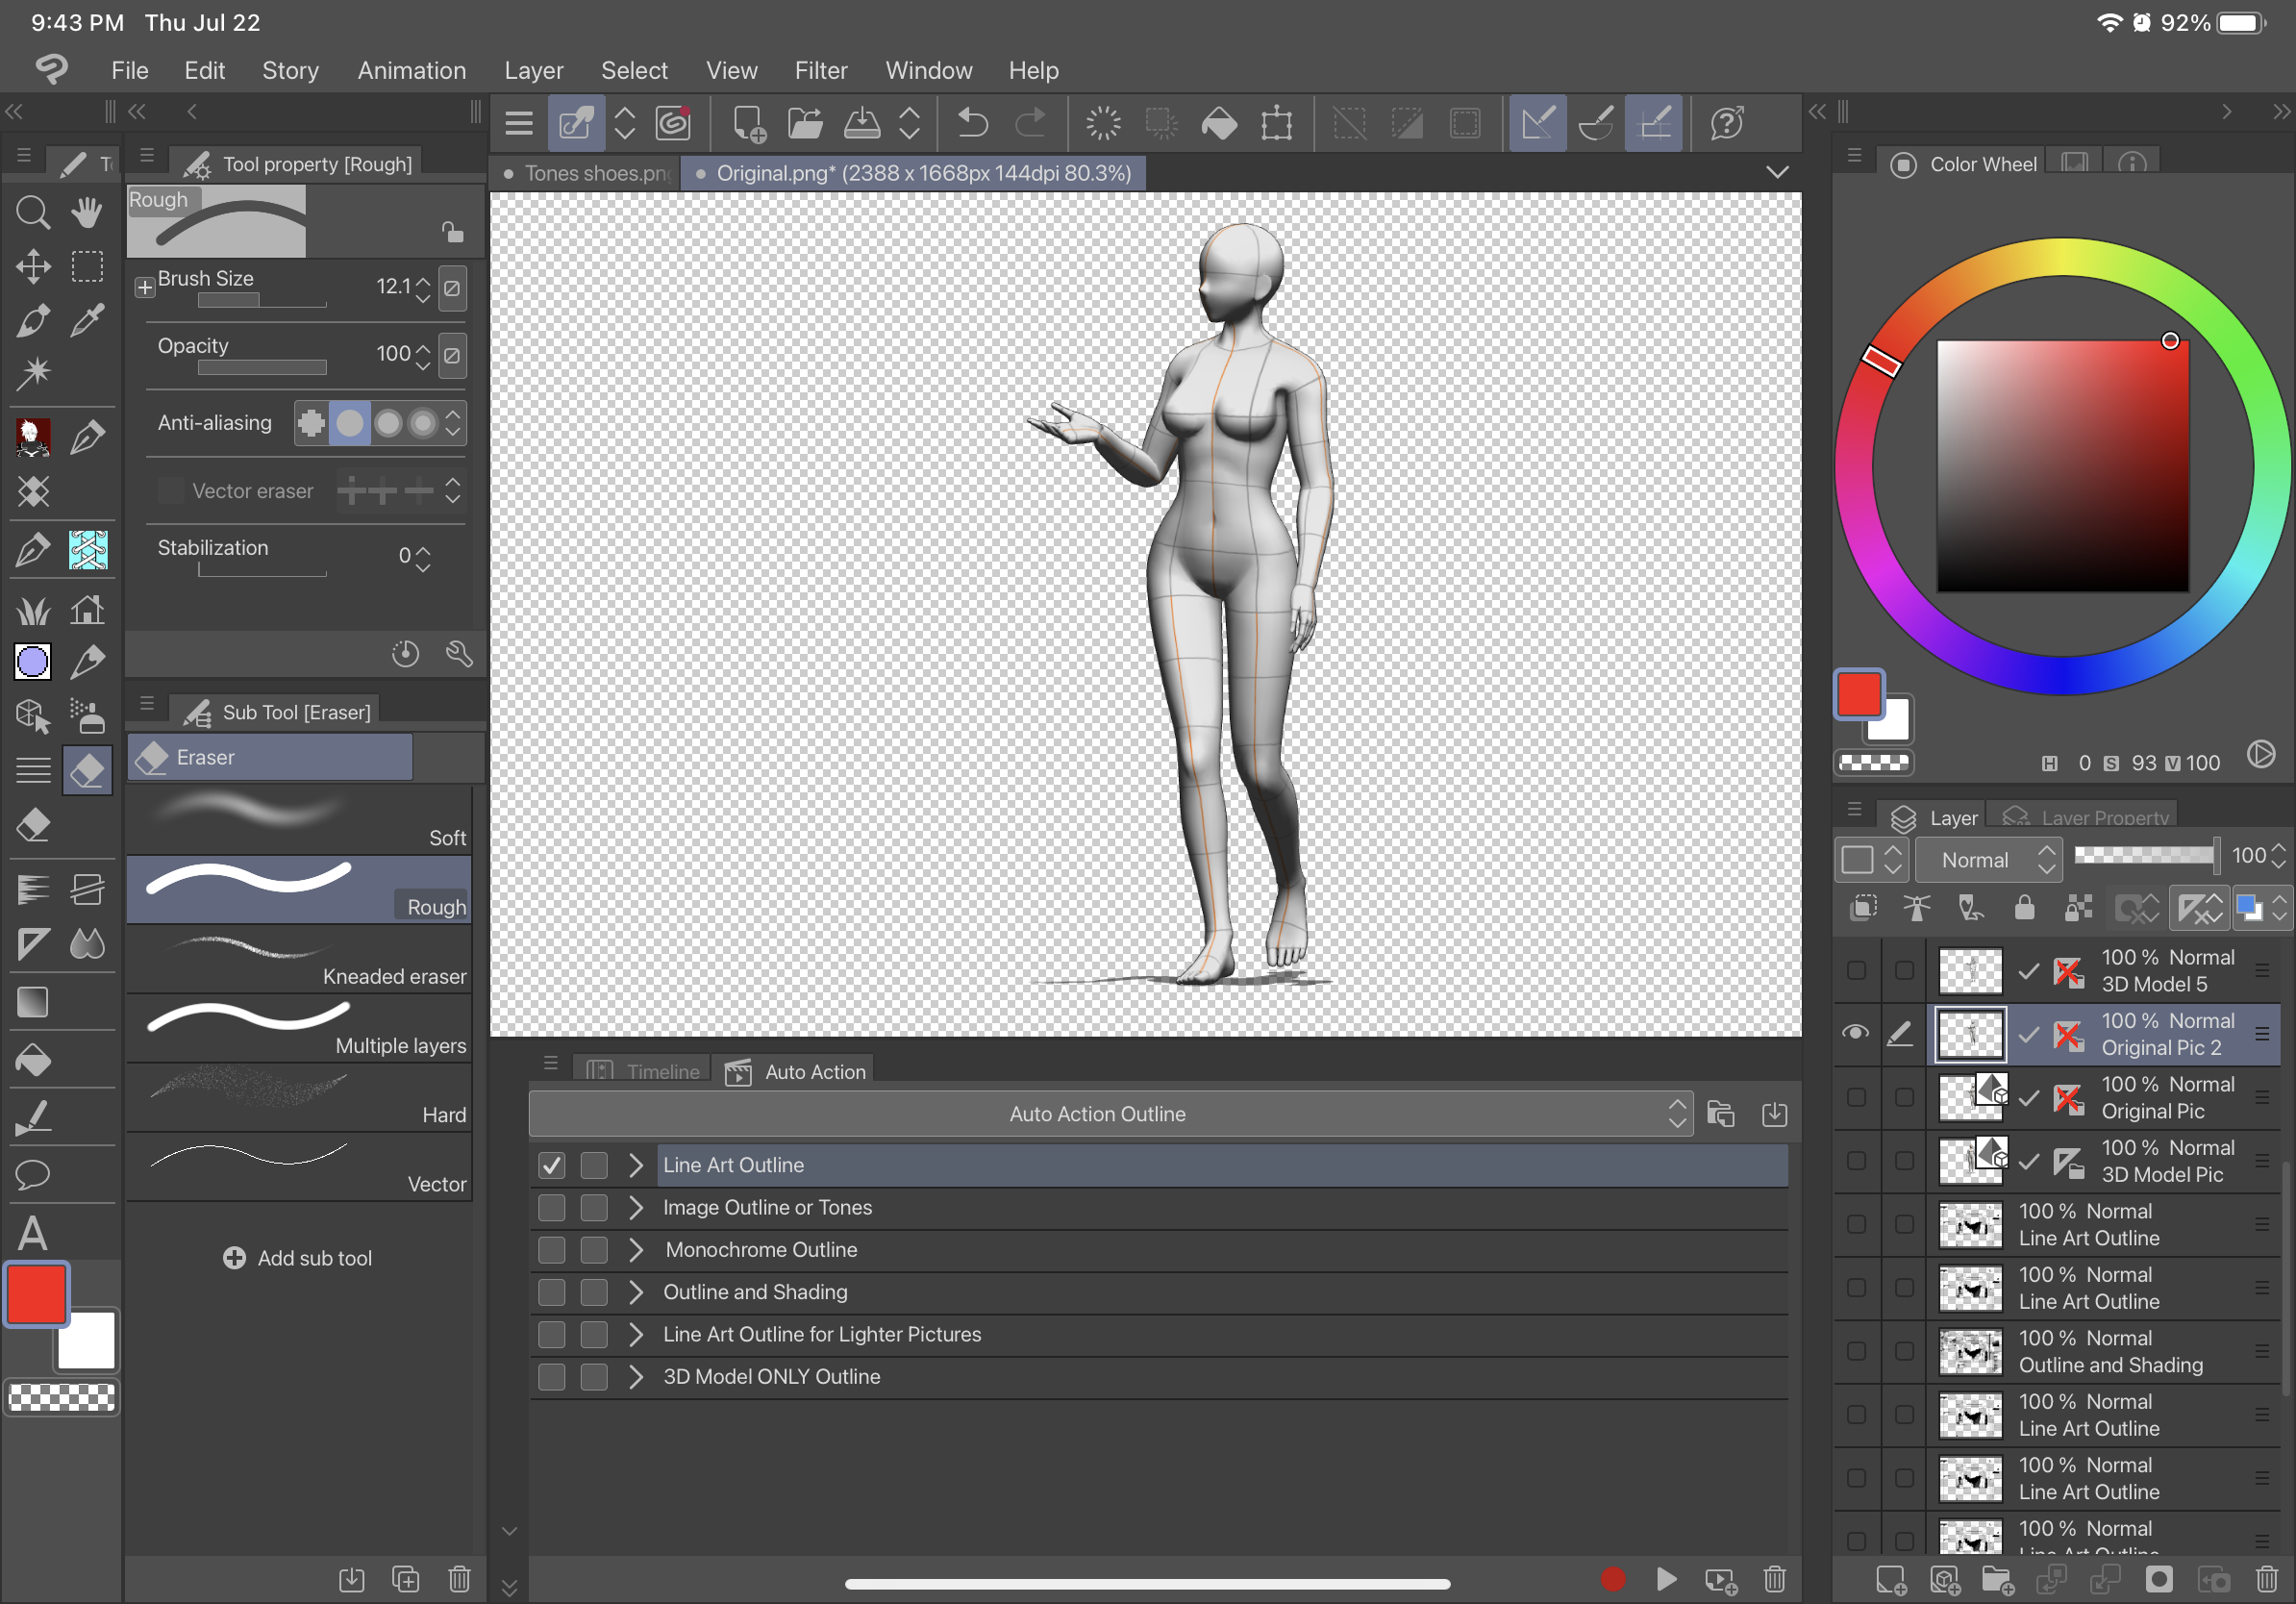
2. Klicken Sie auf den soeben erstellten Raster-Layer und verwenden Sie die automatische Aktion
VORHER-

AFTER- (dies ist mit Line Art Outline)

Drag from downloaded materials into auto action and it will show up under the name Outline. There are 6 variations of this tool.
Description:
The first auto action, Line Art Outline, will outline the picture without any shading and will be a black Line Art type of outline against a transparent background. The second auto action, Image Outline or Tone, will set the image grey and give the image a transparent background and have a second image with tone. The third auto action, Monochrome Outline, will outline the picture without any shading and will be a black outline against a transparent background. The fourth auto action Outline and Shading, will Outline your picture with shading and have a transparent background. The fifth one Line Art Outline for Lighter Pictures, is for extremely light pictures and will create a outline similar to the first auto action. The sixth auto action 3D Model Only Outline, will create a raster layer outline with a transparent background directly from a layer with a 3D model (“3D MODEL ONLY OUTLINE” WILL ONLY WORK WITH LAYERS WITH 3D MODELS and won’t work with a picture such as raster layers to start from). Below is the difference between these different outlines.
Original:
Line Art Outline:
Image Outline or Tone:
Image Outline:
Tone:
Monochrome Outline:
Outline and Shading:
Line Art Outline for Lighter Pictures:
Before-
After-
3D Model Only Outline: (USE DIRECTLY ON A 3D MODEL ONLY)
Before-
After-
Before-
After-
INSTRUCTIONS-TO USE ALL AUTO ACTIONS WITH A 3D MODEL (EXCEPT 3D Model Only Outline):
1. Convert 3D Model into a “Raster Layer”
2. Click On the Raster Layer you just created and use the Auto Action
BEFORE-
AFTER- (this is with Line Art Outline)
Alte Version


Weitere Materialien von VenariArtist


Beliebte Materialien zu „Auto-Action“


Neue Materialien


Abzeichen
-
 MVP ◆Dieser Nutzer hat einen großen Beitrag zur Verwaltung der Community geleistet, indem er viele großartige Antworten auf die gestellten Fragen veröffentlicht hat. Alle drei Monate werden die MVPs auf der Grundlage der in diesem Zeitraum erworbenen Punkte ermittelt und entsprechend anerkannt.
 -
 New Valuable Player (NVP) ◆Die NVP-Auszeichnung geht an die Nutzer, die nach den MVP den größten Beitrag zur Community geleistet haben. Sie werden basierend auf den gesammelten Punkten unter denjenigen ausgewählt, die bisher noch nicht als MVP ausgezeichnet wurden.
 -
 Offizielle Experten ◆Ausgewählt aus allen MVP-Preisträgern, die bereits ein Zeichen für Exzellenz sind, zeugt diese Auszeichnung von herausragender Korrespondenz in der Community. Nach sorgfältiger Prüfung werden sie von CELSYS ernannt und übernehmen ihre Position.* Vorherige Bezichnung: Evangelist
 -
 Offizieller Moderator von CELSYS ◆Moderatoren sind offizielle CELSYS-Mitarbeiter, die fließend Japanisch und verschiedene andere Sprachen sprechen. Moderatoren sind keine Experten der Software oder Illustrationen und können daher nicht direkt auf Ihre Fragen antworten. Aber Moderatoren bieten Unterstützung in Kommunikation und Sprache, um sicherzustellen, dass alle reibungslos miteinander kommunizieren können.
 -
 Offizieller Account von CELSYSDer offizielle Administrator-Account